
This shop has been compensated by Collective Bias, Inc. and its advertiser. All opinions are mine alone. #SoftsoapTouch #OurCaringHands #CollectiveBias
My Mom was always tinkering, crafting, and making something by hand when I was growing up. I love honoring that memory by making her handmade gifts, and it is even more fun when I can involve my kids!
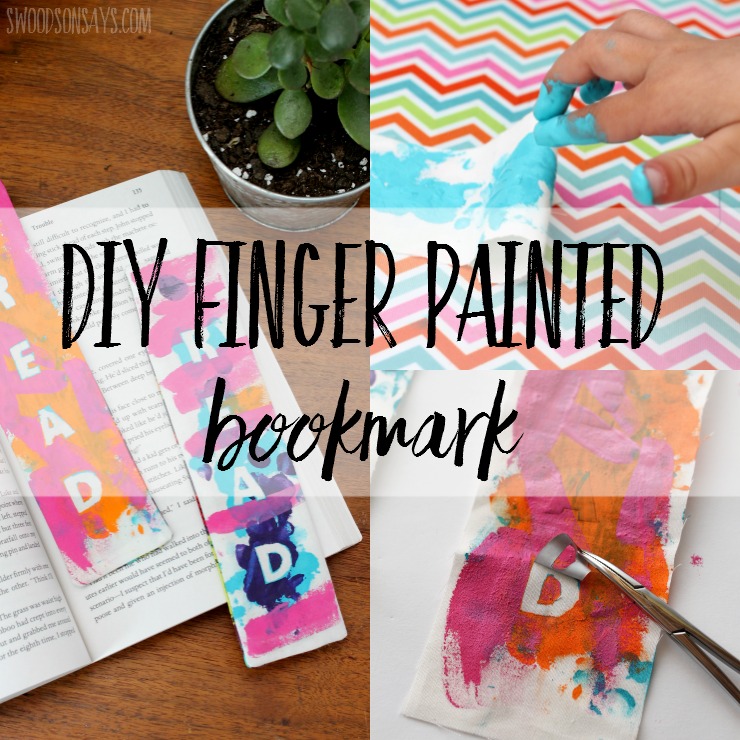
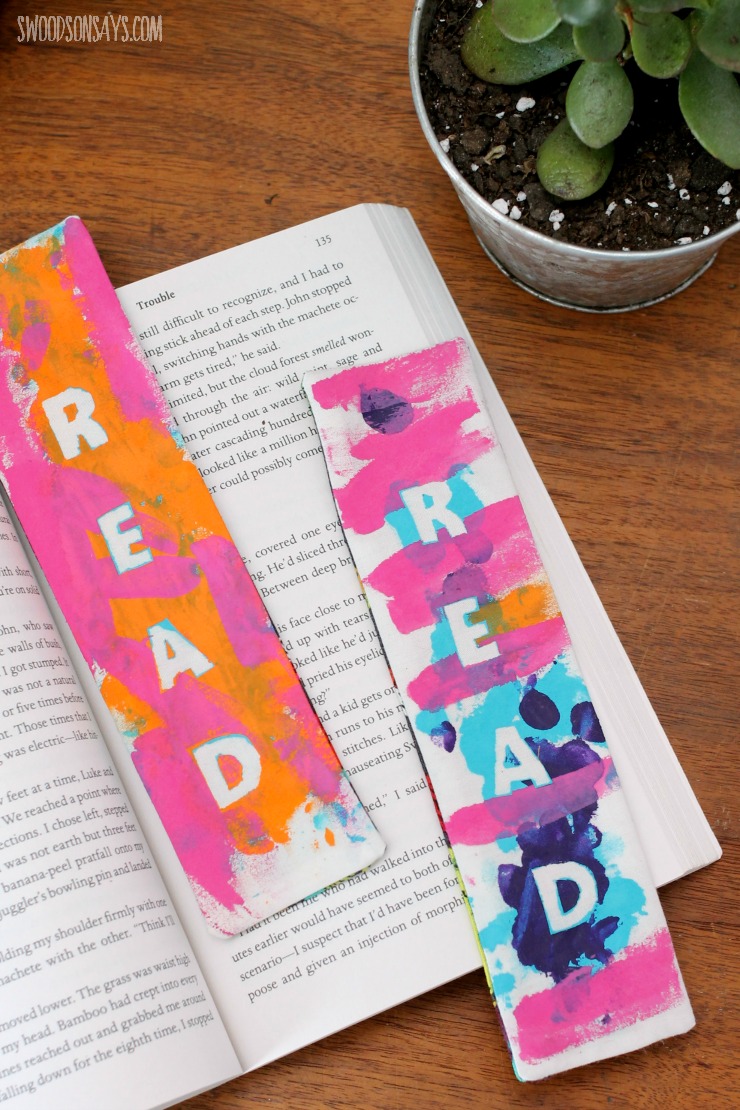
It can be a challenge to come up with gift ideas kids can help with that will actually be used and enjoyed (macaroni noodle photo frame, anyone?) but I love the resist painting method. We made DIY finger painted bookmarks together, washing our hands in between colors with SoftSoap® Hand Wash Plus Lotion™, and they turned out great!
I think handmade gifts are even more meaningful when your loved ones know you wrangled little people and paint when you were making them!
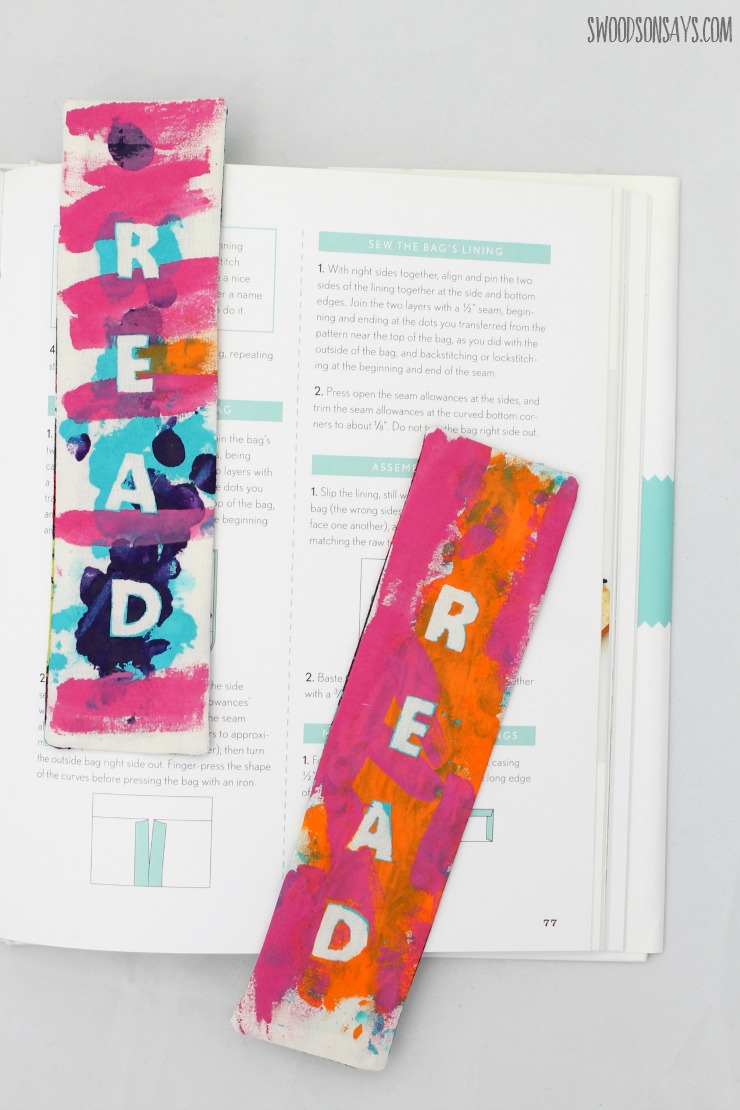
Didn’t they turn out bright and cheery! The bright colors are totally worth the extra waiting time and hand washing; once they’re painted it’s a fast sewing job.
You might also be interested in these projects, if you like this one!
- Finger painted ornament tutorial
- Fabric scrap bookmark
- Tips for quilting with kids
- Kids hand embroidery patterns

Ready to make your own?
How to make a finger painted bookmark
Supplies
-
Pattern file –sign up for my newsletter and get the free download once you confirm your subscription! If you’re already a subscriber, you can access the pattern with the password in each newsletter, in the resource library.
- Quilting cotton scraps
- Paint – pretty much any kind will work, people don’t wash bookmarks very often
- Sewing machine
- Fabric glue (optional – just because it’s easy, you can sew it shut)
- Freezer paper
- Sharp, small scissors or craft knife (or use a digital cutting machine! See how I cut freezer paper with my Cricut in this post)
- Pen
- Tweezers
Steps
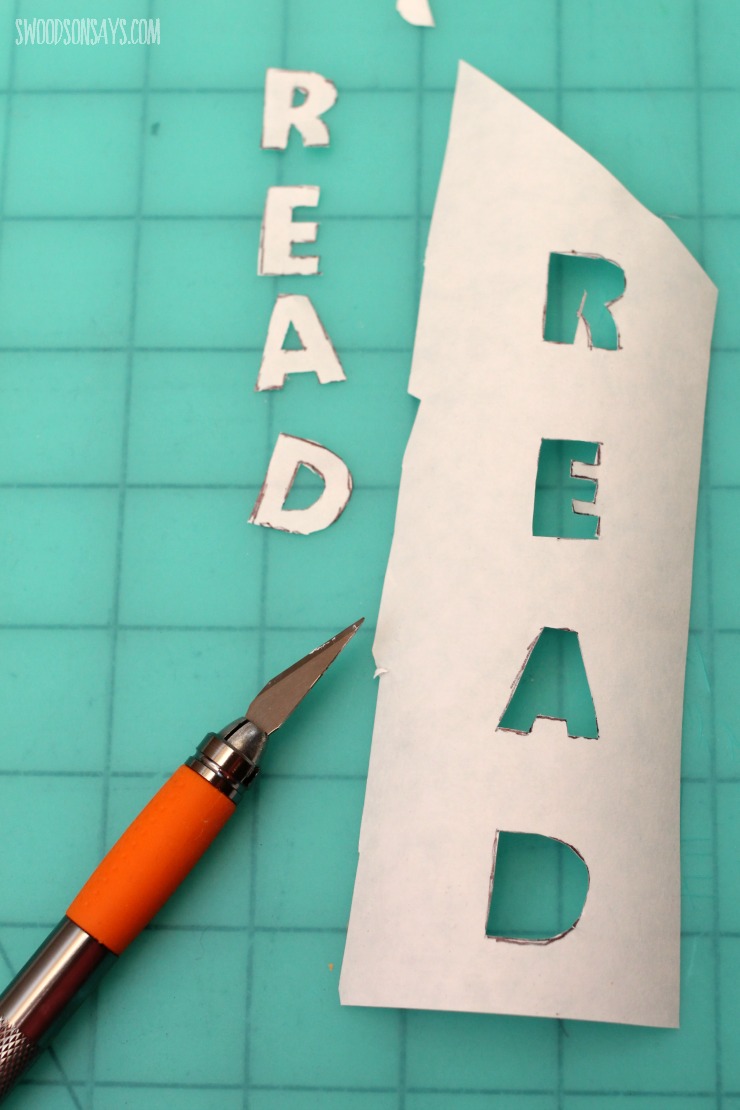
Step 1- Trace the letters on the freezer paper, shiny side down. Carefully cut them out.
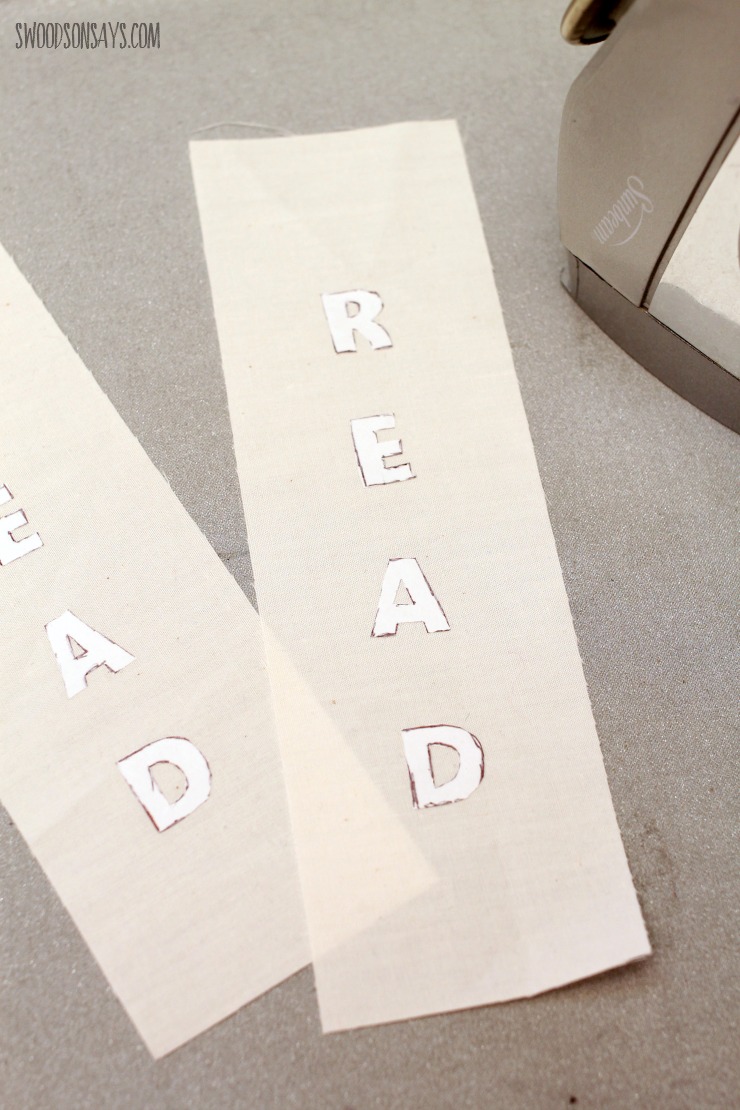
Step 2- Use the pattern piece to cut out your bookmark front and iron the letters shiny side down, and centered.
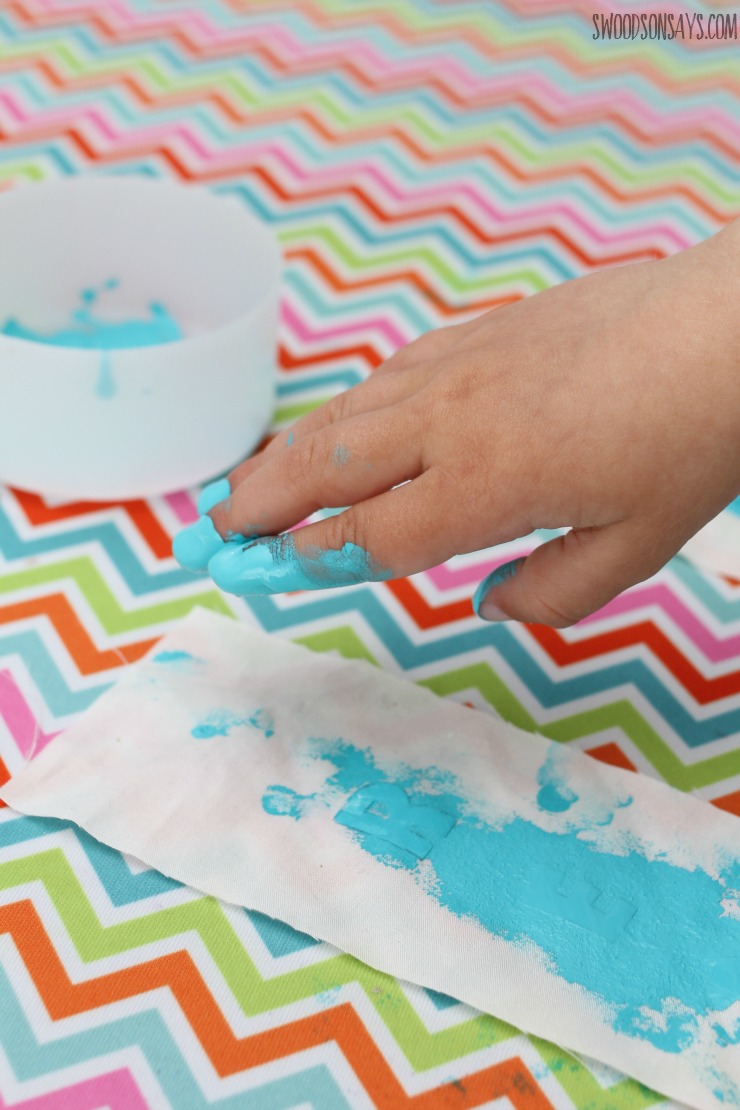
Step 3-Paint! Let them go wild, the letters should stay stuck down as long as they don’t actively try to peel them off.
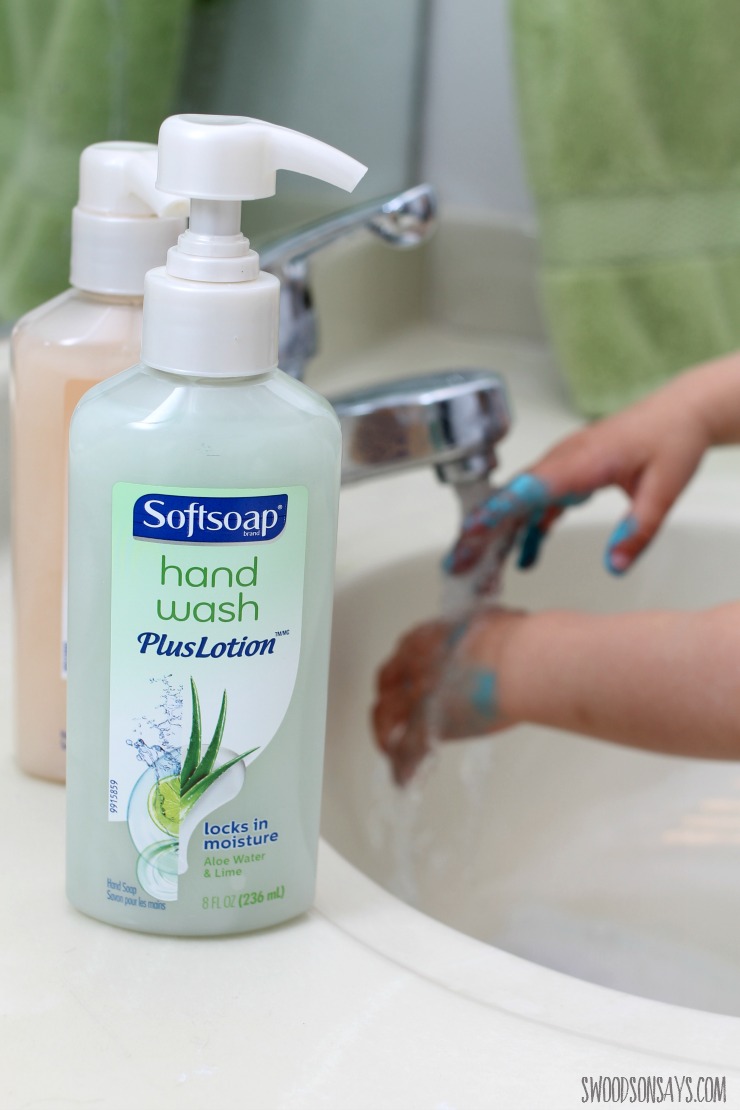
Step 4- Wash your hands, let the first color dry. This keeps the entire bookmark from being brown when several wet colors mix!

Step 4- Let them paint a second color, repeat Step 3 & 4 as needed!

Step 5- Peel off the letters with tweezers or hemostats.
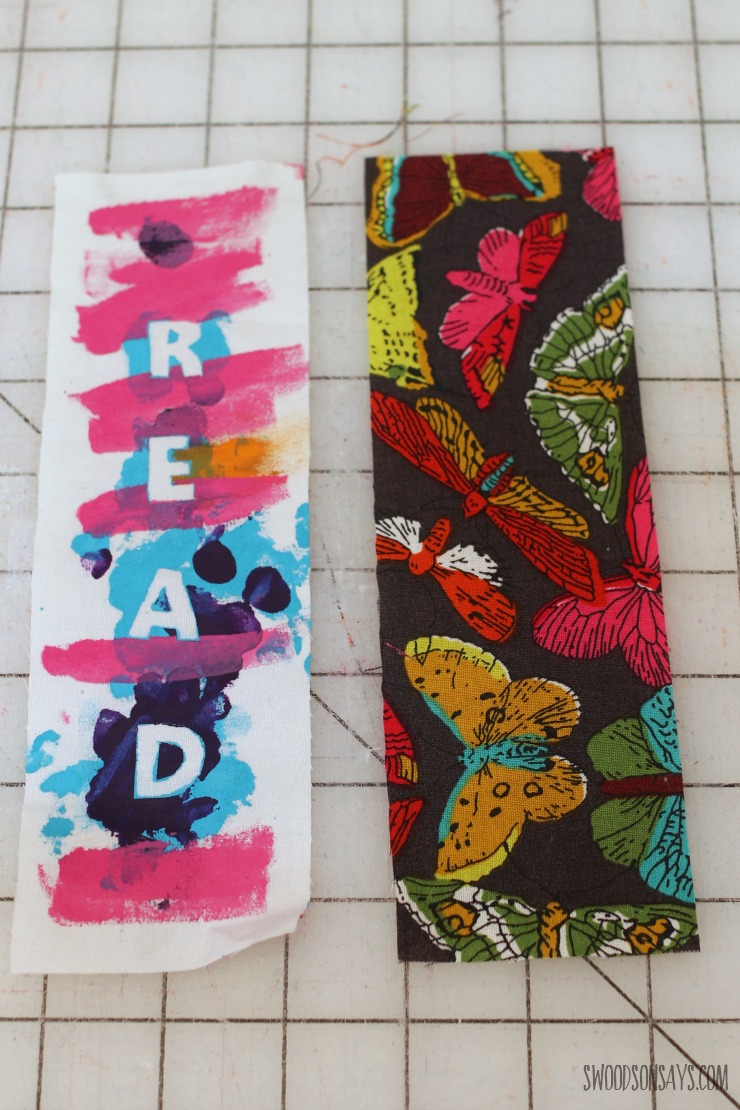
Step 6- Use the pattern piece to cut a backing bookmark the same size.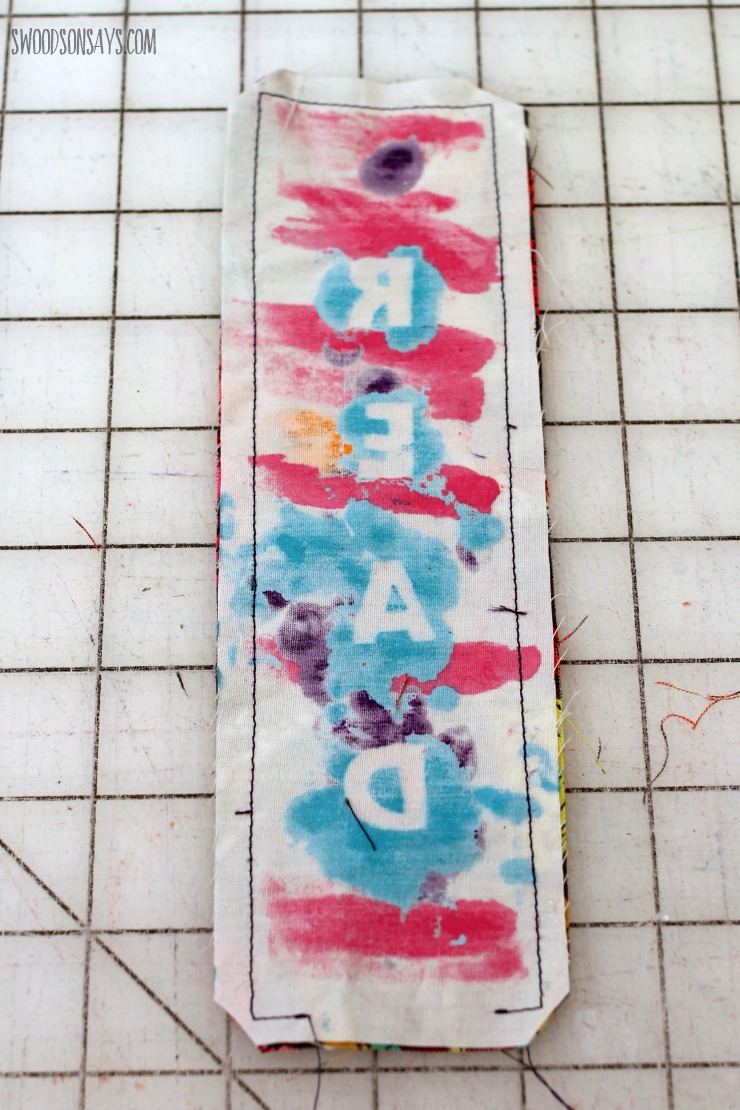
Step 7-Put the bookmarks right sides together (so the ugly/not printed part is facing out) and sew around all 3 edges, leaving a gap about 1.5″ wide. Clip the corners, making sure not to cut through your stitching.

Step 8- Press the seam allowances back before you turn it right side out. Turn it right side out, poke out the corners with a pen gently, press all seams with an iron, and use fabric glue to close the opening. You could alternately topstitch around or hand sew it closed, but glue is fast and easy! You’re done!
Cristi Comes
Thursday 22nd of June 2017
These are so cute. What a fun summer project for the kids. {client}