
This is a sponsored conversation written by me on behalf of Cricut. The opinions and text are all mine.

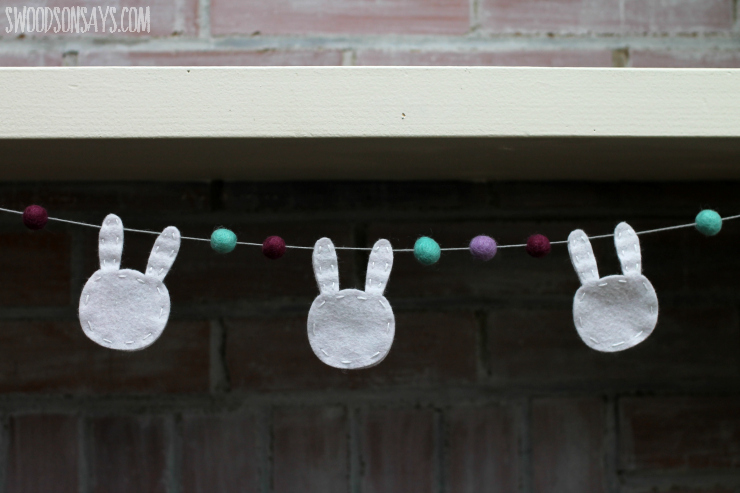
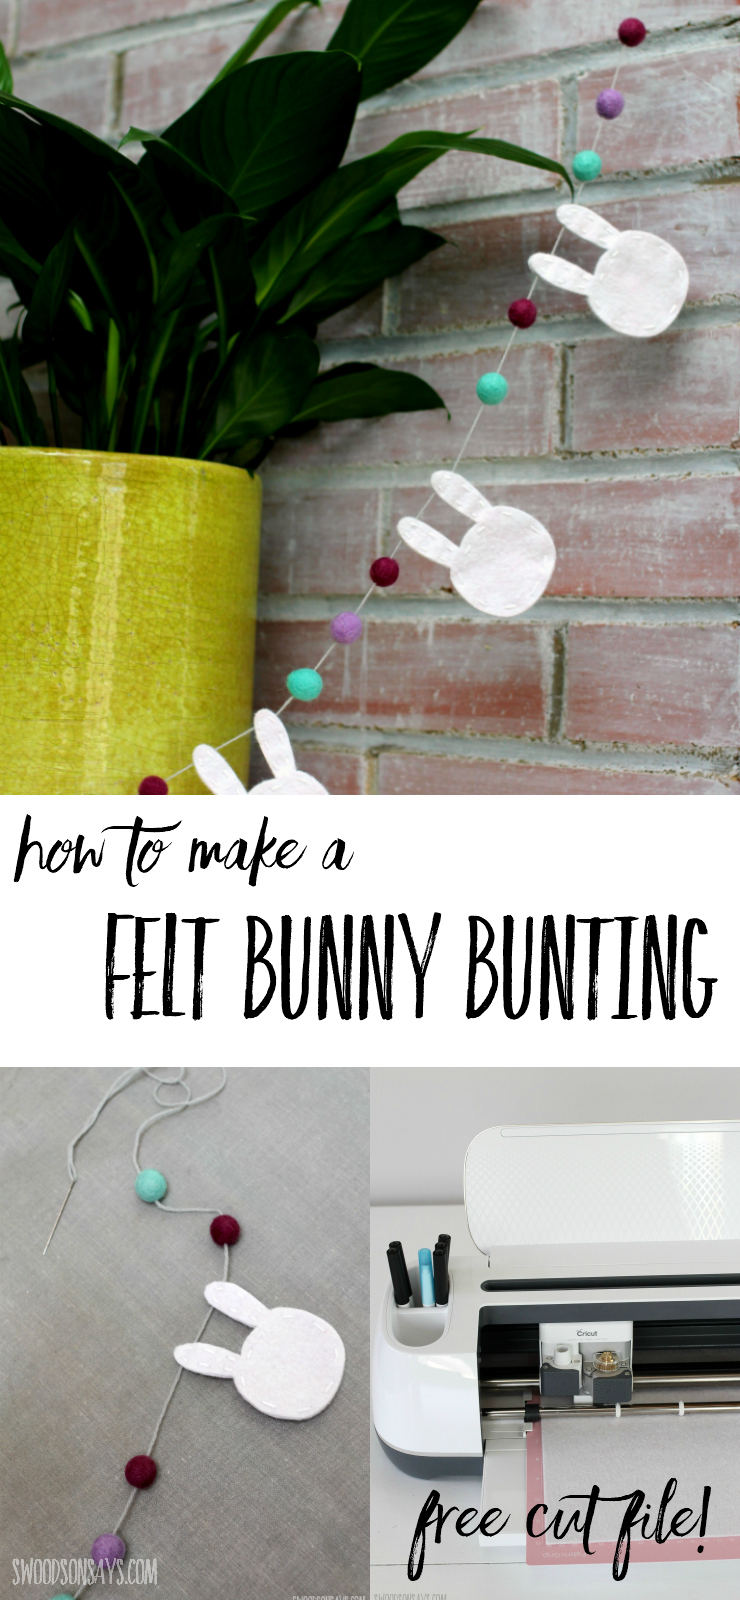
I finally have a fireplace to hang garlands and buntings off of, so I was excited to make this DIY bunny bunting for Easter! It’s an easy craft project, made even easier when you don’t cut the bunnies out by hand. There is a download for the free bunny template below and a full picture tutorial; you can read my full Cricut Maker review here! It has a rotary blade so the felt cuts much smoother than with a straight blade, and I finished this project in just under an hour with the Cricut doing all the cutting for me.
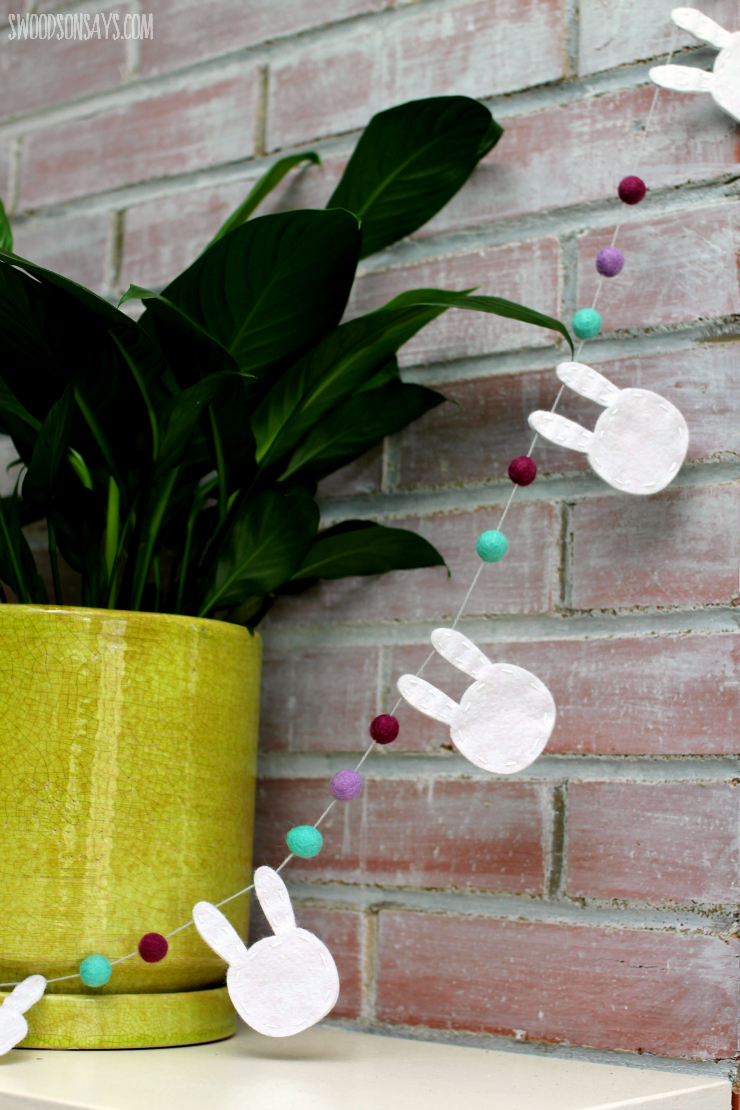
I had a bunch of cute felt pompoms left over from the DIY fairy wand tutorial I shared a while back, so I was happy to use up some of my stash. A little bit modern, pops of color, all wool and cotton, this is all of my favorite things in one DIY Easter craft project!
I love hand stitching projects but you could just as easily fabric glue these together! It’s easy to match them up perfectly with the Cricut Maker* cutting them out so precisely.
Pin this felt bunny bunting post for later, here:
Ready to make your own?
How to make a felt bunny bunting
Supplies
- A thicker, longer needle like one used for darning, so the wool fits through the eye and it pushes through the balls easily – like these
- Mini pom poms
- Wool embroidery floss
- Coordinating embroidery floss that matches your felt
- 9″X12″ sheet of wool blend felt – find my favorite places to buy wool felt online here
- Cricut Maker – there is PDF version of the pattern included too, if you want to go the scissors route
- FabricGrip Mat
- Free bunny template pattern- sign up for my newsletter and get the full pattern once you confirm your subscription! If you’re already a subscriber, you can access the pattern with the password in each newsletter, in the resource library.
Steps
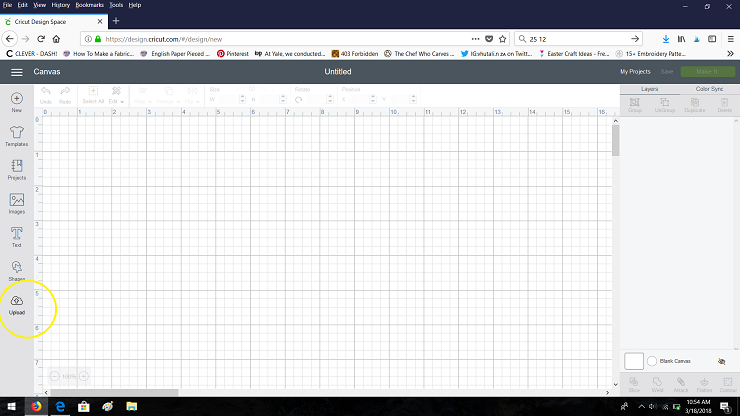
Step 1- Log in to design space and hit upload.
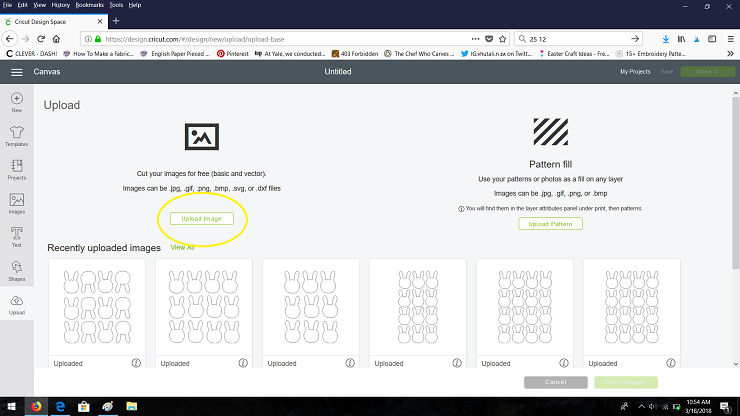
Step 2- hit upload on the left, and upload the SVG file.

Step 3- Once you upload the SVG it will show like this! Hit ‘make it’ up on the top right.
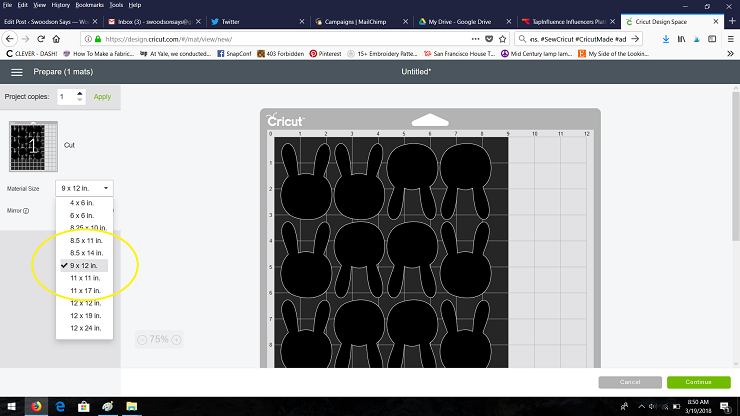
Step 4- Over to the left, hit the drop down box and select 9X12 for the sheet size, it will rearrange the bunnies for you to fit.
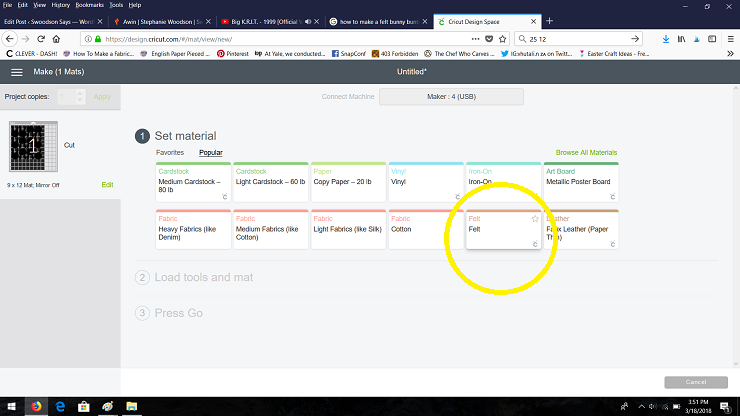
Step 5- Select ‘felt’
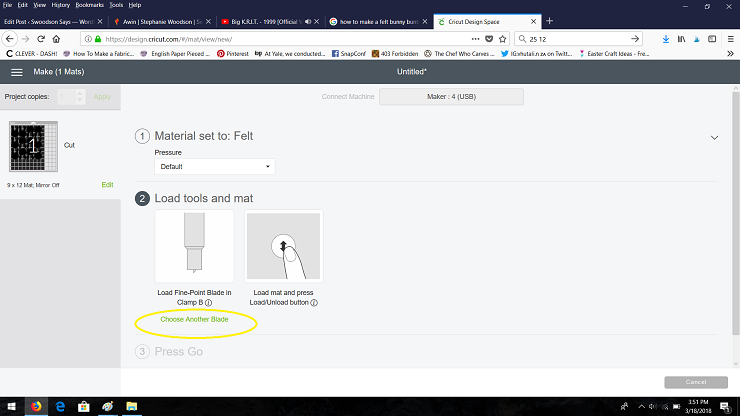
Step 6- I prefer the rotary blade, so hit ‘choose another blade’ and switch to the rotary, and then insert that in your machine.
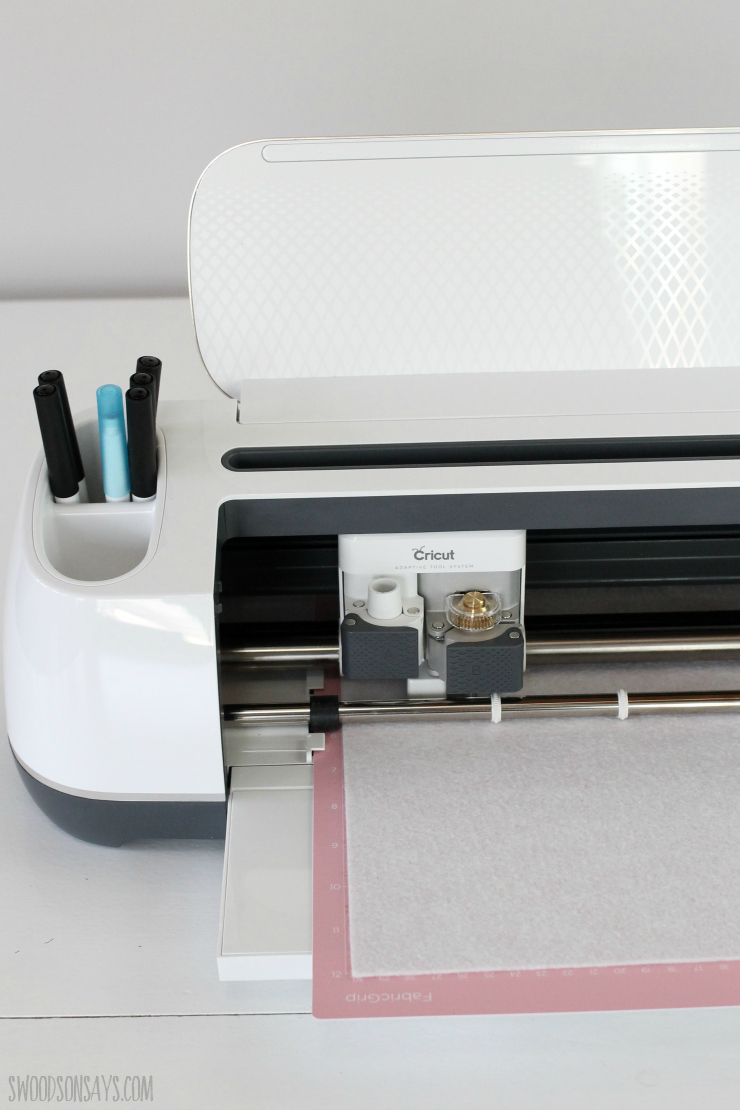
Step 7- Follow the buttons/screen instructions for it to do its magic!
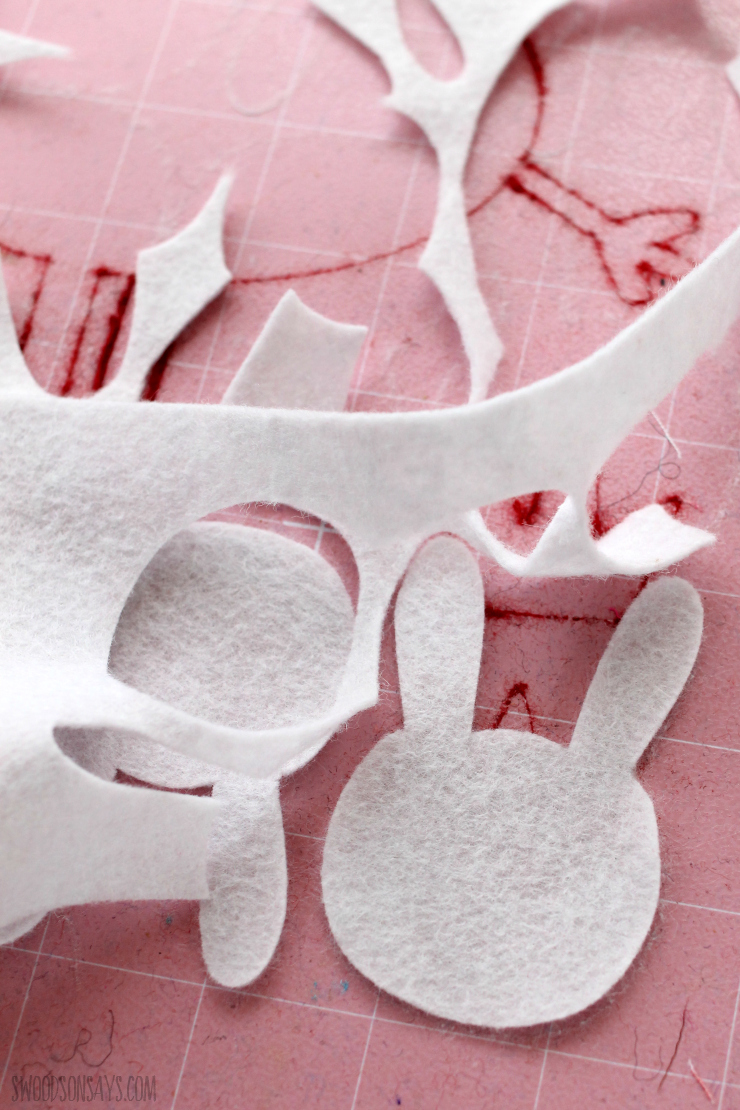
Step 8- Gently peel the excess felt away, revealing your bunnies!

Step 9- Thread your embroidery floss and use a running stitch to stitch two bunny faces together (not sure how? Find beginner embroidery stitch videos here!)
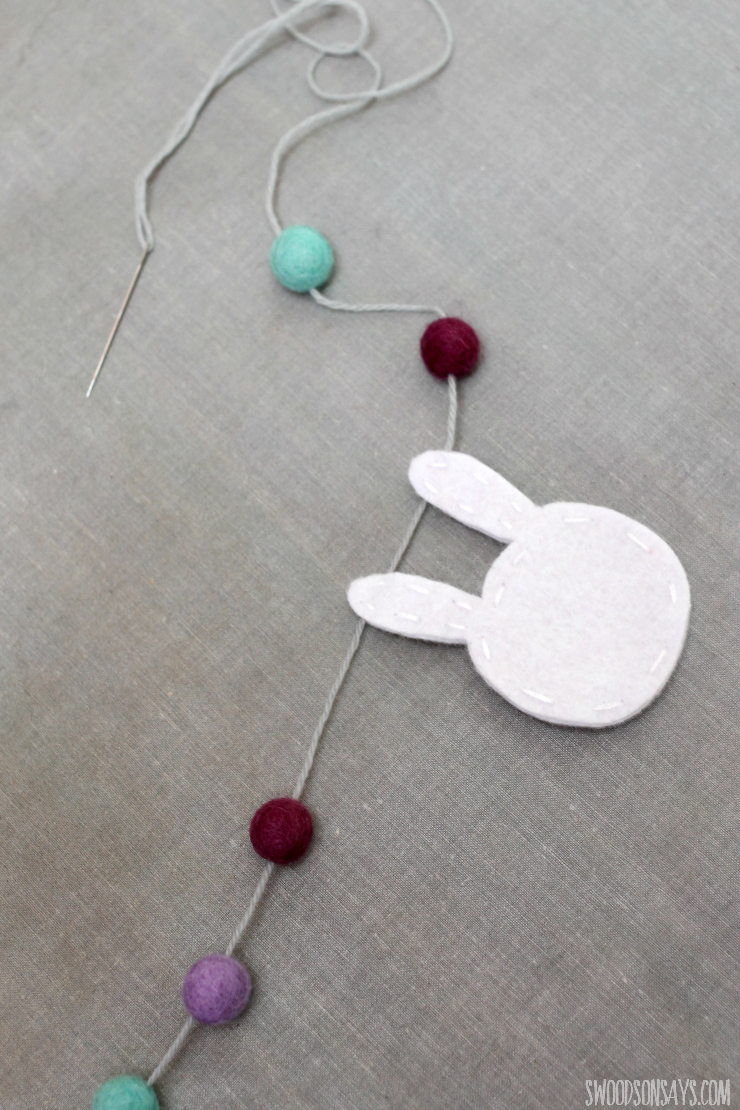
Step 10- Thread your wool floss and add on pom poms in between bunny faces. Be sure to stitch through the ears and not the main face part, otherwise the bunnies will flip over when you hang them up!
You’re done! Hang it up and enjoy your easy Easter decor!
Comments submitted may be displayed on other websites owned by the sponsoring brand.
Justine @ Little Dove
Tuesday 20th of March 2018
Oh my goodness, this garland is so stinkin cute!! I love it. I have a Silhouette and I haven't used it to cut our fabric yet but you're inspiring me to try.
Sierra
Tuesday 20th of March 2018
What a cute idea! It came out so good and I love how festive it is! Sierra~Beautifully Candid
Kristin's Peppermints and Cherries
Tuesday 20th of March 2018
I love the faceless bunnies and the stitching around the edges. It's such a sweet little look for Easter. Pinned your amazing tutorial!
Julie Hood
Tuesday 20th of March 2018
I've never used a Cricut cutter but it looks amazing! That bunting came out so so cute :)
Meg
Monday 19th of March 2018
This is so cute! I love the pairing of the white bunnies with colorful pom poms.
Stephanie - Swoodson Says
Monday 19th of March 2018
Thanks Meg!