
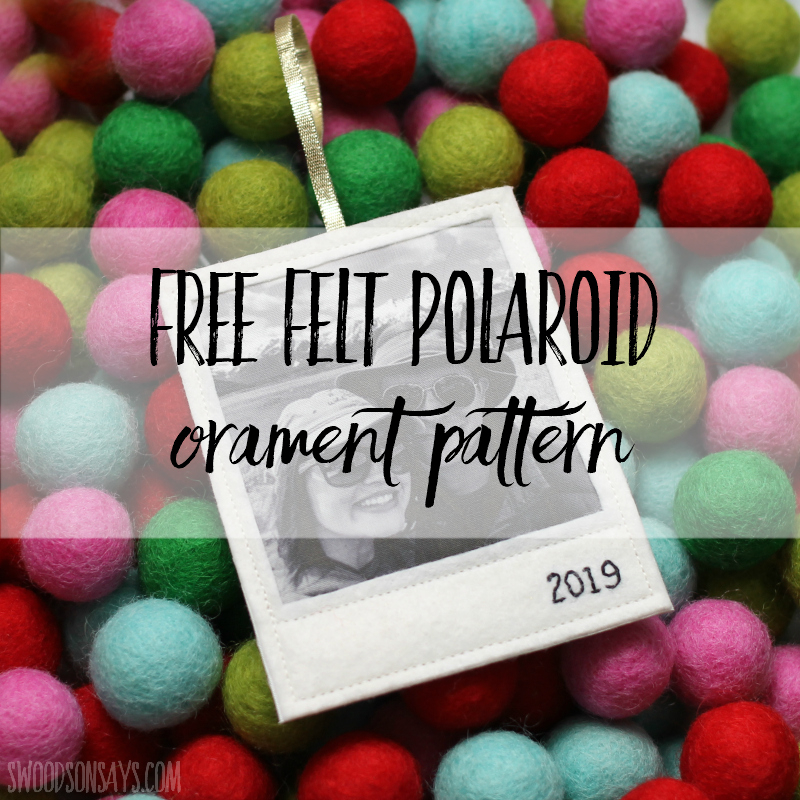
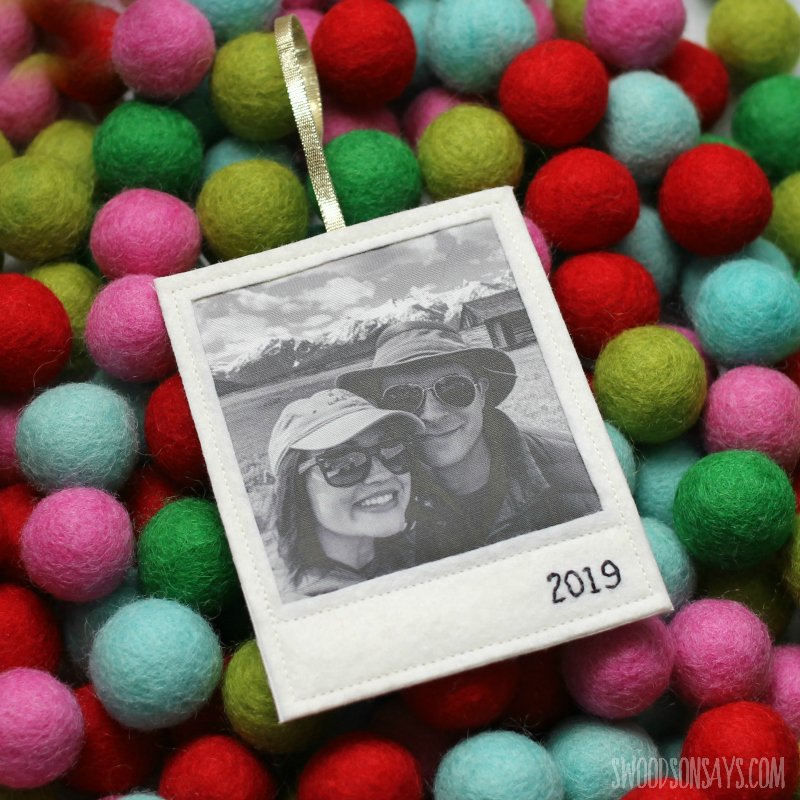
Who else grew up using a polaroid camera! I have a really vivid memory of taking photos in elementary school with one, and the classic photo shape has a lot of positive nostalgia for me. I’m sharing a free felt polaroid ornament pattern if you want to add some 90’s flair to your tree this year – I think they’d make great gift tags too!

It looks super simple but I spent several tries and many hours tweaking this pattern to make it as easy and quick as possible and have a nice heft to it, and I love the final result! Precision cutting & sewing isn’t normally my strong suit but I’m sharing all the tips below to help you end up with an ornament that you love. Another idea is to skip the ribbon and slip in a magnet, putting these on the fridge!
Are you looking for more ornament inspiration? Check out these posts:
- The cutest animal Christmas ornament patterns
- 14+ embroidery hoop ornaments
- 15+ prettiest fabric Christmas ornaments tutorials
- 20+ free felt Christmas ornament patterns
- Christmas stocking stuffers to sew (in addition to any of these!)
Pin this free felt polaroid ornament pattern for later using this link or collage image:
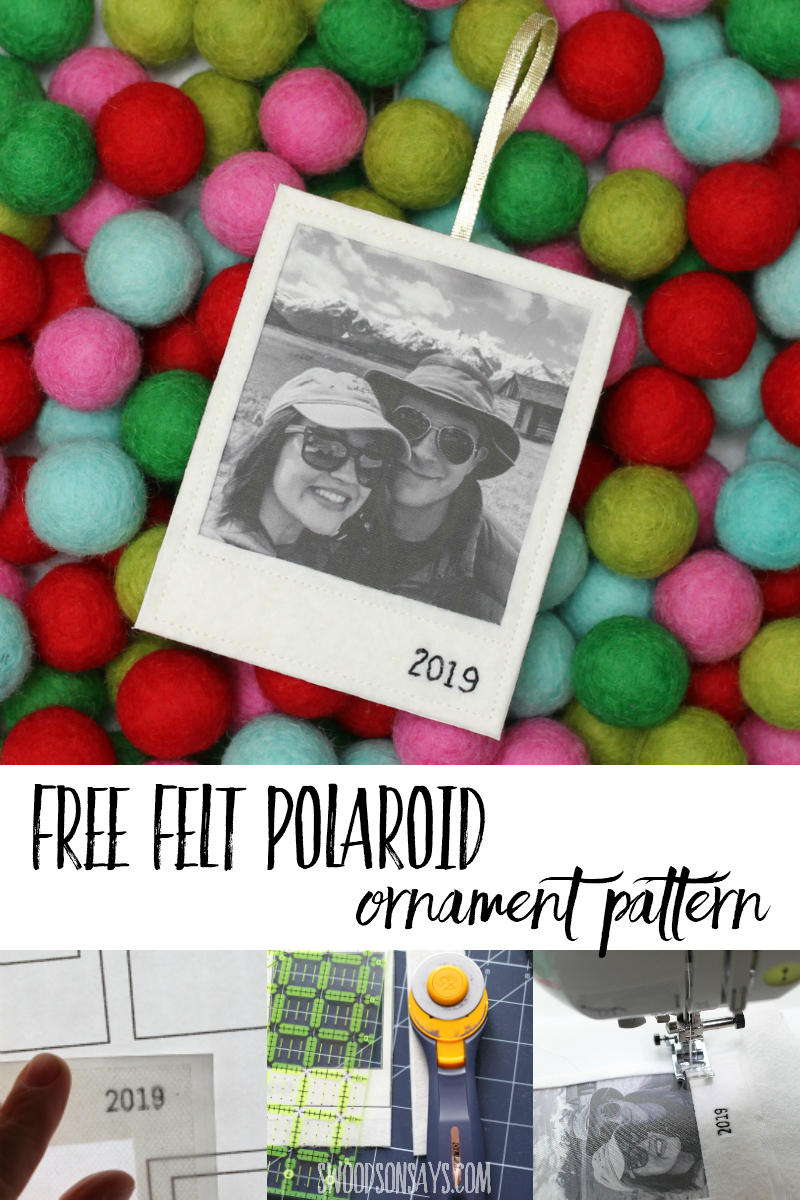
Free felt polaroid ornament pattern
Supplies
- Iron
- Photo printing paper – alternately you can use freezer paper & iron cotton fabric to it, trimmed to printer paper size!
- Heat n bond lite – I like using the printable sheets but you can print on paper & trace on to the by the yard stuff easily
- Scissors
- Inkjet printer
- Acrylic quilt ruler
- Rotary cutter
- Thin ribbon
- Fabric glue
- Sheet of white felt – my favorite shop
- Lightweight fusible interfacing – like Pellon 906F
- Embroidery floss & needle – I used a Sulky Cotton Petite & my fav needles
- Embroidery transfer method – I used Stick N Stitch (see a full tutorial on how to use it here)
- Free template pattern –sign up for my newsletter and get the free download once you confirm your subscription! If you’re already a subscriber, you can access the pattern with the password in each newsletter, in the resource library.
Steps
Read through the whole tutorial before you start! It is probably not the way you would imagine I’d make it, but I promise there is a reason for doing it this way and I was happiest with the finished product following these steps.
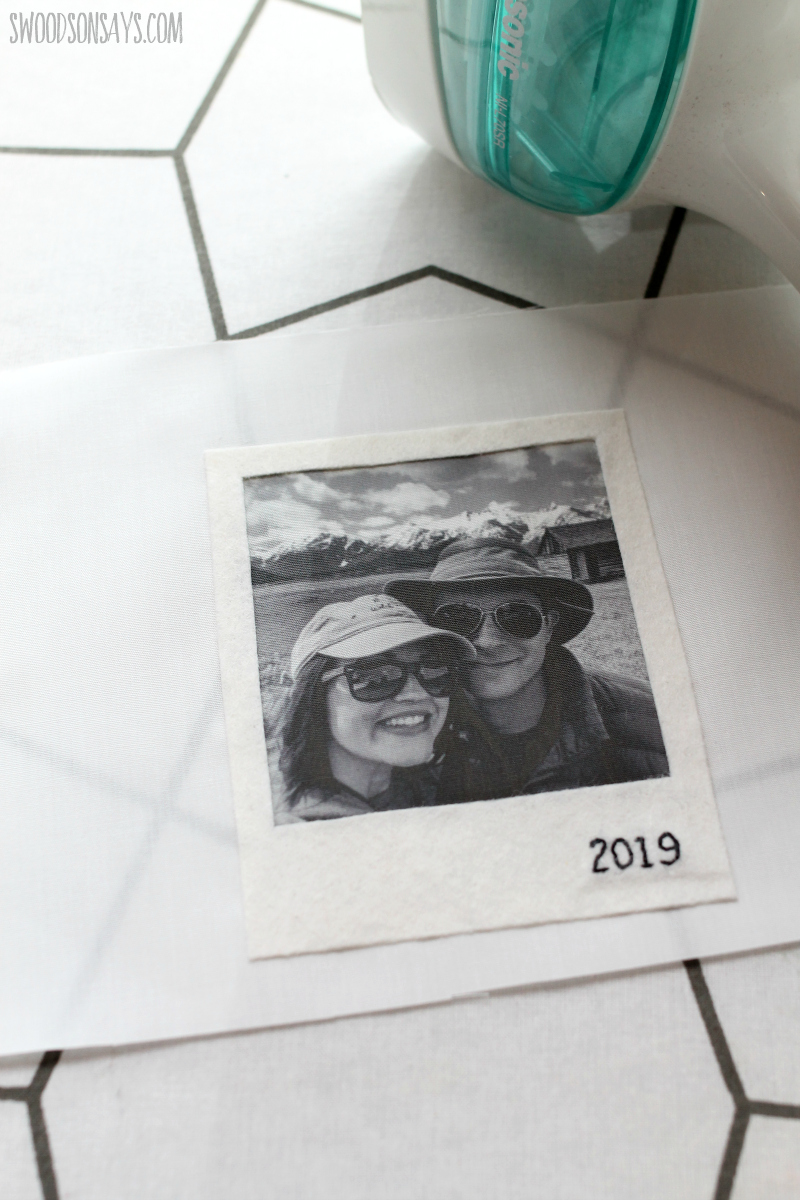
Photo prep!: Before you start, you’ll need to print a photo on fabric that is 7.3 X 7.8 CM (aka 275 X 294 pixels). You need some empty space around the photo so I fit 2 to a sheet, using my photo editing software. You’ll want to choose a relatively bright/light photo with some contrast, I found that faces looked the best vs. landscapes!

Step 1- I embroidered first because I found that the water washing away my transfer paper distorted the printed photo. I used Stick N Stitch (see a full tutorial on how to use it here) but you can use whatever method you’d like, stitching on the year with plenty of space around it. Wash it away if you’re using the same stuff as I did, and let dry.
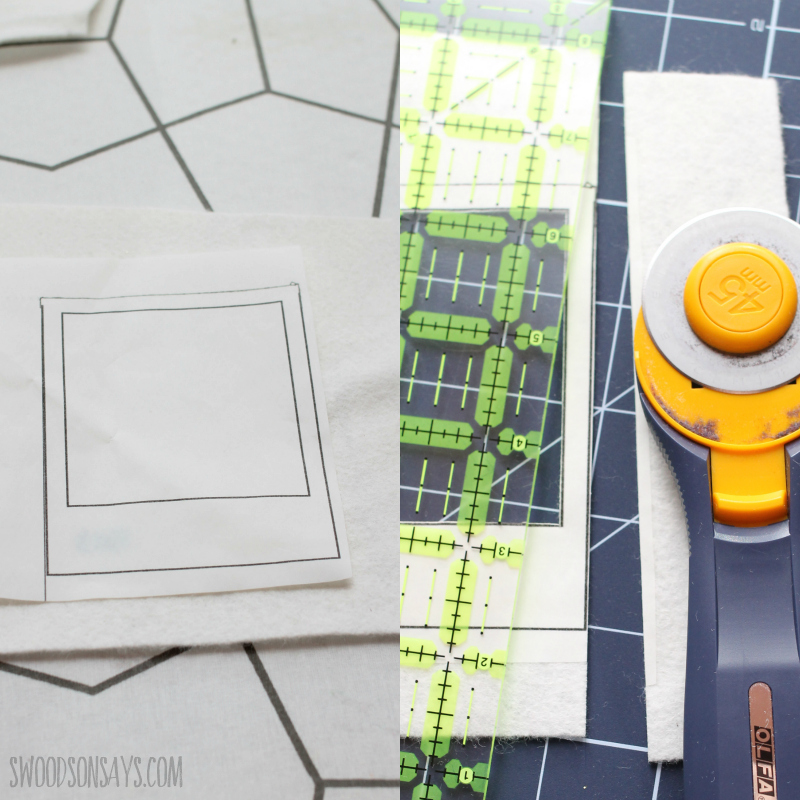
Step 2– Print the template on to Heat N Bond and adhere according to directions, lining it up so that the embroidered year is wherever you’d like it. Keep in mind you’ll be sewing around the edges, when you’re deciding on placement. Then trim it carefully along the outer lines and cut out the center square – I used micro tip scissors for the inside.
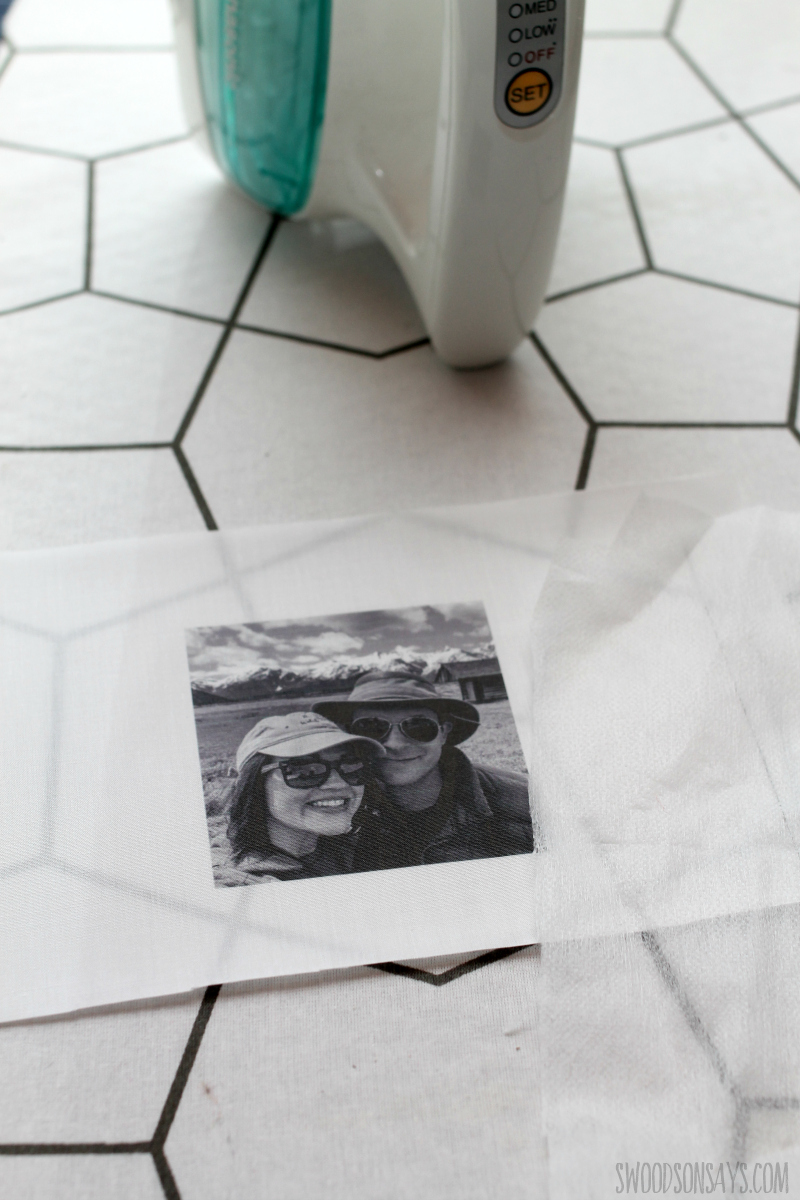
Step 3– Use the iron to add fusible interfacing on the back of the photo fabric, let cool.
Step 4- Peel off the paper backing and adhere with the iron over the photo square.

Step 5– Apply fusible interfacing to another piece of wool felt that is larger than the polaroid frame. Layer it “wrong” or interfaced side up, making a sandwich with the photo paper. Sew along the edges- you can see where I started so I could loop around without any back tracking.
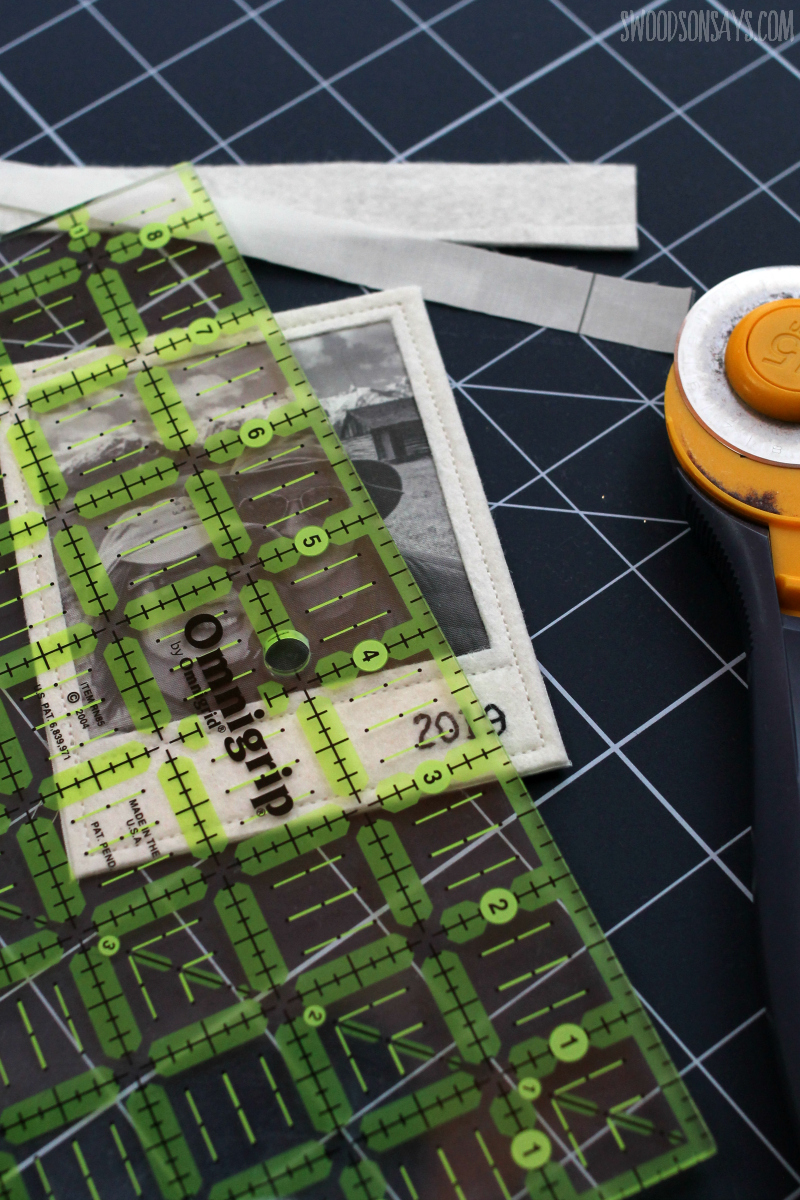
Step 6- Carefully trim so the back wool felt & photo fabric are flush with the front frame.
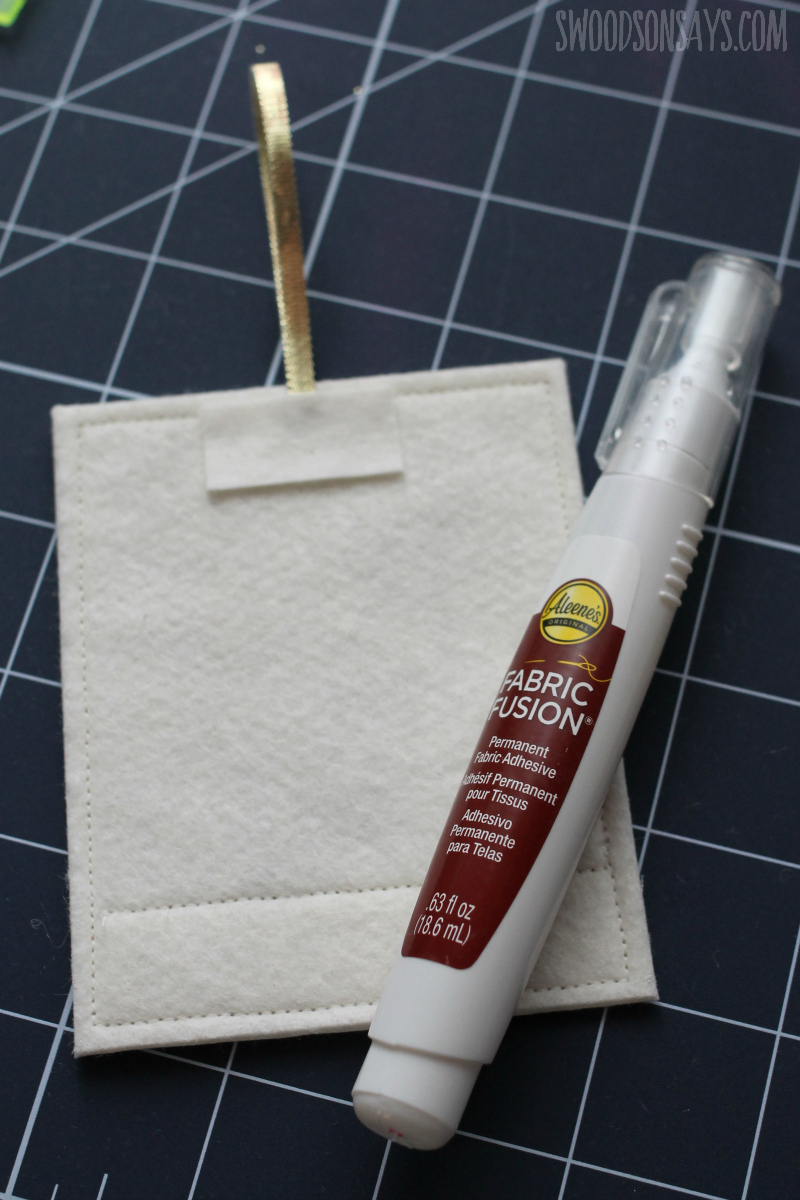
Step 7- Use fabric glue to adhere a piece of ribbon roughly 6″ long, and then more glue to cover its ends with a wool fabric scrap. Let dry and enjoy!
Gina
Saturday 22nd of July 2023
Such a cute idea! Love it. Thank you for the pattern.
Stephanie - Swoodson Says
Sunday 23rd of July 2023
you are so sweet!! thanks for leaving a comment, hope you get a chance to make it :)
Anne
Sunday 17th of April 2022
I loved this pattern! They make such cute gifts; everyone loved them. With your easy-to-follow tutorial, they were not too much effort. Thanks so much!
Stephanie - Swoodson Says
Wednesday 20th of April 2022
Anne, thank you so much for taking the time to leave this comment, it means a lot to me!! I can see thousands of people viewing posts, hundreds downloading my patterns, but it's very rare to hear feedback :) thanks!!
LadyD
Tuesday 31st of December 2019
In case you didn't know - Polaroid photos have been around since the 1970's. Yep, that long ago. And my family had one of those cameras too... but we didn't like the expense much. My mom says the self-developing Polaroid film cost more than Kodak film + development. But you had to wait longer on the Kodak photos. Given the wait time, I guess that makes them about equal.
Stephanie - Swoodson Says
Tuesday 7th of January 2020
I can't say as that I'd give it much thought, that makes sense though because I've definitely seen 70s polaroids in antique malls, they sell on ebay too! The almost instant gratification was such a thrill as a kid!
Kris
Tuesday 31st of December 2019
I LOVE this, Stephanie! Not sure I'm skilled enough for this project, but I'm definitely going to try it! Thanks, and have a healthy and happy New Year!
Baby advisor
Tuesday 24th of December 2019
These are so adorable, what a great idea! I love to see the kid’s eyes light up when they see paints and if you can then display your work for all to see even better, Great job! Happy Holidays.