
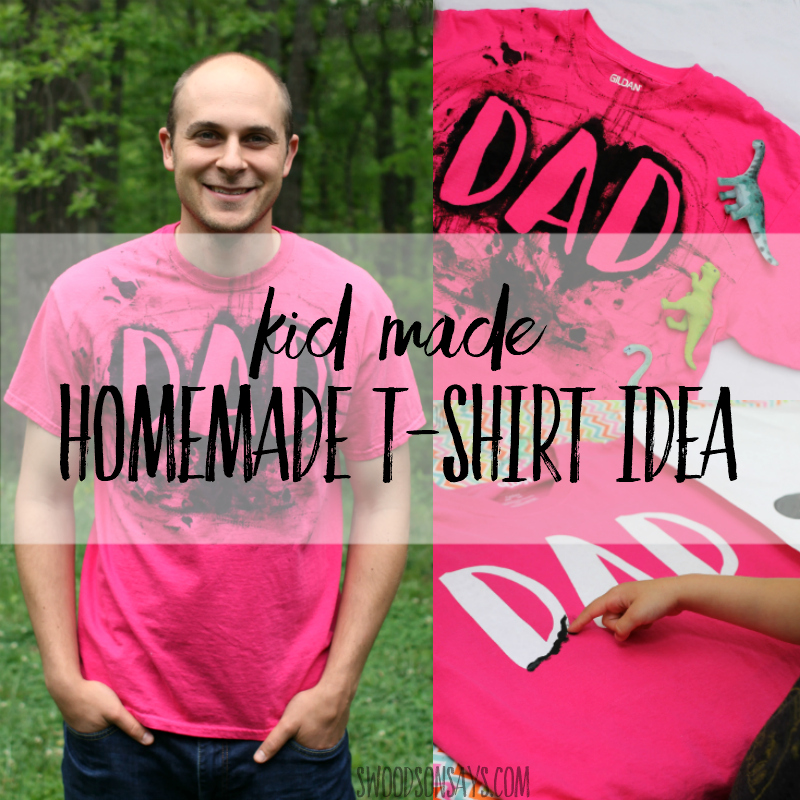
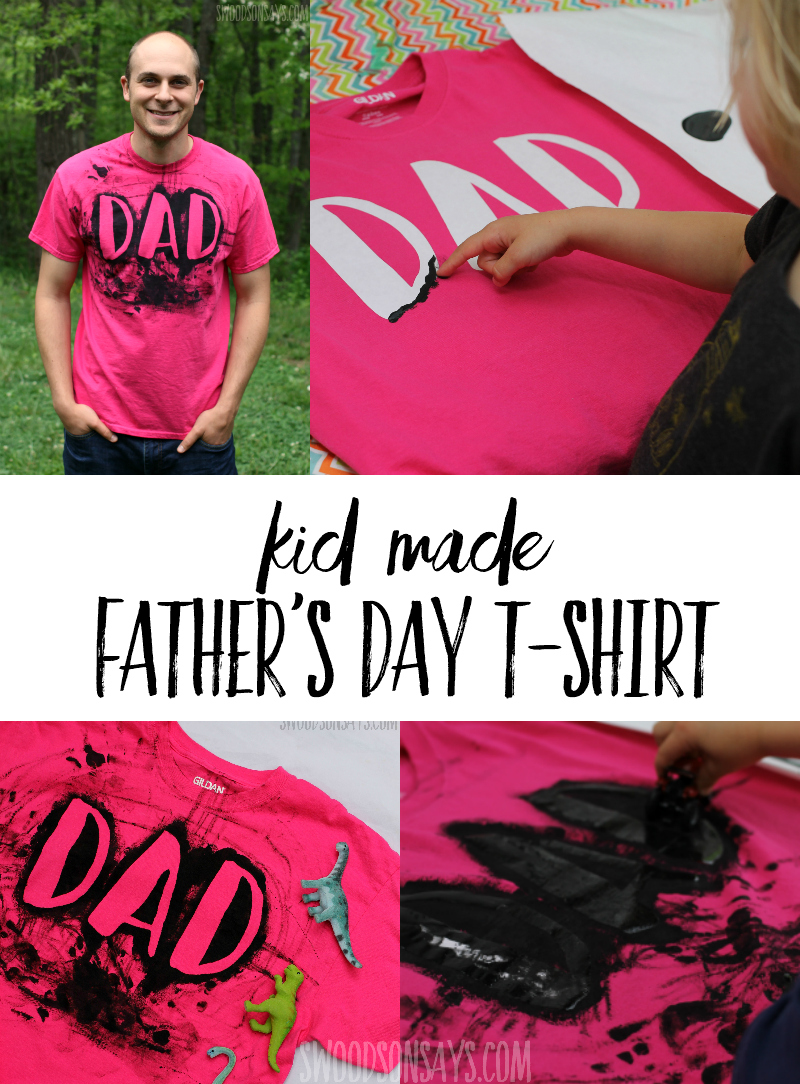
Time for a freezer paper stencil cricut tutorial! My kids LOVE making gifts for other people. I’m hoping they never outgrow it but they really seem to value handmade things, whether it is receiving or giving them. Finger painting is one of their favorite activities so we frequently combine the two into making new projects! I’m sharing this homemade t-shirt idea for Dad a little early so you have time to make one as a Father’s Day gift.

Doesn’t that look good on him? They were practically jumping out of their skin, excited to show him once it had dried.
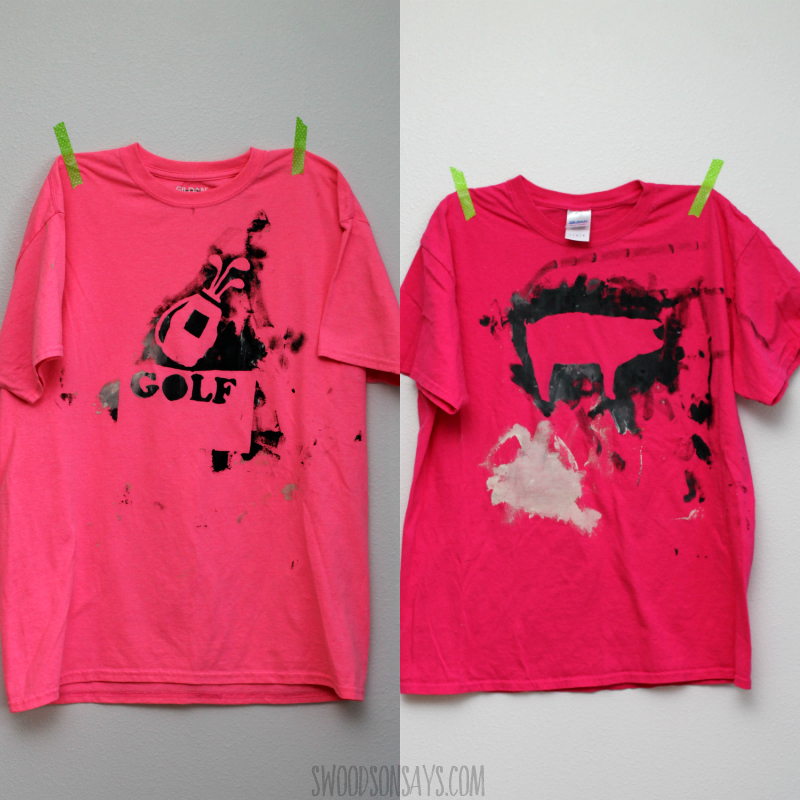
These are the two we did last year, golf on the left for my husband and the pig on the right for my husband. In the past I’ve cut the designs out by hand so I was excited to use my new Cricut Maker to do it instead.
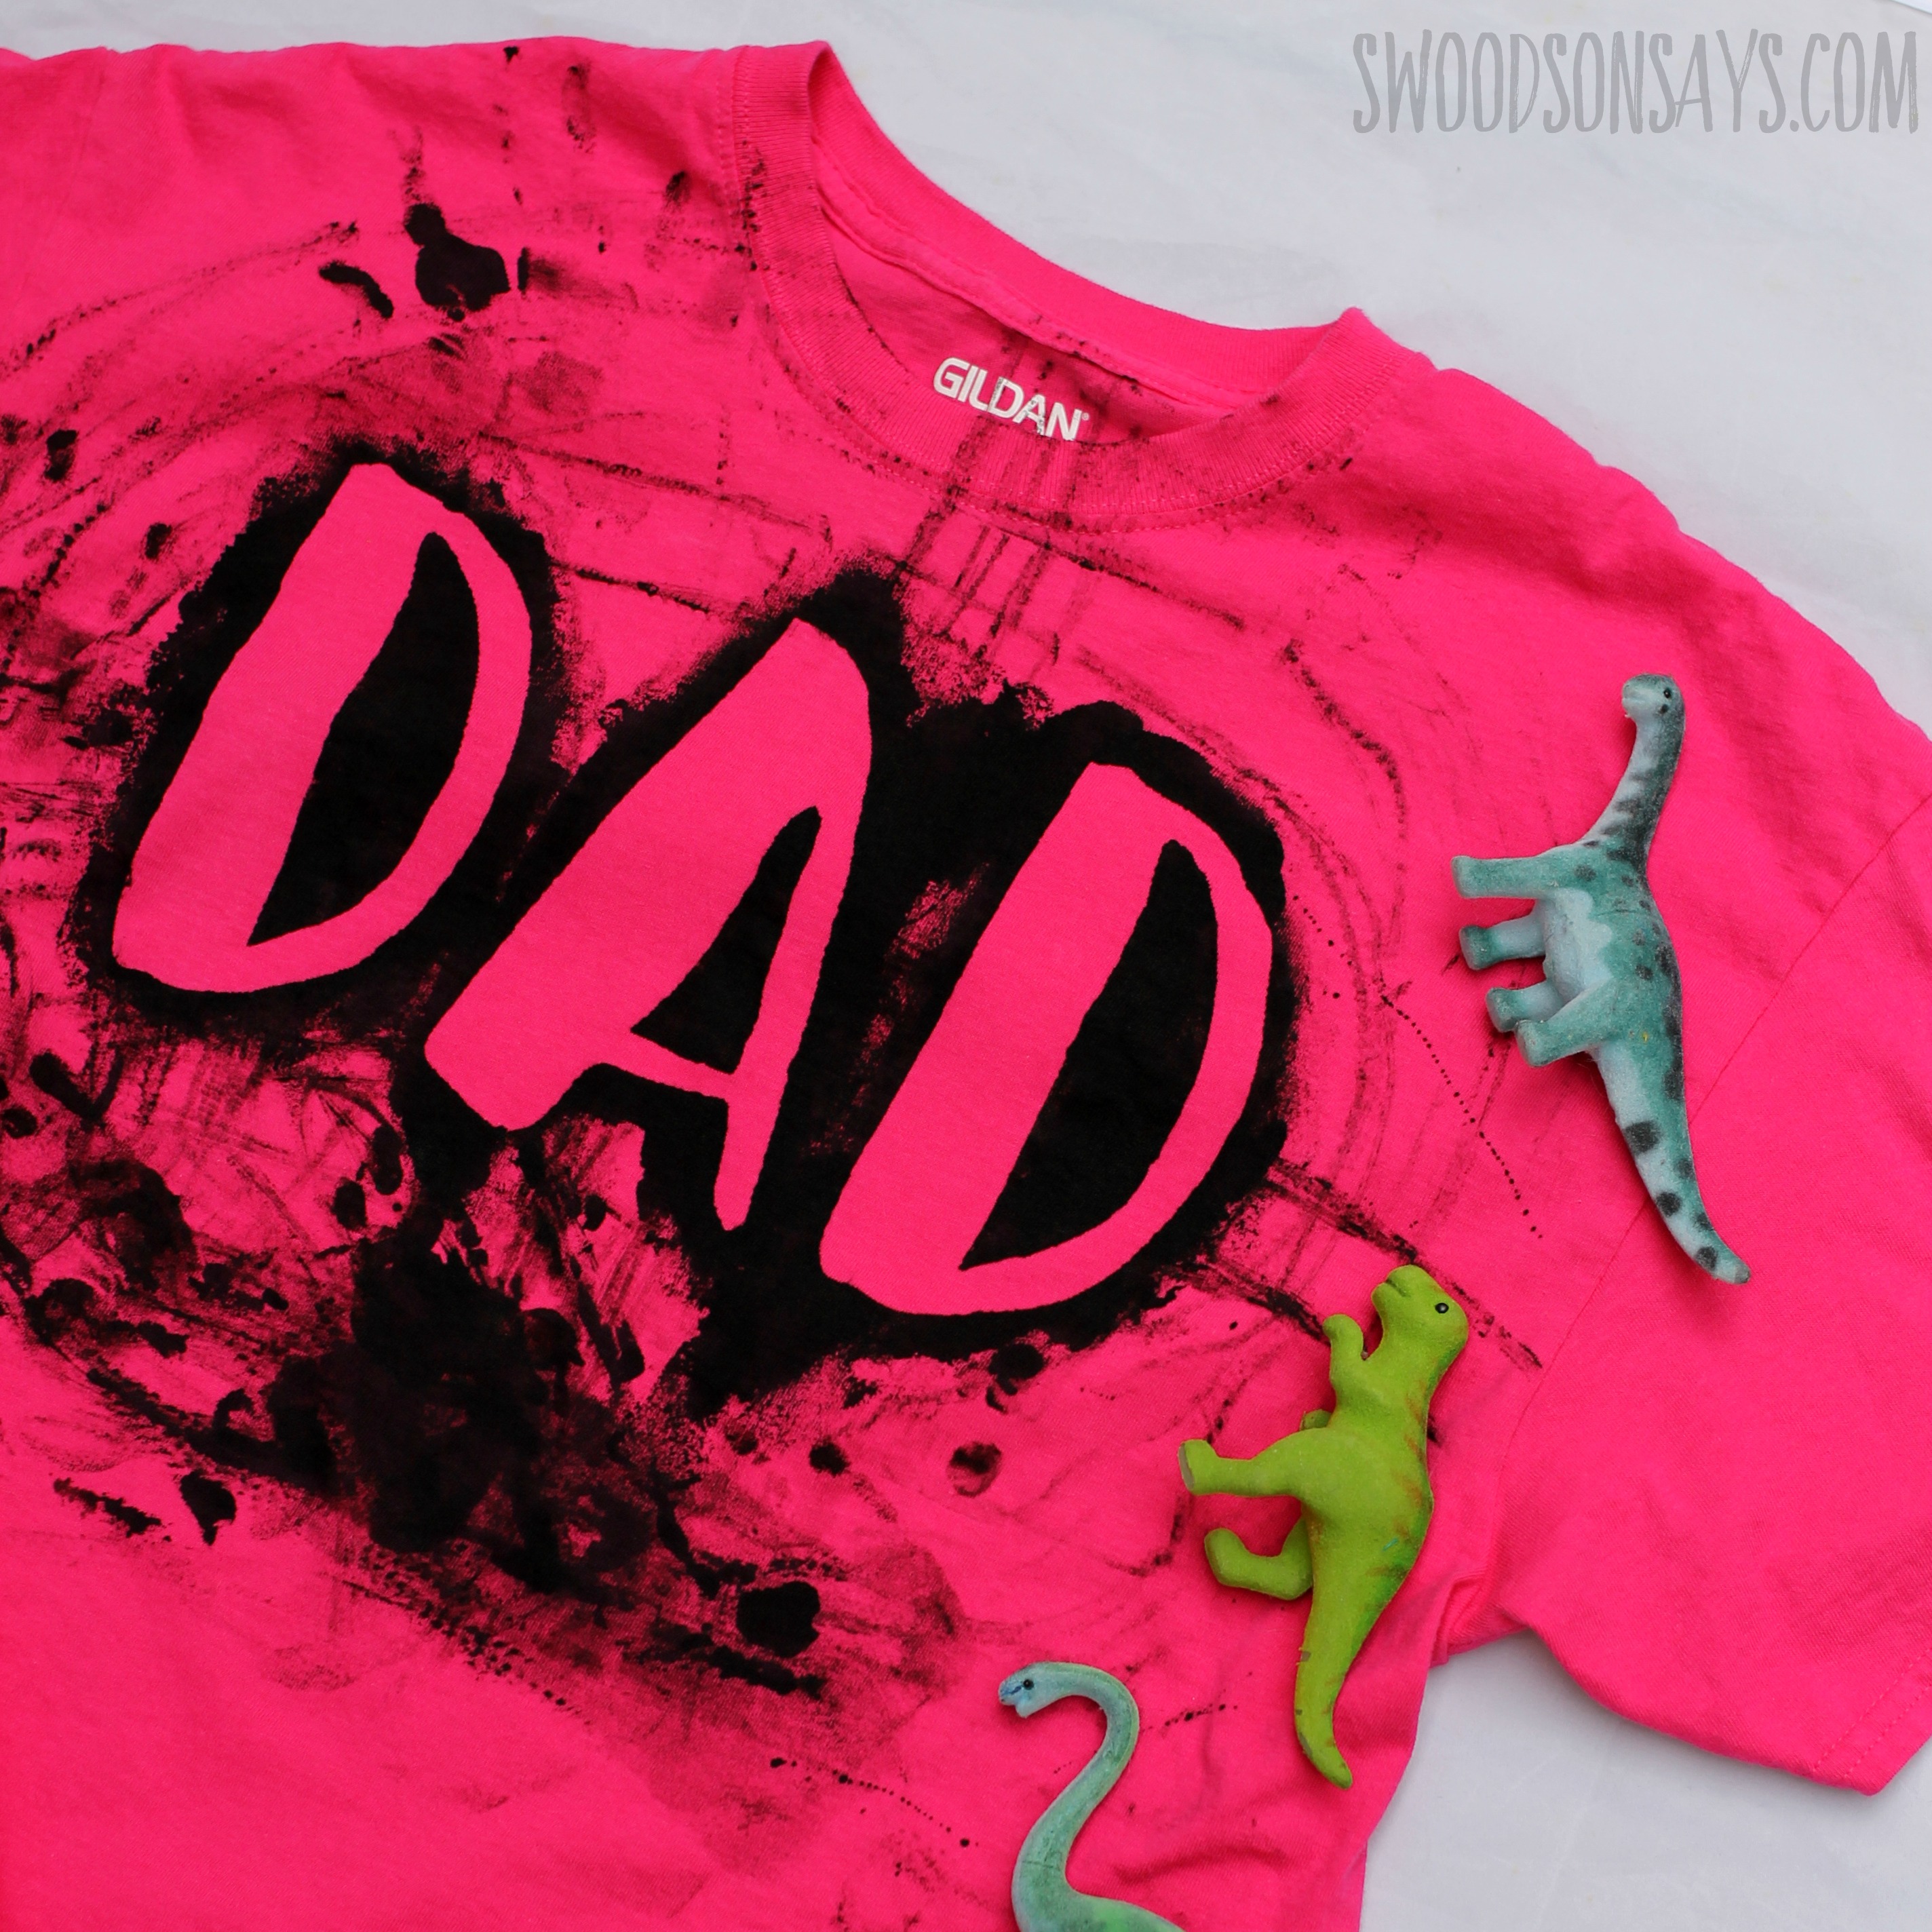
This year we mixed up techniques, including some handprints, toy car painting, and lots of fingerprints.

I am so thankful to be on the wild parenting ride with this guy, he wrangles our two wild children like he was born to do it.
Are you ready to make your own? It is super easy and you can personalize the idea with a design that the Dad in your life will love or use the same file that I did (linked below).
Pin this freezer paper stencil cricut tutorial post for later, here:
Freezer paper stencil cricut tutorial
Supplies
- Blank t-shirt from Goodwill or from Amazon*
- Freezer paper*
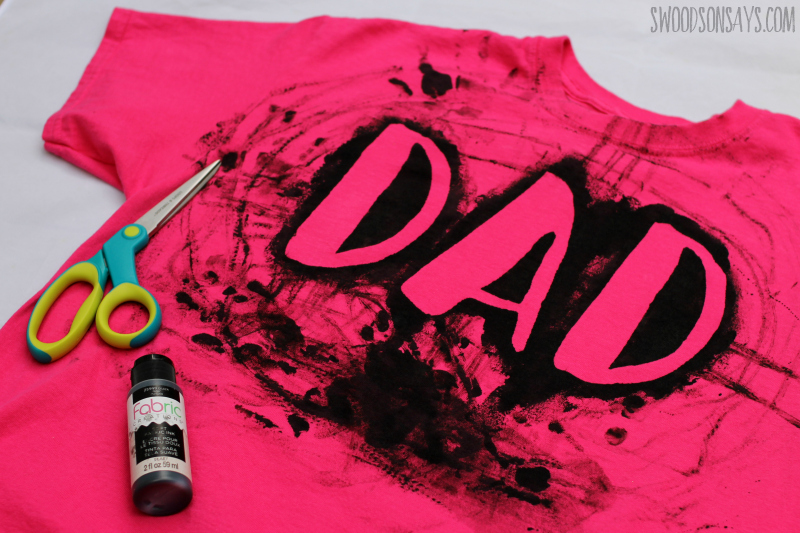
- Fabric paint (I used Plaid’s Fabric Ink*)
- Iron
- Tweezers or scissors to carefully lift the letters up
- Ruler or straight surface
- Digital cutting machine (I used my Cricut Maker) or you can cut it by hand with a craft knife and board (picture tutorial here)
- Cardboard piece that fits inside the tshirt
- File download for DAD – sign up for my newsletter and get the free download once you confirm your subscription! If you’re already a subscriber, you can access the pattern with the password in each newsletter, in the resource library.
Steps
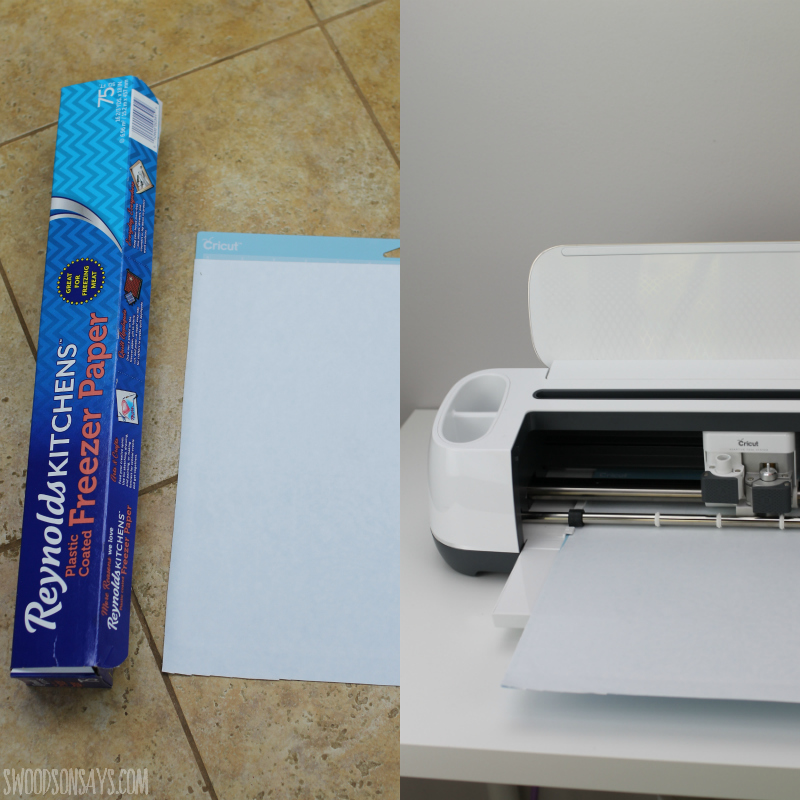
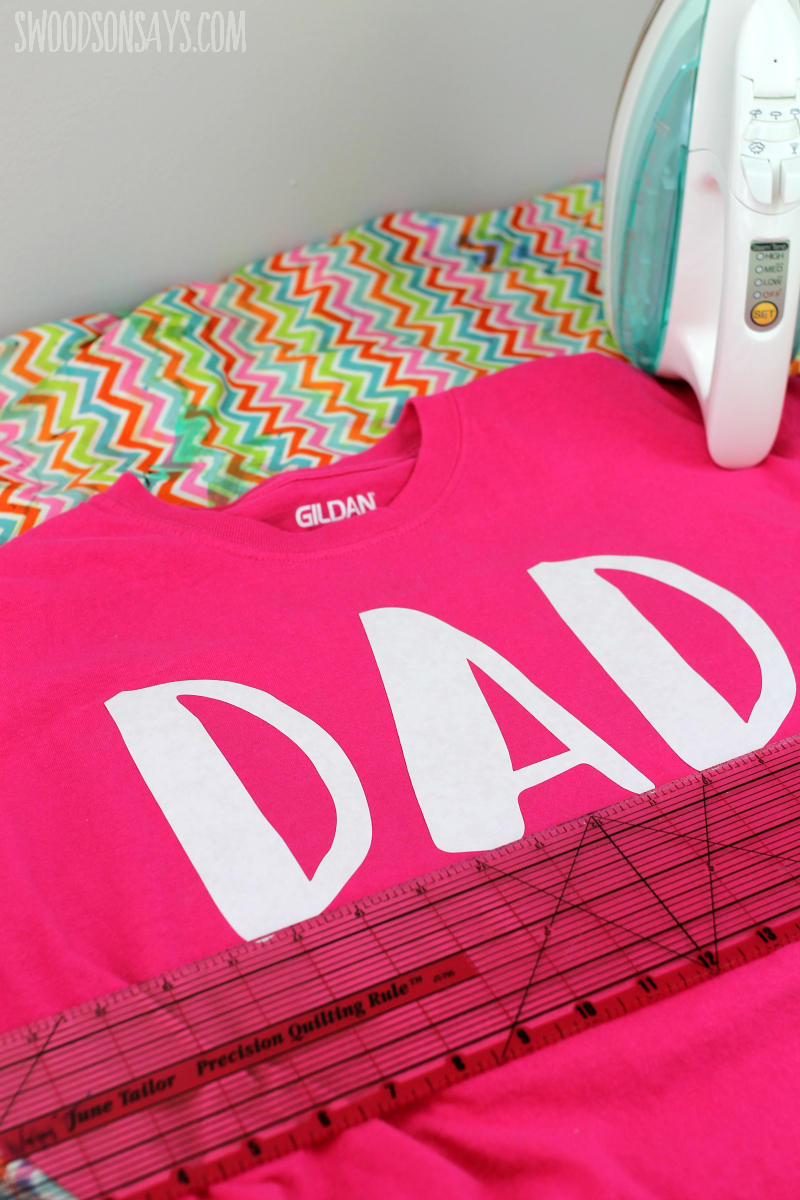
Step 1– Cut out your design! Whether you’re using a digital cutting machine or doing freezer paper stencils by hand, you’ll want to cut it so the shiny side of the freezer paper will be facing down with the letters facing up. Peel away the outline and iron the letters down, aligning them on top of a ruler and making sure they’re centered. Insert cardboard in between the layers of the shirt before painting. I used the blue mat and the freezer paper setting.
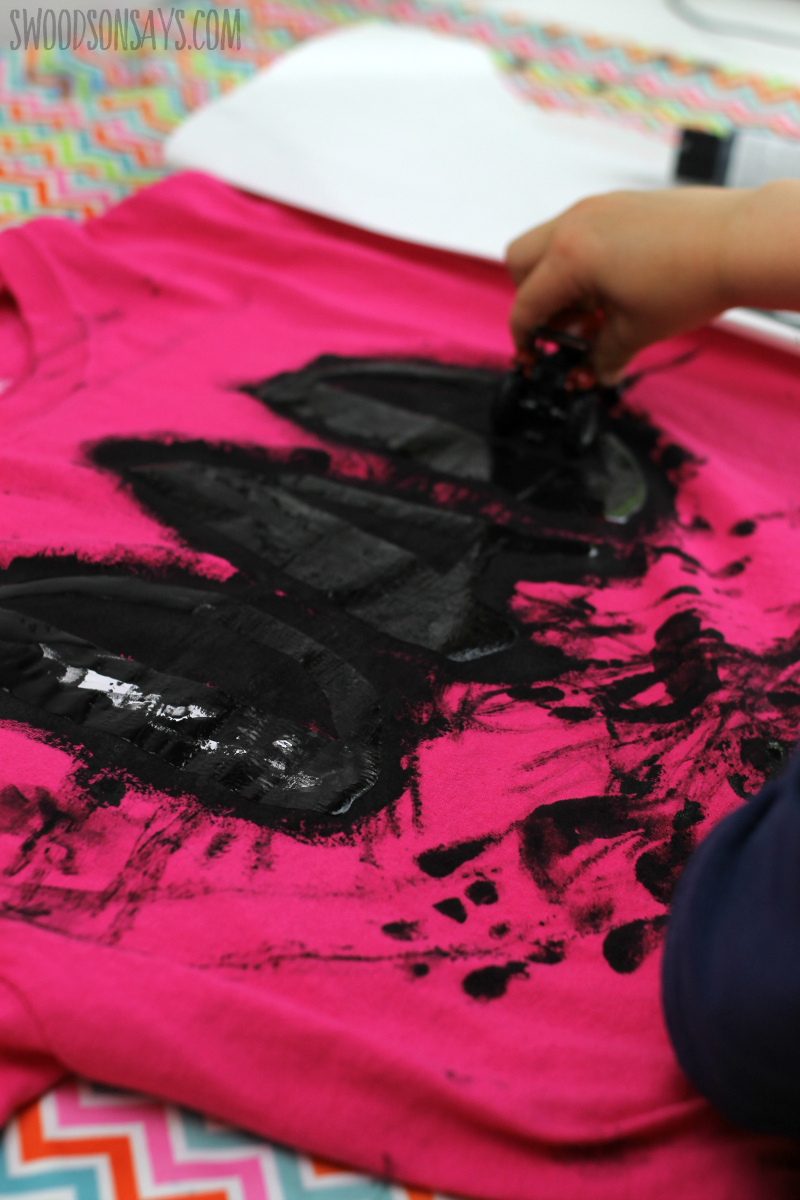
Step 2– Get to painting! Encourage your kids to paint around the edges so the lines will show up. Get creative with brushes, cars, utensils, or plain old fingers. If you want to do multiple colors, let them dry in between or it’ll all turn brown.
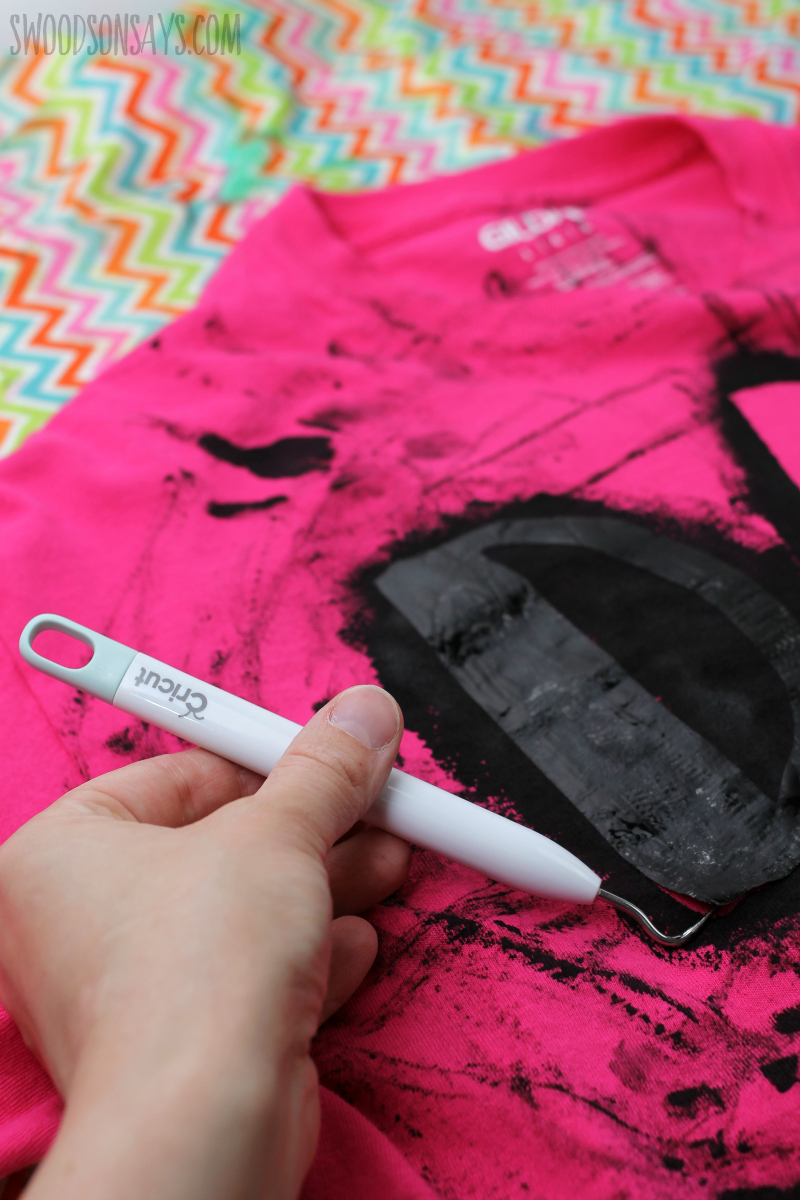
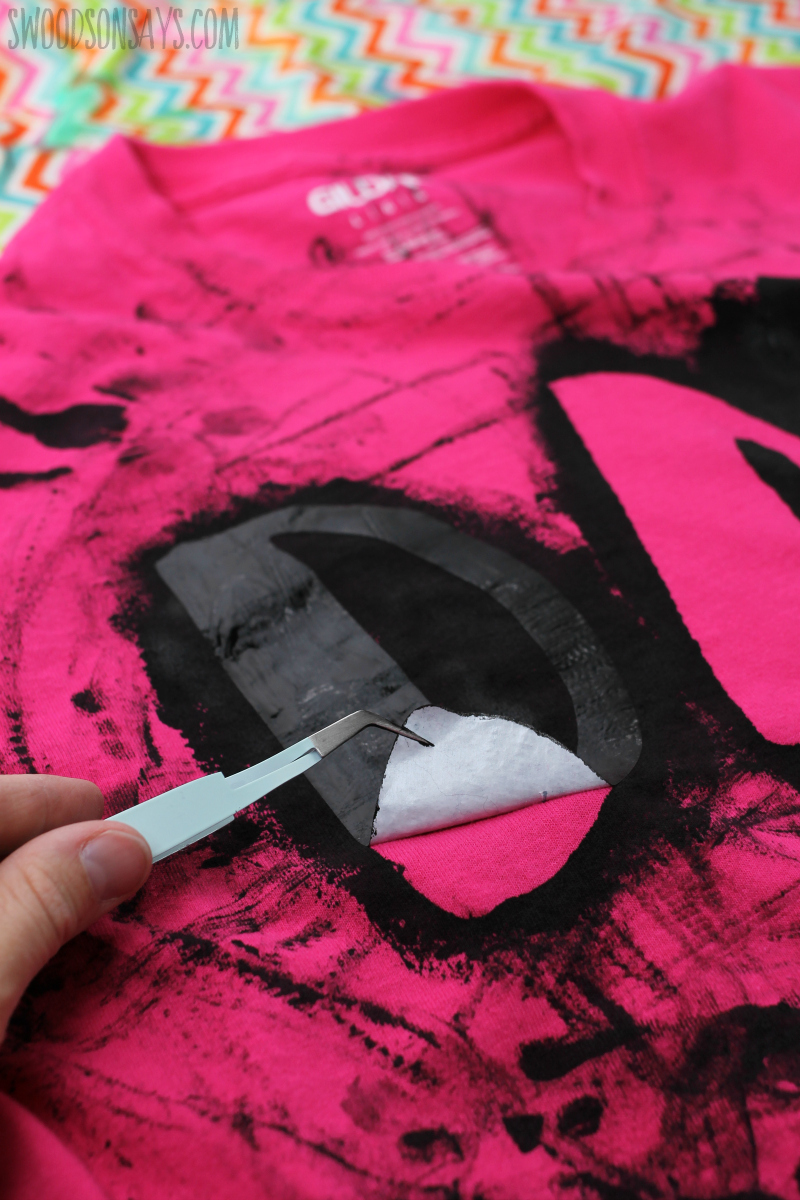
Step 3– Peel up the letters! I’ve always peeled them up when the paint is still wet, for fear of paint really glueing the paper down. I used my Cricut tools* but any sharp point or edge can lift it up easily.
Step 4– Follow the instructions for the fabric paint you used – we had to let ours dry for 24 hours and then heat set it, using a pressing cloth (plain white fabric) and iron. Wash per their instructions and enjoy!
Tell me what design you’d use to make this Homemade T-Shirt Idea for Dad!