
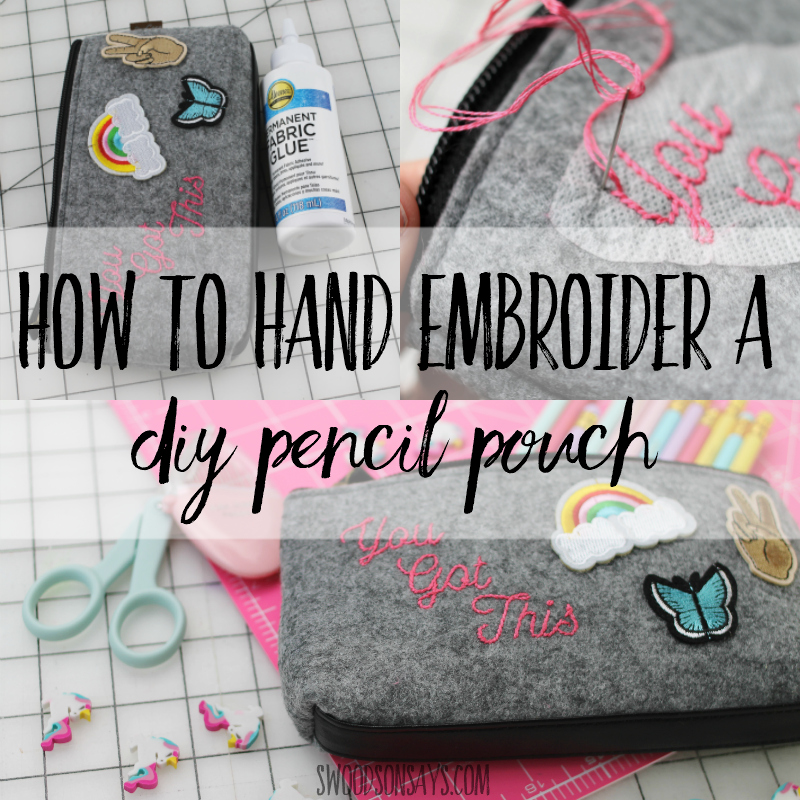
 If you’re looking for a fun back to school craft or a diy teacher gift they’ll actually use, I’m excited to share how to hand embroider a diy pencil pouch! I stitched this with grade school kids in mind but once I was done, I realized I would definitely use this now as an adult. This is very beginner friendly, with both a video and photo tutorial to follow.
This post was sponsored by Amazon Live; they provided all materials and compensated me for my time, but all opinions are my own!
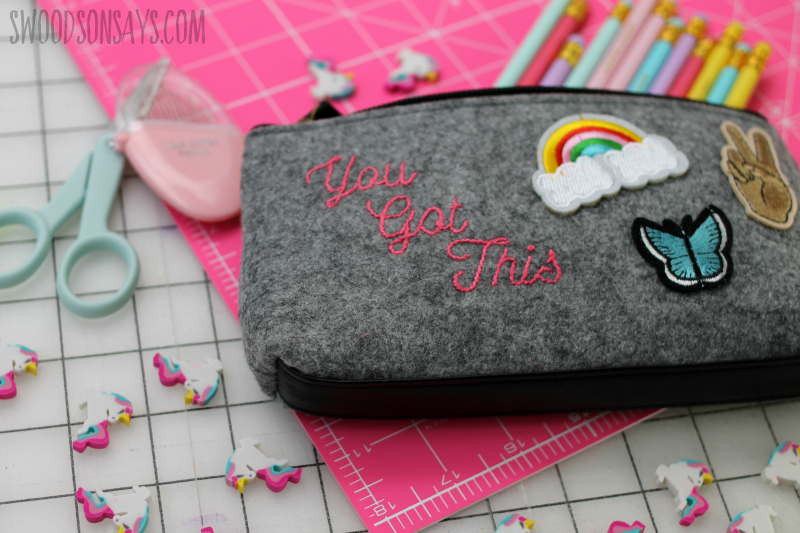
I had a lot of fun picking out the colors and patches for this project! I had to send this one back to Amazon so I need to work on making one that I can keep. I think it would be perfect for embroidery tools when I’m stitching on the go.
If you like this tutorial, check out these while you’re here!
Pin this tutorial for hand embroidering a pencil pouch with this link or collage photo:
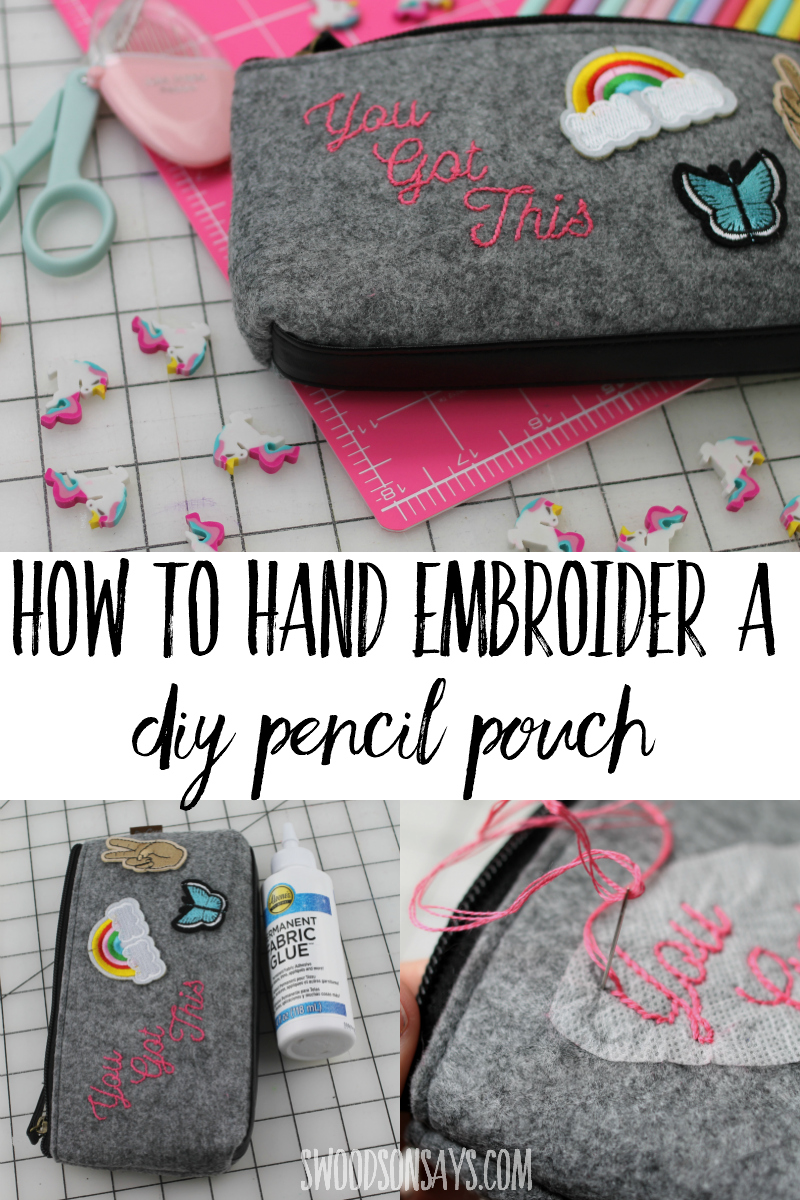
How to hand embroider a diy pencil pouch
Supplies
-
- Stick N Stitch
- Felt pencil pouch
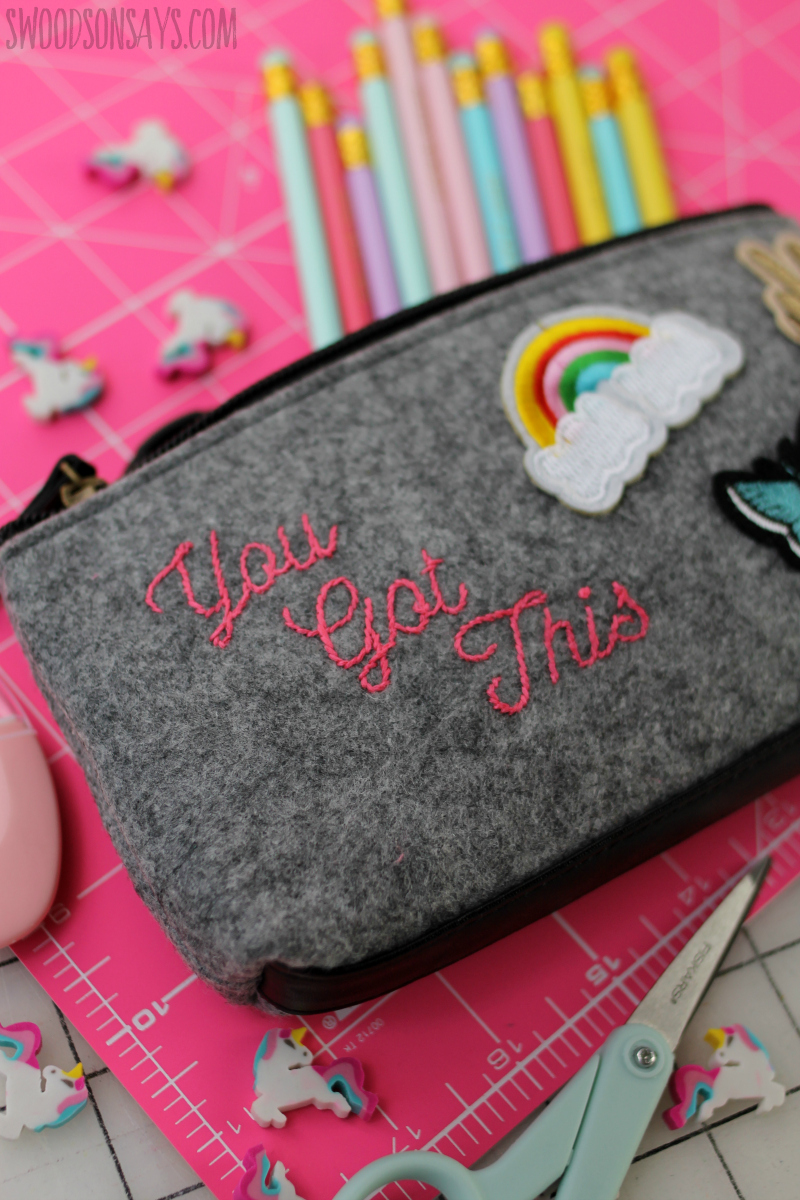
- Assorted patches
- Aleene’s fabric glue
- DMC floss – geranium color used here
- Embroidery needles
- Printer – either inkjet or laser works!
-
Free PDF hand embroidery pattern-sign up for my newsletter and get the free download once you confirm your subscription! If you’re already a subscriber, you can access the pattern with the password in each newsletter, in the resource library.
Steps
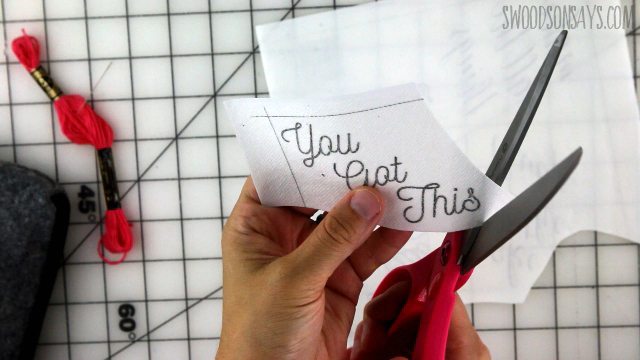
Step 1: Print the pattern out on to Stick n Stitch and cut roughly around the design. Peel off the backing and press to adhere it to the pencil pouch.
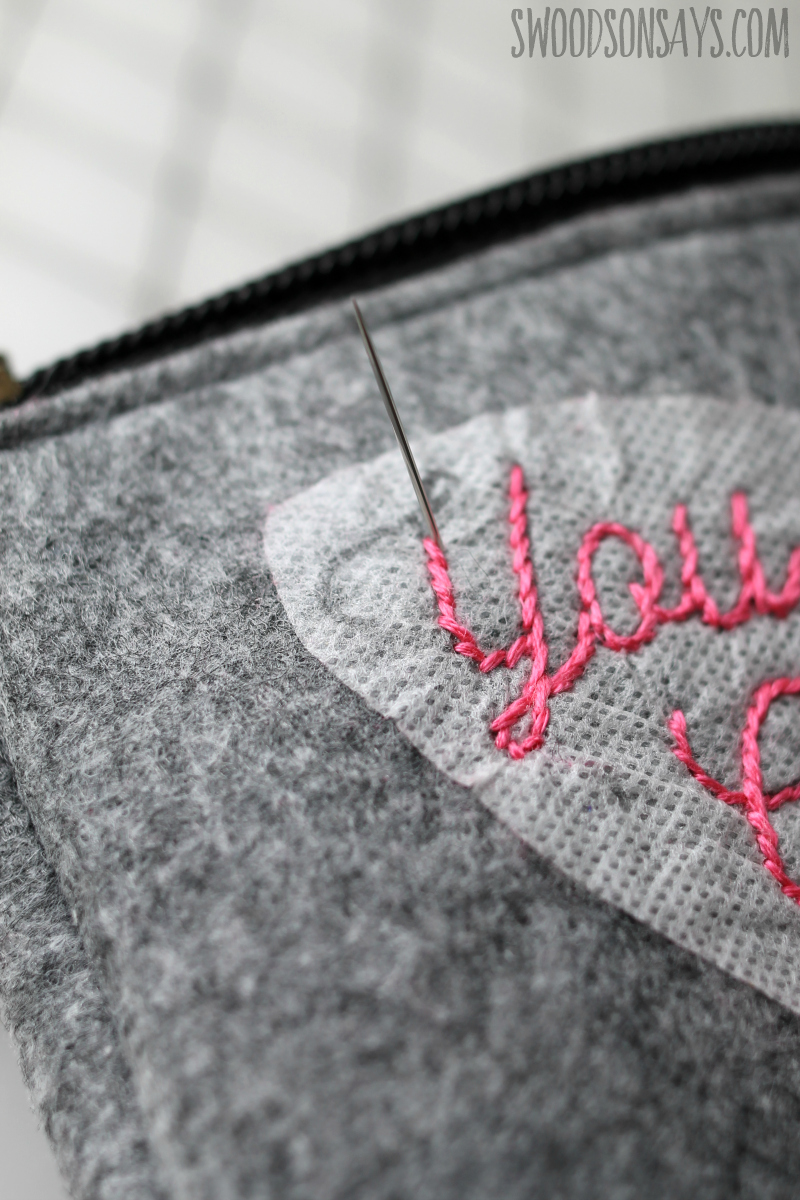
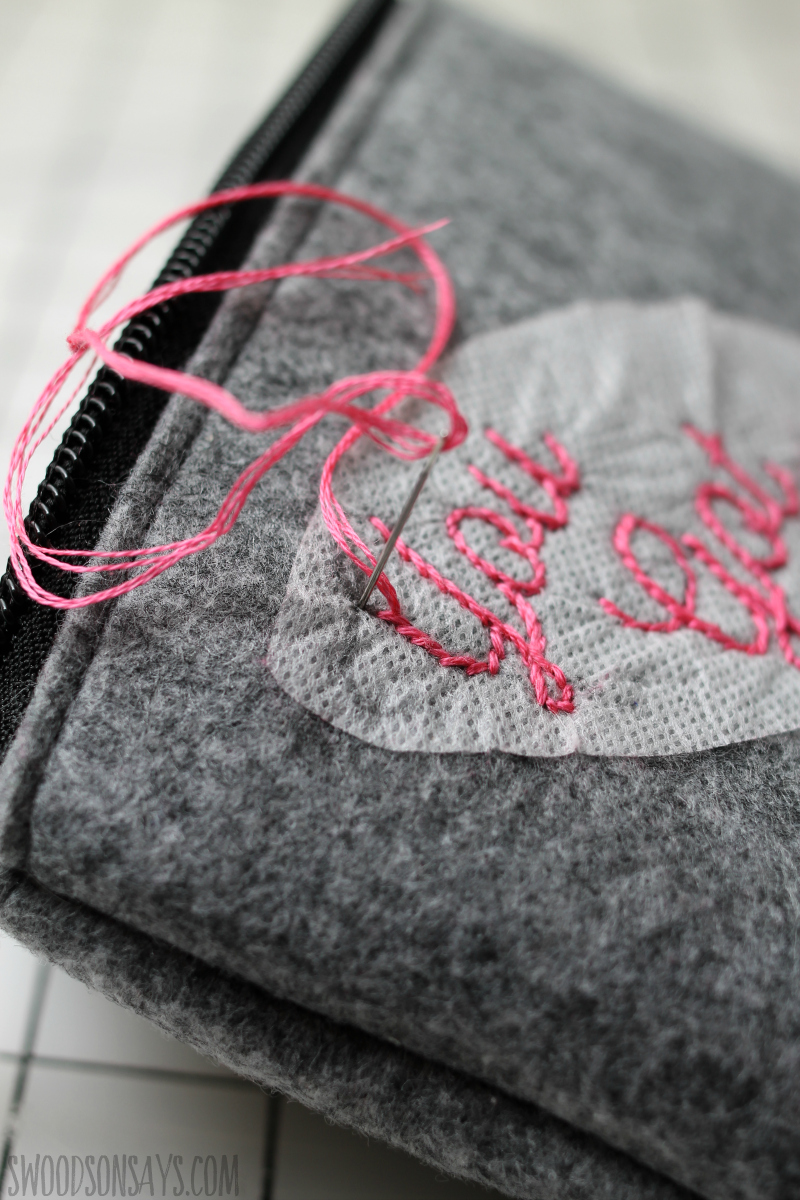
Step 2- Stem stitch the text! You’ll make one back stitch and then bring your needle back up towards the front of the stitch you just took, and repeat.

Step 3- Use warm water to wash away the Stick N Stitch and let it dry! I like to stick a microfiber towel into them to help absorb all the water faster.
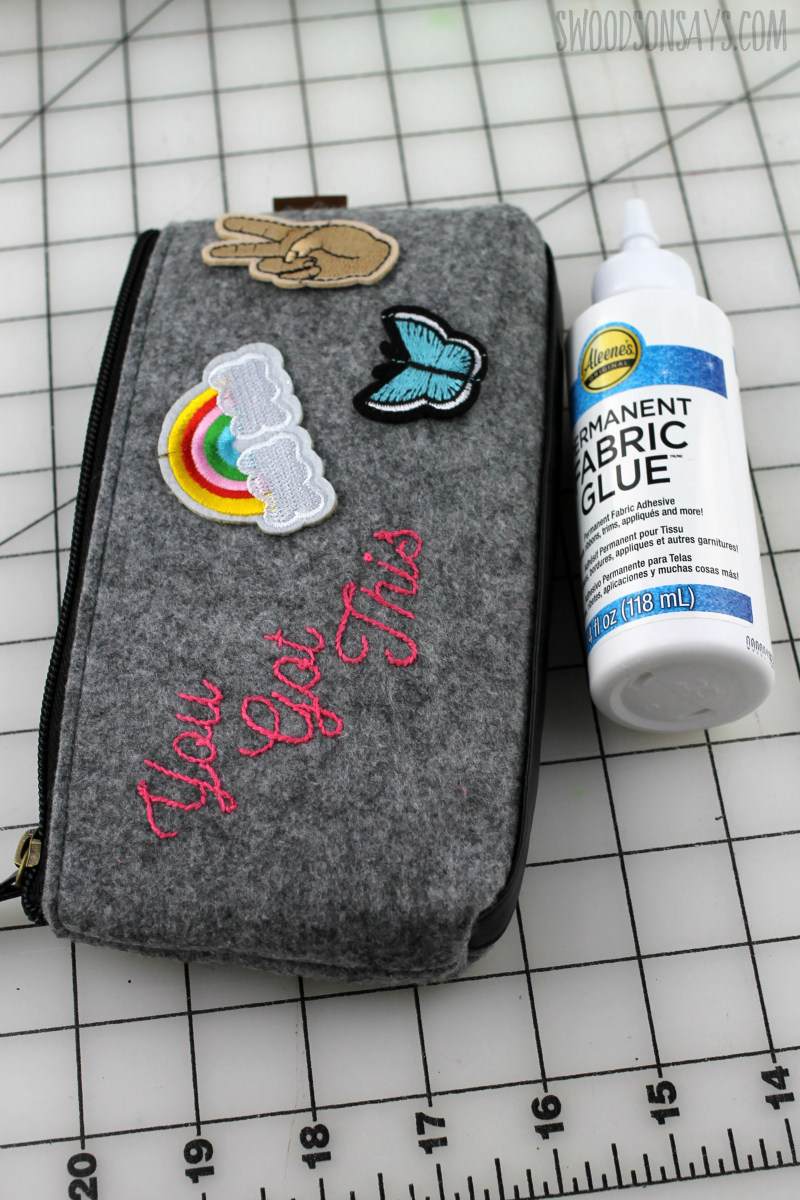
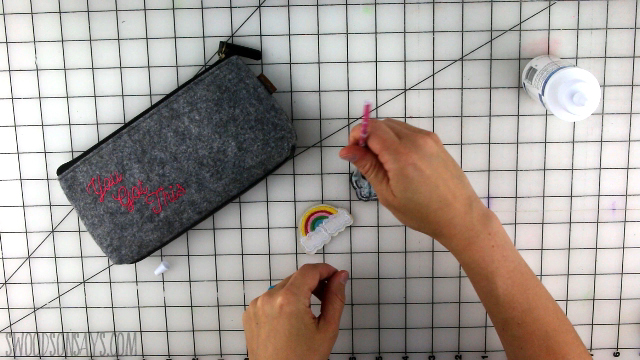
Step 4- Use the fabric glue (follow the instructions for the specific brand you’re using) and adhere the patches on! I used a paintbrush to apply the glue and then pressed to hold for about 30 seconds. If any excess glue comes out the sides, use a q-tip to clean it up. Let it dry and enjoy!
What would you carry in this hand embroidered felt pouch?
Jen Baker
Wednesday 21st of August 2019
love this idea and quote for a pencil case, would be great for empowering young women and teenagers at school or work!
Stephanie - Swoodson Says
Wednesday 21st of August 2019
Yes, it's great for all ages! Thanks!
LadyD
Tuesday 13th of August 2019
If I were to make a pouch similar in design to this, It would need to be larger - perhaps big enough to hold an A5 light board or sketch book approximately that size. I might even go so far as to make a two-pocket pouch so the sketchbook could be kept in a separate pocket from the light box but both in that same pouch.
Stephanie - Swoodson Says
Wednesday 21st of August 2019
those both sound cool!!