
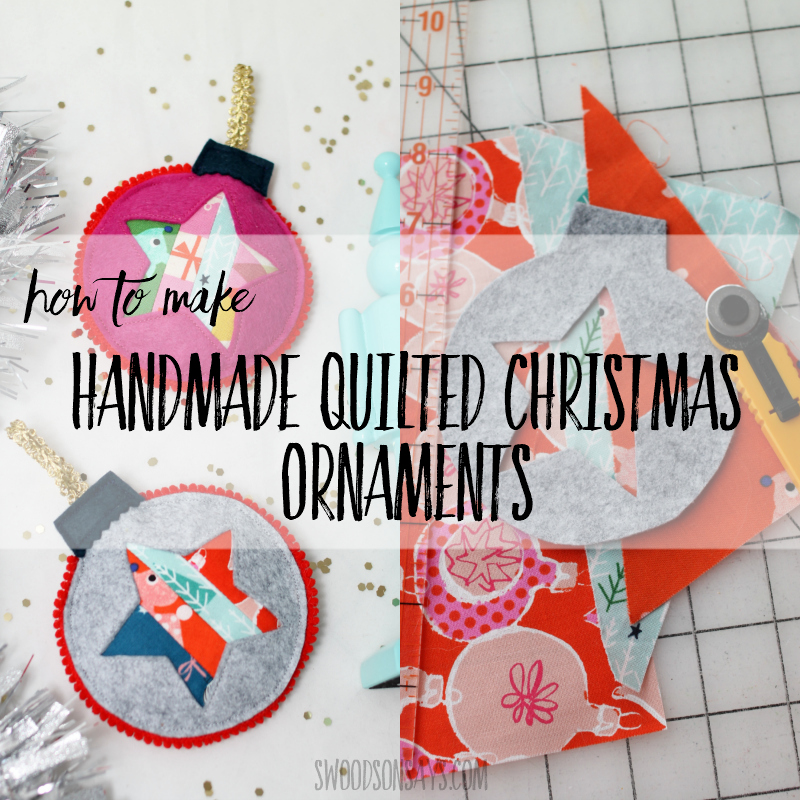
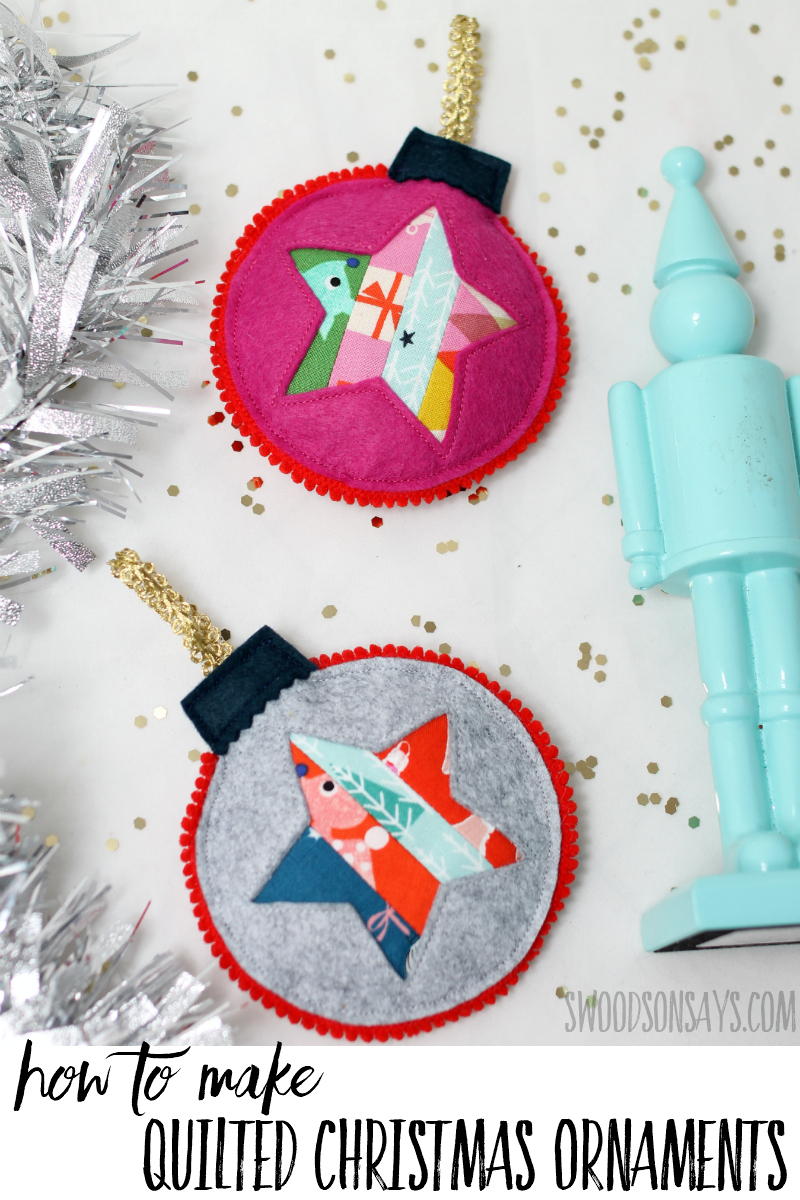
Another free ornament friday, I’m sharing how to make handmade quilted Christmas ornaments! I still have a pile of scraps from the ornament I shared last week and I’m determined to use every last one of them! These scrappy ornaments are really fast to make; it took me about 2 hours to make both of these, while taking photographs, so I’d say it’s under an hour for each one easily. You could try all sorts of different shapes for the felt overlay too, but I love the simplicity of a star!
If you want more Christmas sewing inspiration, check out these posts!
- 15+ fabric ornament tutorials
- 20+ felt Christmas ornament patterns
- 20+ modern Christmas quilts
- 25+ Christmas hand embroidery patterns
- 35+ stocking stuffers to sew
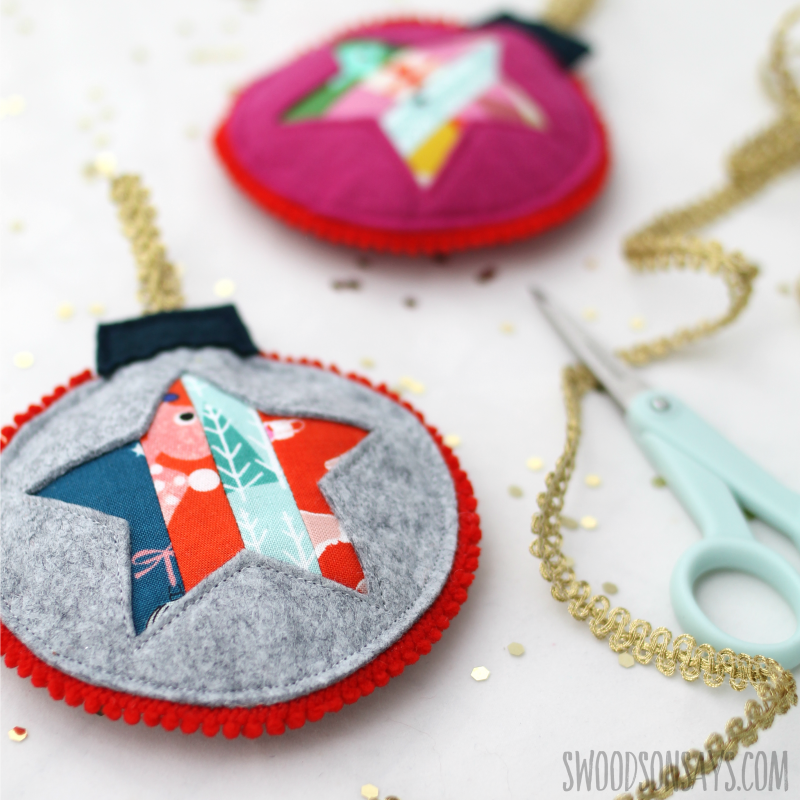
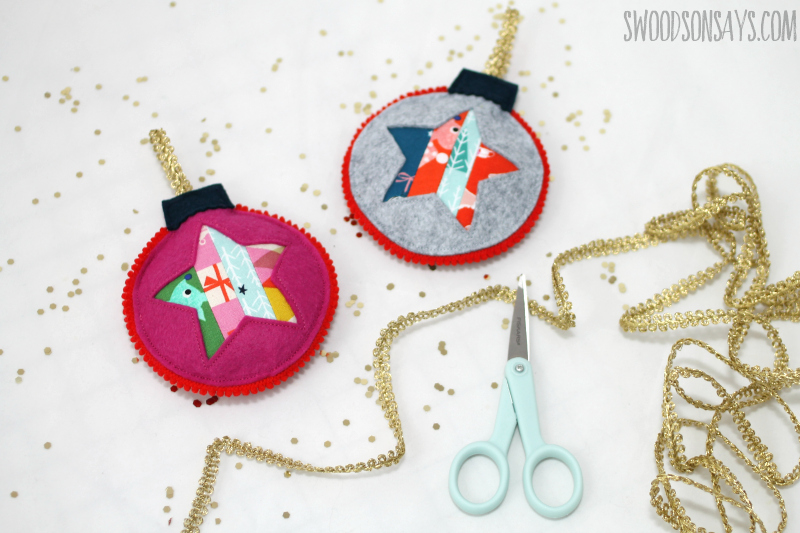
Both the red and the gold trims were given to my Mom, who generously shared them with me! I hadn’t initially planned on using them but think they add an extra pop. You could add sequins, beads, or hand stitching as well! These would look so different with more traditional fabric choices, too, if that suits your fancy. I thought about using my Cricut Maker to cut the felt out, it would work great for that, but ended up going old school with freezer paper for the tutorial.

I added the ornament “topper” piece at the last minute, do you like it? I debated making the outside shape a simple circle, but I think I prefer the ornament shape instead! These were so much fun to make.
Pin this tutorial for how to make handmade quilted christmas ornaments using this link or photo:
How to make handmade quilted christmas ornaments
Supplies
- Quilting cotton scraps – these are all Cotton + Steel
- 1 8 X 10″ sheet of wool blend felt & 1 coordinating scrap – my fav shop is here
- Mini pom pom trim
- Gold metallic trim
- Elmer’s glue stick
- Pen or marker
- Freezer paper
- Sharp, micro tip scissors – these are my favorite
- Regular scissors or a rotary cutter & ruler
- Polyfill stuffing
- Pinking shears
- Coordinating thread
- Iron & ironing board
- Sewing machine
-
Ornament template-sign up for my newsletter and get the free download once you confirm your subscription! If you’re already a subscriber, you can access the pattern with the password in each newsletter, in the resource library.
Steps
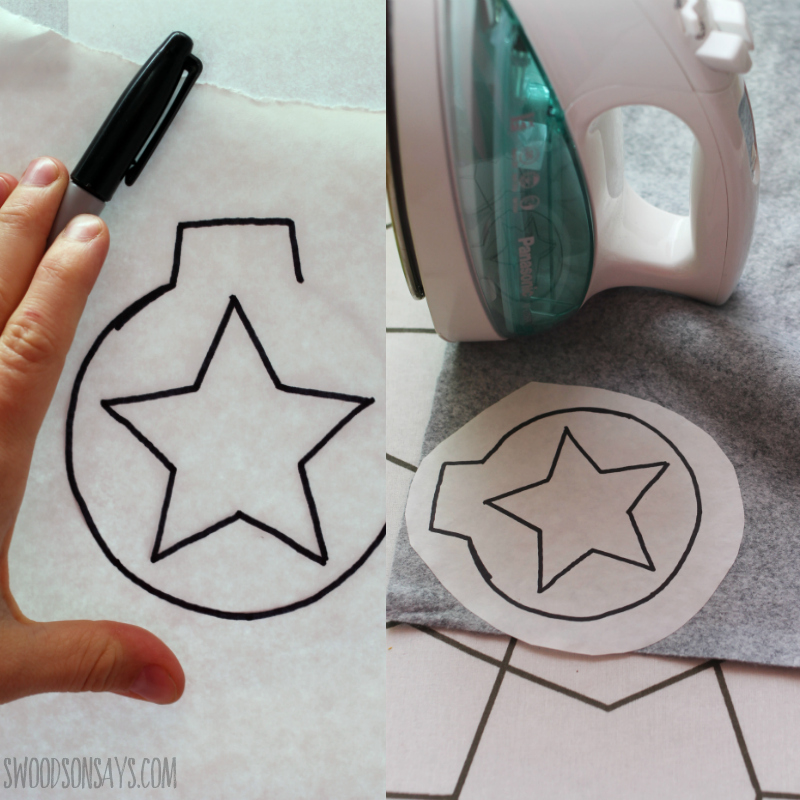
Step 1- Trace the pattern on to the freezer paper, shiny side down. Iron it on to your felt, shiny side down.
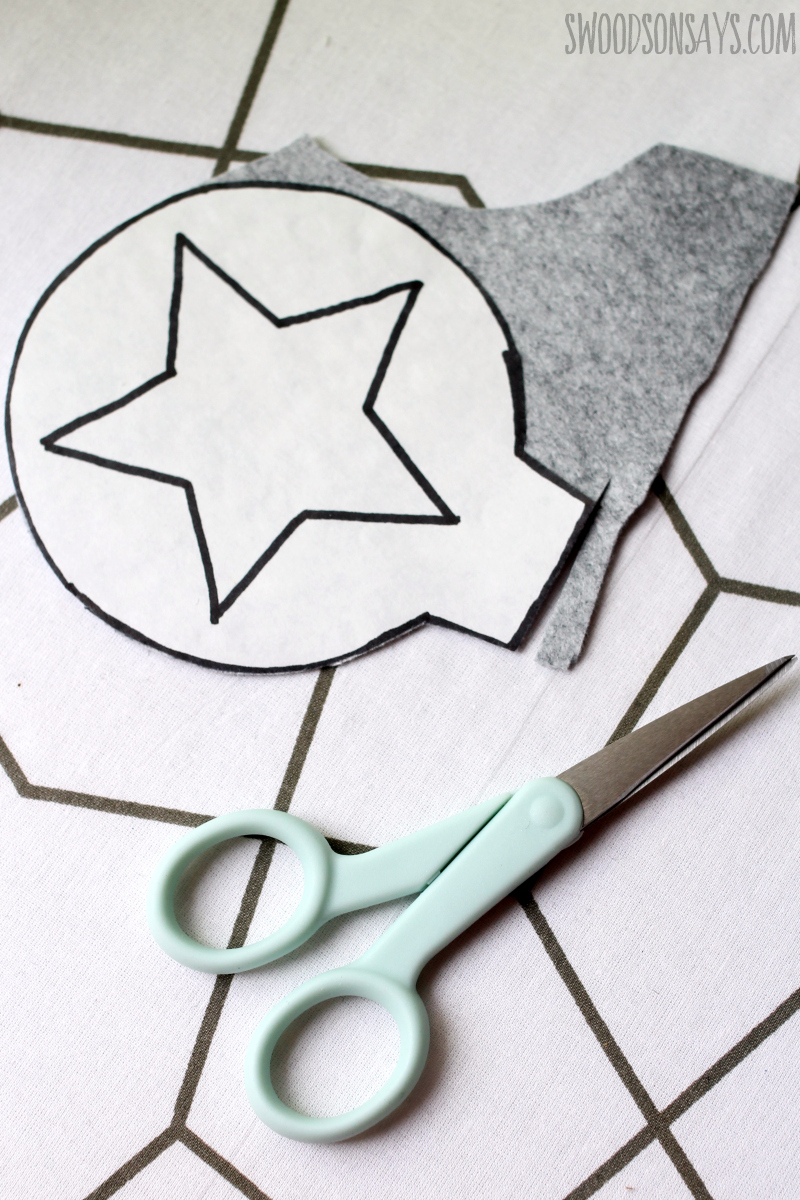
Step 2- Cut carefully around the lines, making 1 full ornament. Iron it down again, and cut another one, including the star inset.
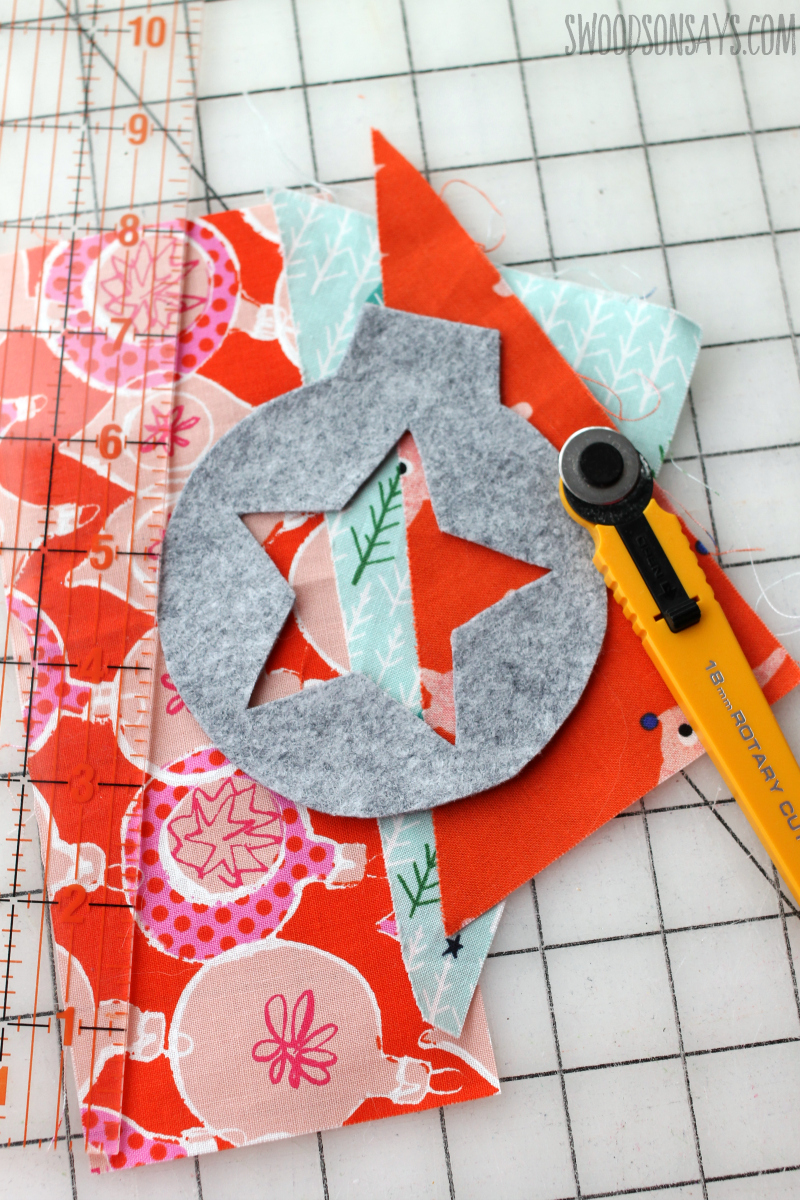
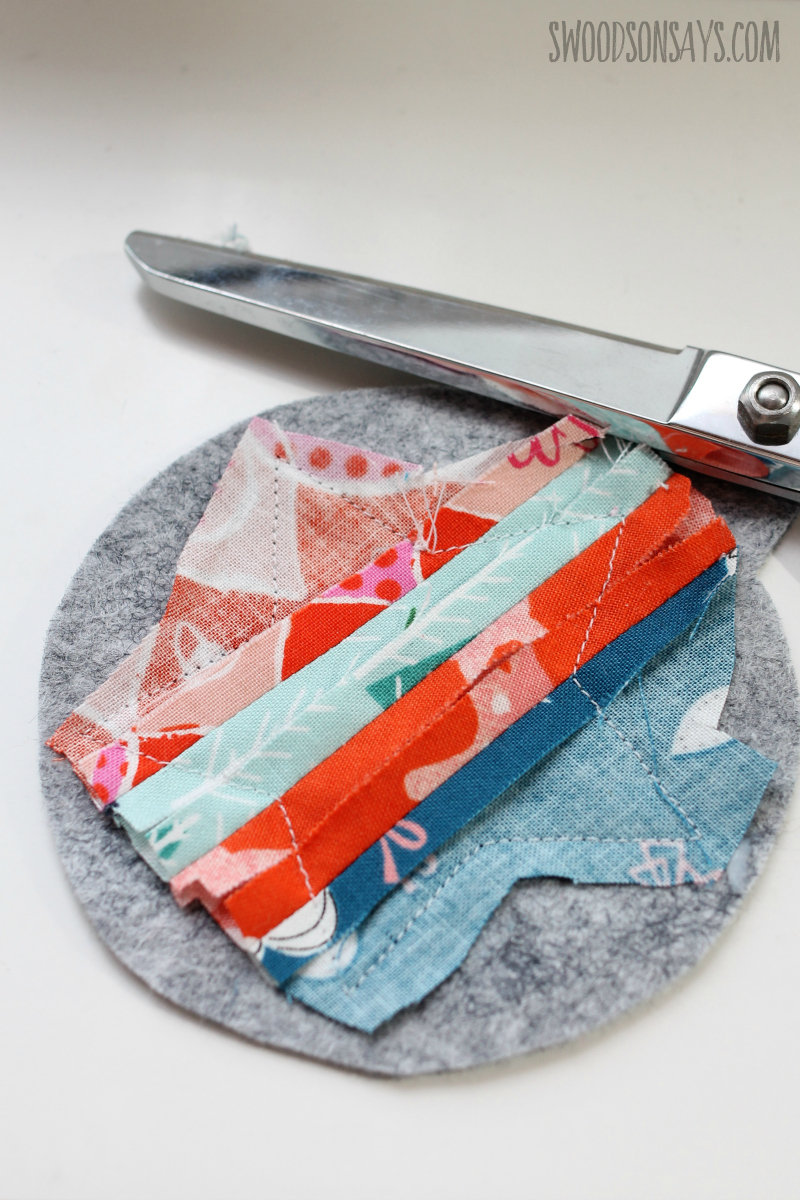
Step 3- Pull together some scraps! Play around with their layout under your felt and then make sure one edge of each one is cut straight.

Step 4- Sew two pieces with a 1/4″ seam allowance, use your iron to press the seam open. Lay it back out and use your scissors or rotary cutter to cut 3/4″ away from the seam you just created.

Step 5- Sew your next piece on! You can play with different width strips if you’d like, this is what I went with. Add another piece on the other side. Press all seams open.
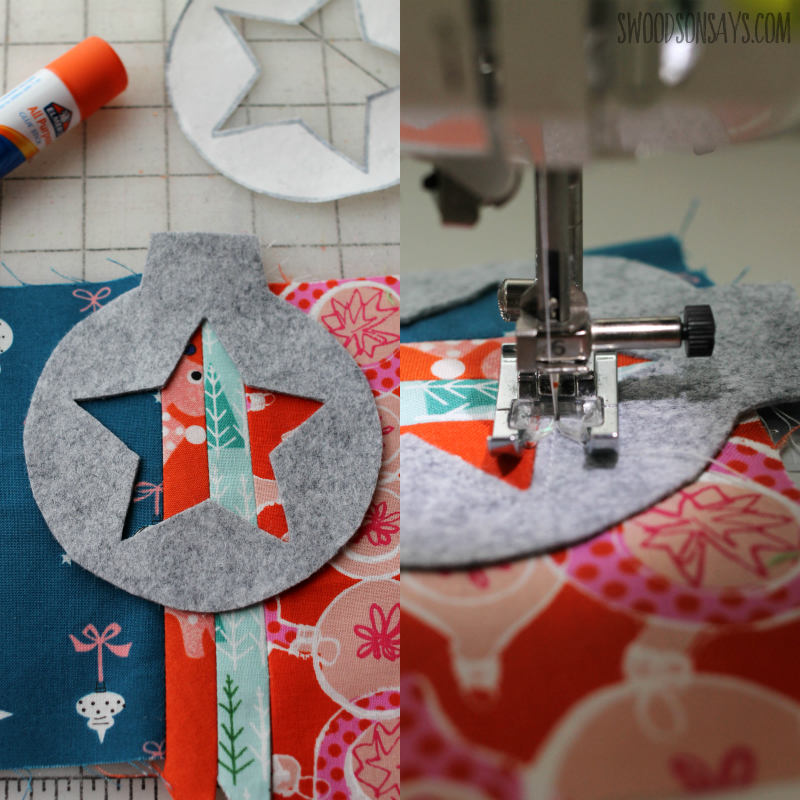
Step 6- Lay your ornament over the top and play with placement. Use your glue stick to adhere it down, lightly, and then sew along the edges.
Step 7- Trim the excess cotton from the back, being careful not to cut the felt or through your stitches.

Step 8- Glue the pom pom trim to the back of the front and the gold trim as a tie to the top of the ornament back.
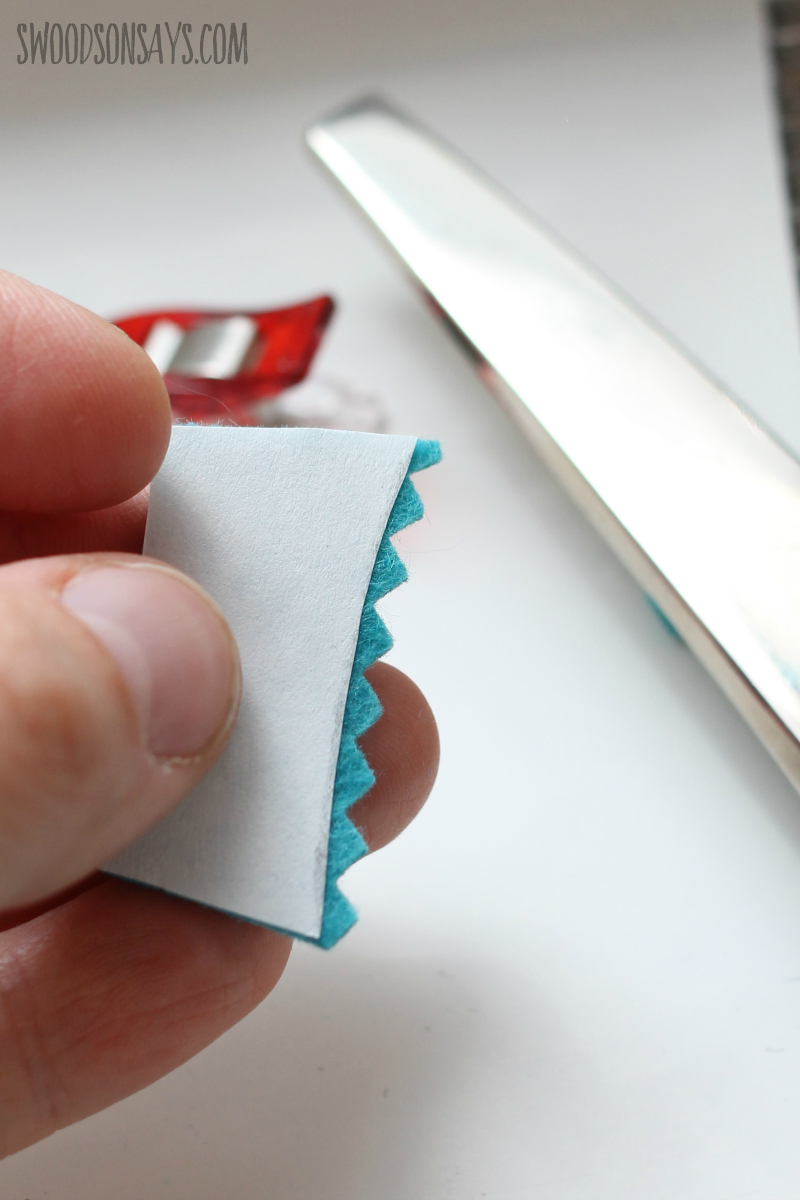
Step 9- Repeat the trace/iron process for the ornament topper – I used my pinking shears on the bottom to give it a little texture! Sew it on to the ornament front with coordinating thread.
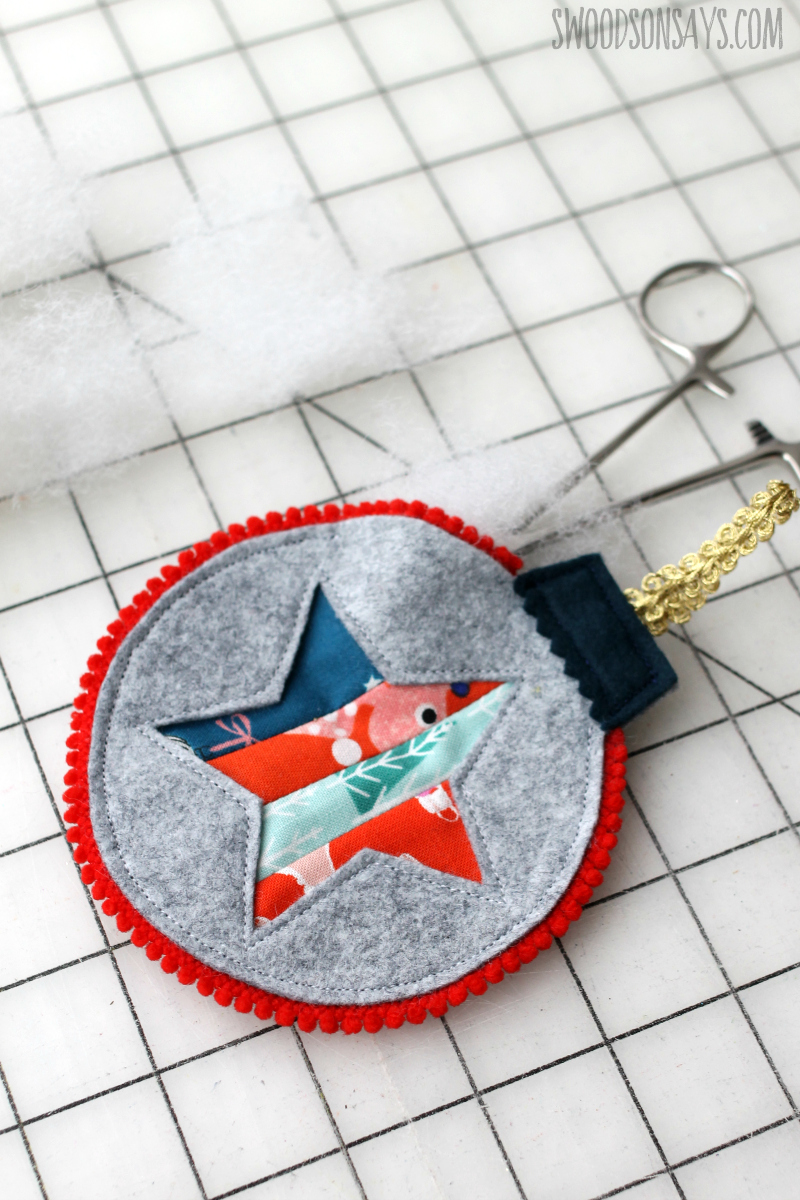
Step 10- Sew the ornament front and back together, leaving a 2 inch gap. Stop, add stuffing, and finish sewing. You’re done!
Anne
Saturday 1st of December 2018
Très joli vais essayer merci
Stephanie - Swoodson Says
Sunday 2nd of December 2018
De rien!
Super Mom - No Cape!
Friday 30th of November 2018
Those are really cute! And goodness knows I've got lots of scraps!
Stephanie - Swoodson Says
Sunday 2nd of December 2018
Thanks so much, they were fun to make!
Ellen
Tuesday 27th of November 2018
I was looking for a way to use my Christmas fabric scraps and this is perfect! Such a cute design and thanks for the step-by-step instructions (which I sooooo need!)
Stephanie - Swoodson Says
Thursday 29th of November 2018
You're welcome, I'd love to see them if you sew some!
Julie
Saturday 24th of November 2018
These are so sweet, they would be lovely as a special gift wouldn't they? (as there is quite a lot of work involved!) I can see them as lovely gifts for a babies first Christmas, maybe with a name and date embroidered on the back.