
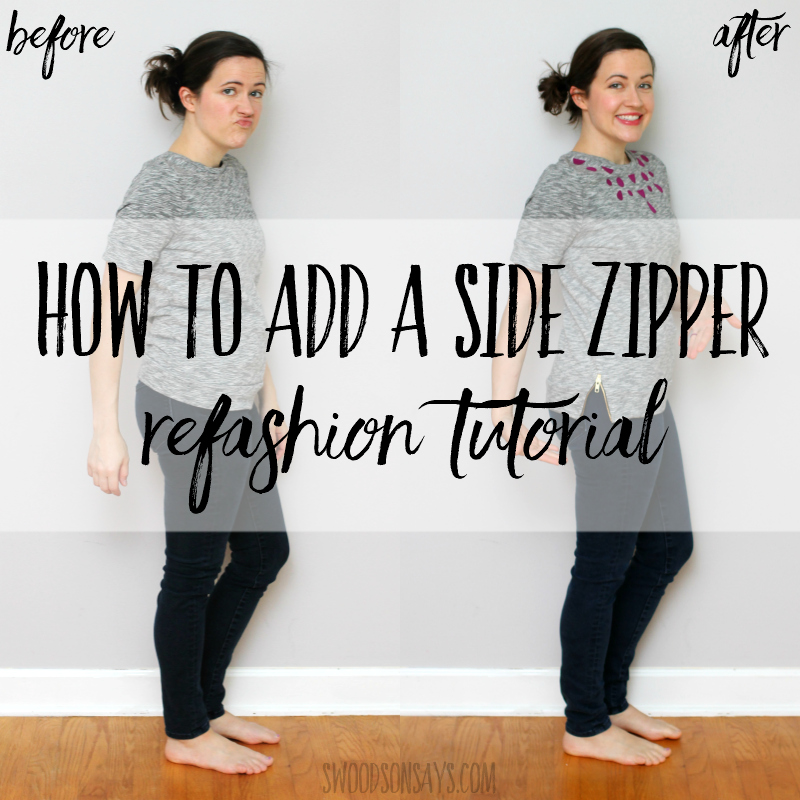
Another way to make a shirt bigger around the torso – add a zipper! A lot of refashion ideas are heavy on the bows and lace, neither of which I’m crazy for, but zippers add a different vibe. This particular top had a bunch of loose threads around the neckline, I’m guessing there were jewels cut off, so I trimmed all of those and added a faux jewel applique instead.
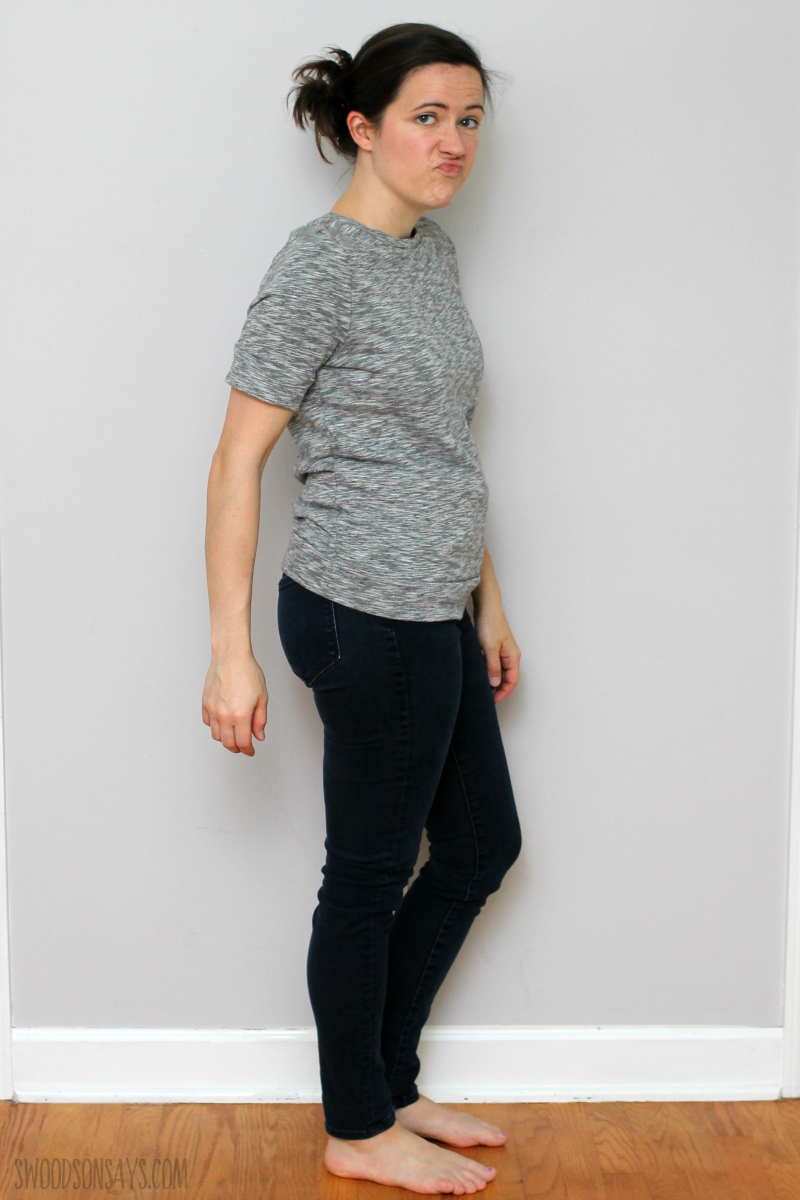
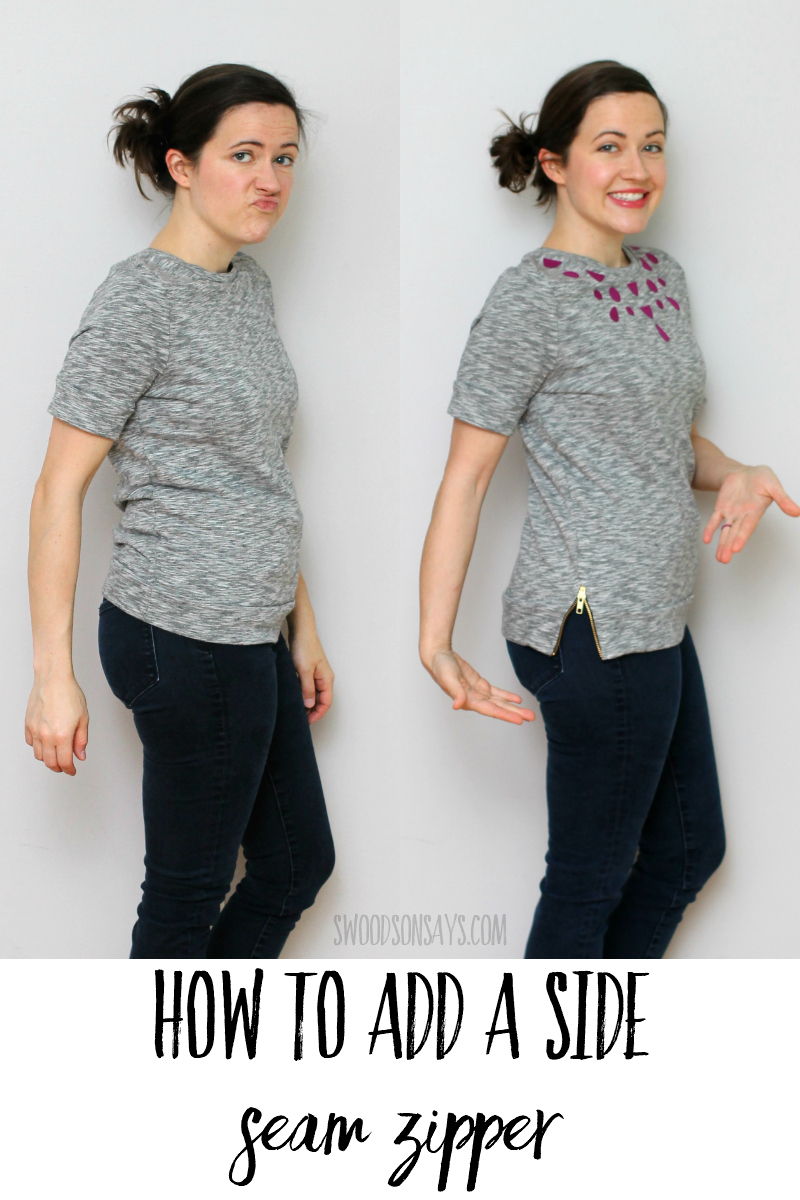
Long time followers know my 2 children absolutely demolished my stomach muscles and left me lots of extra skin (and stretch marks, for the record!), all of which you can see in detail if you want to scroll back in my feed or search on my blog, so I’m forever thinking up ways to refashion to accommodate it. It’s not necessarily something I want to hide but I definitely don’t like looking pregnant or having shirts ride up/feel taut on everything that I’ve tucked into my jeans (high waist for life).
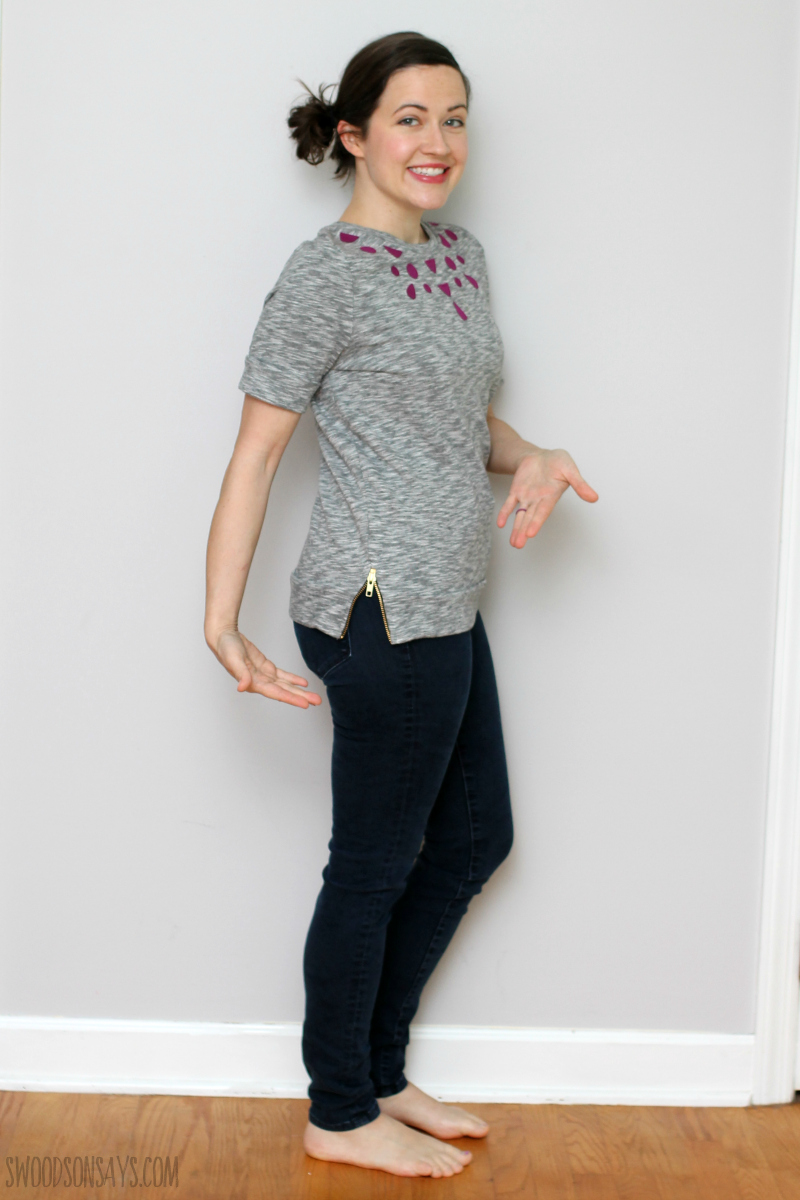
The short little zipper gave my stomach just the extra room it needed! Even if you have washboard abs, this would be nice for big holiday dinners too, am I right?
You might also be interested in these other posts while you’re here:
- 20+ ways to refashion clothes that are too small
- Five Tips for Thrift Shopping to Upcycle & Refashion
- 10 refashioning tips for successful sewing
- 24+ Men’s button down shirt refashion ideas
- What to do with old jeans, 40+ ideas
- 13+ T-shirt refashion ideas
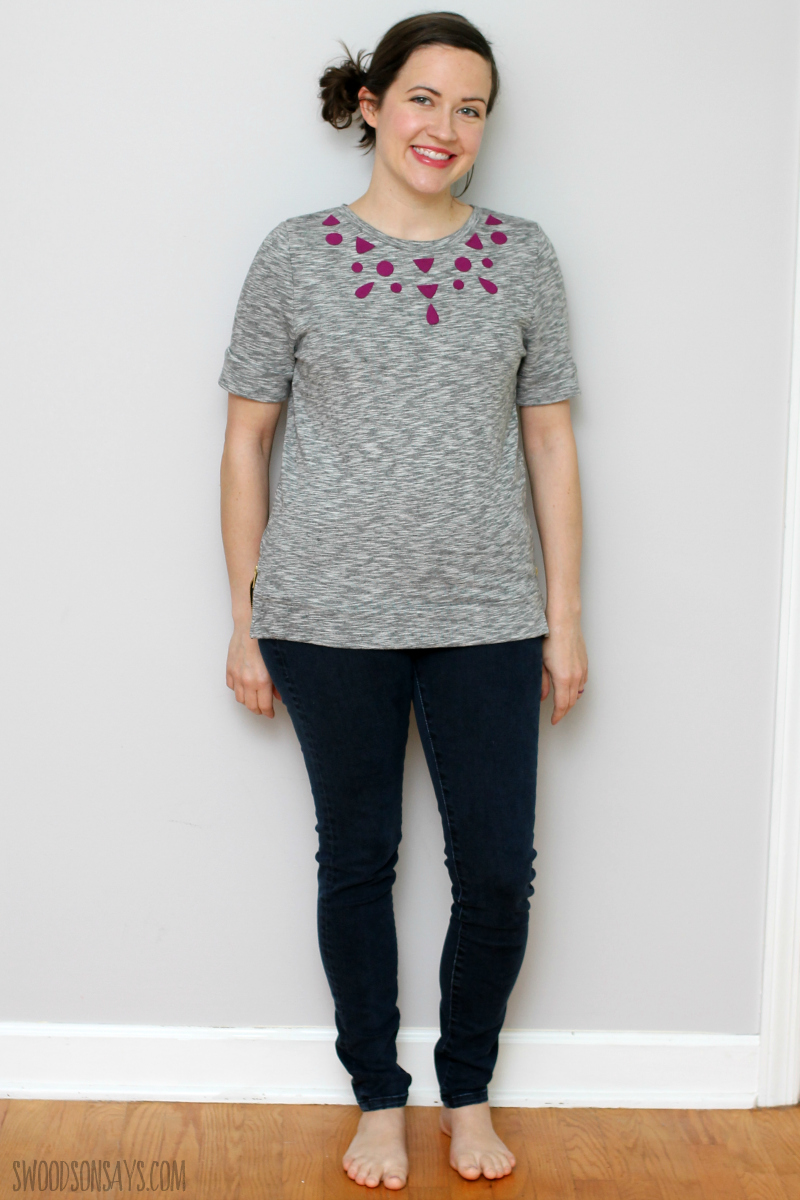
You can’t really tell that I added the zippers from the front but here is a better view of the neckline! I thought about adding stitching to make it look more obviously like a necklace but stuck with the more subtle approach. This is just an old t-shirt from my upcycle stash, knit fabric is my fav since it won’t fray at the edges.
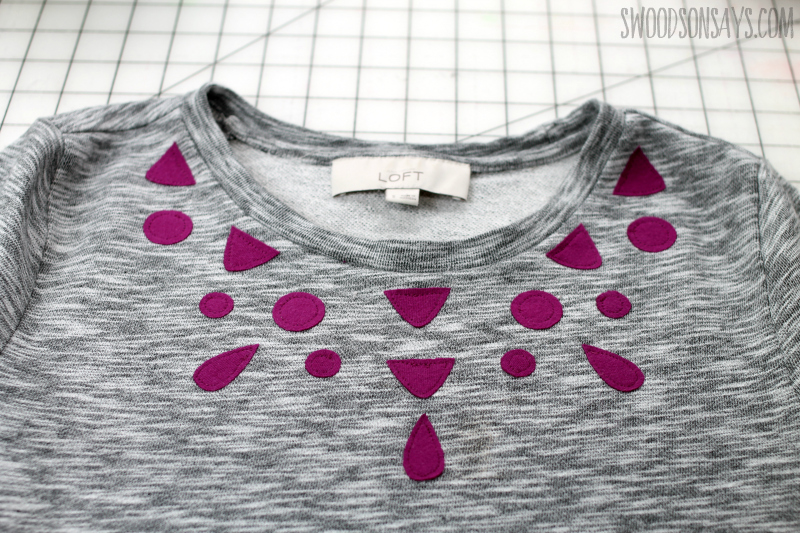
This post I’ll be focusing on how to add the side zipper to the hem, but my faux jeweled neckline was a big part of this refashion too! If you want this file to copy the look, sign up for my newsletter and get the free download once you confirm your subscription! If you’re already a subscriber, you can access the pattern with the password in each newsletter, in the resource library. Once you have the file and if you’re not sure what to do next, read this tutorial for how to machine applique!
This is not the most picture perfect zipper installation; I like to think I fall ahead of the refashion bloggers who are like “and then, put a zipper in!” or “hot glue that in and never machine wash anything!” but behind on true, technically trained sewing teachers. Anything I’m taking the type to write out I want it to be clear, accessible, and look decent as well as holding up through machine wash and drying. Keep reading if that sounds like what you’re looking for – and I’m always open to feedback in the comments for ways to do things better or where things need to be more clear!
Pin this refashion tutorial for how to add a side zipper with this link or collage image:
How to sew an exposed zipper
Supplies
- 4″ zipper
- Seam ripper – shop on Amazon – Etsy
- Zipper foot – shop on Amazon
- Applique foot for topstitching
- Quilting clips – shop on Amazon
Steps
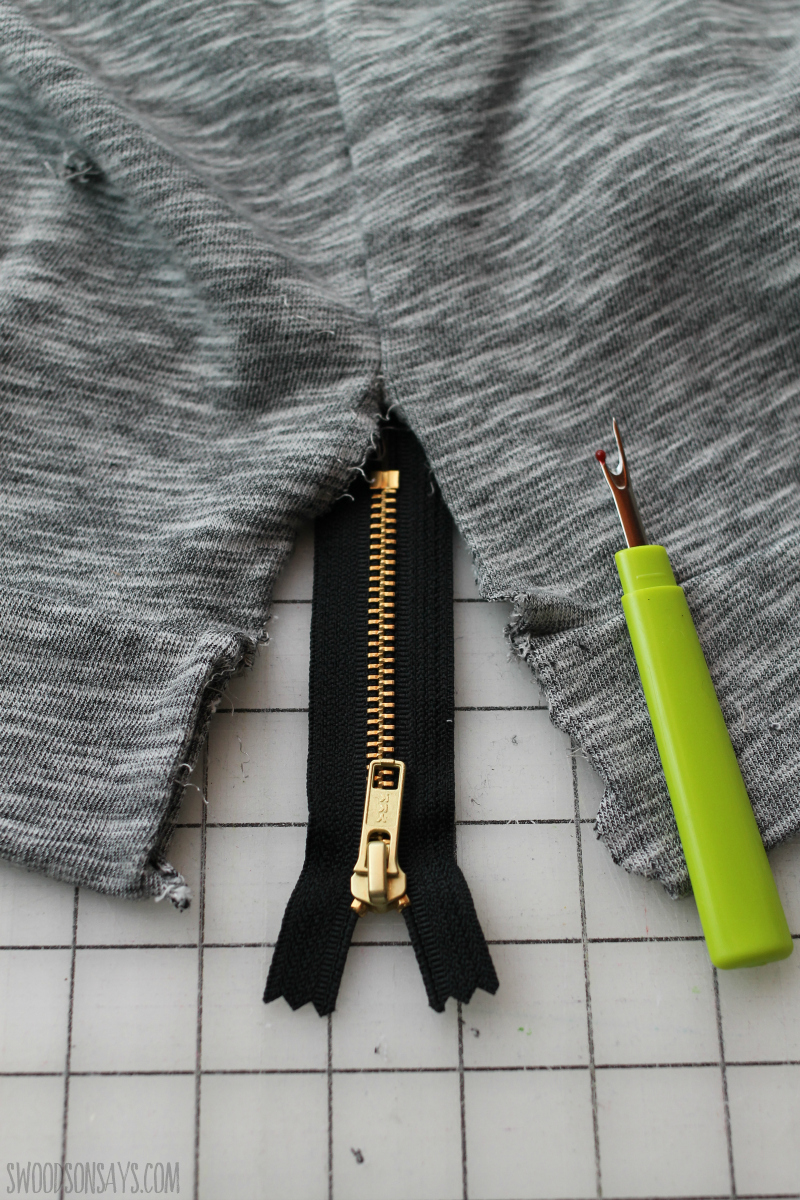
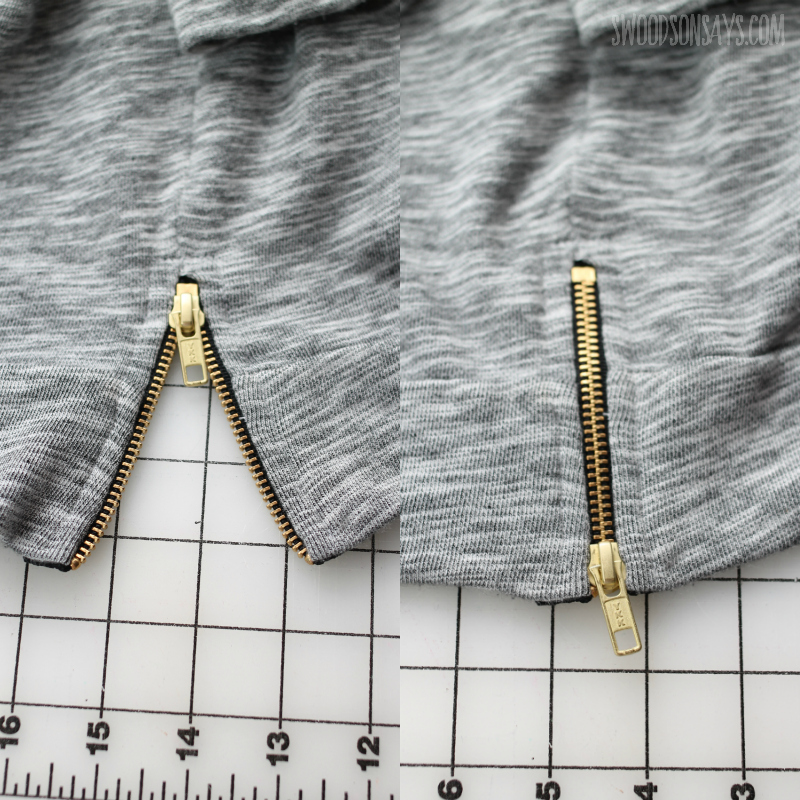
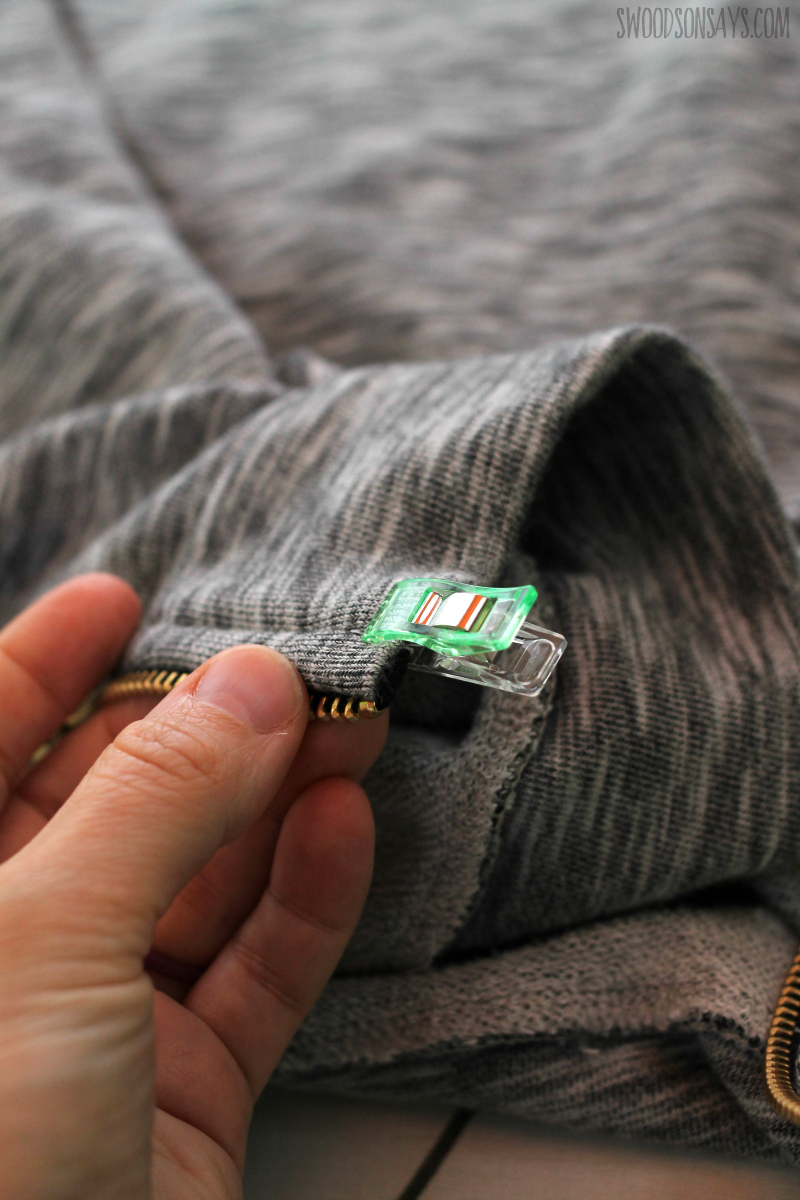
Step 1– Seam rip up the side! You want to plan for the gold teeth at the bottom aligning with the pre-existing hem and then maybe an inch or so above here the zipper stop will end. This particular shirt is heavy sweatshirt weight, if yours is lighter I’d recommend putting lightweight strips of interfacing on each side after seam ripping. My hem is a band which complicates a bit, if it was a regular hem I would seam rip that out as well.
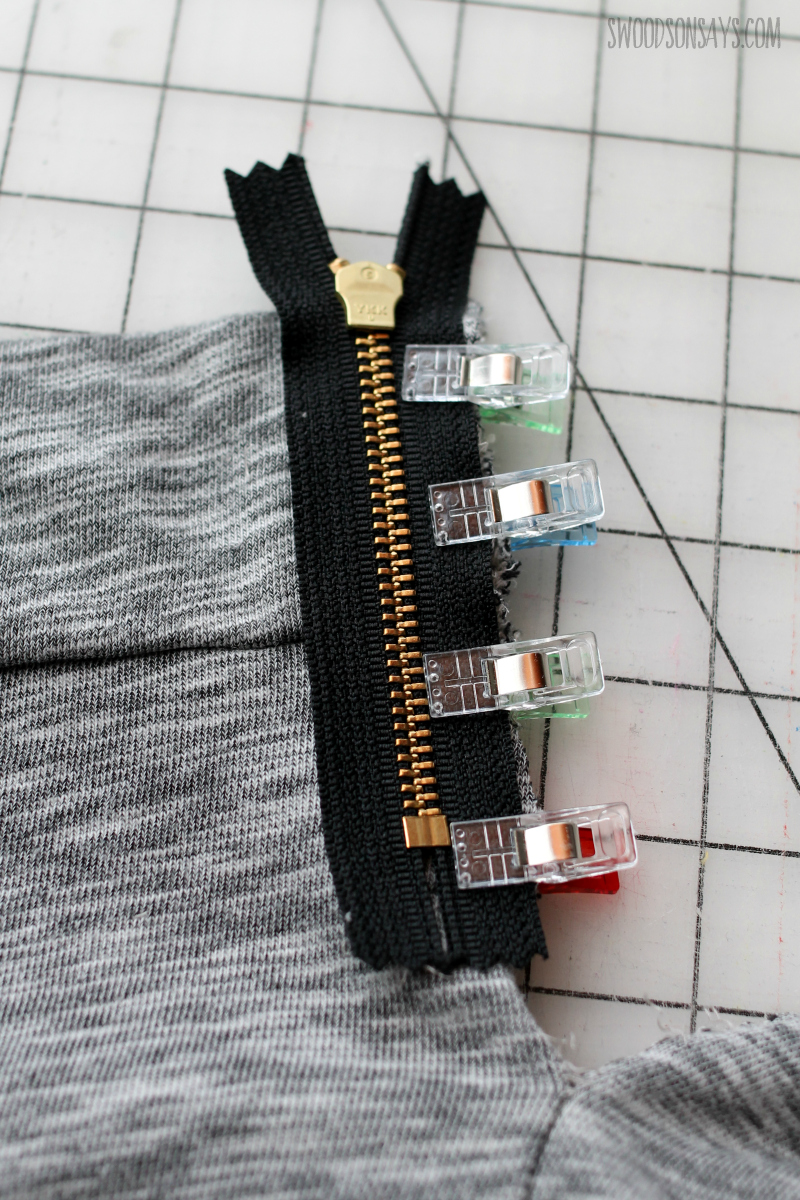
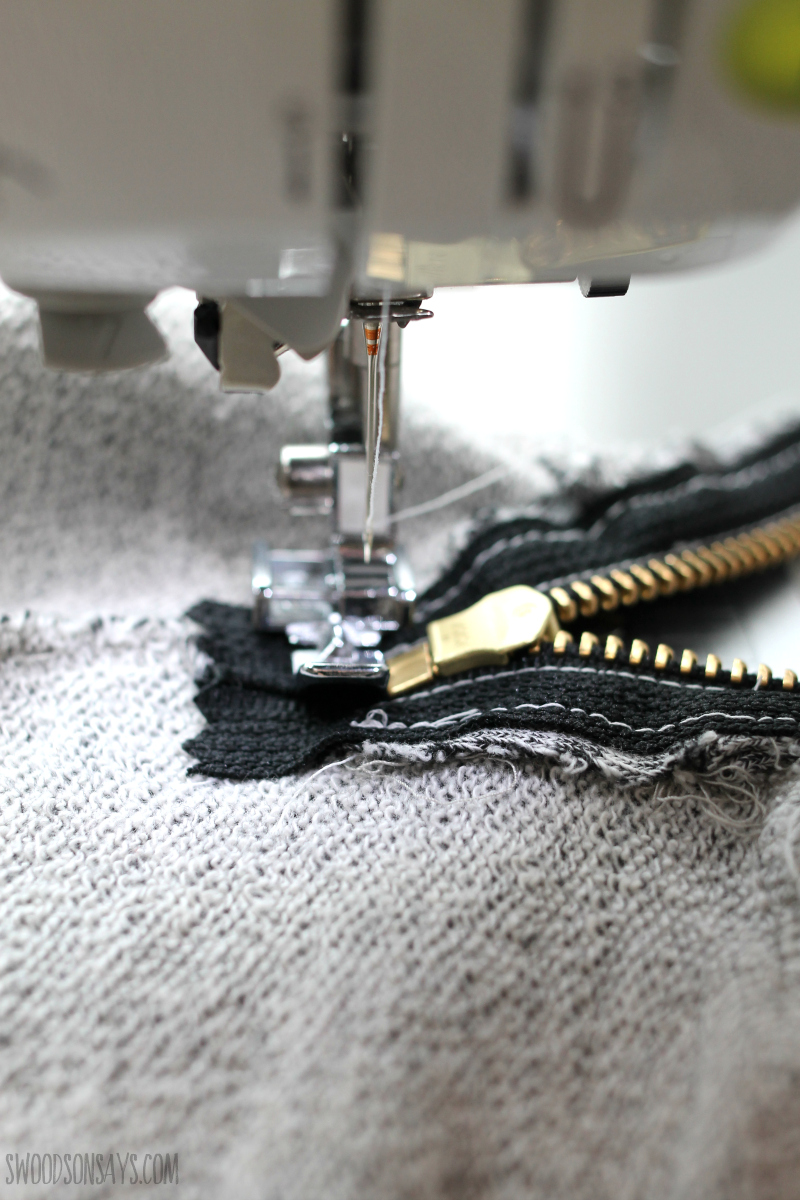
Step 2– Clip one side of the zipper in, again with the bottom teeth aligning with the base of them hem. Flip it over and make sure everything is a go before sewing.
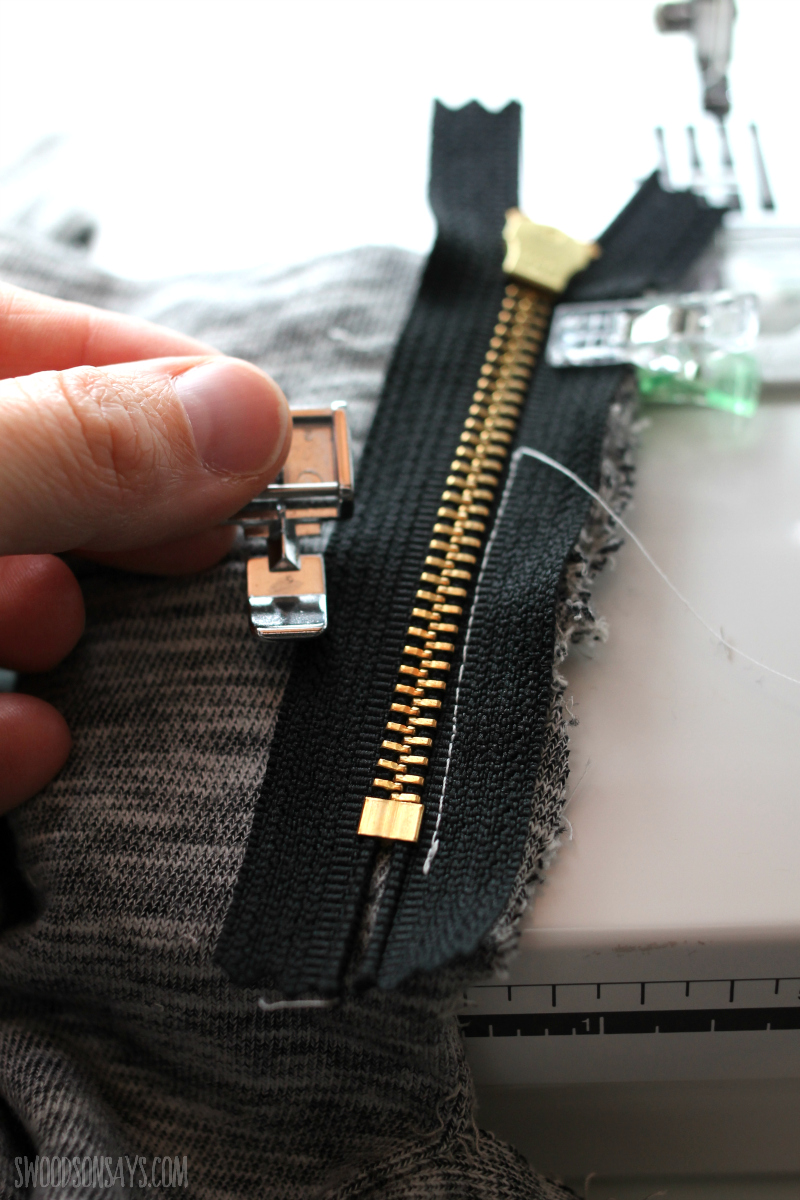
Step 3– I used a zipper foot! I start with it closed, sew half way, unzip and finish the other half. Repeat on the other side.
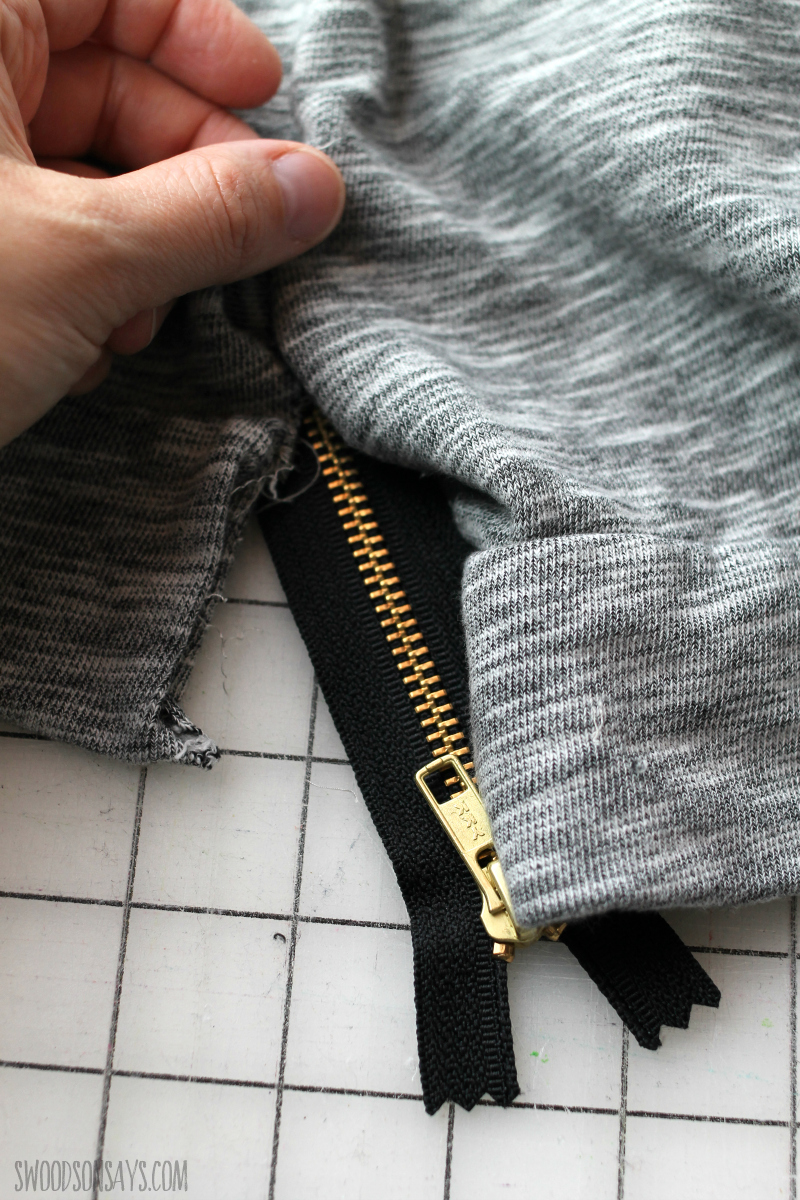
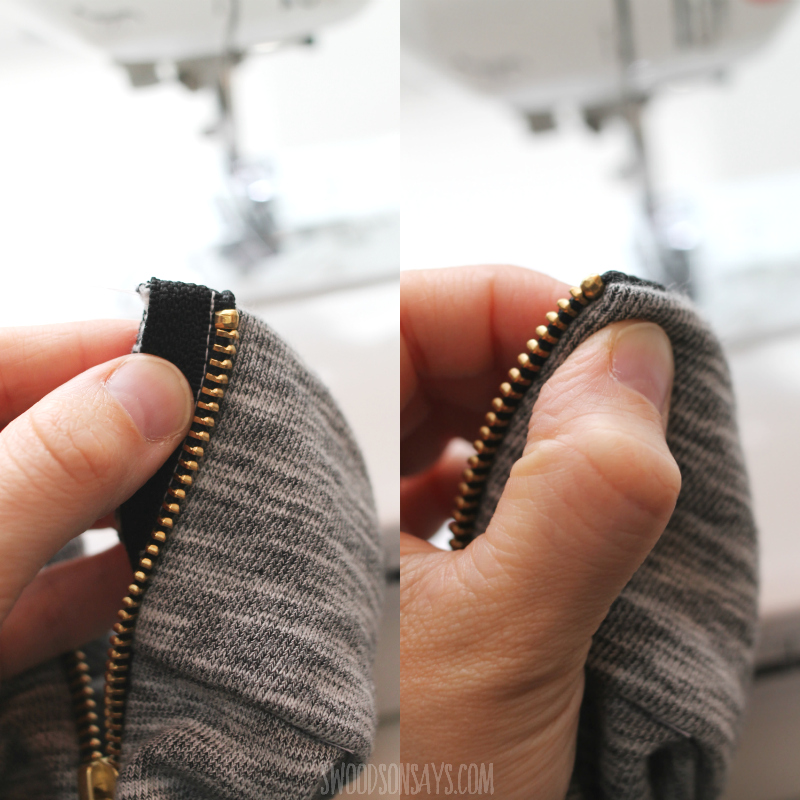
Step 4- It’s tricky to photograph, but making sure that the seam allowances are open, underneath where those tails are, sew across the top of the tails next to the zipper stop. If you still have a hole above there, in the shirt’s side seam, sew that shut, angling down from the original side seam to where you just sewed horizontally, closing the gap. If you’re unsure or your fabric is fragile, try hand sewing first and then finish it with machine sewing when you’re satisfied.
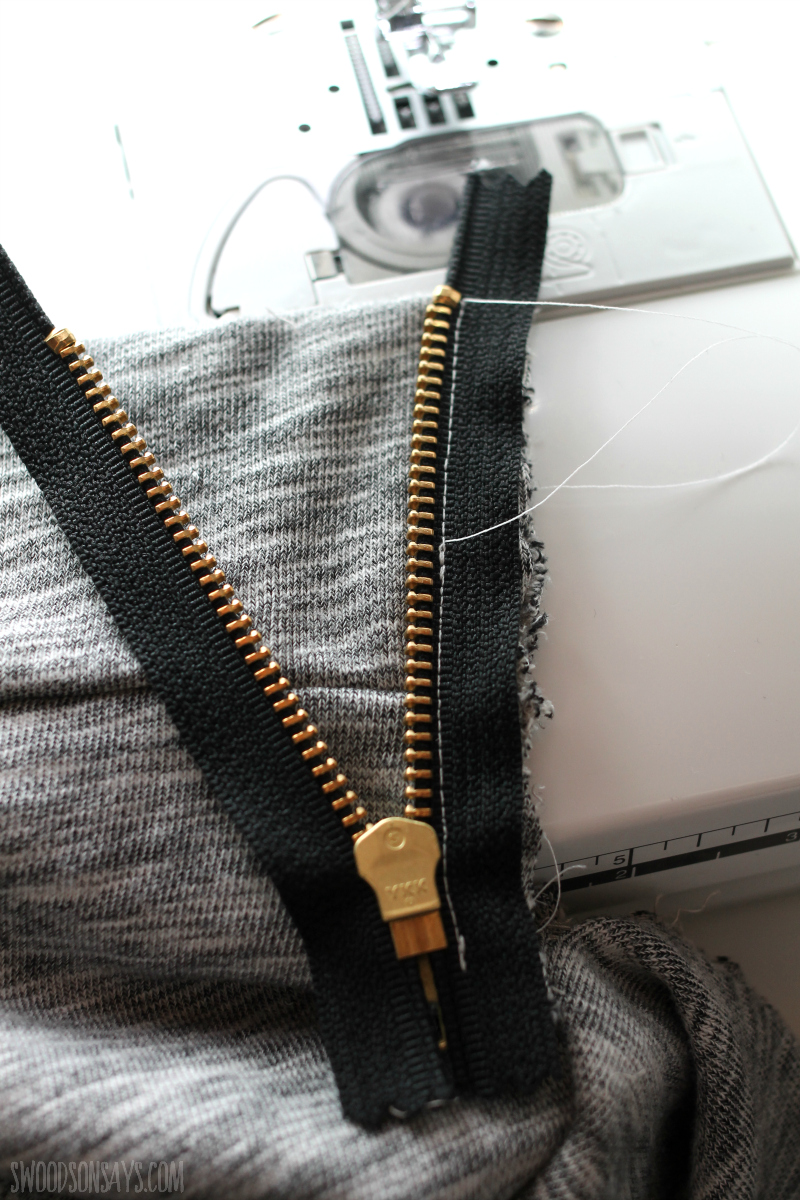
Step 5– Before top stitching, let’s fold over the zipper end. You can put a bit of a glue stick here to adhere it if you want to make your life easier, but it isn’t required.
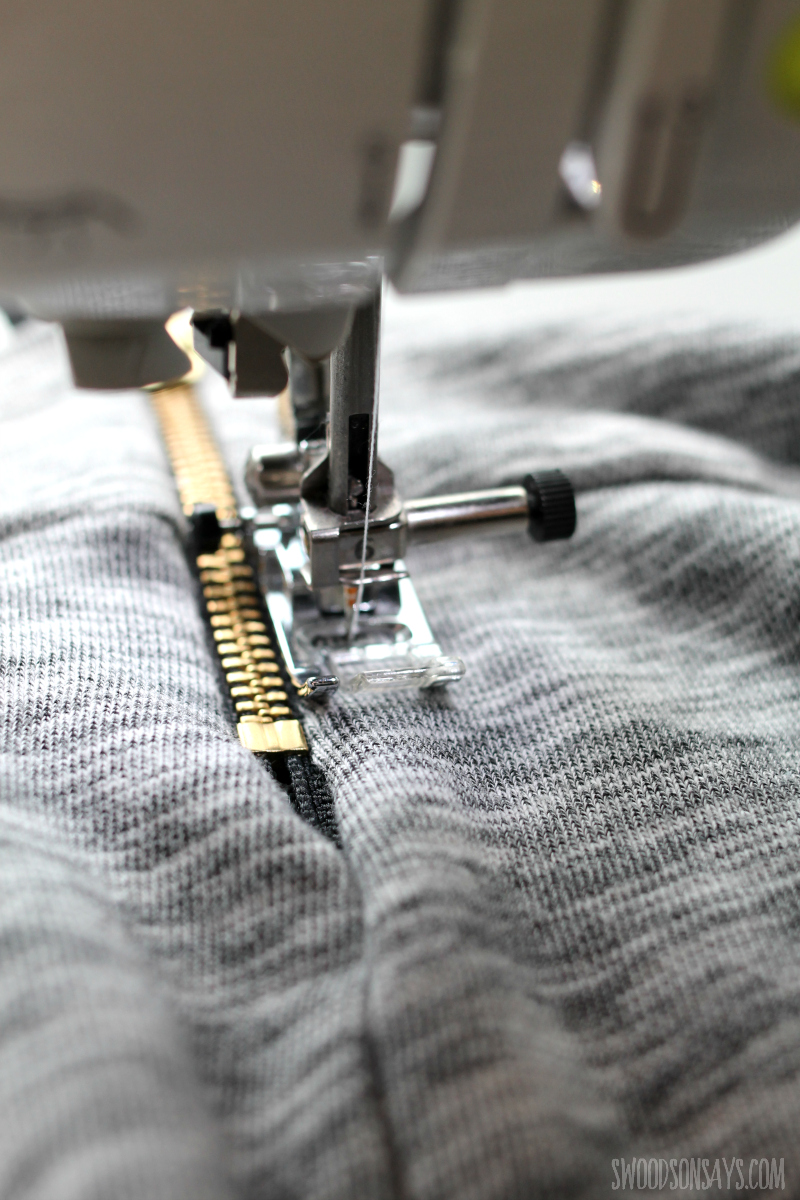

Step 5– Topstitch around! The second photo shows what the bottom of the zipper should look like when you’re done.
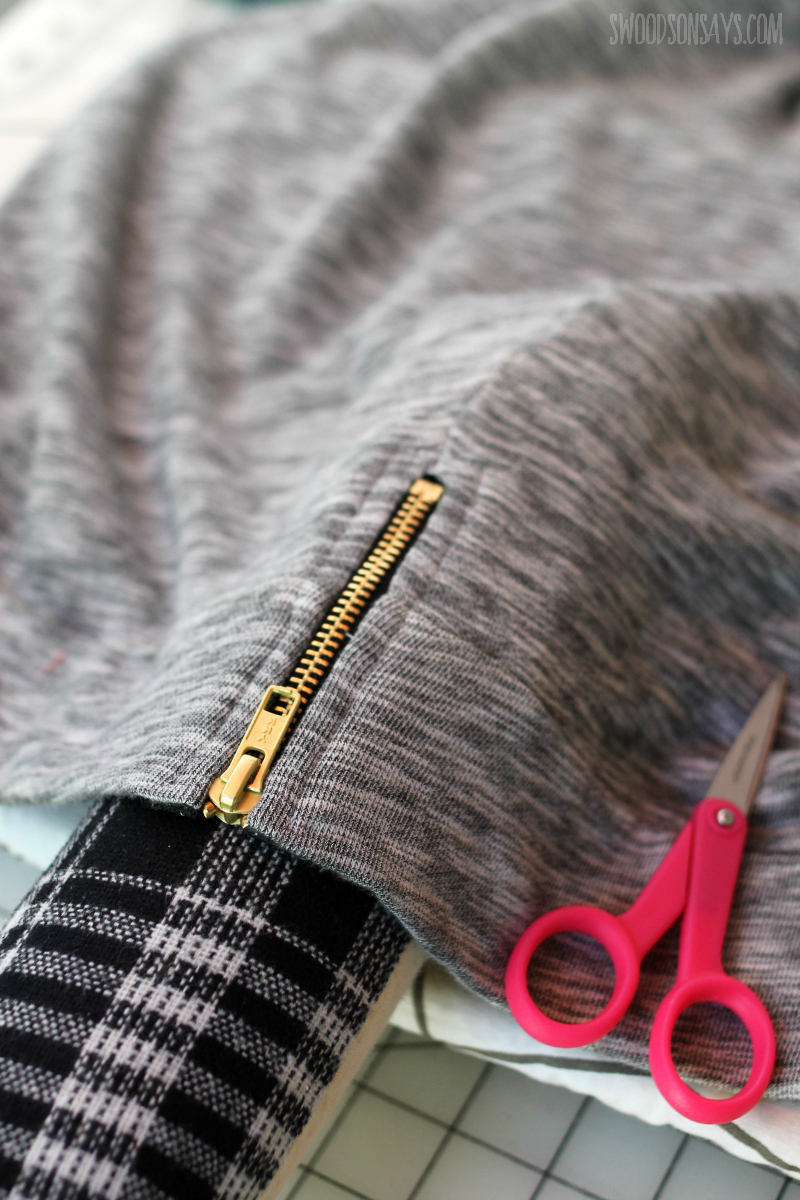
Step 6– Press the heck out of it!
Step 7– My zipper tails still stuck a bit stiff so I added some fabric glue to really adhere them and let dry. And I’m done!

Karen
Tuesday 2nd of June 2020
This is a super idea! I only had one almost full term pregnancy but I never did have strong abdominal muscles even before that. I'm always looking for ways to "fix" the shirts I buy -- its so much better to just make them from scratch :) However sometimes a particular fabric or style just says "Buy me" very loudly ...... Anyway, this is a good alteration and I will keep it in mind as I deal with my own tight shirt waists and also for those that I am asked to alter by family members or friends.
Susan McCoy
Tuesday 2nd of June 2020
I absolutely love this great idea.Thanks for sharing. You're a very clever seamstress.
Stephanie - Swoodson Says
Sunday 12th of July 2020
Thank you for your kind words Susan!
Sharon
Tuesday 2nd of June 2020
Love this idea! I have the exact same problem after having my two kids too, I also run a bit heavier around the hips but small shoulders. I need to buy a bigger size for my tum and bum but they nearly always fall off my shoulders and make me look huge! Thank you for sharing xx
Stephanie - Swoodson Says
Sunday 12th of July 2020
You're welcome Sharon, thanks for leaving a comment and reading!
Edi
Tuesday 2nd of June 2020
Thanks for the links - thanks for saying something & thanks for a fab tee shirt refashion. I’ll be reading the links & updating my tee shirts :)
Stephanie - Swoodson Says
Sunday 12th of July 2020
Thanks for reading Edi!
Kris
Tuesday 2nd of June 2020
What a great idea, Stephanie! So stylish and, I'll bet, give you more room than just adding side slits. Beautiful re-creation :)