
This is a sponsored conversation written by me on behalf of Cricut. The opinions and text are all mine.
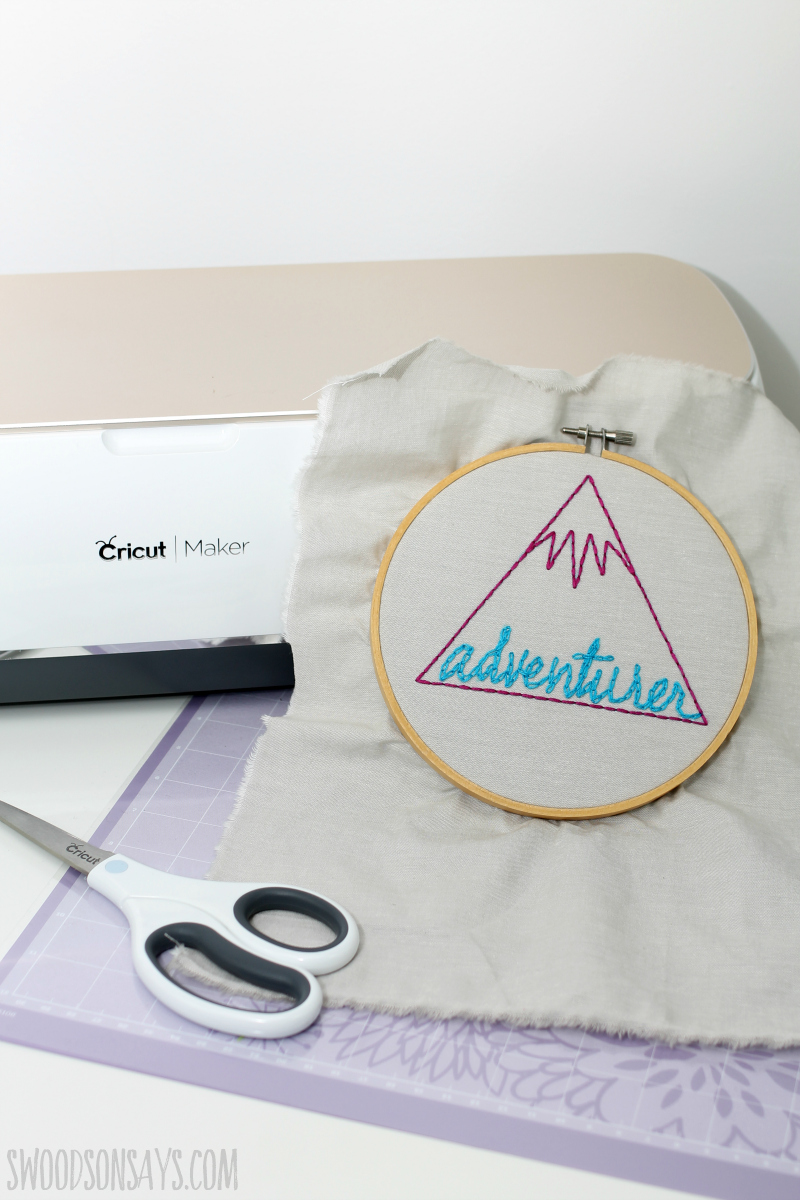
I’ve used my Cricut Maker to make a stuffed animal project, a felt project, and now I used it for a hand embroidery project. One of the advantages of the Maker is how precisely you can cut things so I wanted to use a felt overlay for an embroidered background. It’s so nice to have everything line up 100% perfectly.
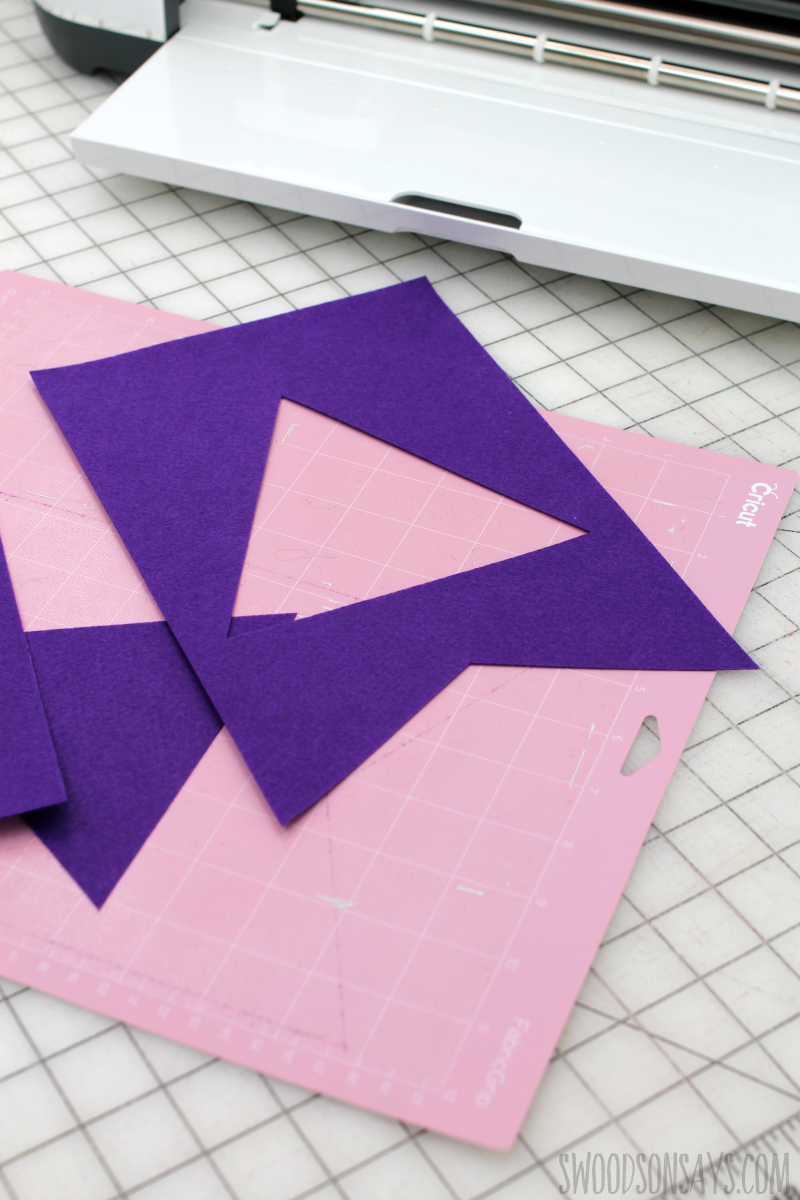
Design space has 500+ digital sewing patterns and quilt blocks available from Simplicity®, Riley Blake™; I used one of the included design files for the hand embroidered portion and one of the included shapes (with a cut-out) for the pennant.
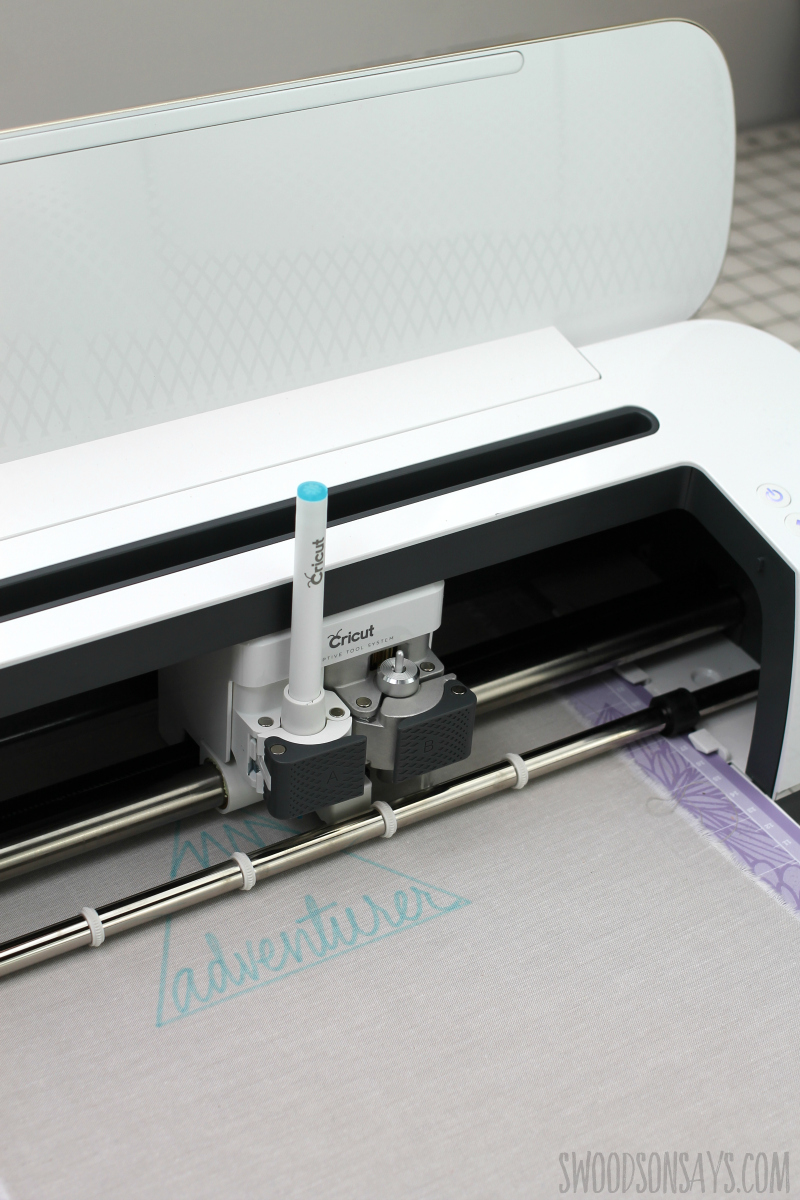
The Cricut Maker is top of the line for cutting performance since it has the rotary blade and auto-adjusting pressures! It’s super easy to just select the material you’re using instead of fiddling with a knob. It also adjusts itself for using the fabric marking pen, which was perfect for transferring the pattern.
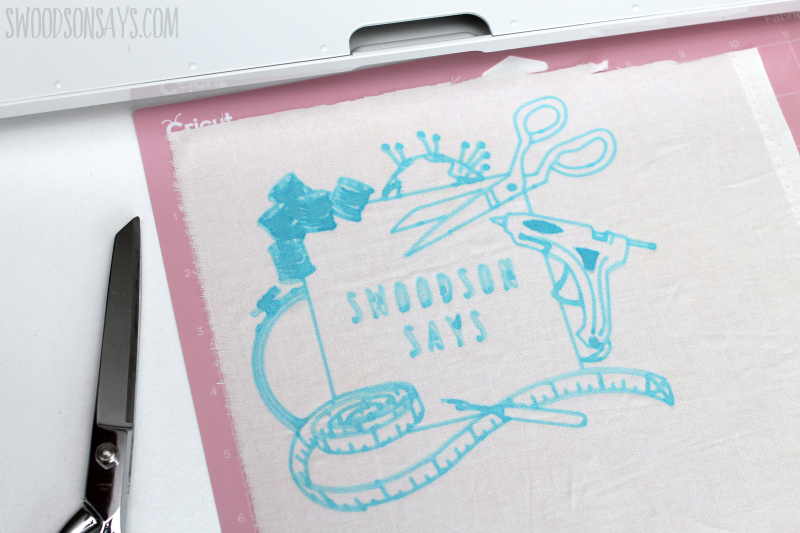
There are a few considerations when you’re choosing a pattern; I’m going to share some of the issues I ran into when I was playing with this idea. A pattern that is too detailed isn’t going to transfer well, because the pen is relatively thick. You can see here how the thread spools in my logo became big blobs. The lines also need to be relatively thin, otherwise it will draw multiple passes and make it really blurry.
![]()
![]()
Another issue is when working with thinner fabric and/or the fabric grip mat, it has more give. You can see here where the pen got a little stuck – something I adjusted for in my official tutorial, that you’ll see below! One thing I didn’t do was using a very thin point marker that wouldn’t wash out but would instead be stitched over and covered up, but maybe next time.
Design space has several designs that I think would work well for hand embroidery, or you could look through these patterns to find a good one and upload/convert it for the Maker!:
You can pin this Cricut tutorial for later using this link and photo:
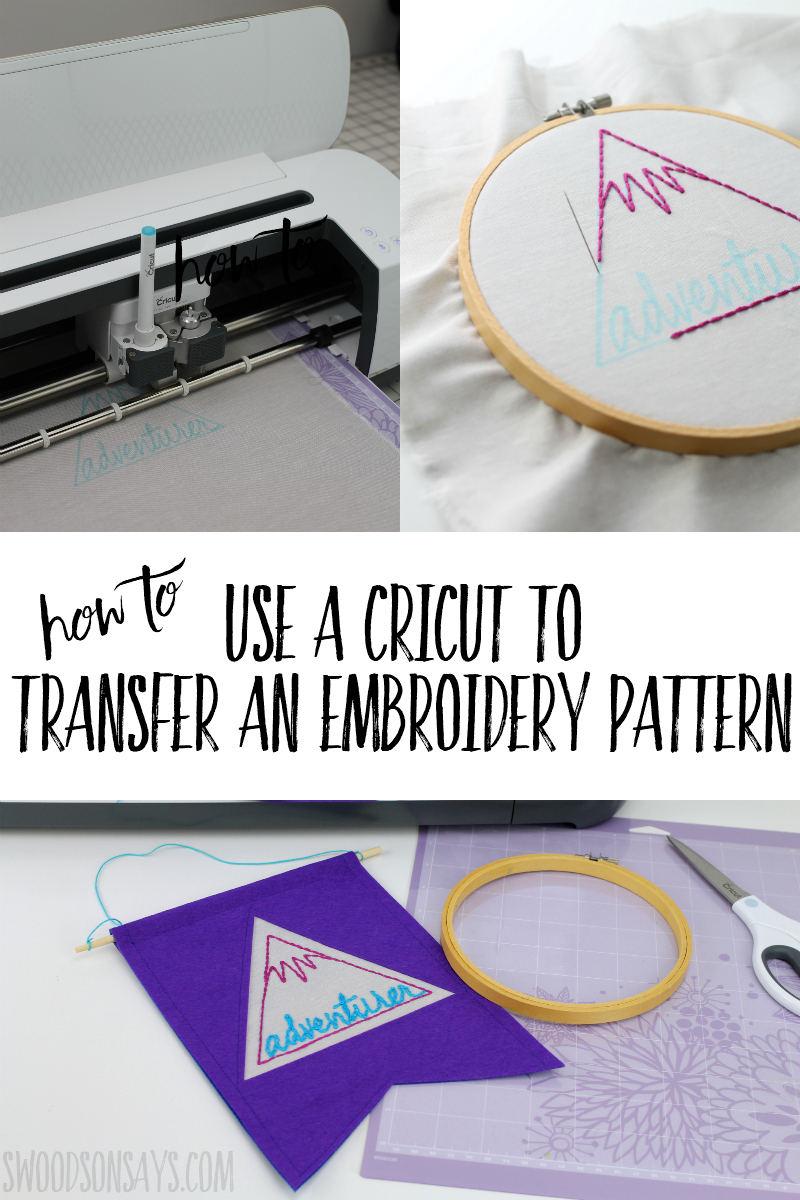
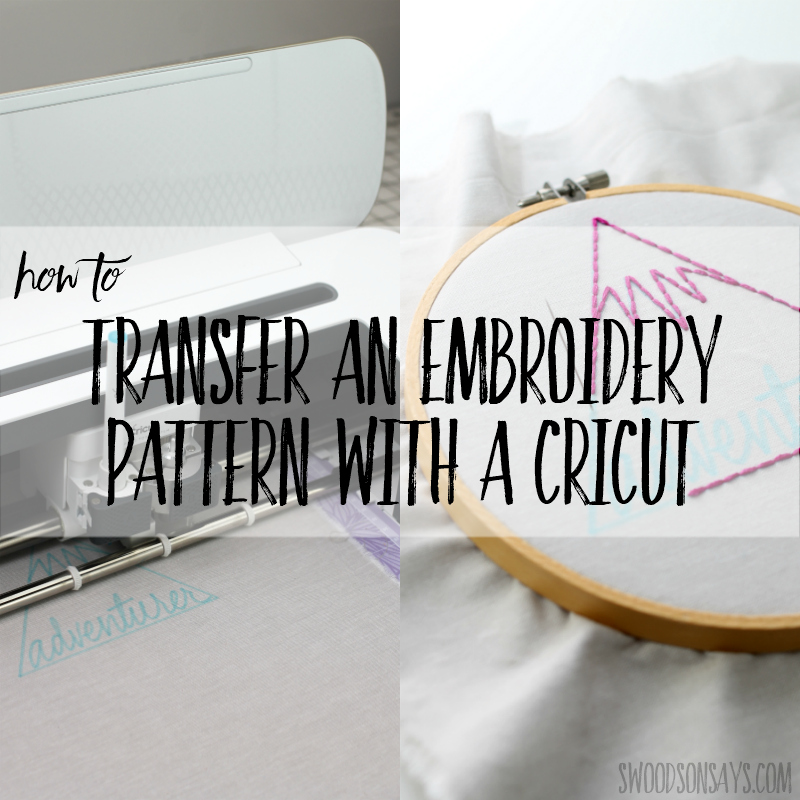
How to transfer a hand embroidery pattern with a Cricut
Supplies
- Washable fabric pen (see my tips for using the Cricut fabric marker here)
- Cricut Maker machine (see my full review for the Maker here)
- Sheerweight fusible interfacing
- Woven cotton fabric to stitch on, fat quarter size
- Embroidery floss
- Embroidery needle
- 6″ Embroidery hoop
- 2 12″ square felt pieces
- Strong grip mat
- Fabric grip mat
- Brayer
- Cricut Easy Press & Easy Press Mat
- Project file from Design Space
- Pins
- Small dowel or chopstick for hanging
Steps
Step 1
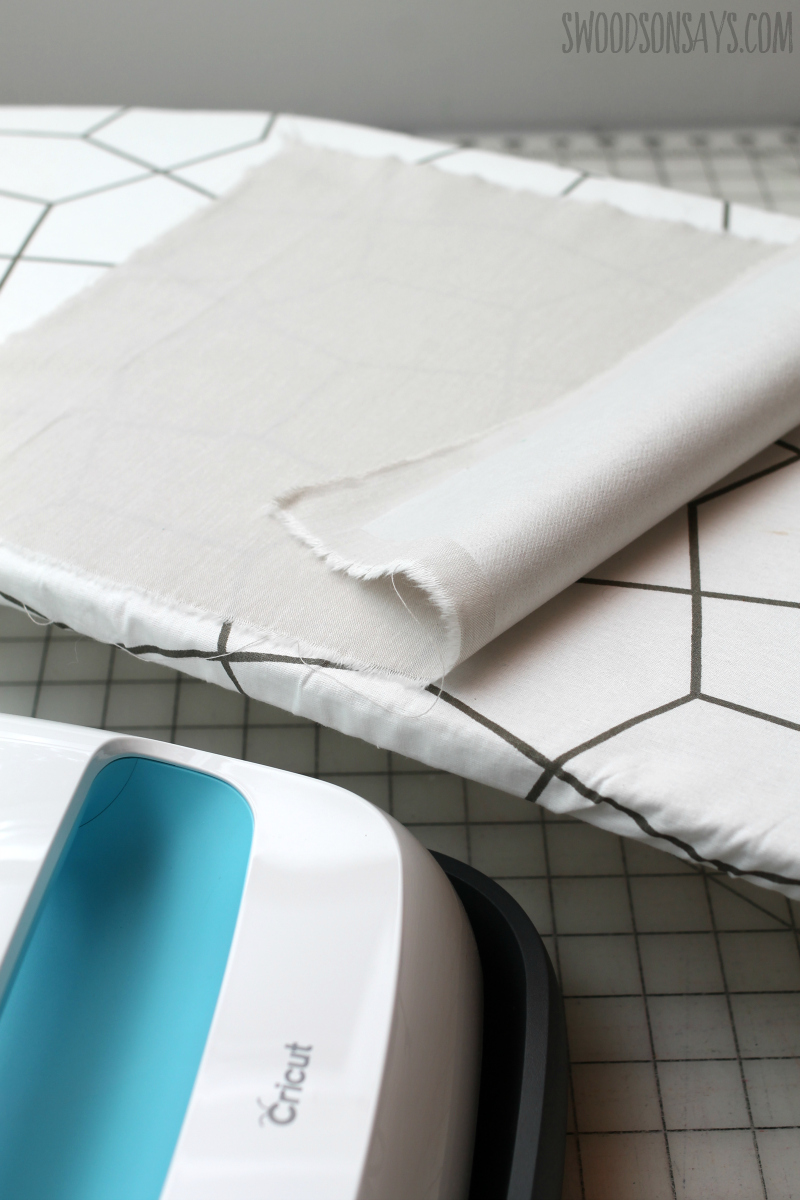
Cut the fabric to 12″ wide, use the easy press to iron it flat and then apply the fusible interfacing to the back.
Step 2
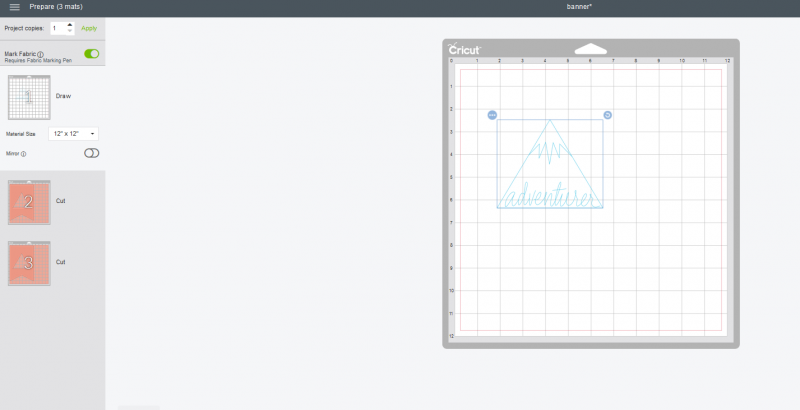
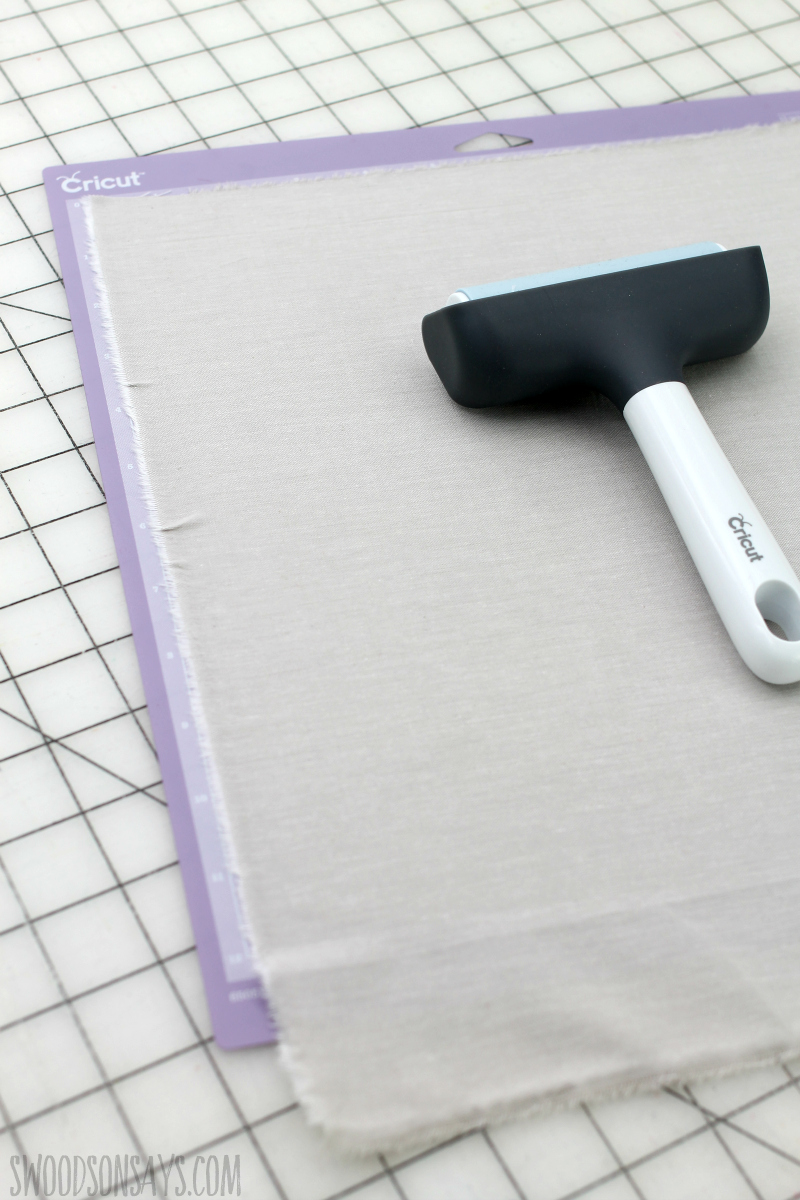
Use the brayer and smooth the fabric out on the strong grip mat. Go into Design Space and hit ‘make it’ – taking the extra step to drag the embroidery down in the middle of the board (so you have enough room around it to put in the embroidery hoop.
Step 3
Insert the washable fabric pen and let the Maker draw out your pattern.
Step 4
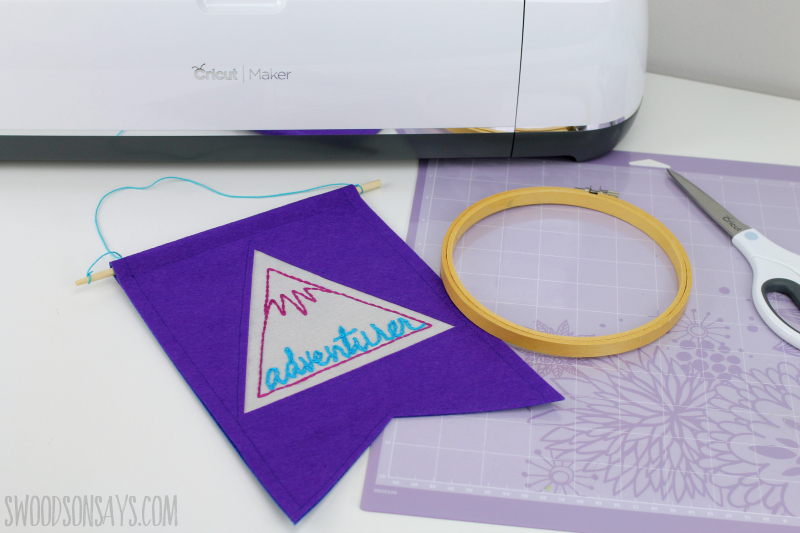
Use the felt sheets on the fabric grip mat, cut out each felt pennant piece.
Step 5
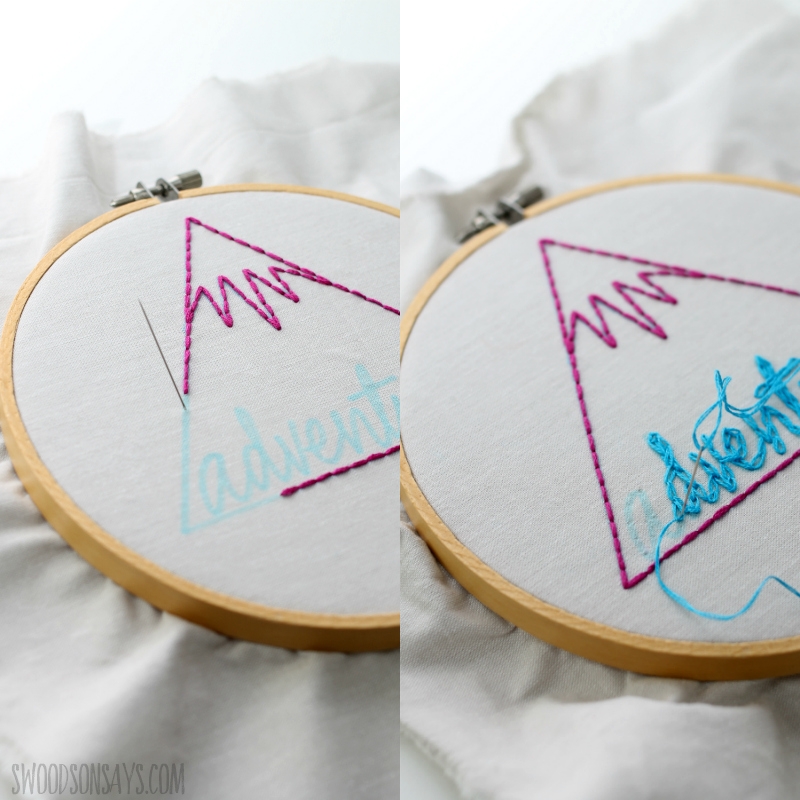
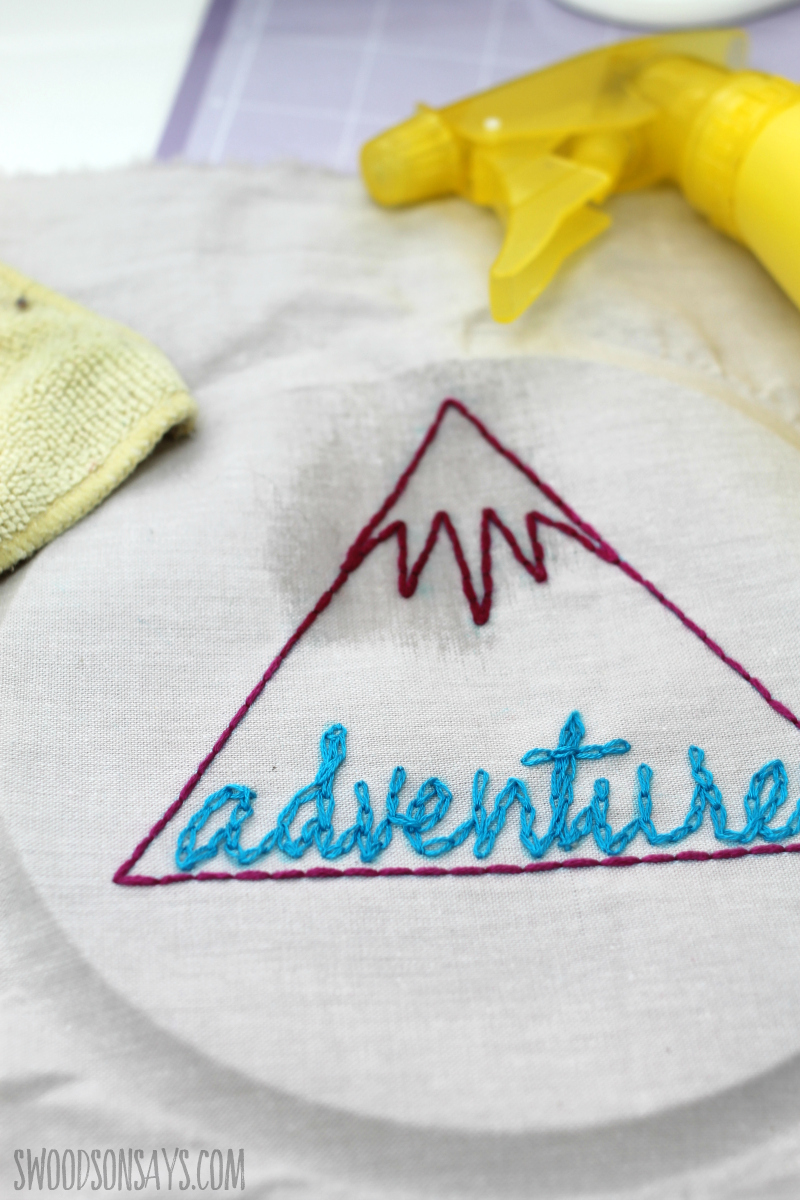
Time to stitch! Insert the fabric into the hoop, tighten it until it is taut, and stitch. I used a simple backstitch with all 6 strands of embroidery floss for the outline and then a chain stitch with just 2 strands (see videos for how to do these stitches here).
Step 6
Use water and a gentle rag to scrub away at any marker peeking out. Alternatively, you can soak it and leave to dry overnight.
Step 7
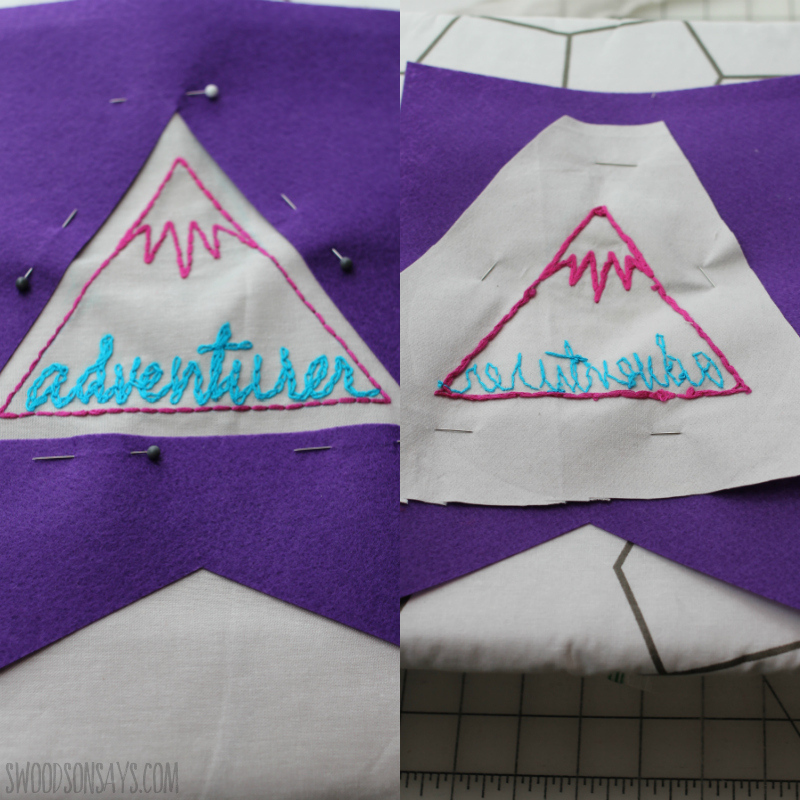
Pin the embroidered fabric below the felt pennant, and trim any excess that would hang over.
Step 8
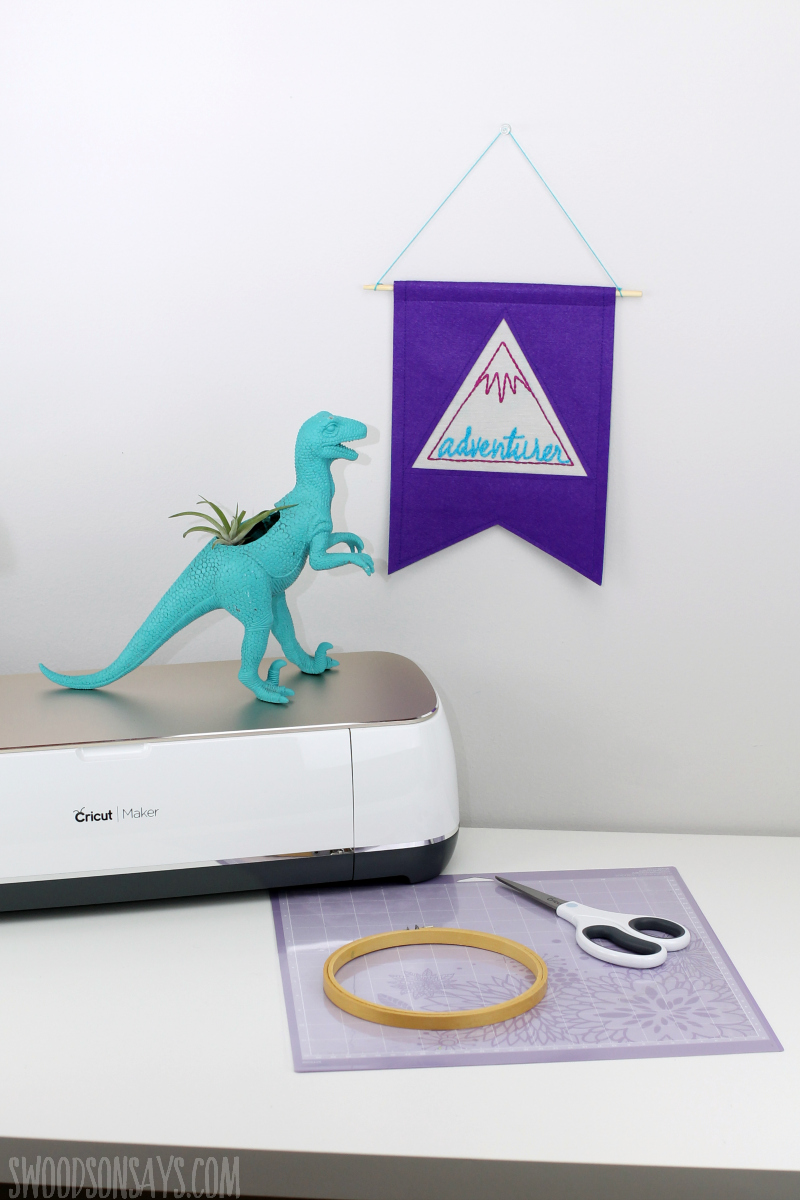
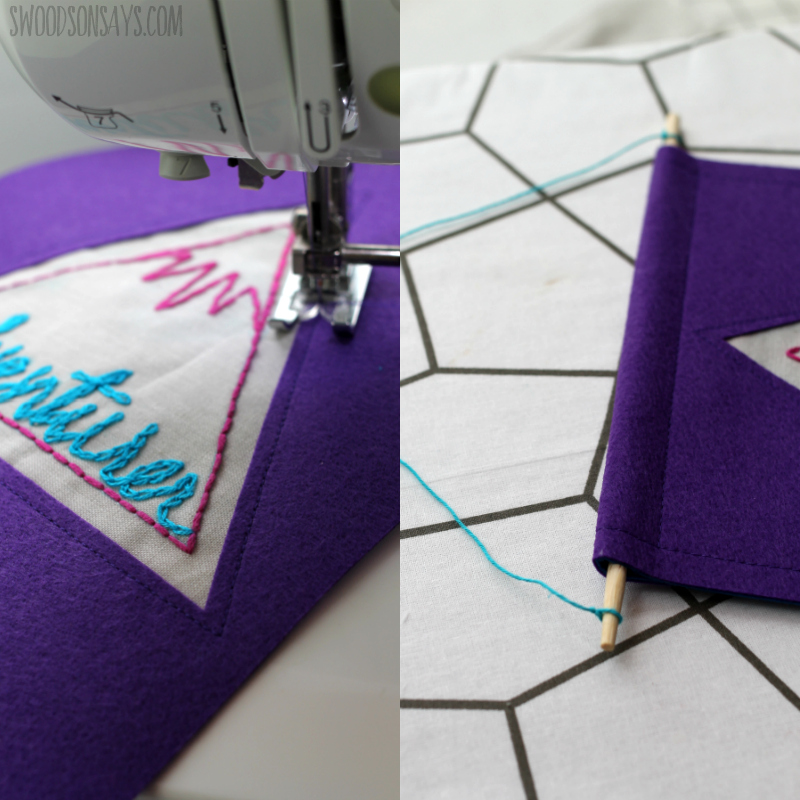
Stitch around the embroidered inset, and then stitch the pennant front and back together. Then fold the top over by 1 inch, creating a channel for the dowel with a straight stitch. Insert the dowel, hang it up, and enjoy!
Comments submitted may be displayed on other websites owned by the sponsoring brand.
Lynn C
Friday 2nd of October 2020
Hi Stephanie, I am trying to put my own pattern into cricut maker but I can not see how to set the marker to washable fabric pen. I want to draw a shape (the stitching line) with the washable fabric pen and the cut 1/4 inch around that shape. I am making a doll with a shaped face so having the stitching lines drawn are important for the pieces to fit together well. I am stumped as to how to set it up in CDS so I can draw the stitching lines with the washable fabric pen and then cut on the cutting lines.. I can send a photo of the pattern piece if that helps... Best wishes Lynn C
Stephanie - Swoodson Says
Saturday 3rd of October 2020
Hi Lynn! I'm wondering if this tutorial would help you? https://www.daydreamintoreality.com/write-cut-cricut/
Lynn C
Tuesday 22nd of October 2019
Hi Stephanie,
I see you did not end up with Cricut drawing double lines on your fabric for each design line - when I upload my embroidery design and change from cut to draw the image changes to double lines as if cricut wants to trace around my image lines. How did you get just single lines on your fabric?
Best wishes, Lynn
Stephanie - Swoodson Says
Wednesday 8th of January 2020
Hi Lynn! I replied by email but replying here again in case other readers need to know - that means the initial design was too thick, so change the stroke width and see if that helps!
Reyse Marcus
Monday 27th of August 2018
Hi Stephanie, the idea of this transferring is really good and unique as well. this is such a great deal to do with some machine job in the fabric. thanks for providing the tips and tricks. this was really helpful
Stephanie - Swoodson Says
Thursday 13th of September 2018
glad you enjoyed it!