
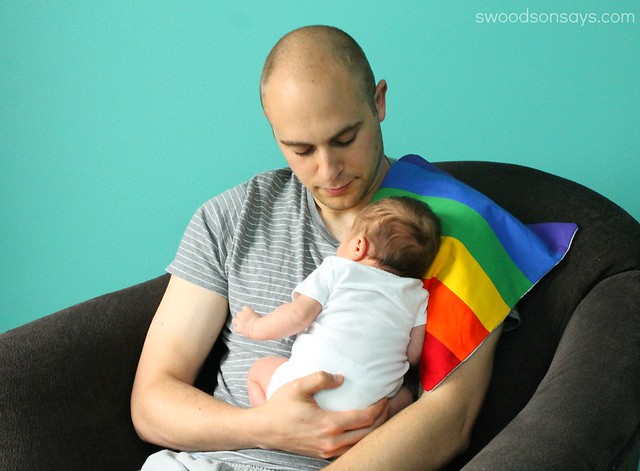
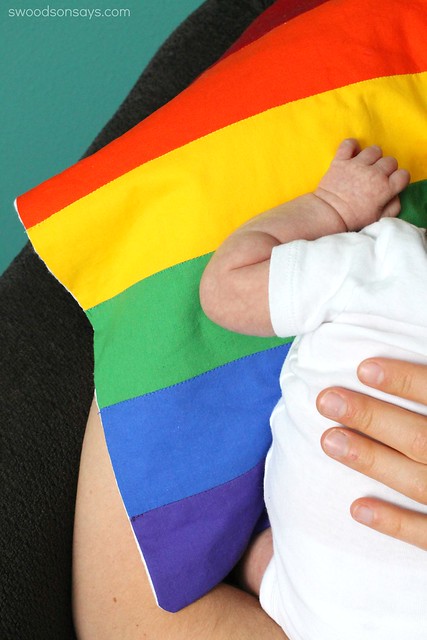
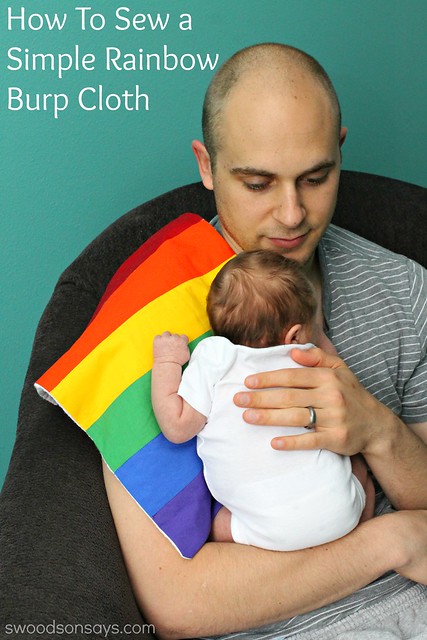
Burp cloths are so easy and fast to make – my Mom made us a bunch of pretty embroidered and embellished ones that get lots of use! It’s funny how I forgot so many unsavory aspects of a newborn in less than two years, but I quickly remembered how much easier it is to wash a rag instead of change your shirt. I was looking for a fast, easy sew that would make me smile – so I added a rainbow pieced patchwork on top of a prefold diaper for a bright and fluffy burp rag.
If you like this post, you’ll probably want to check these out too!
- Free rainbow soft rattle pattern
- How to find time to sew with young kids around
- 75+ most popular free PDF patterns to sew
Supplies:
- 1 Gerber Prefold* or rectangle of absorbent fabric (terry cloth or flannel) measuring 12.5″ X 16″
- Red, orange, yellow, green, blue, & purple scraps of woven cotton measuring 3.125″ X 12.5″
- Coordinating thread
- Hand sewing needle
- Iron, Sewing Machine
- Scissors* or rotary cutter*
Before you get started, be sure to prewash and dry all fabrics, including prefolds if you’re using them. Burp cloths get lots of laundering, so you want to be sure the colors aren’t going to bleed or shrink!
Is there anything sweeter than squishy baby rolls on bright, beautiful fabric? I think not! These would also make a perfect baby shower present – I paired one with a rainbow softie and a rainbow-y book as a baby gift, which you can see in this post.
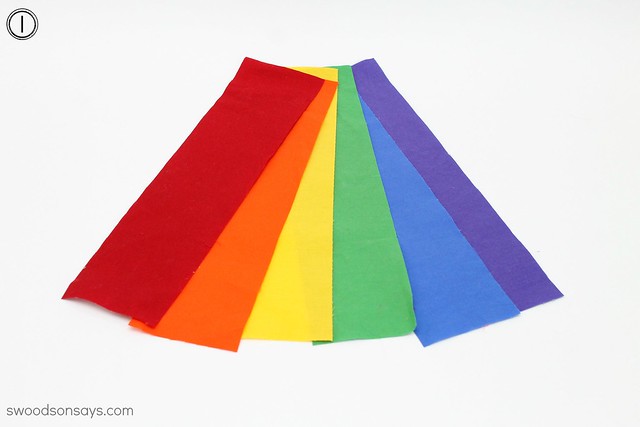
Step 1. Cut all fabrics to the exact lengths and press smooth- using a rotary cutter and quilting ruler (like this one*) will give you the straightest lines!
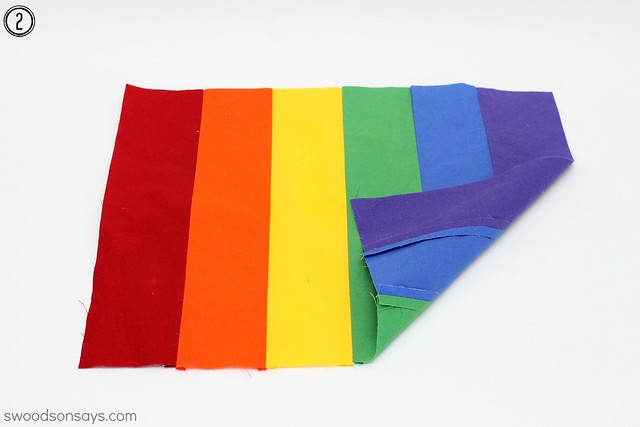
Step 2. Going in the order of the rainbow (Red, Orange, Yellow, Green, Blue, Purple) sew each strip right sides together, with a 1/4″ seam allowance. Press the seams open and flat.
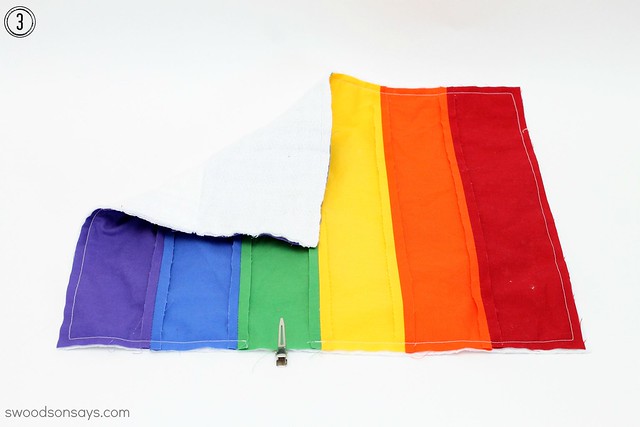
Step 3. Place the rainbow top right side down on top of the prefold or absorbent fabric. Sew along all 3 edges with 1/4″ seam allowance, leaving a two inch opening. Be sure to back and forward stitch at the beginning and end of sewing. Trim the seam allowance down, turn right side out, gently poke out the corners, and use a ladder stitch to close the opening.
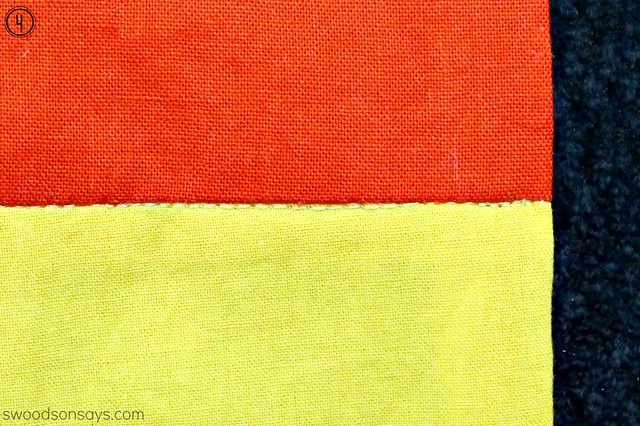
Step 4. Press the entire burp cloth and then stitch “in the ditch” between each panel with coordinating thread. Press again and you’re done!
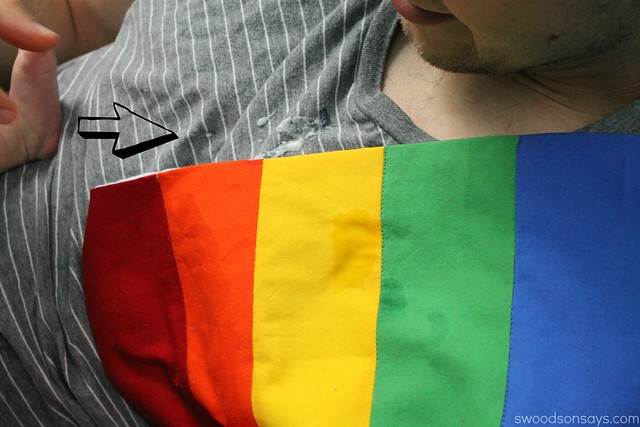
Unfortunately there is no burp cloth wide enough to outsmart my daughter; she has an uncanny knack of shifting her head right at the last minute!
Katy M.
Thursday 20th of August 2015
What a fun way to add some bright colors to a burp cloth. Those prefold diapers were ALL we used when Louis was a wee one. I'll add this to my bank of ideas to make for new babies!!
sew surprising
Tuesday 18th of August 2015
Awwww, she is super cute, bright colours are always perfect for little ones :)
Stephanie - Swoodson Says
Tuesday 18th of August 2015
Thank you so much! I love bright colors too :)