
I updated a plain shirt, with a reverse applique t-shirt refashion! Reverse applique is a technique where you sew a design and cut away the top layer, revealing the fabric beneath. I will definitely wear this DIY graphic tee more than I would’ve the plain old tshirt and I love how it turned out. This was my first Cricut Maker tshirt refashion but you can make it with regular old scissors or a craft knife too. If you’re new to refashioning, I have my best tips for sewing refashions here!

One of my most popular tshirt refashions also used the reverse applique technique with geometric shapes so I’m thrilled that it worked with text, too.
Check out over 13 t-shirt refashion ideas if you want more inspiration!

What do you think, would you wear this look? If I’m not sewing, I love spending time outdoors with my family. I also frequently misdirect us when we’re hunting down a waterfall, so the text is a bit of self-deprecating humor too. It’s a good thing they still keep adventuring with me!

This beautiful azalea bloomed just in time to coordinate with my new shirt! Several of my favorite colors mixed up in this top and I’m really happy with how this turned out.
Pin this reverse applique t-shirt refashion for later, here:

Ready to make your own?
Reverse applique t-shirt tutorial
Supplies
- Freezer paper*
- Ballpoint needles* (you always want to use these when you’re sewing with knit (read: stretchy) fabric!)
- Thread
- 2 tshirts – one for the fabric peeking through, one for the top
- Cricut Maker (see my full review of the Cricut maker here) or other digital cutting machine (you can also do this old school with a craft knife & cutting mat, see that technique here!).
- Pins
- Iron
- Acrylic quilt ruler*
- PDF file for the text (this is zipped with an SVG file for machines and PDF for printing)sign up for my newsletter and get the free download once you confirm your subscription! If you’re already a subscriber, you can access the pattern with the password in each newsletter, in the resource library.
Here is a video of the process!
Steps
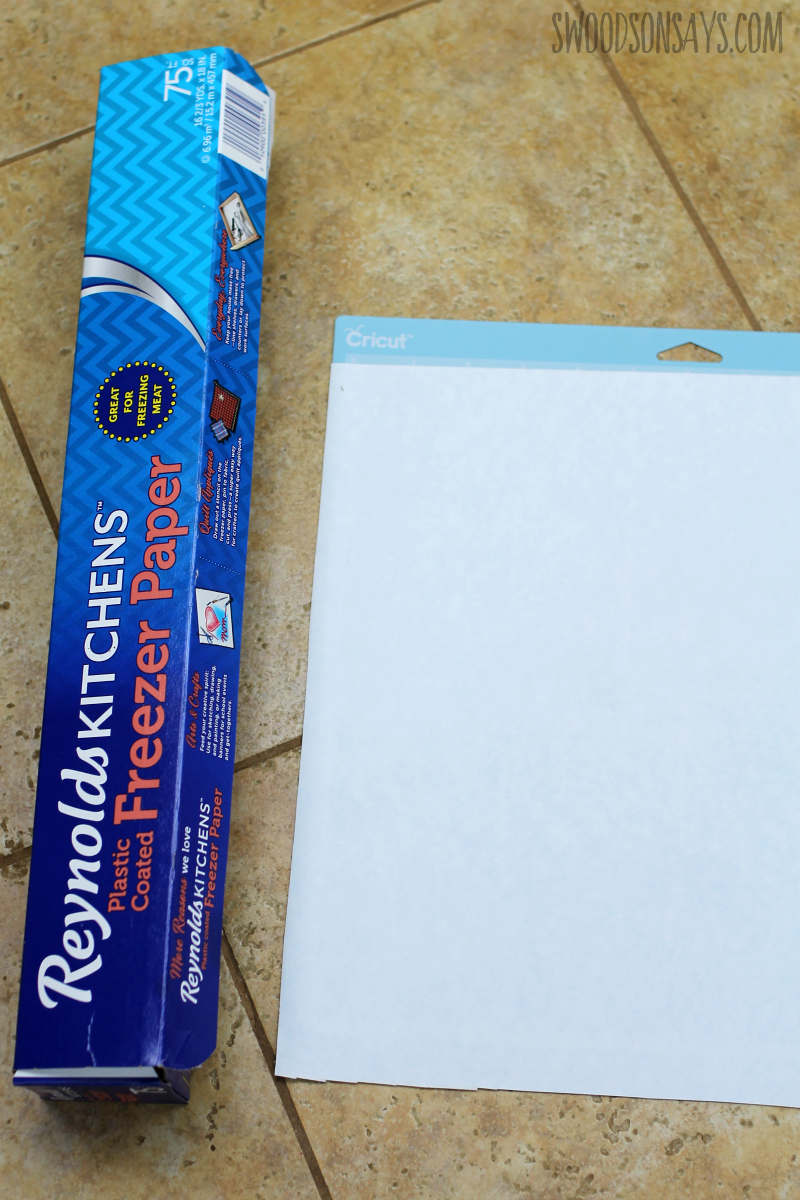
1- I used a light grip mat and put the freezer paper shiny side down, trimming it to fit the 12″ mat.
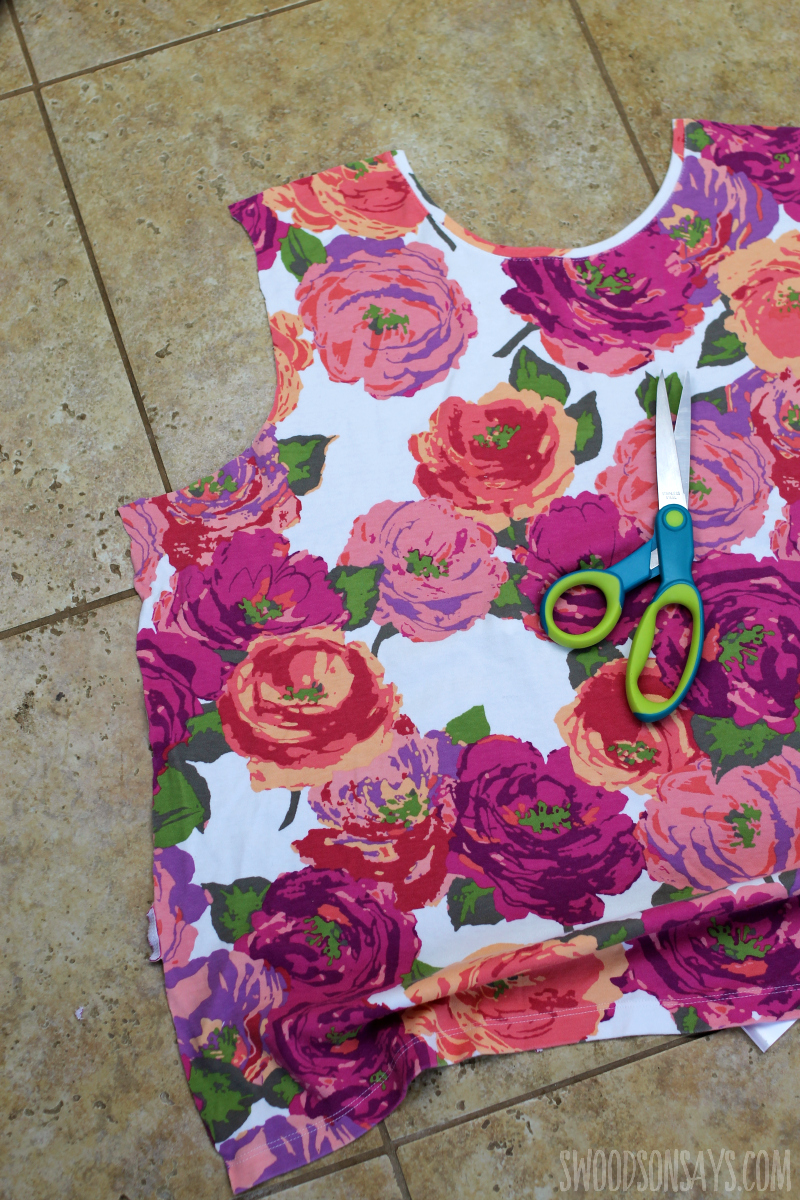
2. Whatever tshirt you want peeking out as the bottom layer, cut along the side seams and off at the sleeves/shoulders.
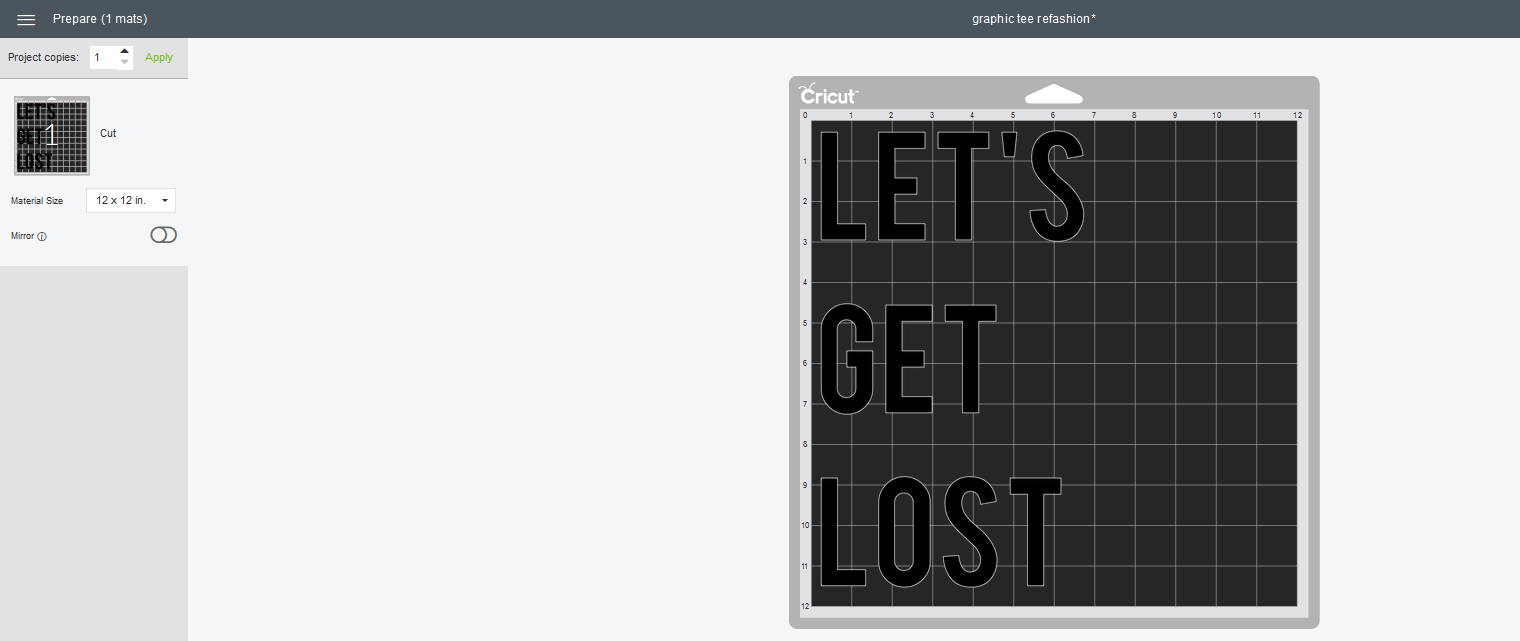
3- If you’re using a Cricut, load up the SVG, hit the 12X12, and do NOT mirror with the shiny side down.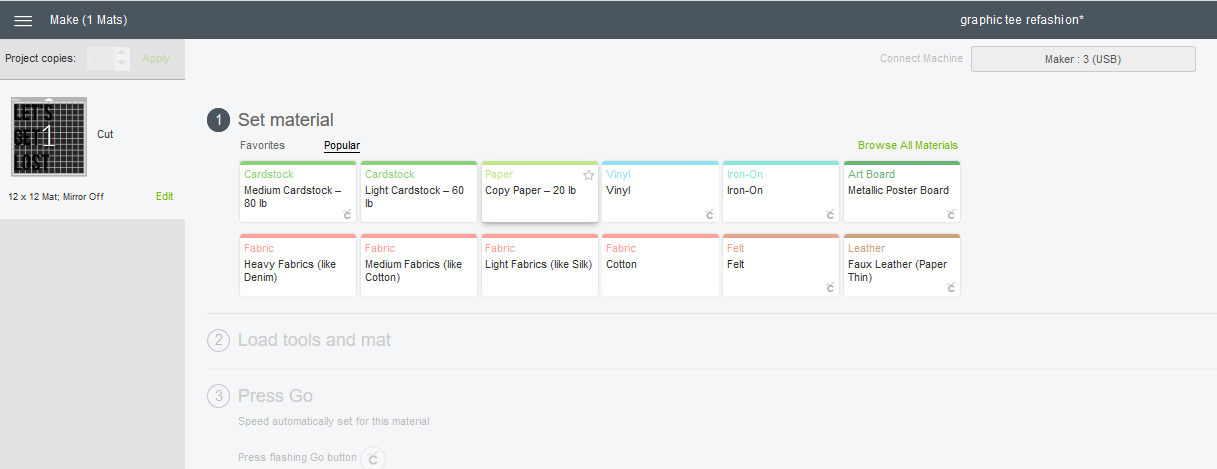
4- I chose Copy Paper weight and then less pressure. Let it cut (or bust out your exacto and cut it yourself!)
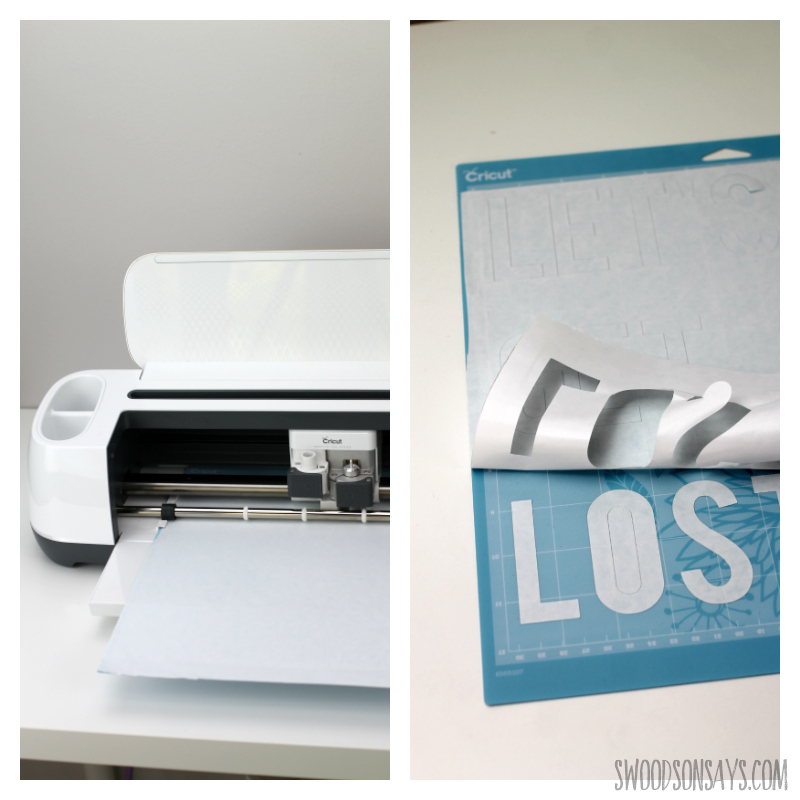
5- Gently peel away the exterior outline, taking care not to rip anything too badly since we will use this to position the letters.
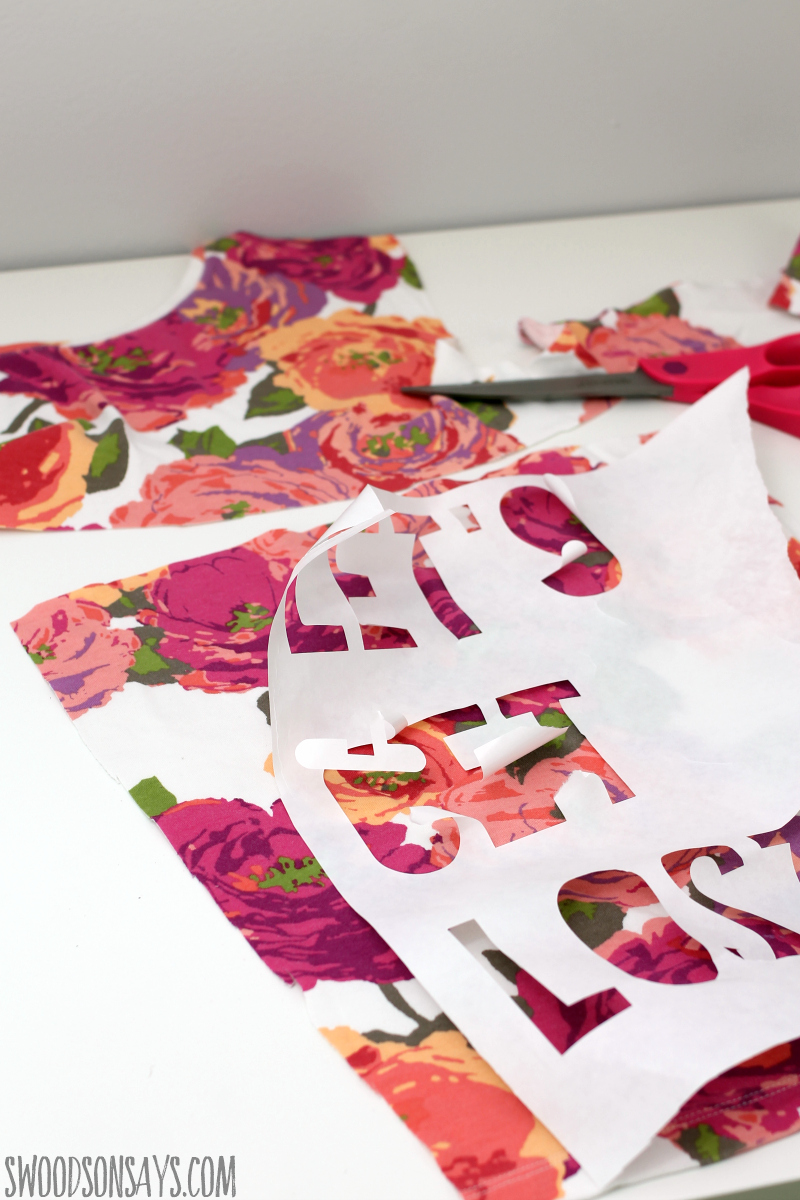
6- Lay out your outline and cut with about 2″ extra around on all sides, making sure you have enough bottom fabric to cover the pattern.

7- Turn your main shirt inside out and lay out the bottom layer right side down, and pin around the exterior, making sure to not go all the way through the back of the main shirt.
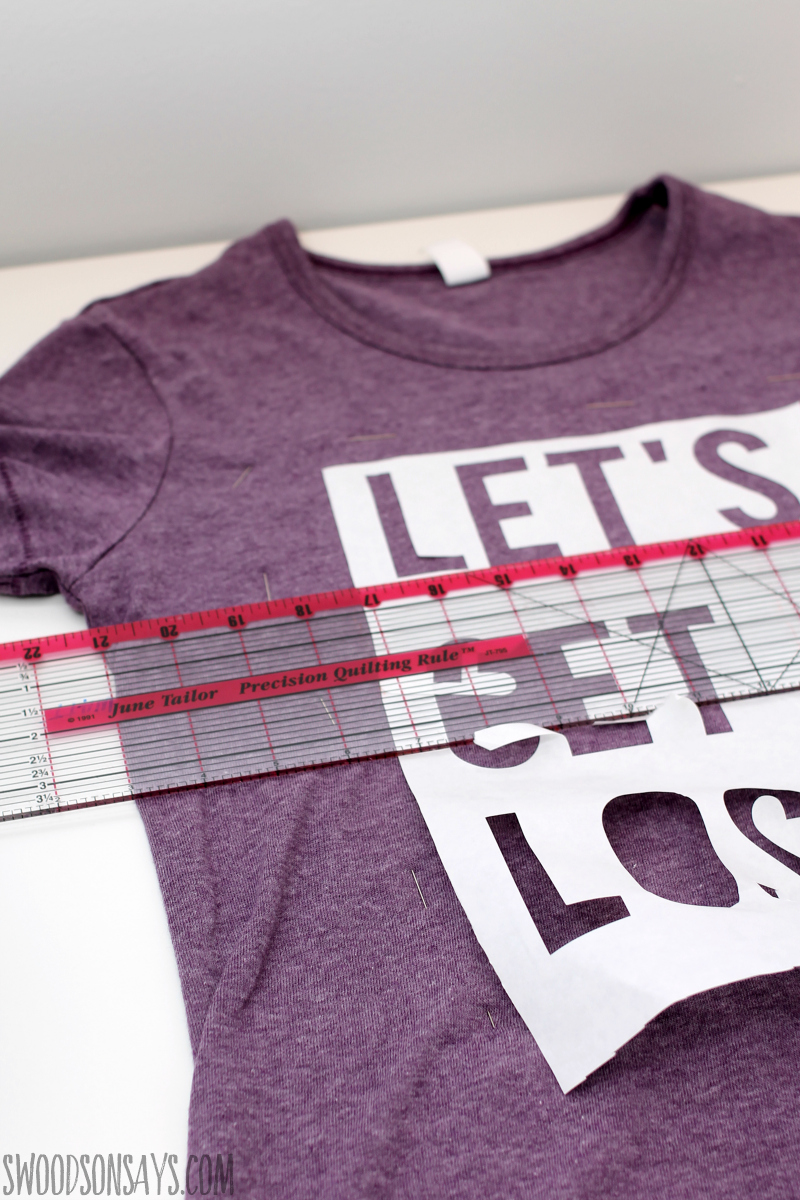
8- Turn the shirt right side out carefully and use a ruler and line up your text so it is even and center it underneath the neckline.
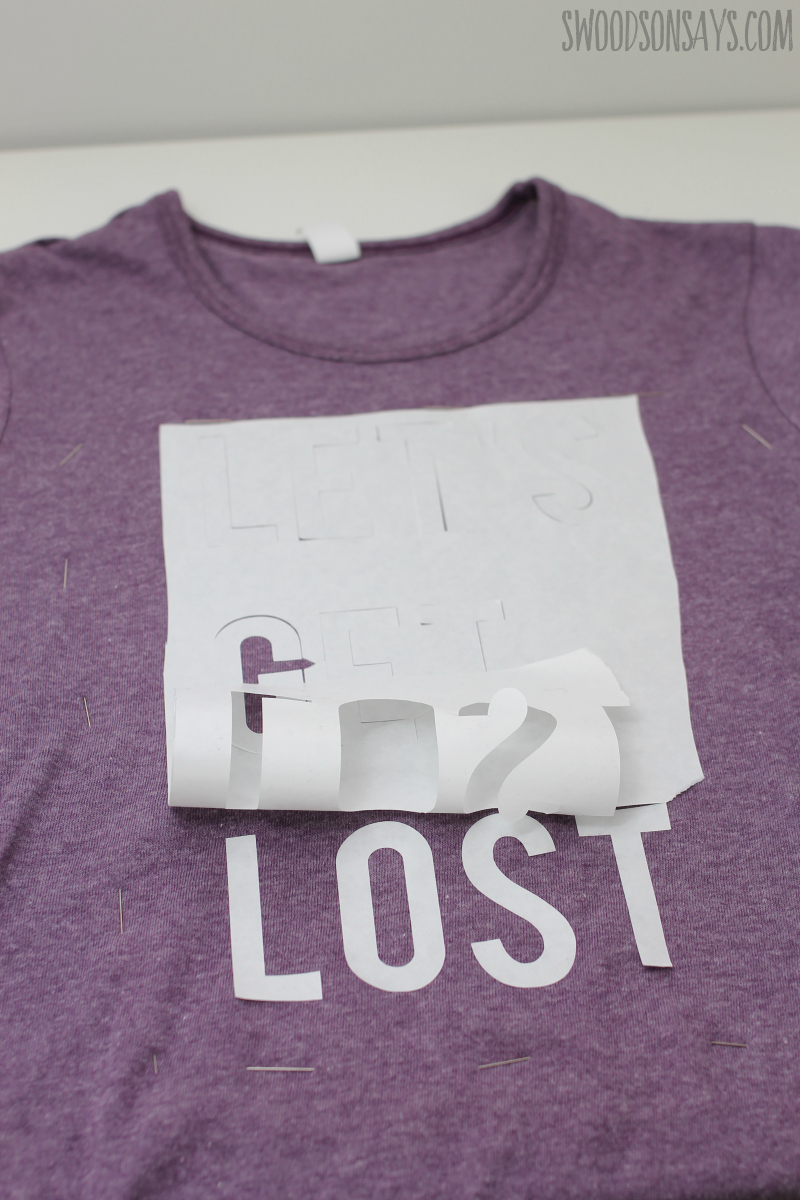
9- Use your iron to iron down the outline, and then slowly put each letter back in and iron it to adhere. Peel off the outer layer you used for placement.
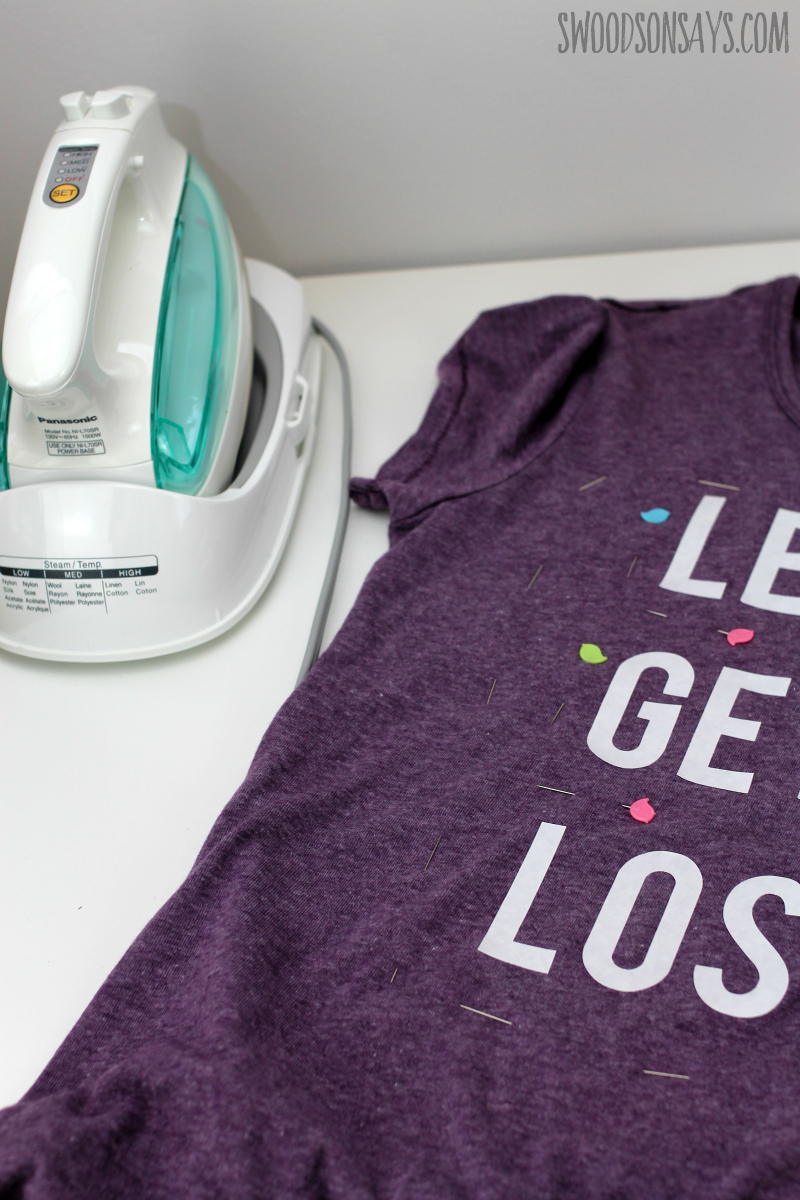
10- Place extra pins in between the lines of text to make sure nothing will slip around. Use your iron to make sure all letters are staying put.

11- Use your ballpoint needles and sew right along the edge of each letter. I used a walking foot, which has little feed dogs that move the layers along at the same pace. Go slowly and carefully around each letter, taking a few stitches back and forth at the start of each letter.
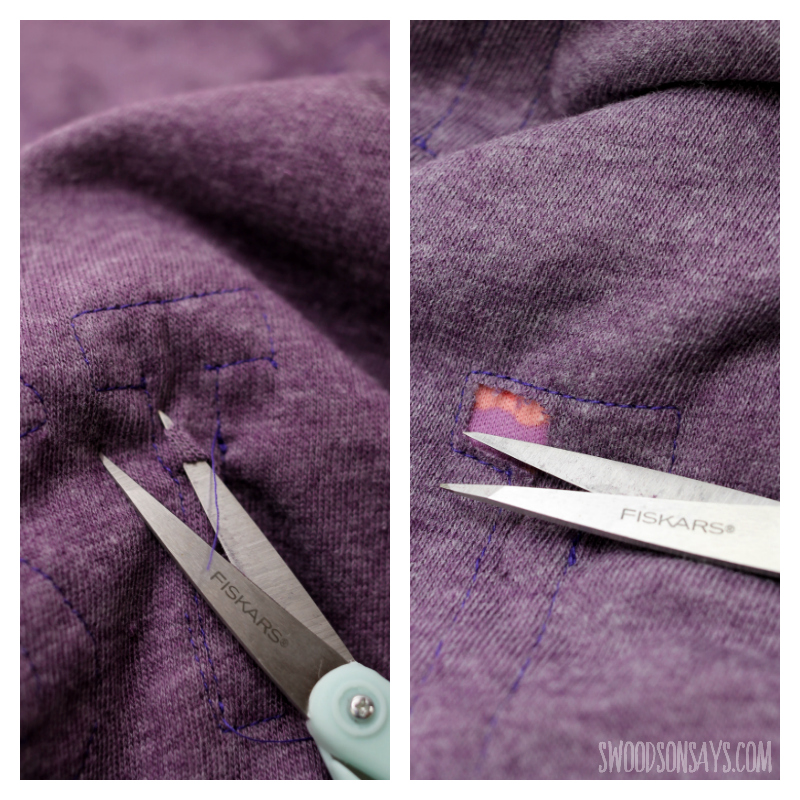
12- Very carefully, use your sharp scissors to cut through the top layer, and trim slowly around the edges. You don’t want to cut through the stitching but just along it works best. You can always cut off more but you can’t add it back on! .
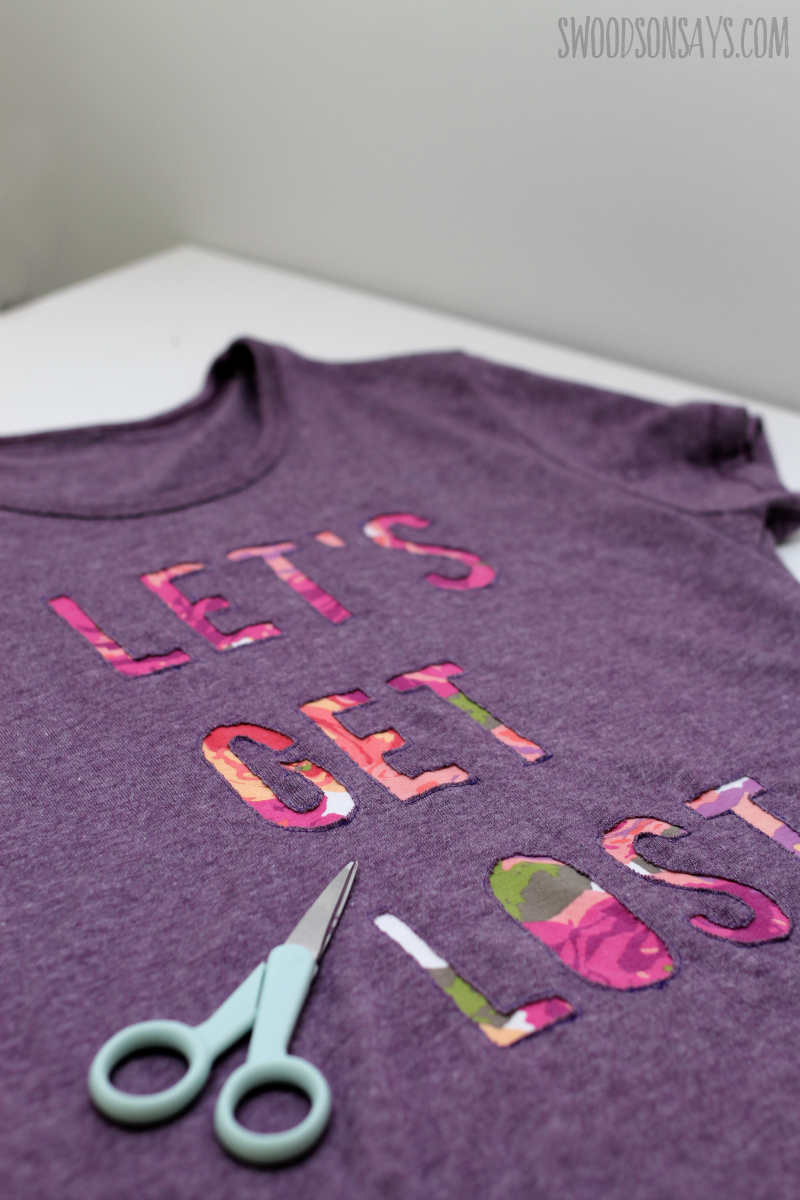
13-Continue through all of the letters until you’re done, and then optionally turn it inside out and trim the threads or excess bottom layer. Remove all your pins and enjoy
Jen
Thursday 7th of June 2018
Thank you for the tutorial! I am searching for some ideas for some new T-shirts for my kids. They are growing up too fast, and there is nothing fun in the shops these days! Might just make something myself! Thanks for ideas!
Stephanie - Swoodson Says
Monday 2nd of July 2018
Happy sewing Jen, thanks for the kind comment!
Julie
Saturday 5th of May 2018
That's brilliant, I've done a little reverse applique in the past but not for AGES, I think I'd forgotten what a fun technique it can be. I'm sure I have some plain old T shirts hanging around that would look great with this treatment. Thanks
Nähbegeisterte
Saturday 5th of May 2018
A great idea to spice up a shirt. :) Thank you for the instructions. Have fun wearing and greetings the Nähbegeisterte