
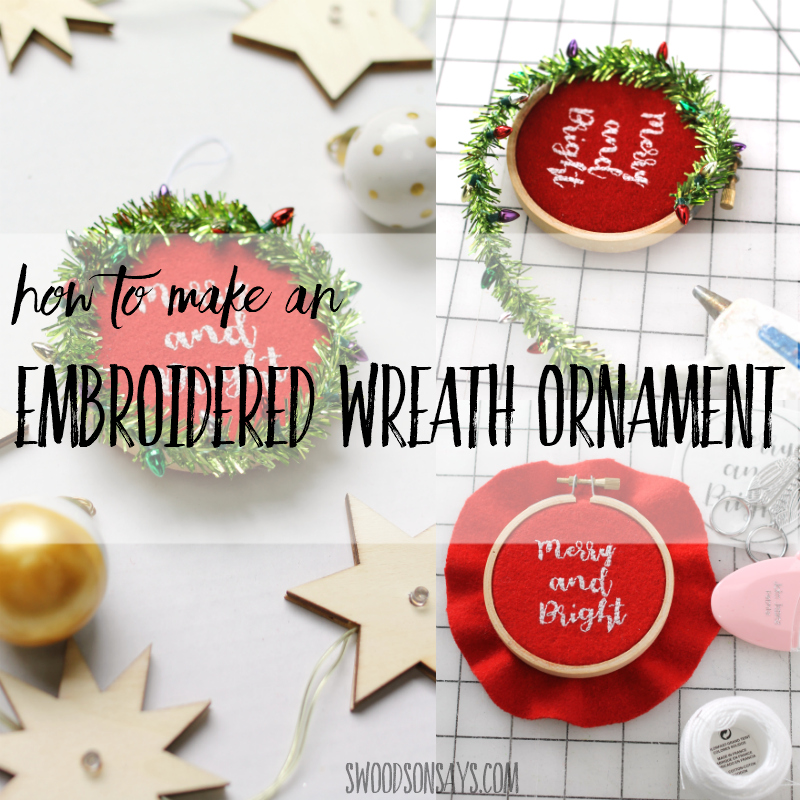
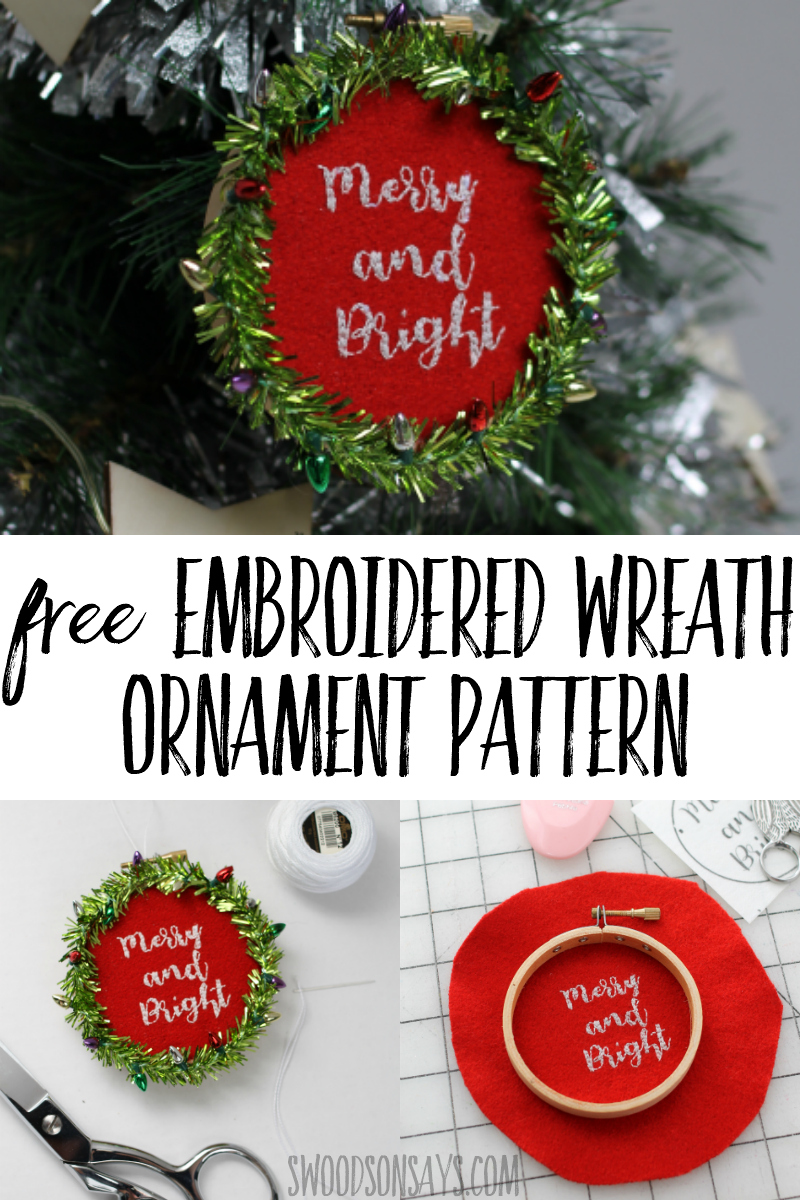
Combining two of my favorite things today; hand embroidery and tiny dollhouse furnishings! I love how this turned out, and it’s super easy if you want to know how to make an embroidered wreath ornament for yourself! I grew up with a tree full of handmade Christmas ornaments, by us kids and my mom, so I am happy to continue that tradition.

Isn’t it cheery! I have a whole round-up of other embroidery hoop Christmas ornaments, if you need more inspiration!

I love gifting ornaments because they’re handmade with love BUT don’t take up a ton of space. One Christmas I gave a grandparent-in-law a giant ornament wreath that I made, which was graciously received, but in retrospect I am sure she didn’t want that giant honking decoration in her life!

Would this fit in on your tree? I never have a heavy theme, just lots of festive cheer and bright colors, so it will be a great addition.
Pin this tutorial for how to make an embroidered wreath ornament with this link or image:
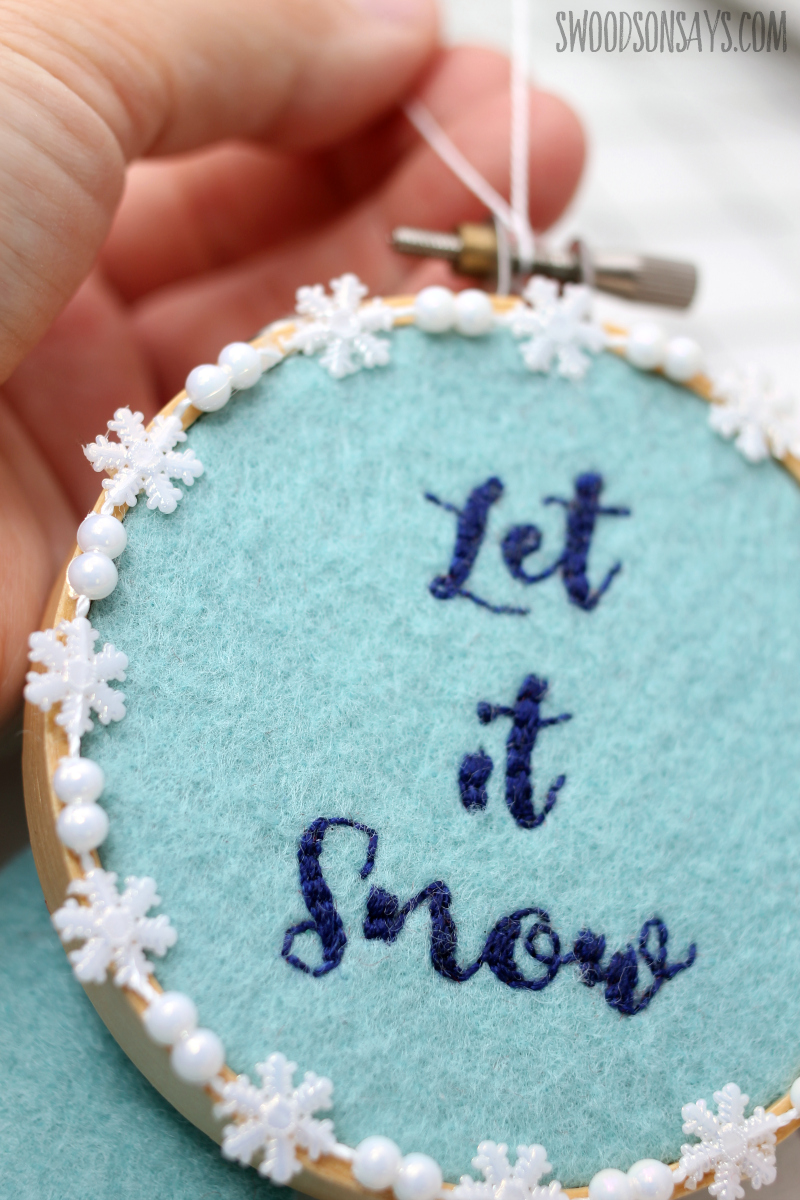
Check out the similar “Let It Snow” version that I shared over on Fleece Fun!
How to make an embroidered wreath ornament
Supplies
-
- miniature lightbulb garland
- 3″ embroidery hoop
- red wool felt
- white pearl cotton
- embroidery needles
- hot glue gun
- scissors –
-
embroidery pattern-sign up for my newsletter and get the free download once you confirm your subscription! If you’re already a subscriber, you can access the pattern with the password in each newsletter, in the resource library.
Steps
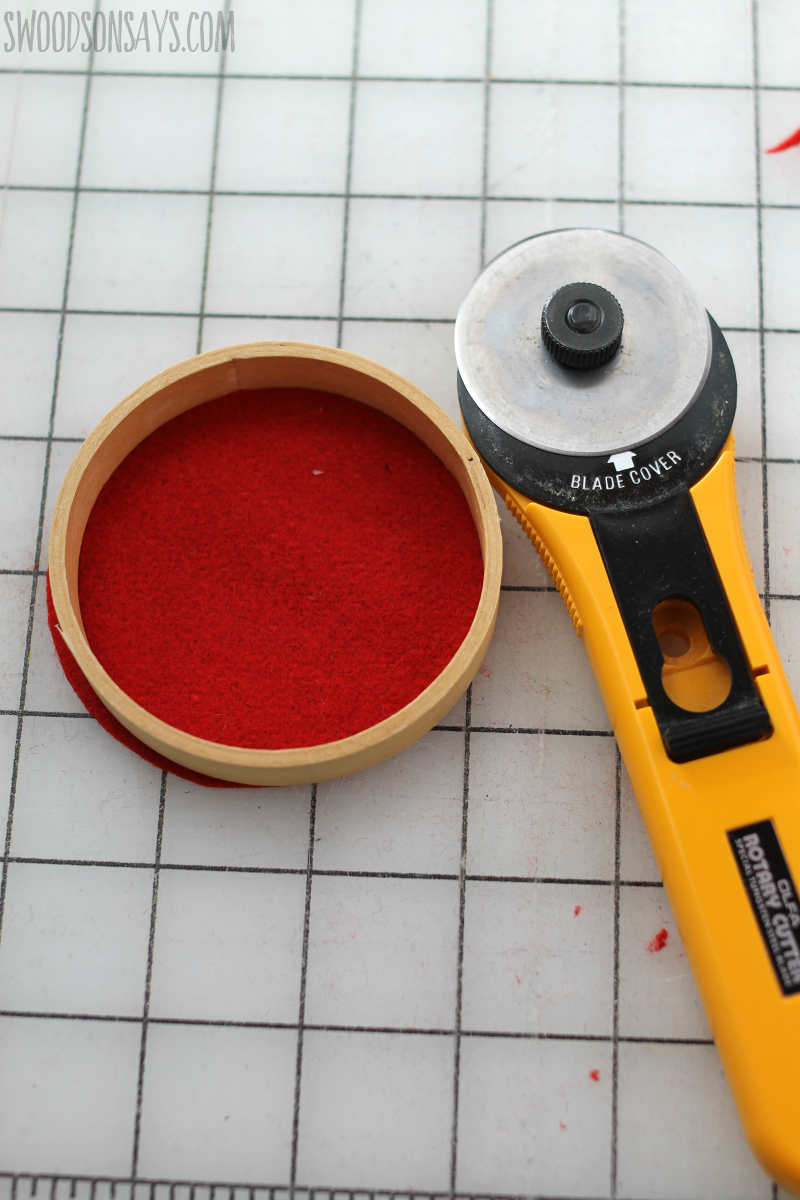
Step 1- Use scissors or a rotary cutter to trim a felt circle roughly the size of your hoop’s inner circle, set this aside for later.
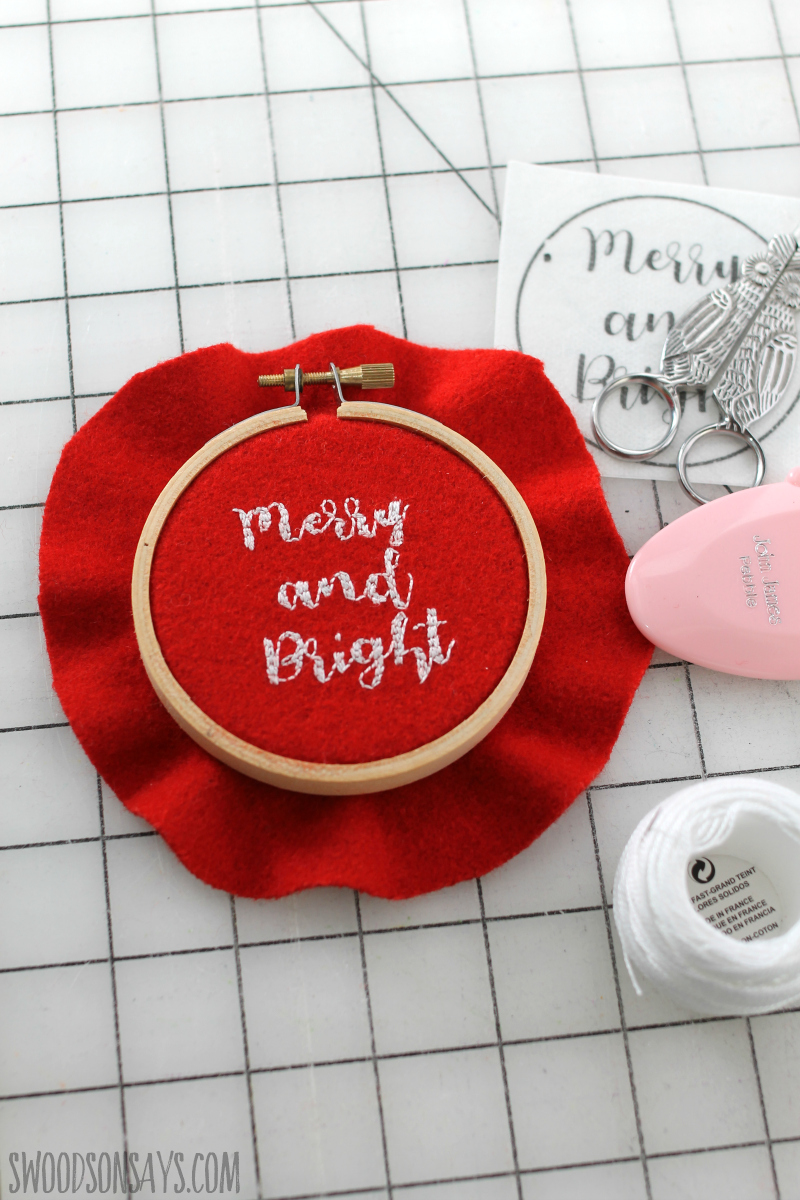
Step 2- Transfer your embroidery pattern and stitch! I used Stick n Stitch, the papery stuff you can see in the background, if you’re not familiar, check out the tutorial for how to use it here.
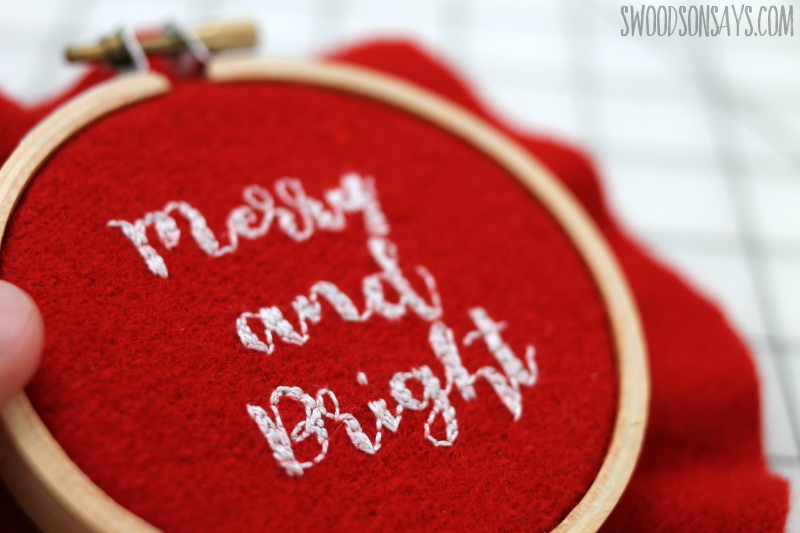
I used a simple backstitch for everything, filling it in on the thicker parts of the letters. Easy!
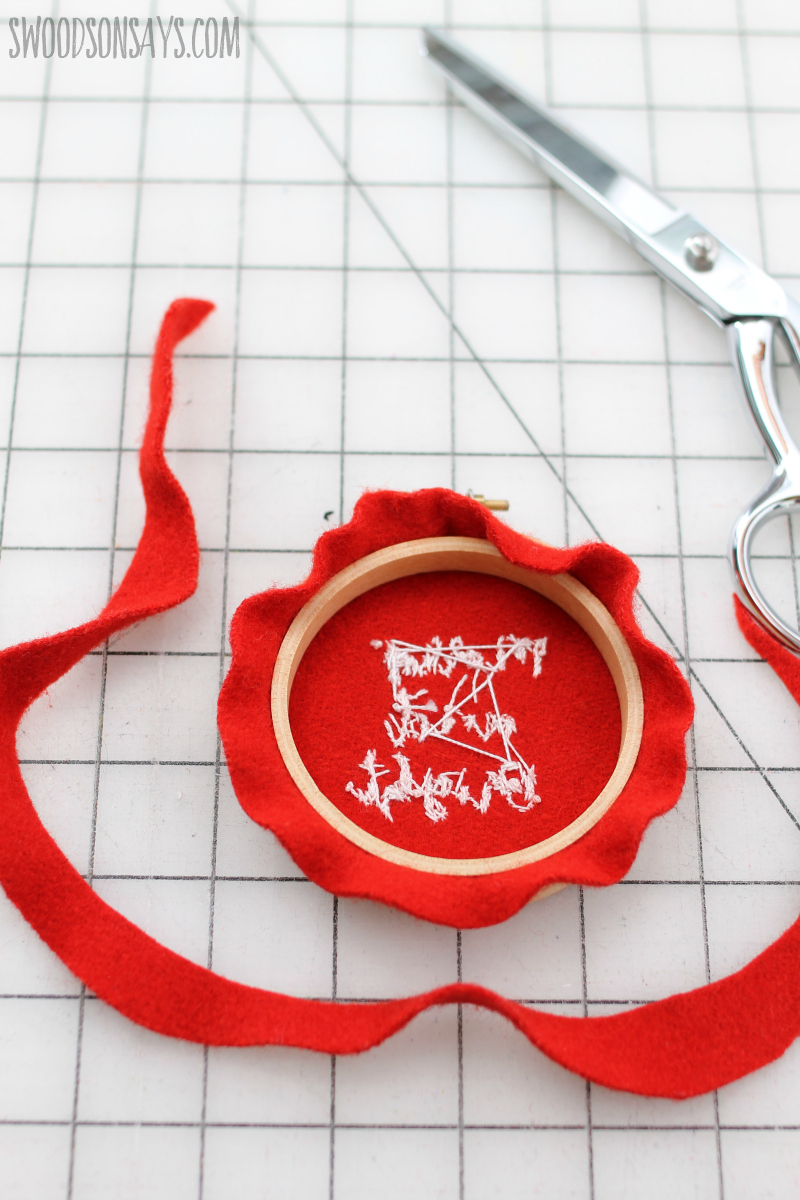
Step 3– Once you’re done, flip it over and trim so you’re left with roughly 1/2″ overhang of felt around the edges.

Step 4– Use your hot glue to tuck that down and secure it.
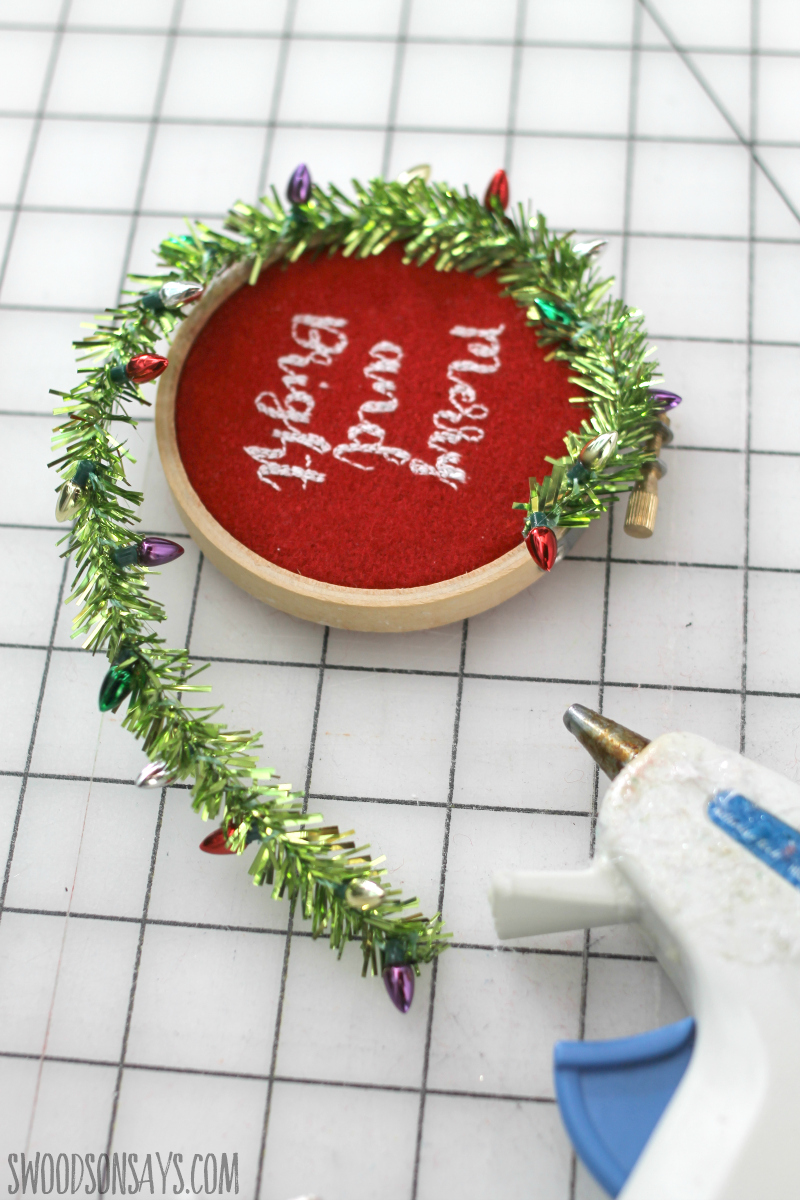
Step 5– Flip it over and glue on your wreath! You will have to trim a bit off if you use exactly the kind I linked.
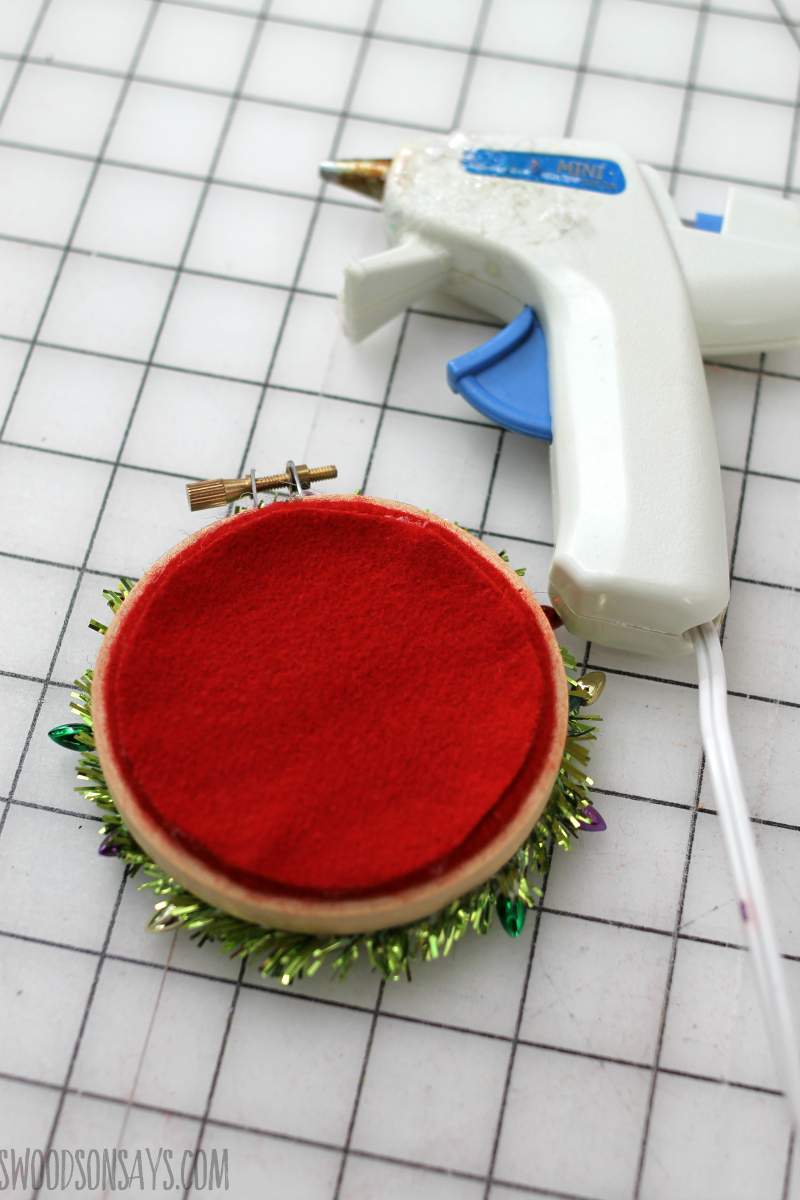
Step 6– Also hot glue that first circle you cut on to the back, covering up the “guts”.
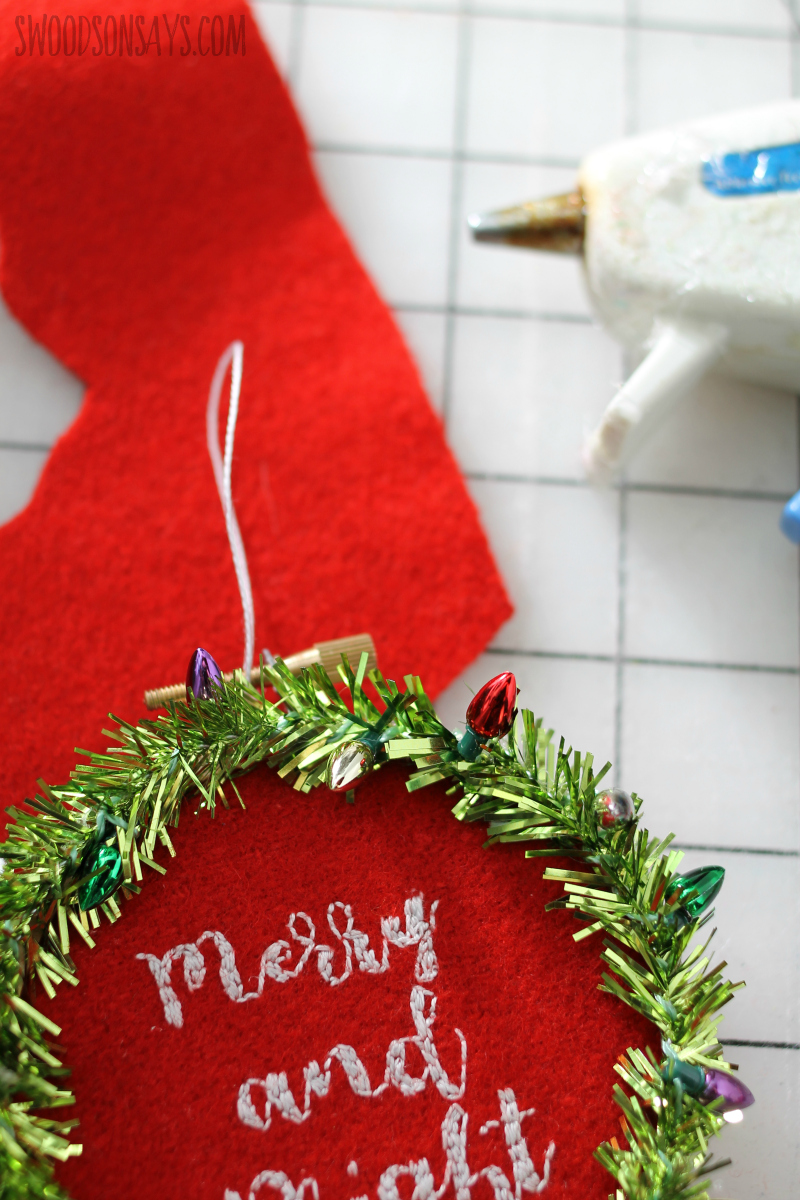
Step 7– Use your floss to add a hanger; I tie a double knot, and then flip it so the knot is on the bottom and secure it with a dab of hot glue. You’re done with your embroidered wreath ornament!
Stephanie - Swoodson Says
Friday 2nd of November 2018
test