

How cute is this comfy, dragon wings costume diy! If I’m going to take the time to sew something, I want it to be comfy, so I picked a stretchy “scale” fabric that is easy to wear and fun to watch shimmer. I’m excited to share that I’m collaborating with JOANN, who sells the amazing fabric, to share this project! That means they compensated me for my materials and my time, but of course I only share products & stores that I already use and love, and all opinions are my own.

This is a hoodie “hack” costume which means I didn’t sew the base (check out more hoodie Halloween costume ideas here!). This is a really practical way to make costumes, I think, and will now be comfy and high enough quality to keep wearing it over and over again.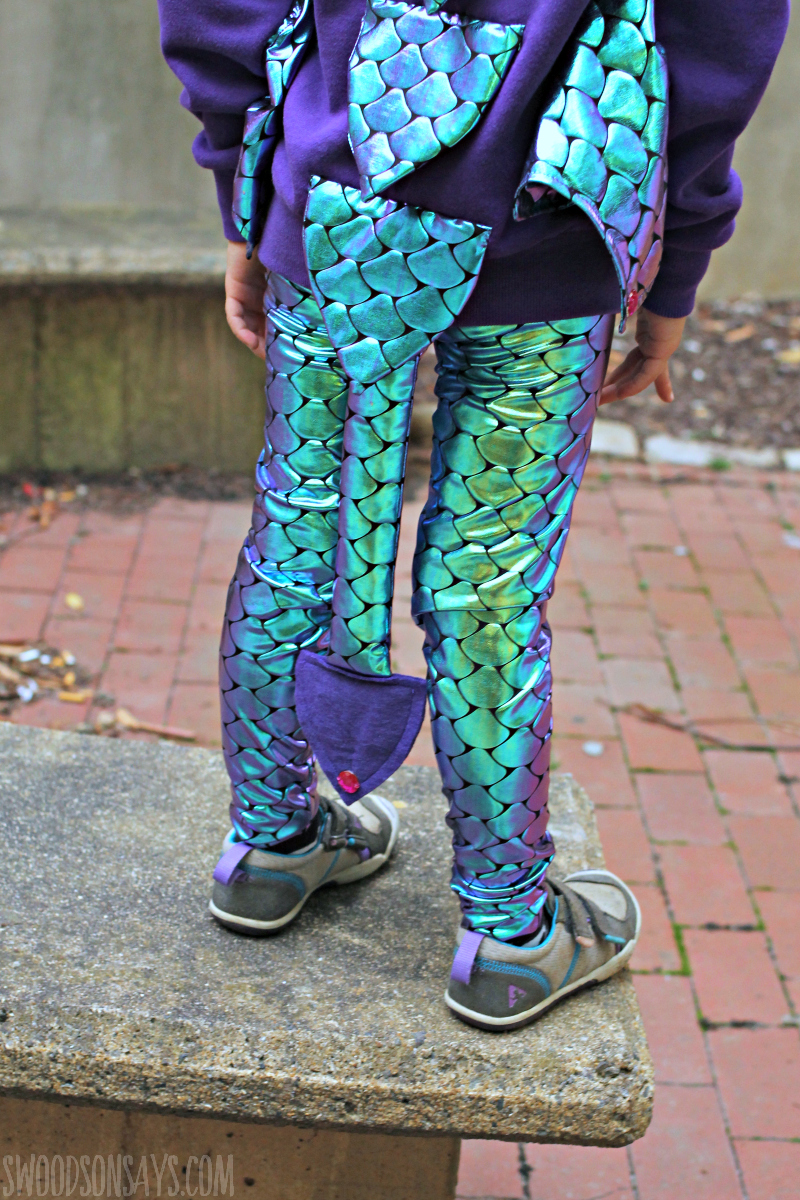
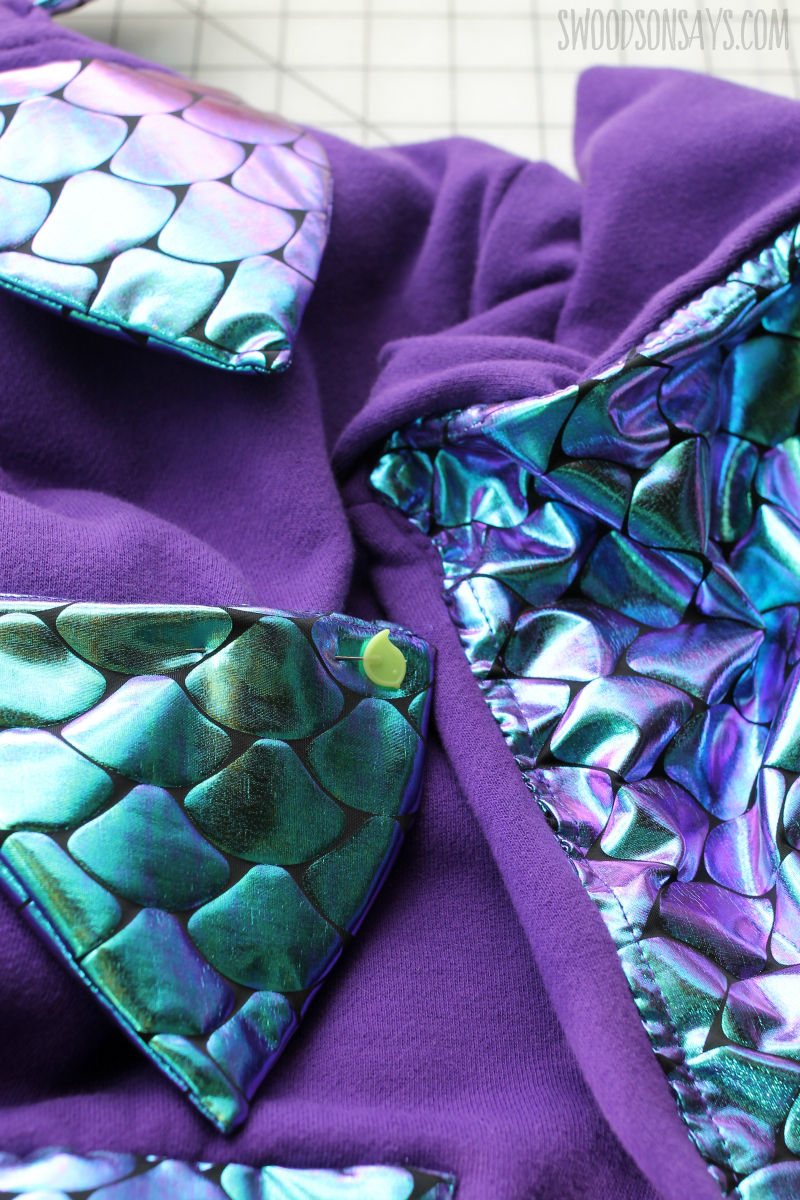
I added a little tail; it would be super fun to let kids decorate the base of their tale however they’d like, too! A kam snap holds this one on so it is easy to take off for washing, but you could hand sew it in really quickly if you’d prefer.
If you like this post, check out these other posts while you’re here!
- Glow in the dark diy jellyfish costume tutorial
- Halloween costume sewing patterns for kids
- 20+ Halloween sewing projects
- An upcycled diy dragon costume I sewed after this one
The spikes feel so cool! You could put a line of them down the top of the sleeve if you were feeling really motivated, as well.
Isn’t she cute? We went out to dinner that night and she heard all about it. A renaissance festival is in our future so I’m hoping she wants to wear this to that event too!
Pin this dragon wings costume diy for later using this link or this photo:
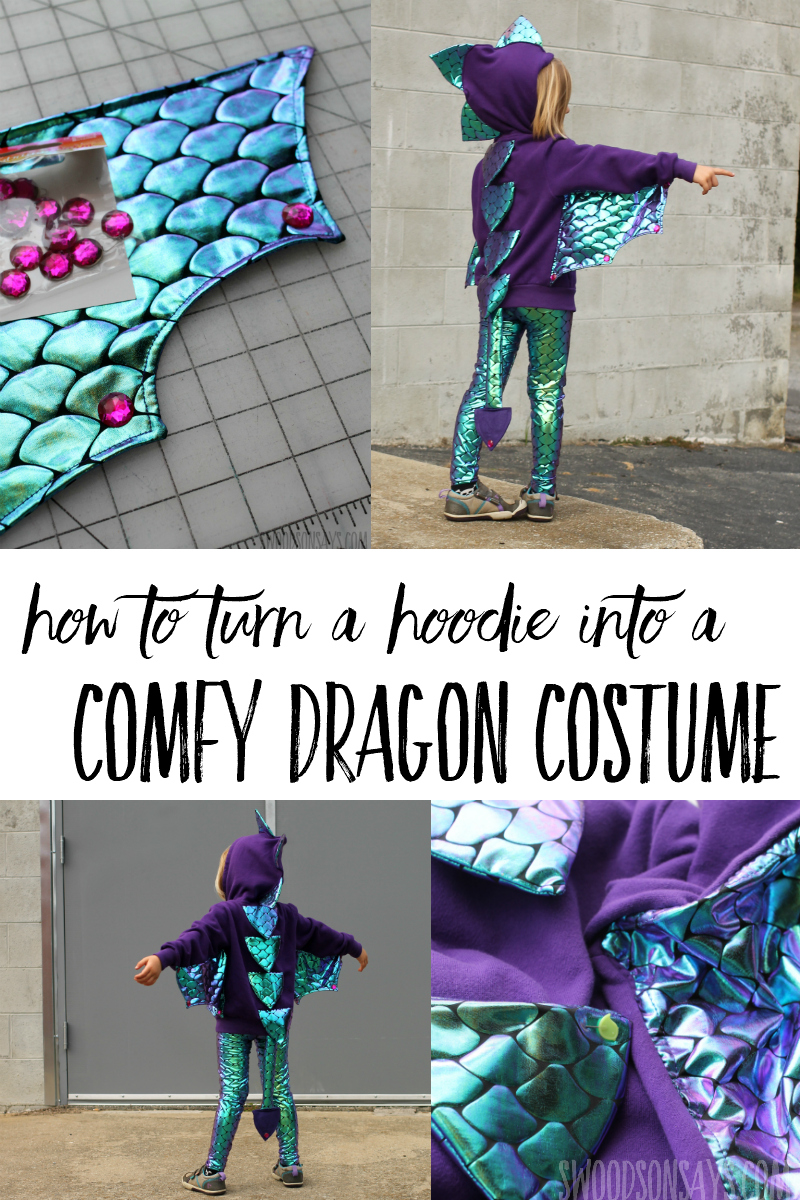
Dragon wings costume diy
If you’d rather buy a cheap PDF of the tutorial and spike pattern piece, you can buy one here and skip the ads and newsletter signup!
Supplies
- Roughly 2 yards (will depend what size you’re working on) Yaya Han Cosplay Polyester & Spandex Fabric 58”-Mermaid
- 1/4 yard Black felt
- 1/4 yard purple felt
- Poly-fill or other stuffing (I always mix in fabric scraps!)
- Coordinating thread
- Microtex or stretch needles
- Purple zip up hoodie
- Seam ripper
- Tracing paper or newspaper to create your wing pattern
- Pink sew-on gems (I bought mine in store from JOANN but can’t seem to find them online, they were with the decorative buttons)
- Walking foot (optional but useful)
- Pins or clips
- Sharp scissors
- Marker
- KAM snaps (optional, attaches the tail but you can sew it on as well)
- PDF pattern for the leggings. I used a free kid’s pattern from Bella Sunshine Designs, join their Facebook group and check the announcements for the free code/link to download your own..
-
PDF file for the dragon spike- sign up for my newsletter and get the full pattern once you confirm your subscription! If you’re already a subscriber, you can access the pattern with the password in each newsletter, in the resource library.
Steps
- I broke these into 3 different parts; wings, spikes, and tail!
- I used microtex needles for this thin, stretchy fabric
- A walking foot makes it much easier to sew this project, which feeds the top and the bottom, keeping it all even, and a serger makes the construction faster but is not necessary.
- Use a 1/2″ seam allowance unless advised otherwise
- If you are using a sewing machine be sure to use a stretch stitch! The one that looks like a zig zag or a triple straight stitch.
Wings
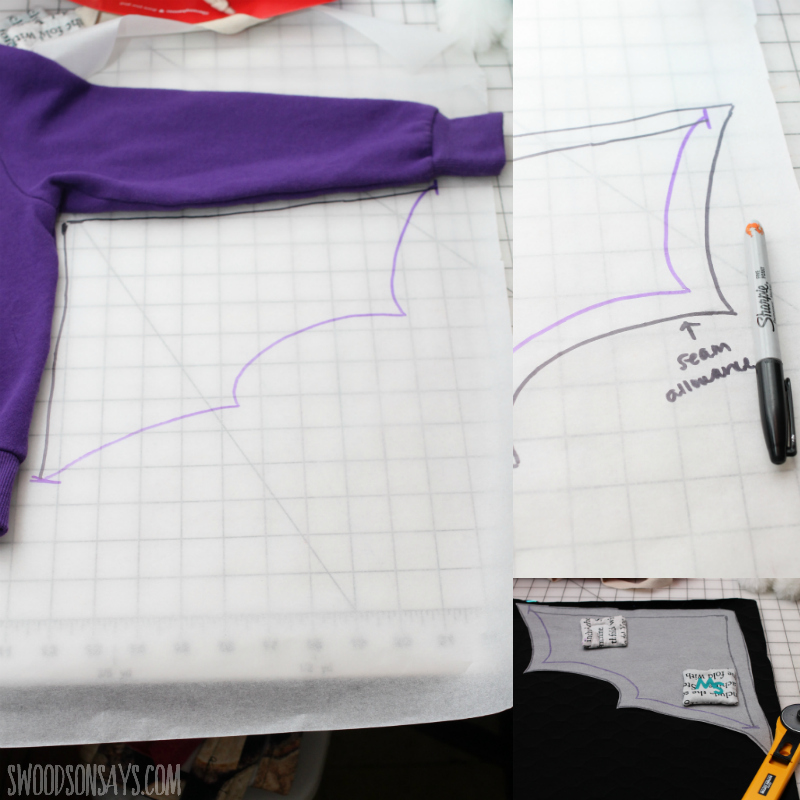
Step 1-Create a wing pattern! I marked where the cuffs met on the body and the sleeves, then free-handed in between those. You’ll then want to draw a seam allowance (the area you’ll be sewing and then trimming) around the shape you want for your wing. I went with a rough 1/2″ seam allowance. Lay it on the fashion fabric (this is NOT felt, it is just the wrong side of the scale fabric) and cut two, mirrored.
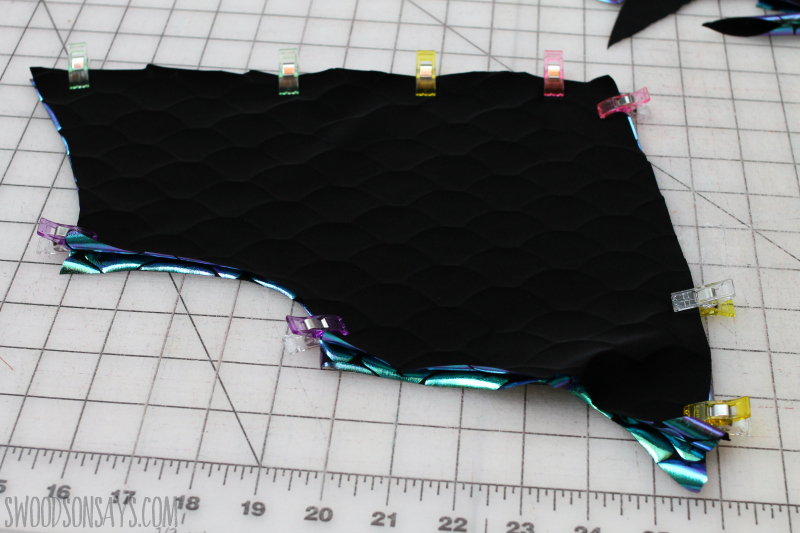
Step 2- Trim the seam allowances closer. Layer the pattern pieces right sides together and pin, you will sew with 1/2″ seam allowance all the way around leaving a 4″ open gap at the short, straight end.
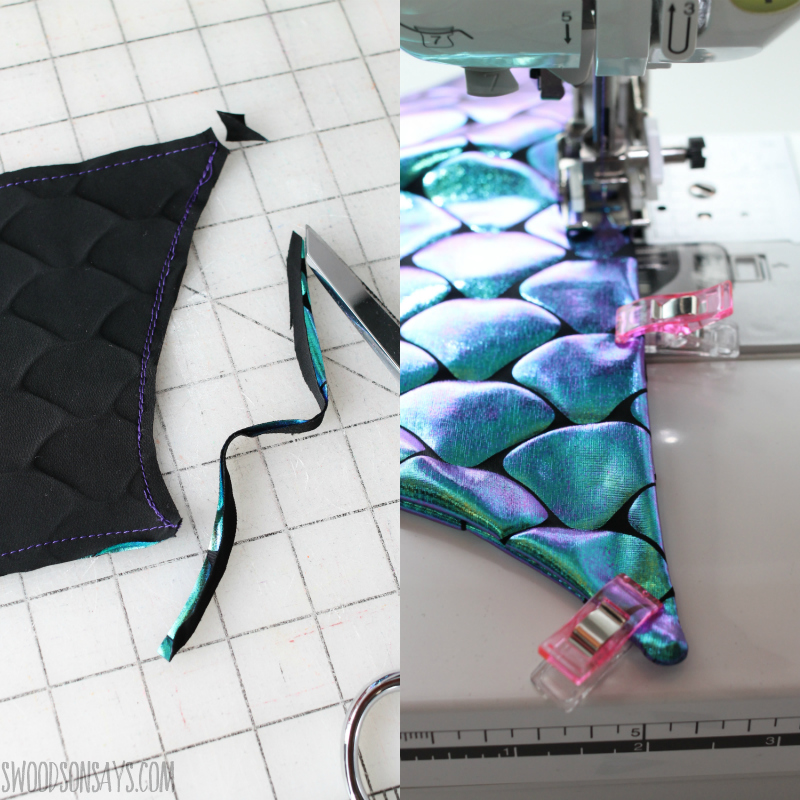
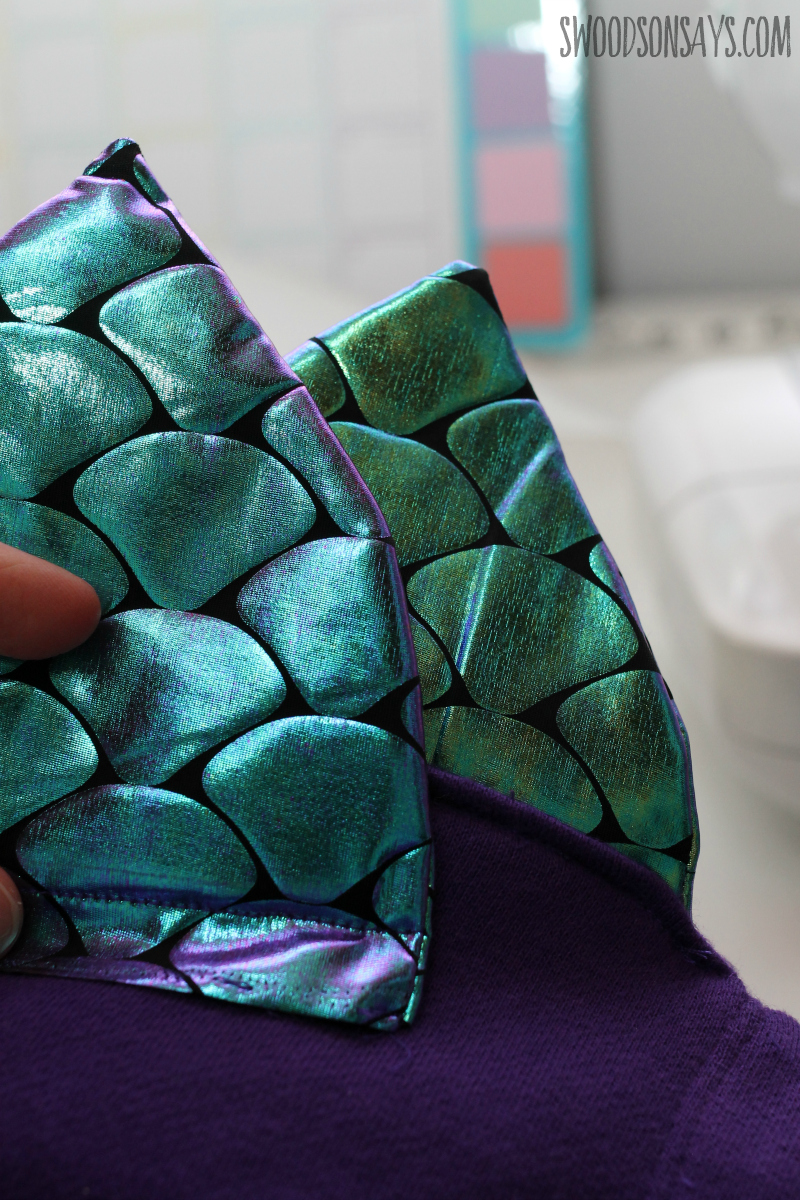
Step 3- Trim down the seam allowance and cut off the corner tips outside the stitching line. Pull the wings right side out, poking out the points, and pin all the way around. Sew with a 1/4″ seam allowance, which will help define the wings and close the gap.
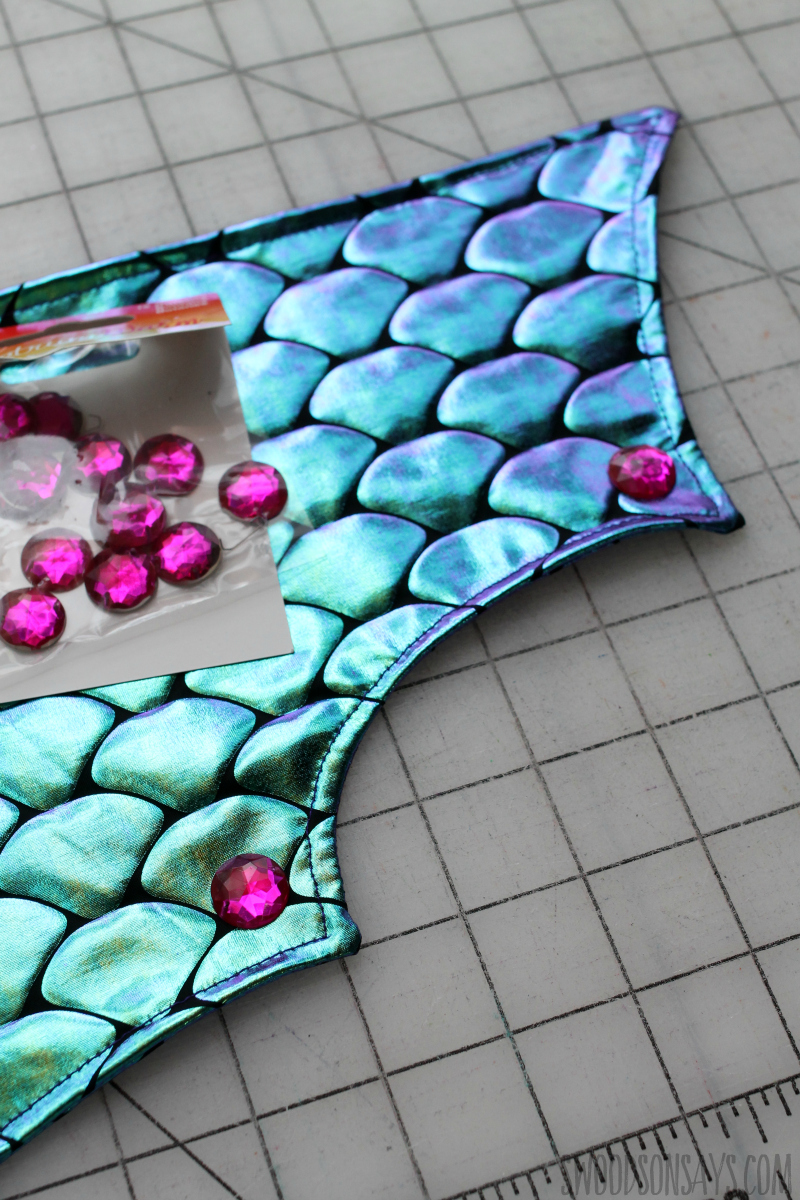
Step 4- Sew on some gems! I bought these in store at JOANN but couldn’t find the exact ones online. My kids are so thrilled!
Step 5- Sew the wing on! I used a simple slip stitch and attached it to the seam allowance of the arm & bodice. Just match it up with the edges of their hoodie.
Repeat steps 1-4 for a second wing. Pay attention the direction of the scales if you care that they look the same!
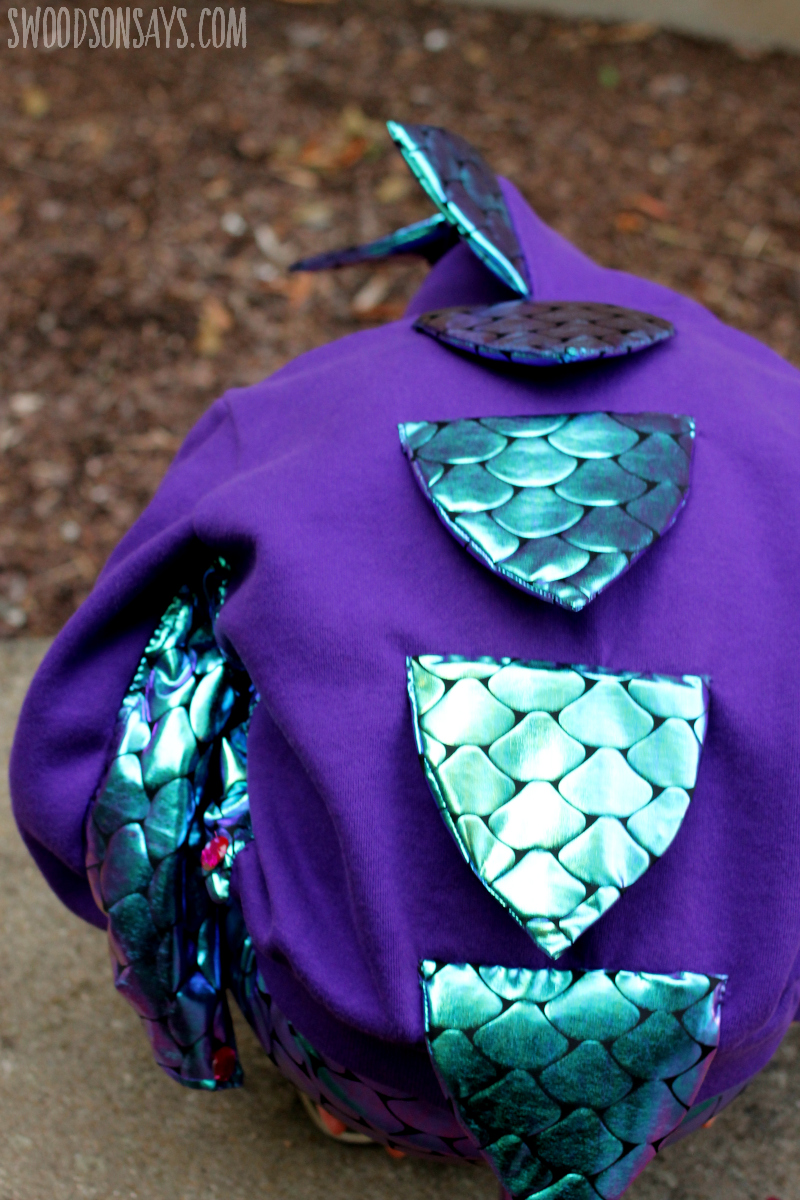
Spikes & pants
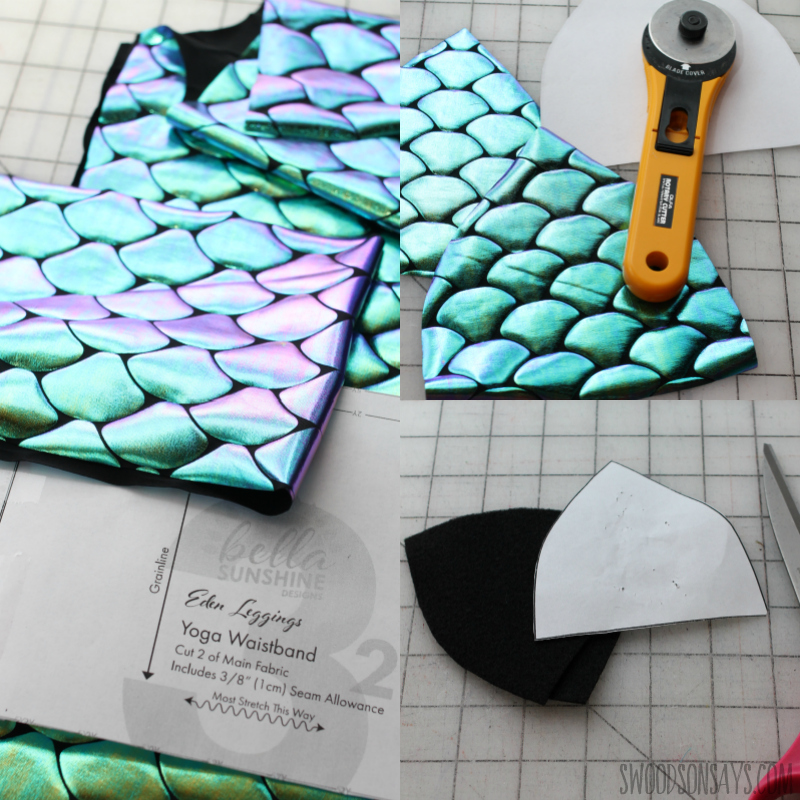
Step 1– Cut! Cut & sew leggings according to the pattern. Cut 2 scale fabric pieces, from the large spike pattern, for each spike you want to use (my 4t hoodie used 7 spikes) and then 2 felt pieces, from the small spike pattern, to correlate with each spike. Cut 2 more for the tail.
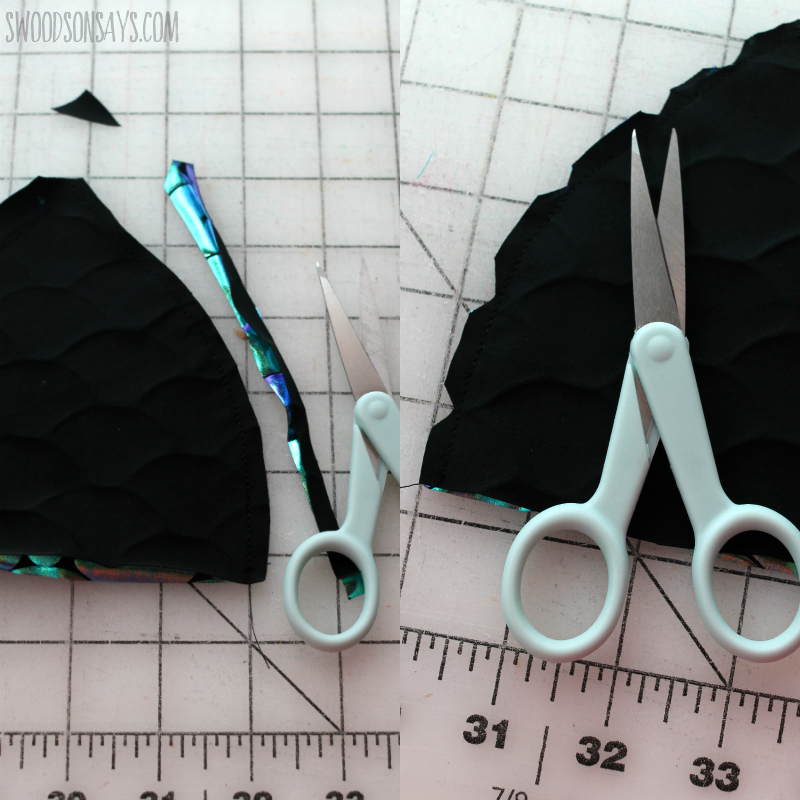
Step 2– Use your scissors to trim down the seam allowance and cut small notches to make the curve super smooth.
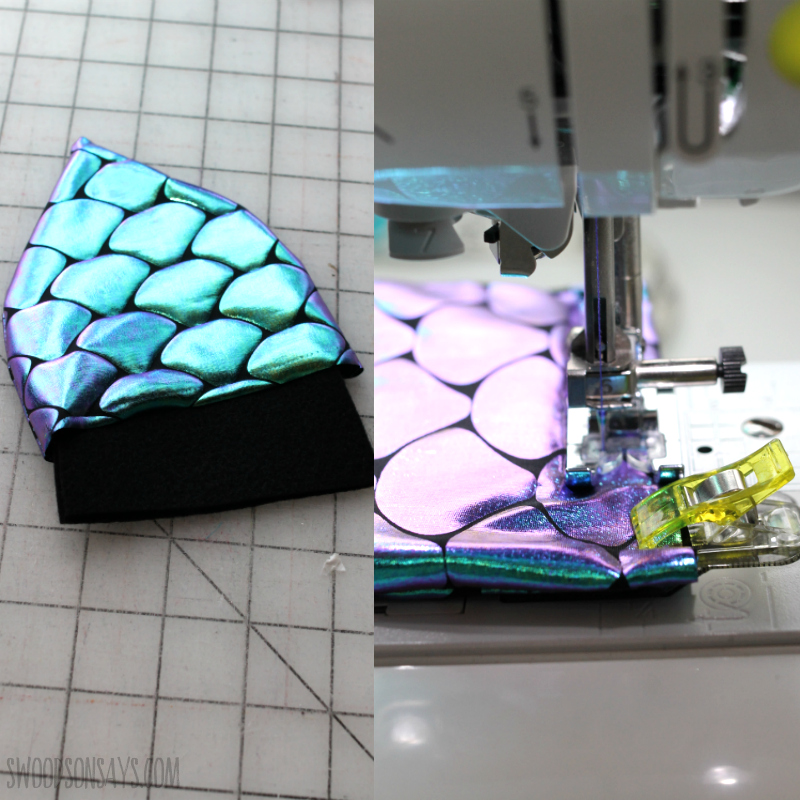
Step 3– Turn the spike right side out, poke the top out gently, and slide a stack of 2 felt smaller spikes inside. Use a long basting stitch to secure the bottom and keep it all even.
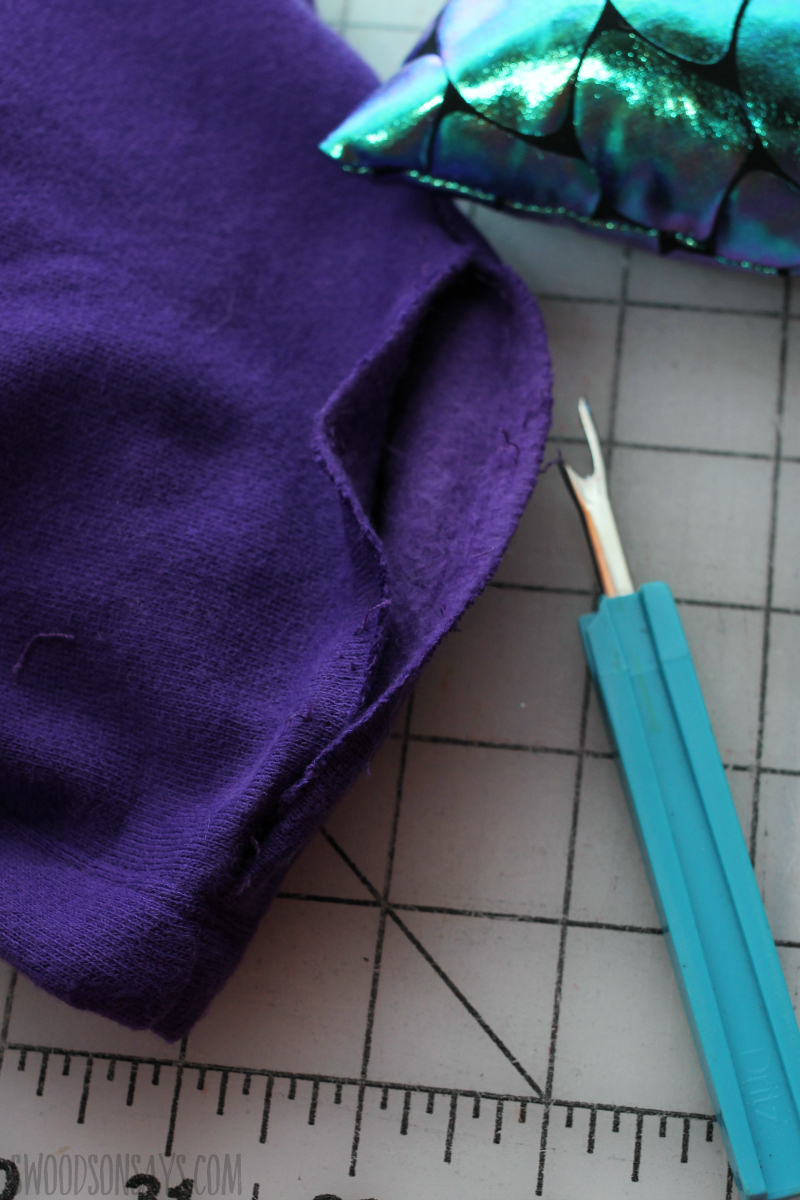
Step 4- Place your spikes along the hood to determine placing and then use your seam ripper to rip out the center seam far enough so the main scale can slide in. Repeat for the rest of them.
This shows about how far to slide it in, roughly 2″ deep.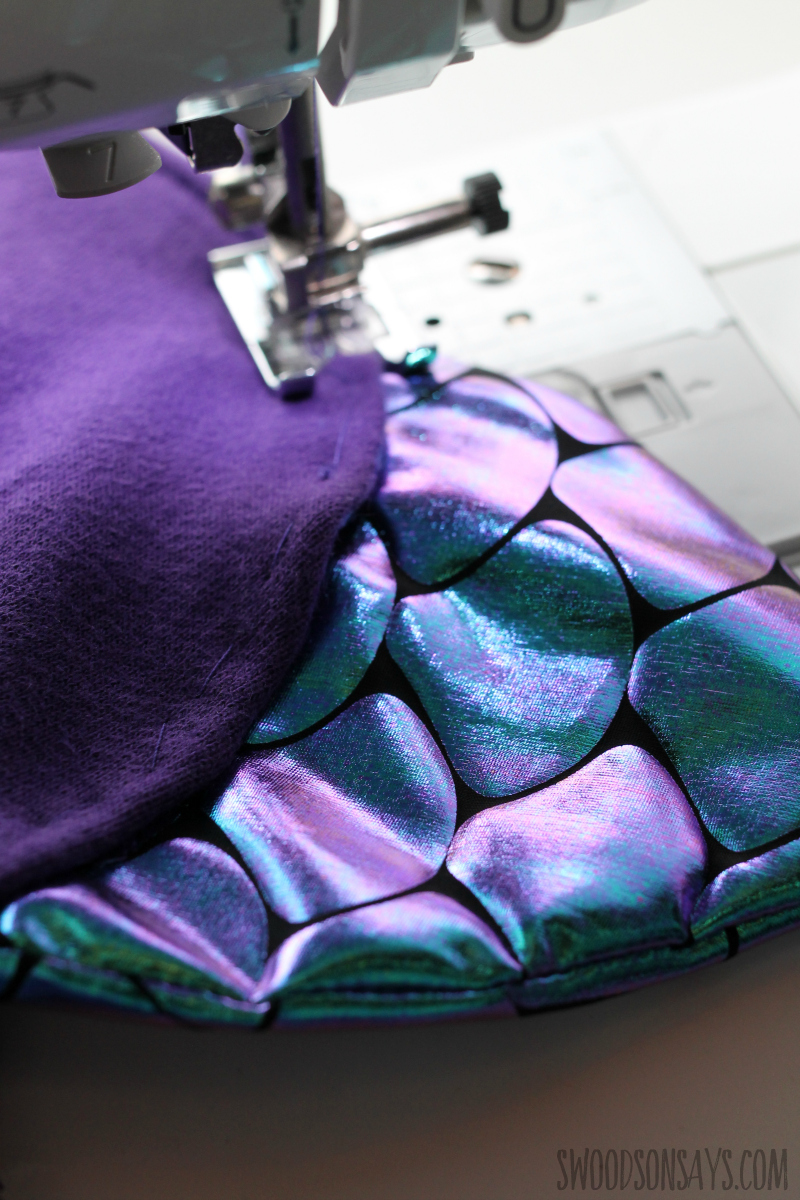
Step 5: Sew the openings back together! Just like a sandwich with the spikes in the middle, sew along the edges. Make sure the edges haven’t curled up so it’s a clean seam. I wish I’d used my walking foot for this, but it was fine with several pauses to readjust. I sewed with approximately 1/4″ seam allowance so you catch all the layers. I had to seam rip mine back open a few times as I played with scale, leaving the hood a little stretched out. Subsequently, I chose to hand baste them in place before machine sewing, it makes it easier to catch all the layers.
Note: the spikes seam allowance will be jutting into the hood portion. You can trim this flush with the original seam; this particular hoodie I’m using has a lined hood so you can’t see them at all.
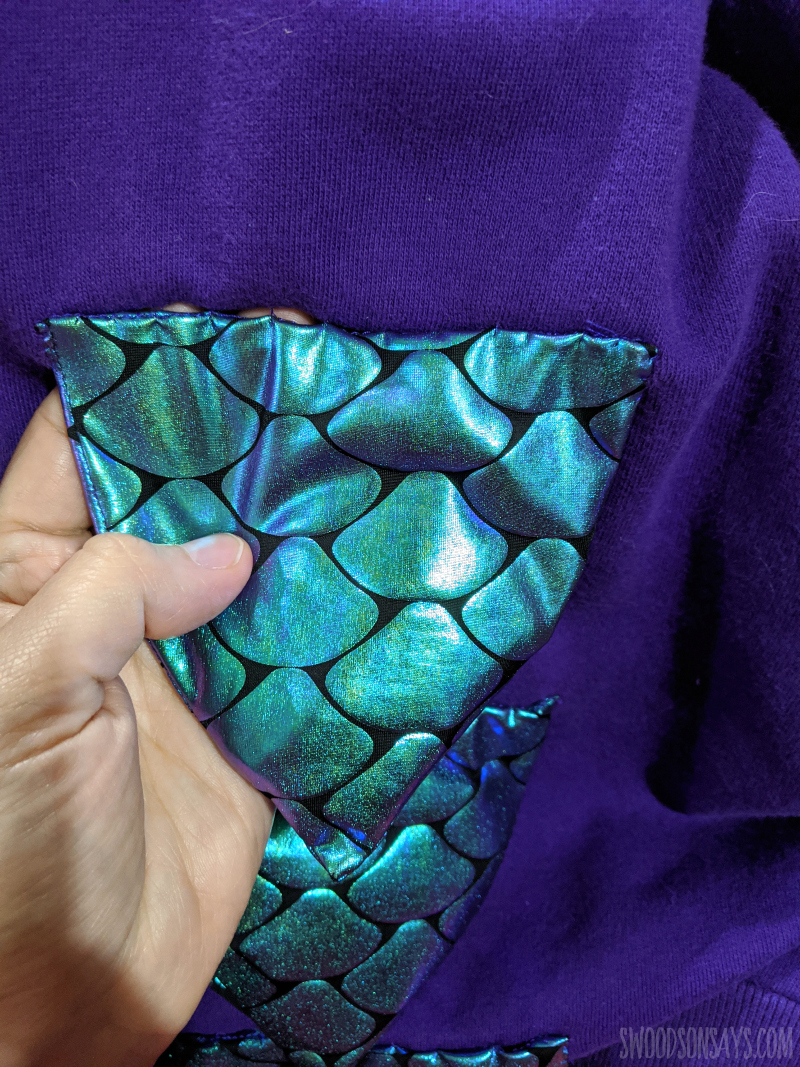
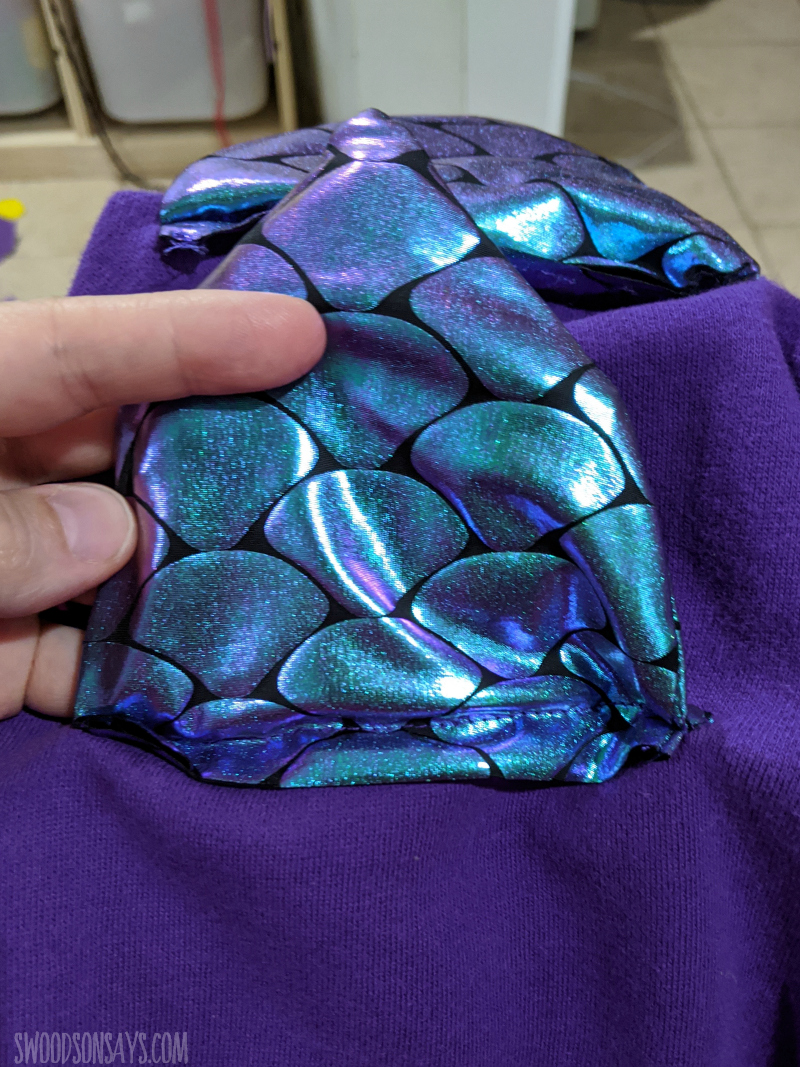
Step 6: Hand sew the remaining scales down the spin, just at the top or all the way around if desired. I used a slip stitch here as well. [2020 update – I’ve had a few folks asking for clarification on how these are sewn on, so see the below photos for clarification!]
Tail
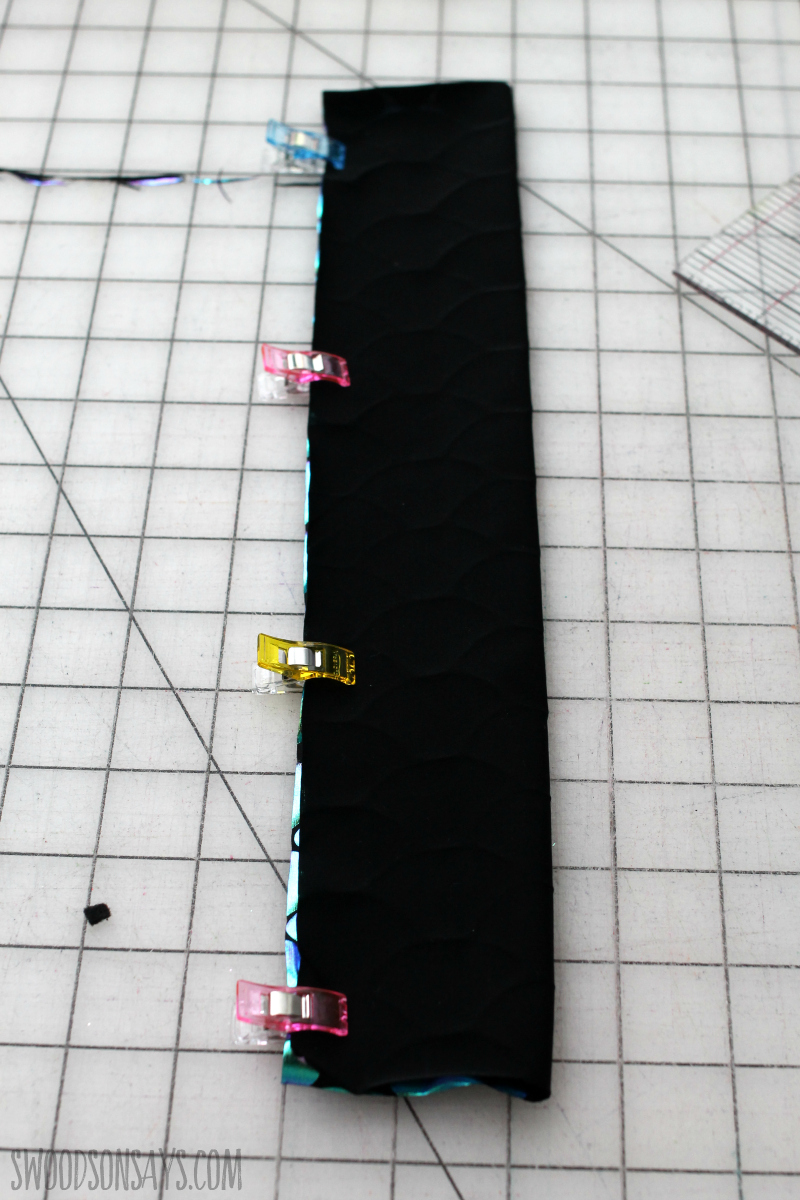
Step 1- Cut the tail; roughly 4″ wide by 11″ long. Pin the long sides and sew everything except the one top end together.
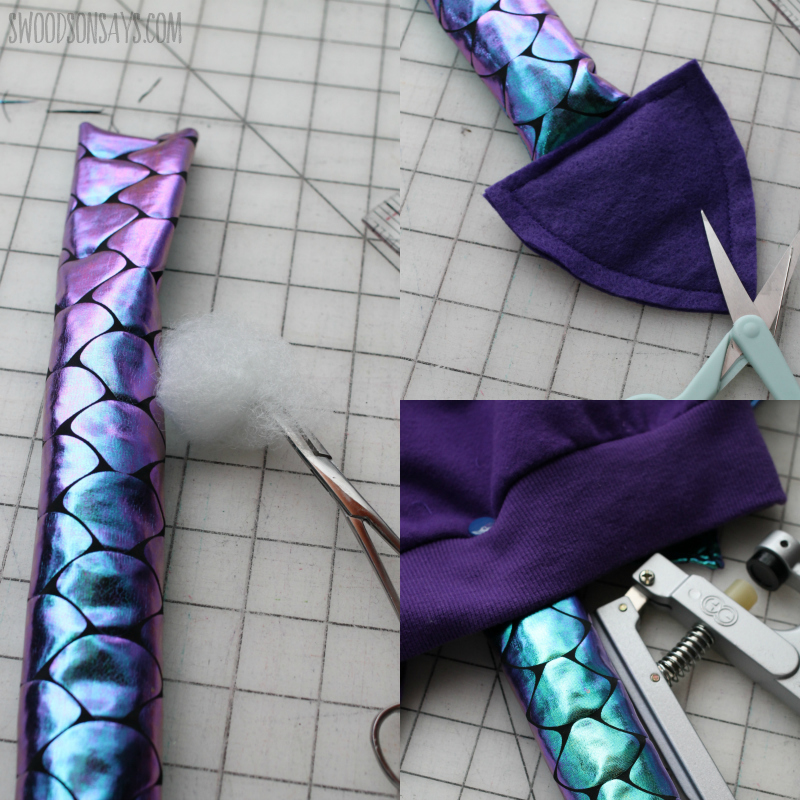
Step 2- Pull the tail right side out and stuff carefully. Use your accent felt spikes and sew them together, leaving a gap at the top. Slide the tail through the gap, make sure it is straight, and sew the top shut. Then sew or attach your tail to the hoodie! I opted for a KAM snap, so it is easy to take on and off for long car rides, etc.
If you try this dragon wings costume diy idea, or sew anything else with this fun fabric from JOANN I’d love to see it!
Yulia
Saturday 28th of September 2024
Hi, I had this tutorial pinned on one of my pinterest boards, as I was going to make hoodie dragons for my kids, and it was removed due to a copyright infringement. I found other pins with this tutorial as well, so I was wondering what I did wrong :)
Stephanie - Swoodson Says
Sunday 6th of October 2024
hi Yulia! You didn't do anything wrong so to speak - but someone else did and you repinned it :) The pin you must have had ( I don't remember personally but this is semi-common so I know the scoop) was where someone else took my images, put them in a collage, and redirected to their website. They don't let me just swap in the right link/photos, I have to mark it copyright infringement and then they take it down so people aren't frustrated with not finding the tutorial, or not getting to the original creator! Nothing wrong with this tutorial - and if you want a correct pin, I always have a link in my posts :) https://www.pinterest.com/pin/195273333831267094/ to repin. Let me know if that makes sense or if I can answer anything - promise it wasn't anything personal about you! I hope you try this tutorial!!
Billi
Sunday 10th of March 2024
Thank you for sharing such an amazing dragon, Stephanie. I'm using upcycled sweatshirts to make matching dragon family hoodies for my kids and grandkids and great niece and her daughter. Hopefully I'll be able to get the kids together to get pictures. 😉 I don't know if you know but the links to JoAnn's don't work. Thanks for sharing your creativity with us.
Stephanie - Swoodson Says
Tuesday 12th of March 2024
Hi Billi! That sounds so so fun and I would LOVE to see pictures when you're done, what a great project. I'm super sorry about the JOANN links, they changed their program for affiliate links without any notice and I'm having to hunt them down and update them manually. I just fixed the ones in this post -- I can't believe it but even 6 years later they still have the same scale fabric :) Hope the sewing goes well, thank you for notifying me about those links!!
Joanna K
Saturday 11th of November 2023
I made my son one of these three years ago, and he still loves it. I'm about to make him another one for Christmas, since he's outgrown the other one. Thank you for such accessible instructions! I'm lousy at sewing, and this is the first thing I attempted that I felt was a success!
Stephanie - Swoodson Says
Monday 1st of July 2024
your comment made my day Joanna, I love hearing that feedback!! I hope his next one turned out great too :)
Beth Onstad
Friday 13th of October 2023
I love the patterns you should see my daughters sewing she is incredible! This is her instagram “Anabell Blossom” so go check it out.
Sheila Hornyak
Sunday 9th of October 2022
My granddaughter is excited to have this for Halloween, so I got the exact fabric and new microtex needles, but my machine will not sew it without skipping most of the stitching. Is there a trick I don't know about how to sew this fabric? I am def not a hand sewer. Ugh!
Stephanie - Swoodson Says
Sunday 9th of October 2022
Hi Sheila! Ack!! I'm assuming your machine it sewing fine on other types of fabric (but maybe double check if you're not sure!). I would probably try some stretch needles if shopping is easy, sometimes machines work better with those -- https://www.joann.com/schmetz-stretch-machine-needles-5-pk-size-11-75/2583870.html and/or slide some tissue paper underneath as you stitch? Definitely a pain :/ I usually use a walking foot on top with stretch fabrics, too.