
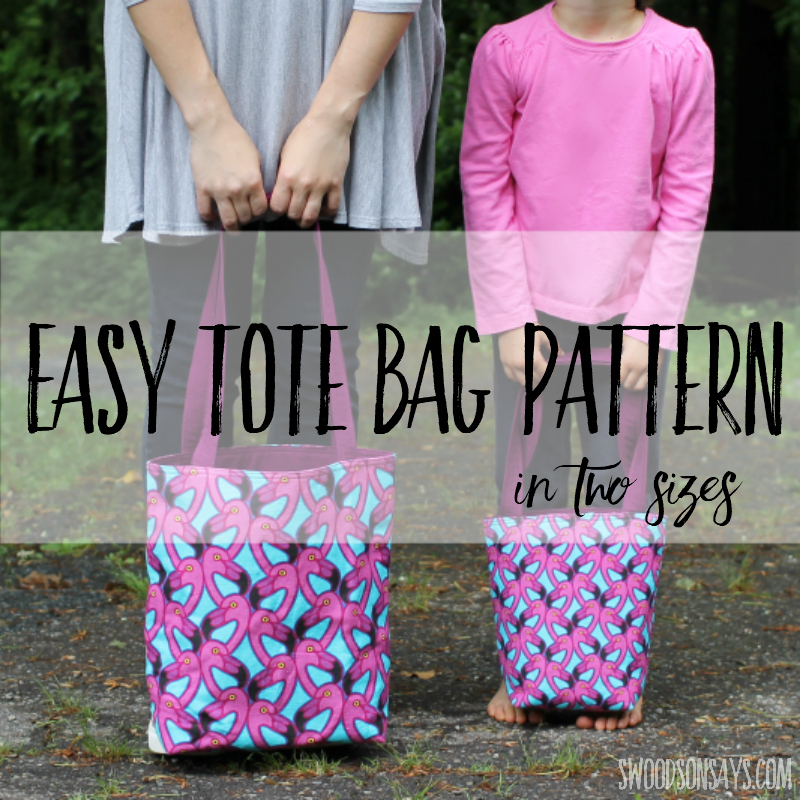
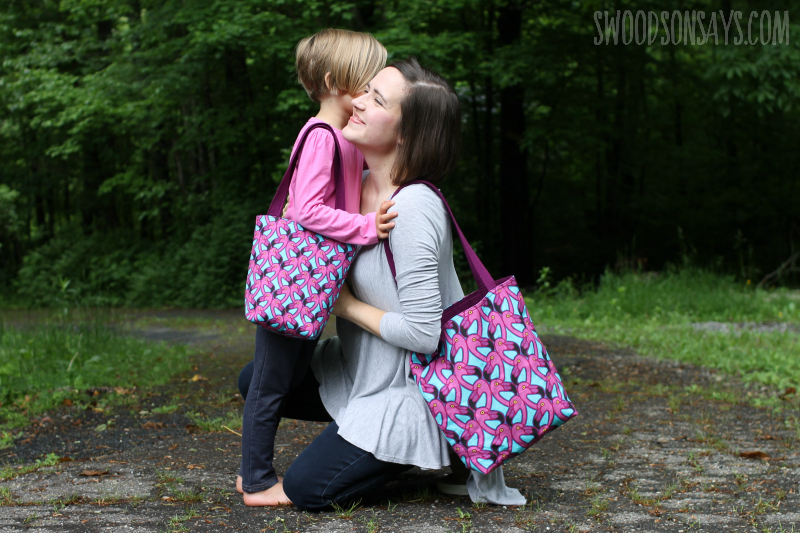
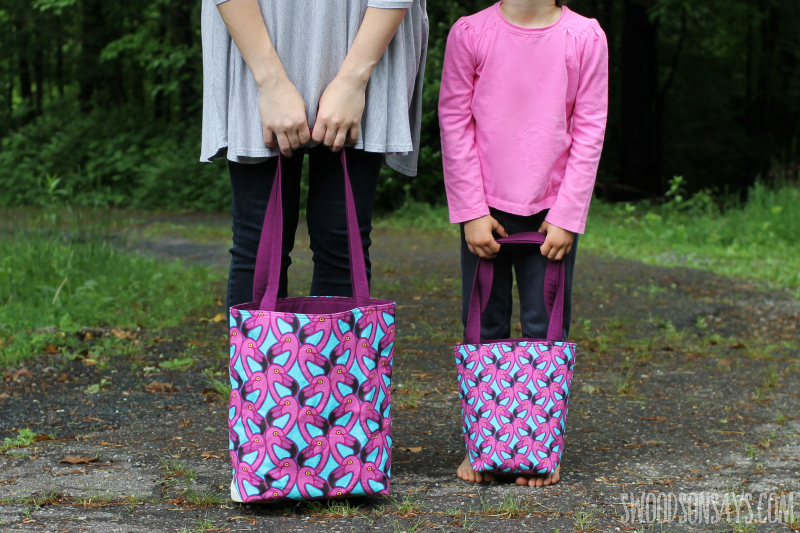
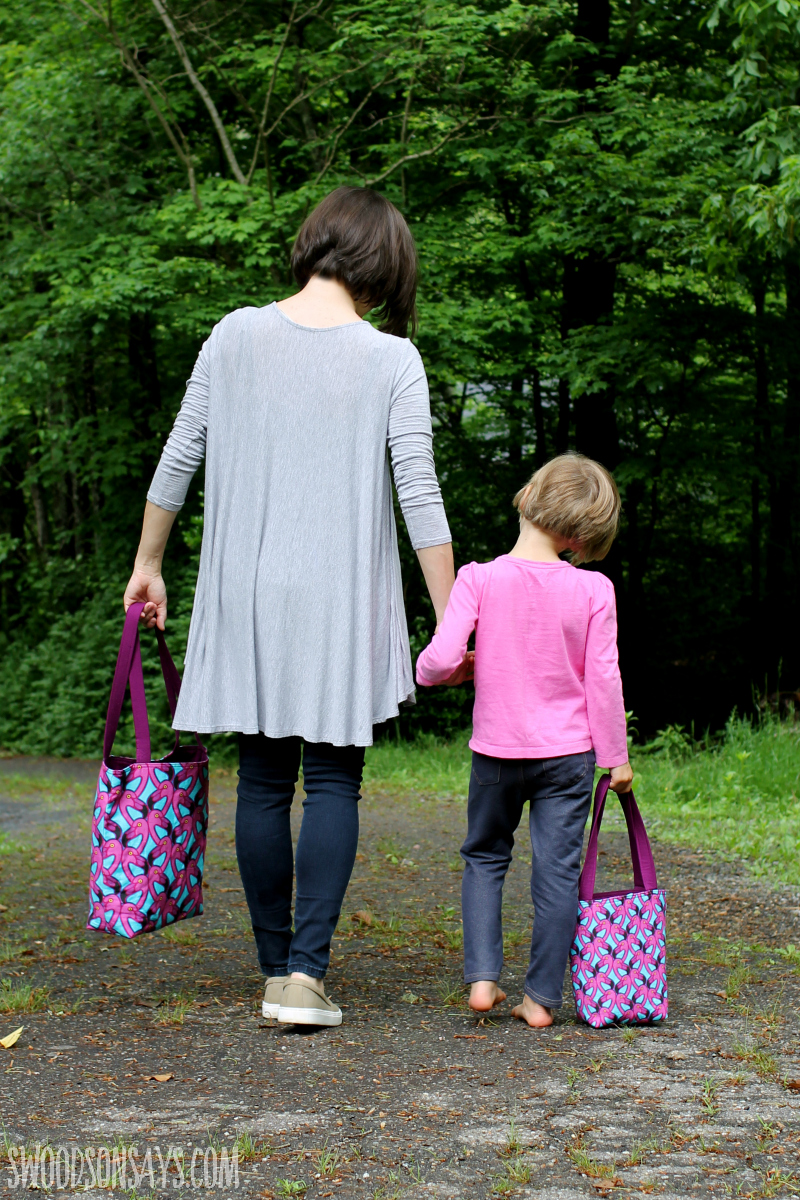
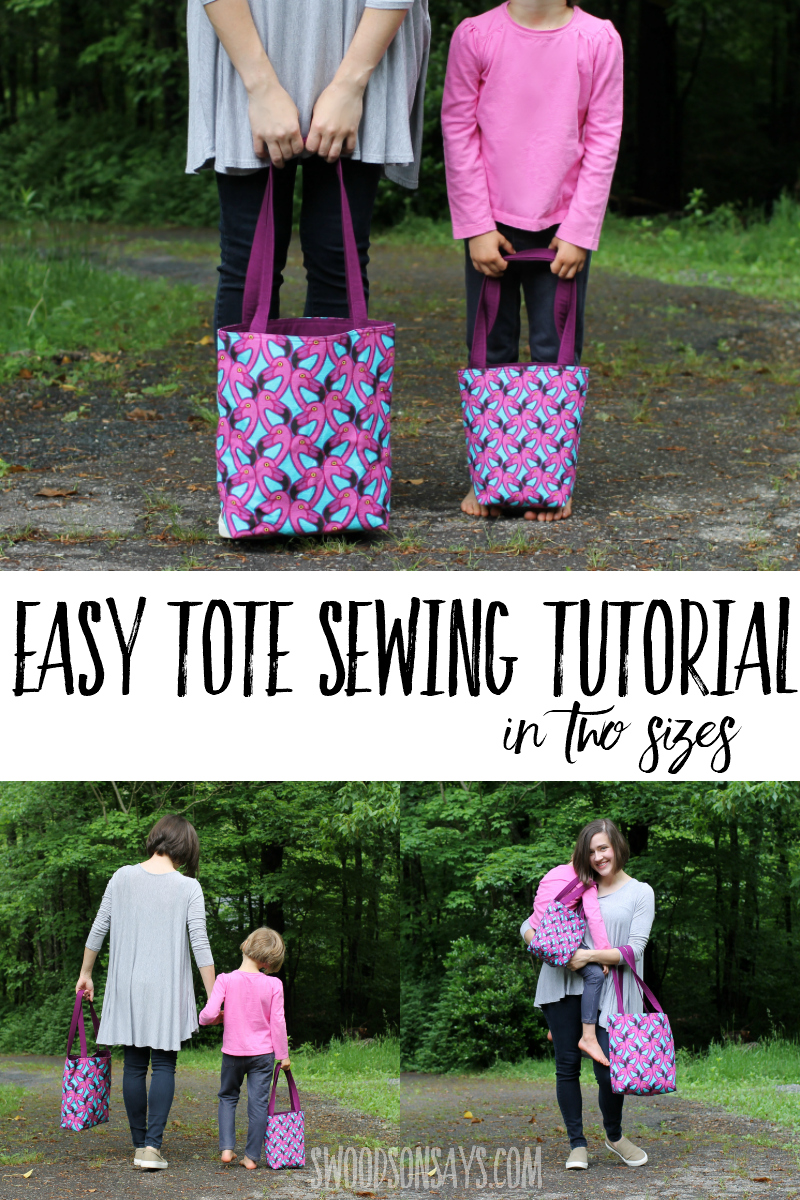
 I had so much fun with this tutorial and am excited to share an easy tote bag pattern! I tried to make it as simple as possible to follow but still end up with a nicely finished tote. My daughter loves collecting rocks and hauling her stuffed animals around so I thought I’d design a size for her too, aren’t we cute with our matching bags?
This post was sponsored by JOANN, which means they supplied materials and compensated me for my time, but all opinions are my own.
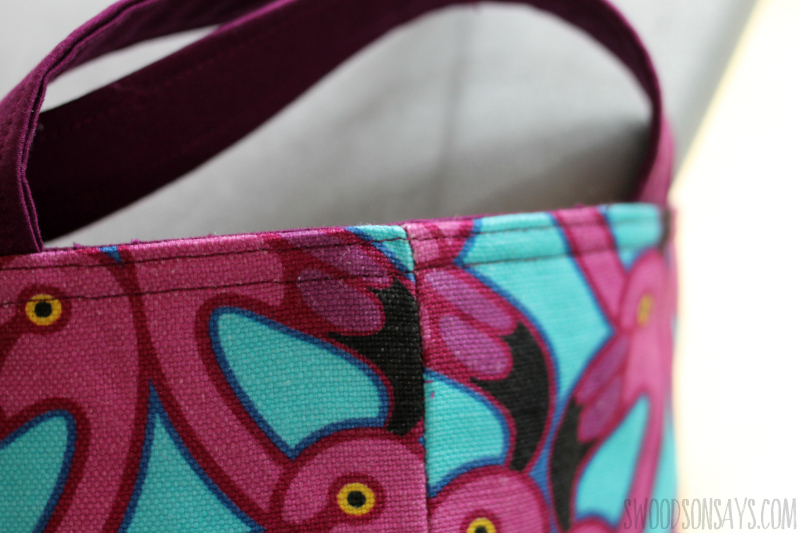
I used the same fabric, but with two different size scales! I’m no pattern designer; I used the new myfabric option (this is the art deco flamingo in midweight linen/cotton blend) from JOANN.

Here’s an example of the larger size, sewn from an old quilt! All I did was skip the interfacing and use webbing for straps, I’m going to write a separate tutorial with some other tips soon.
If you like sewing bags, you’ll like these other posts too!
- How to sew an upcycled leather purse
- The best knitting project bag sewing pattern
- Bohemian Carpet Bag – A Purse Pattern Review
- DIY Canvas tote bag
- 12+ DIY purse patterns to sew for kids
- Upcycled tote bags – 13+ ways to makeover a logo tote
The finished adult bag is roughly 13″ tall and 14″ wide at the top, the child bag is roughly 9″ tall and 9.5″ wide at the top. I wanted something that slid easily over our shoulders, so many tote bags we own have handles that are too short. 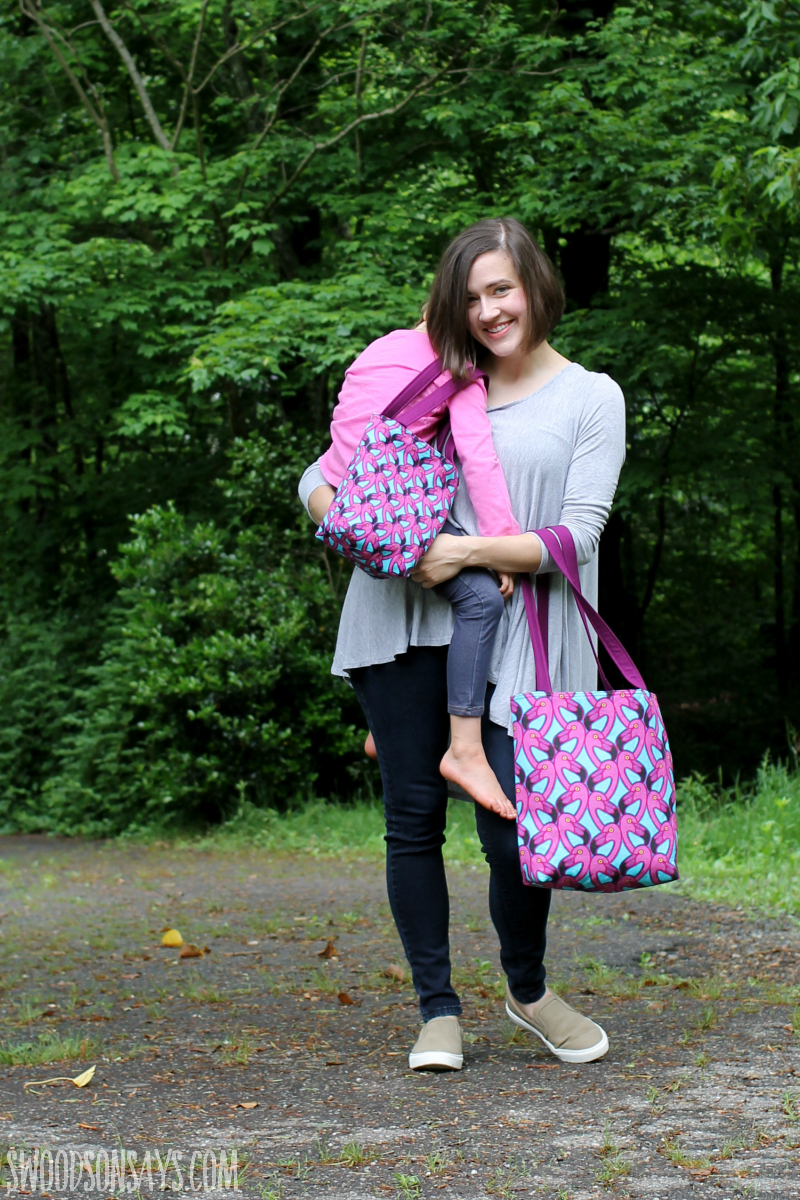
We have a big road trip coming up soon and I’m excited to see what she stuffs in this sweet little bag while she is packing!
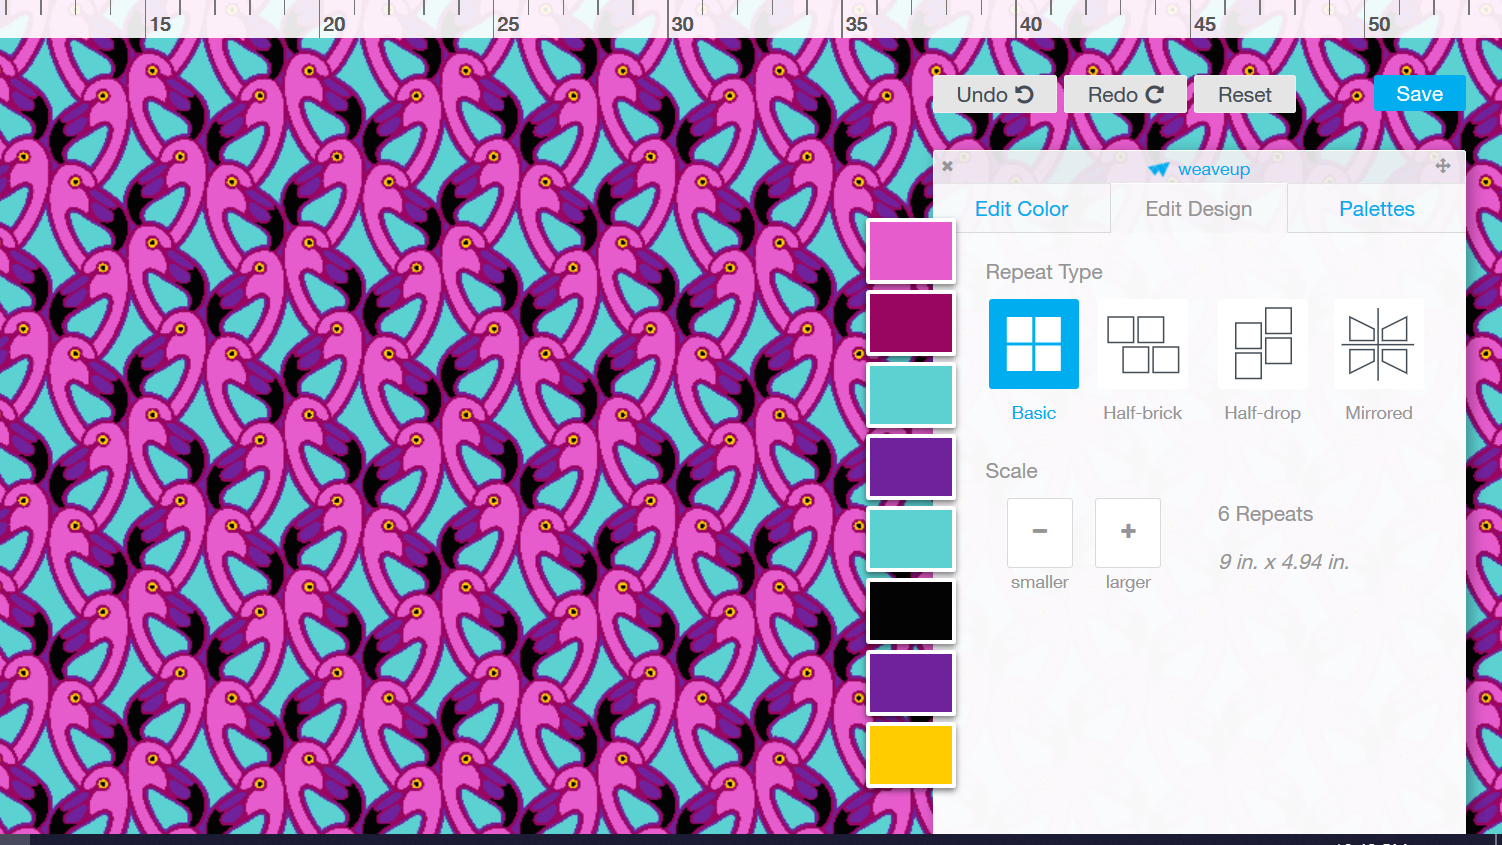
Here you can see the art deco flamingo in midweight linen/cotton blend, and how I changed the colors.
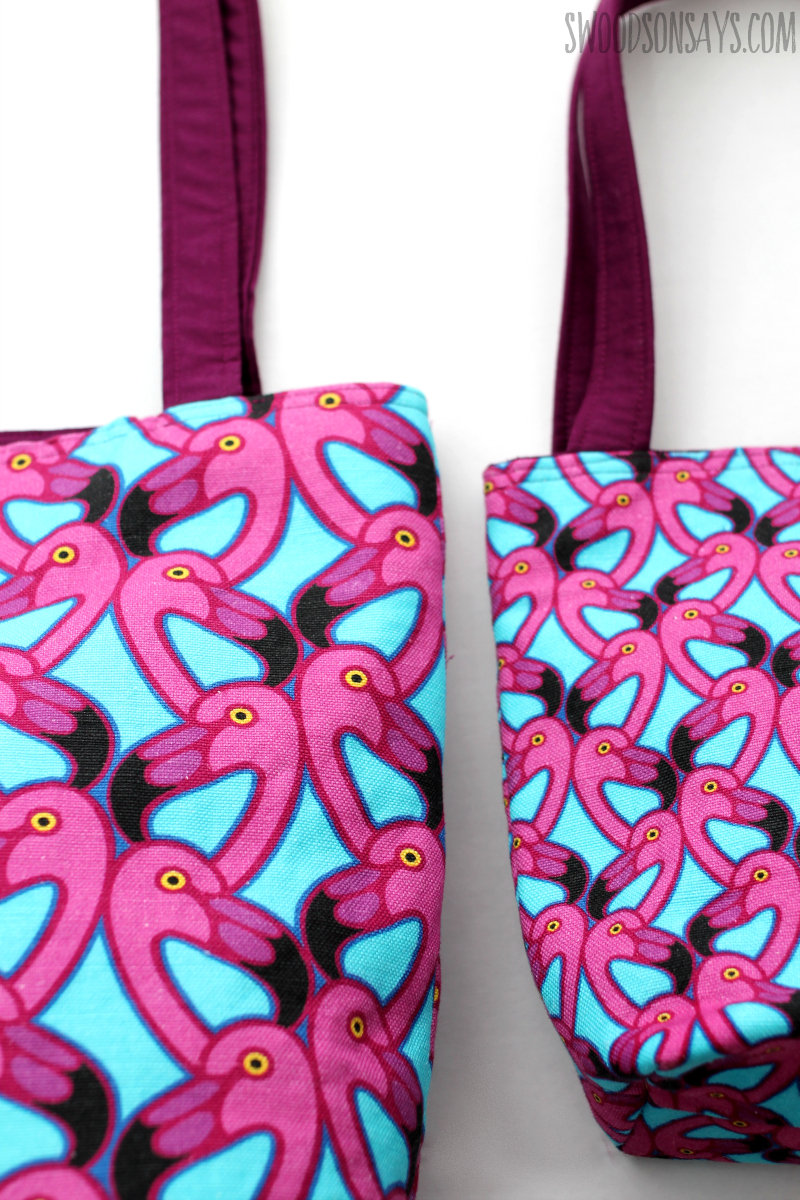
This is a close-up of how the different scales look in real life!
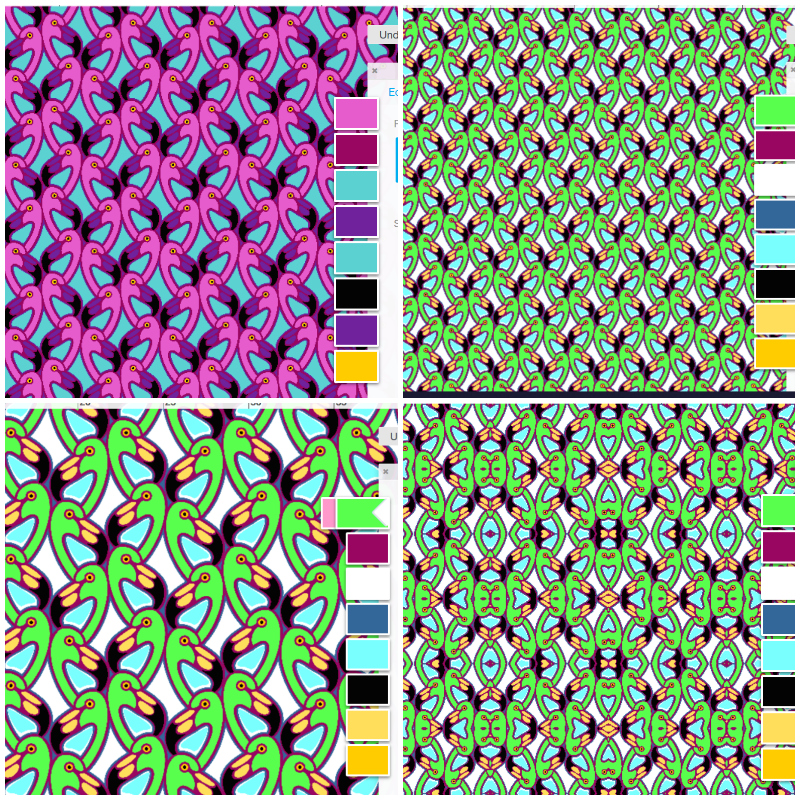
I thought I’d show some of the other options; in addition to colors you can play around with reflections, scale, and repeats. They have over 4,000 designs to choose from so it’s a great tool for semi-custom fabric and can be printed on a bunch of unique substrates. I want a funky silk/cotton shirt with these flamingos on it!
Pin this easy tote bag pattern for later with this link or collage image:
Ready to make your own? It’s super fast!
Easy tote bag pattern
Supplies
Supplies are listed for one adult bag and additional supplies would need to be purchased for one kid bag.
- 1 yard fashion fabric for the outside – woven cotton or home decorator weight (I used art deco flamingo in midweight linen/cotton blend)
- 1 yard lining & strap fabric – woven cotton (I used kona cotton berry)
- 1 yard fusible fleece (optional)
- Coordinating thread
- Rotary cutter
- Quilt ruler
- Quilting clips
- Iron
Steps
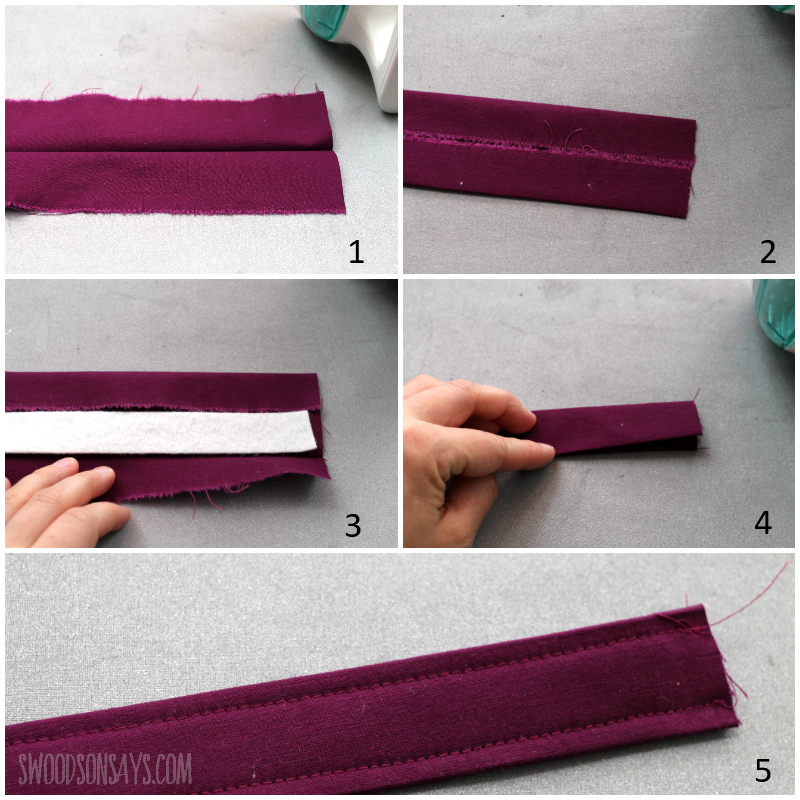
Step 1- Let’s make straps! For the adult straps, cut two straps 4″ wide and 27″ long (child: 4″ wide, 20.5″ long). Fold each strap in half lengthwise, and press (1). Open the strap back up and then press each long side to the crease you just formed, press again (2). If desired, cut a 7/8″ strip of fusible fleece as long as each strap. Open up one side and tuck it under, folding back into place and using the iron to adhere it as directed (3). Fold the strap back in half and press again (4). Stitch along each long side (5).

Step 2: From the outer fabric, cut 2 rectangles 15″ wide by 16″ tall (child: 10.5″ wide, 12″ tall) and cut a 2″ square out of each bottom corner. Repeat for the lining fabric. 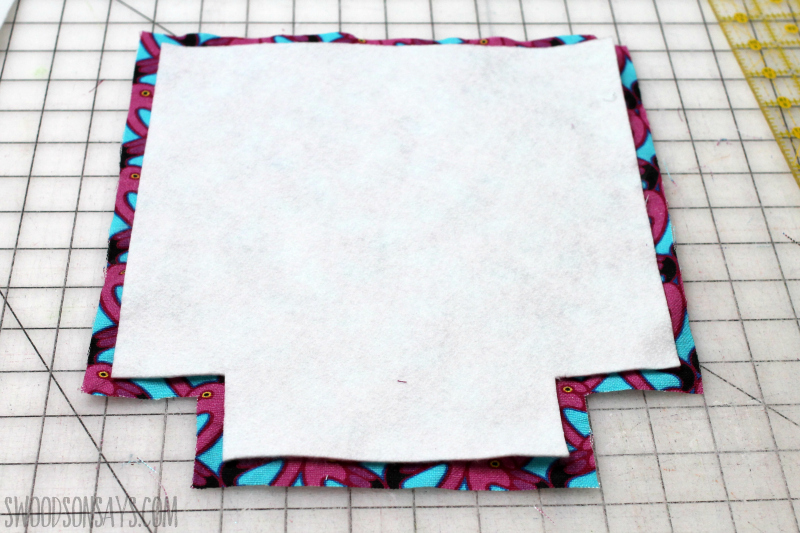
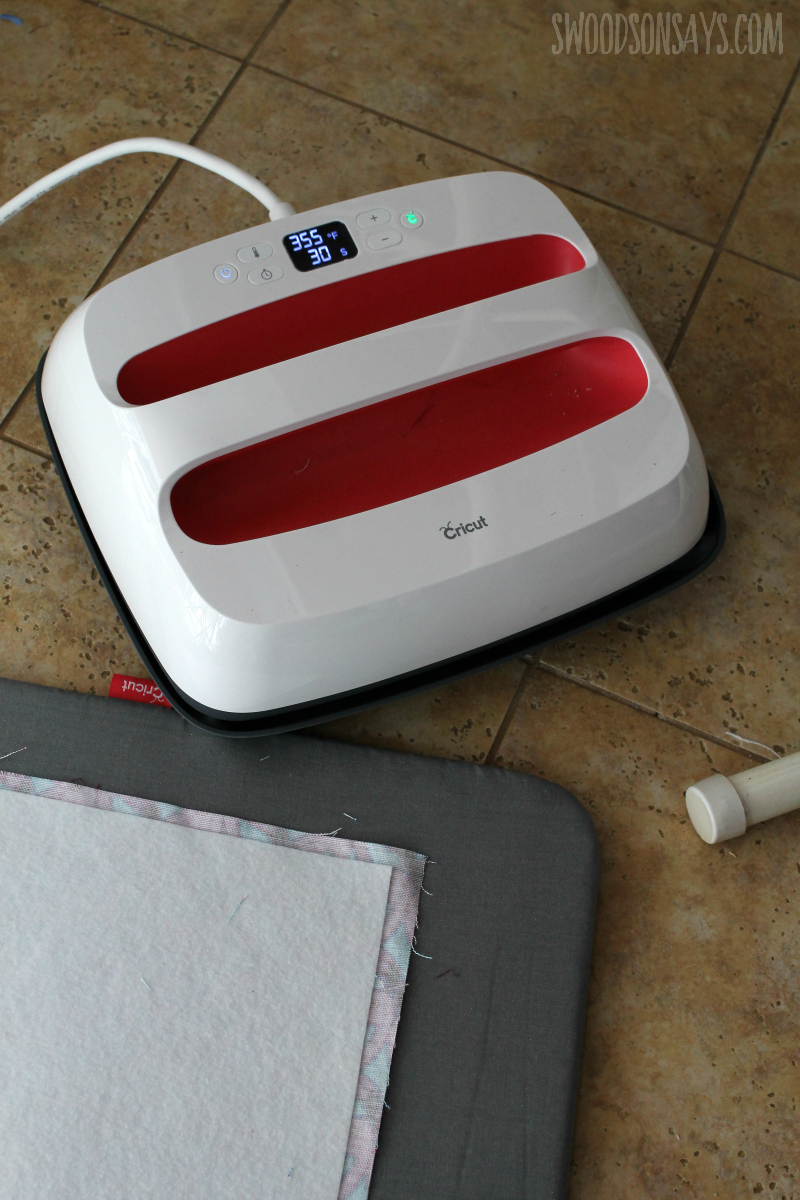
Step 3: If desired, use one of the main body pieces to cut out a matching one of fusible fleece, and then trim off 1/2″ off each side & the inner squares, creating a smaller piece that will keep the fleece out of the seam allowances. Adhere it to the fabric as directed – I used my Cricut Easypress 2! 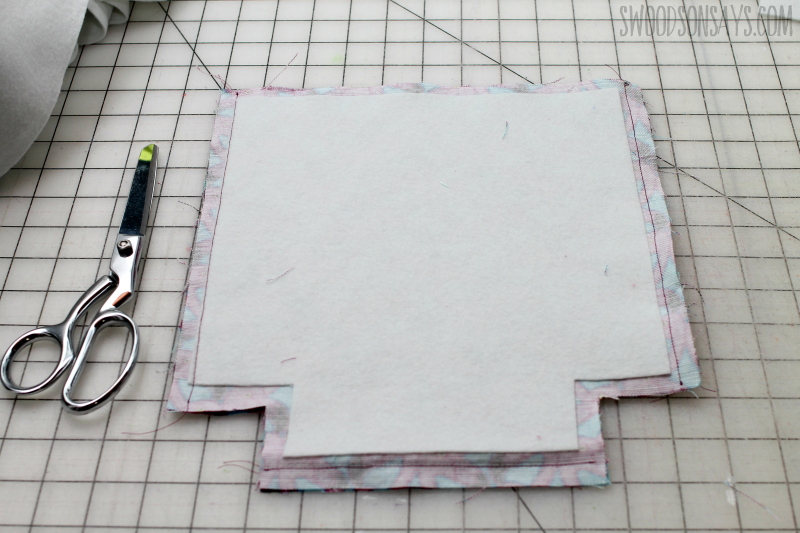
Step 4: Sew with a 1/2″ seam allowance along the side and bottom straight edge. Press the seams open. 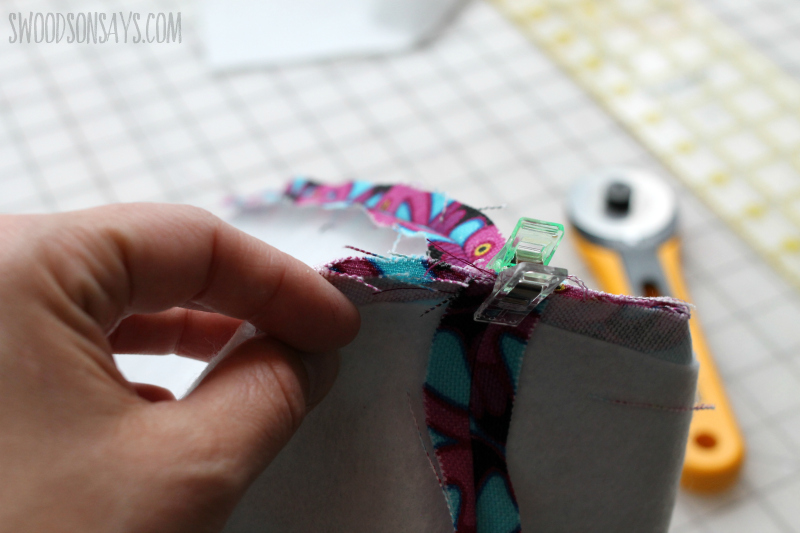
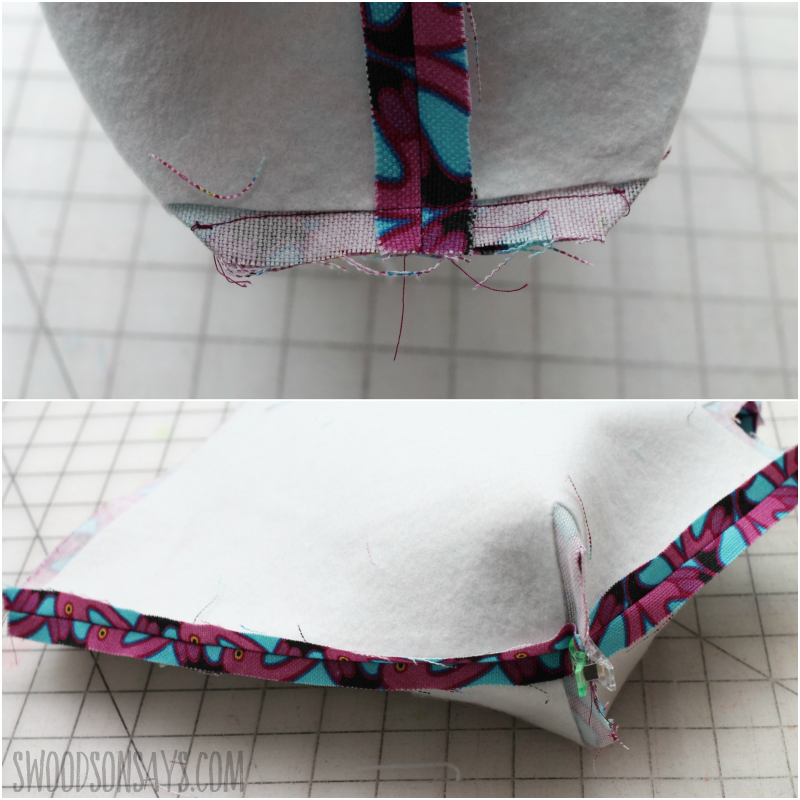
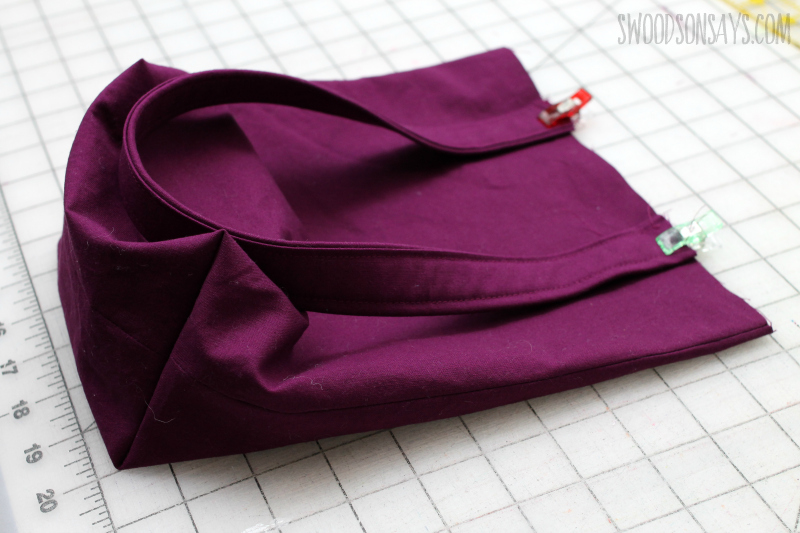
Step 5: You’re going to now fold each corner up so the seams match up. Clip to keep them steady and sew with 1/2″ seam allowance.
Repeat steps 4 & 5 for the lining fabric as well.
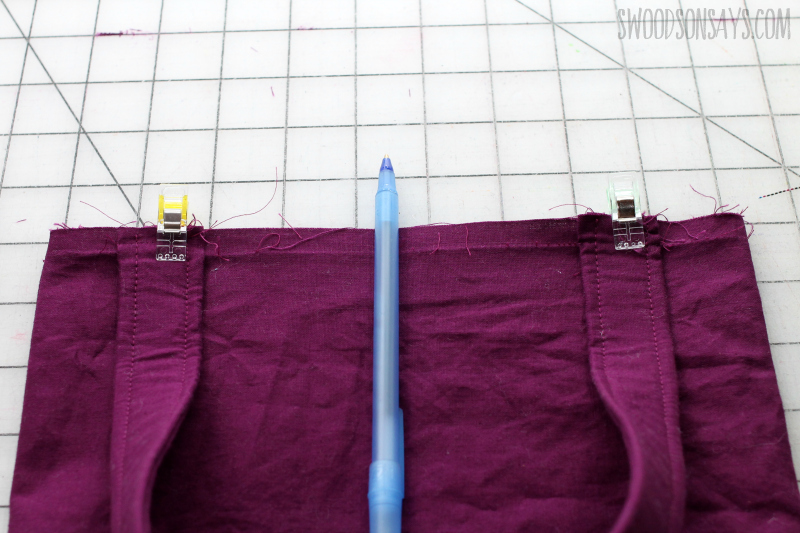
 Step 6: Turn the lining right side out and then clip the straps on, 2.5″ inches in from the outer seam (2″ in for the kid’s version). Baste stitch each strap on to both sides to make it easier on yourself, then they won’t slip during the next step!
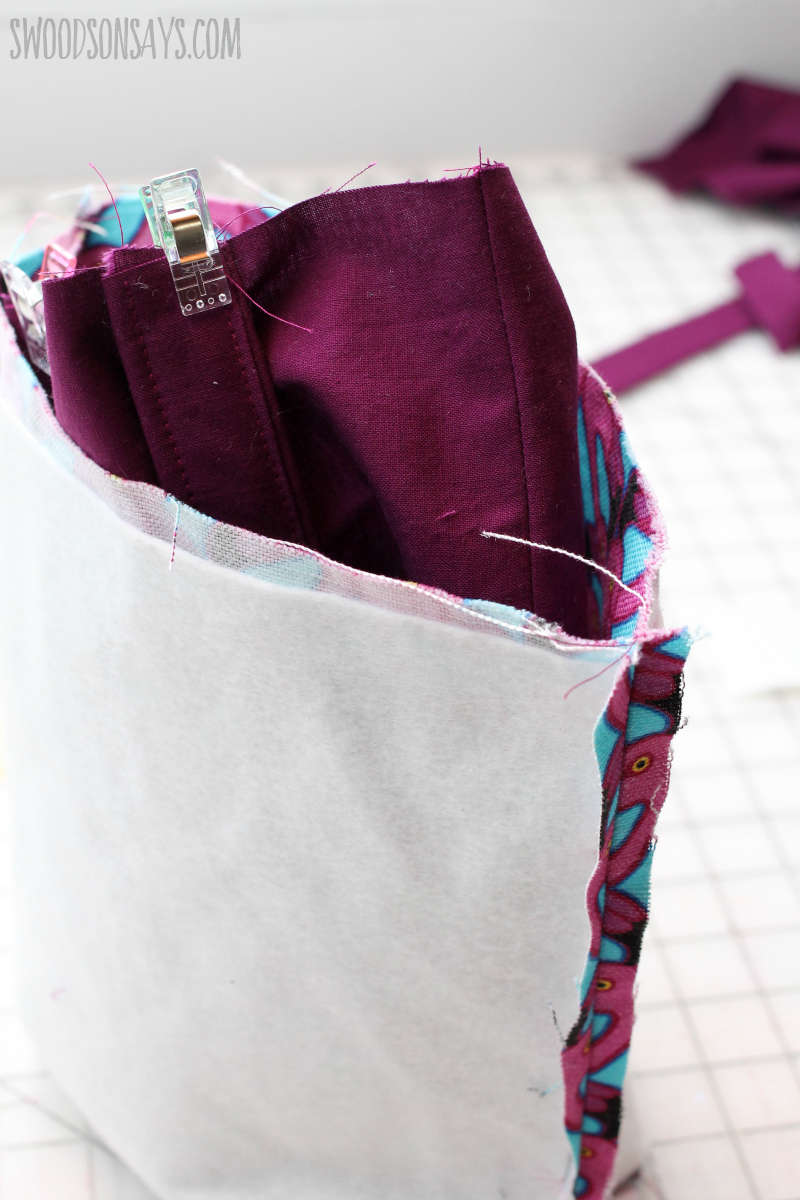
Step 7: Keep the outer bag wrong side out, and layer in the lining that is right side out, with the straps down and sandwiched in between the layers. 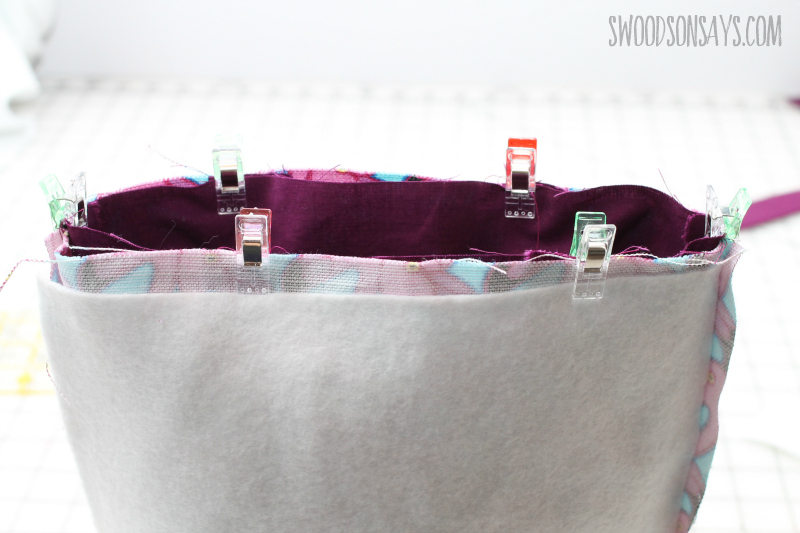
Step 7: Pin it all around, matching the side seams, and sew with 1/2″ seam allowances- leaving an opening between the straps for turning. 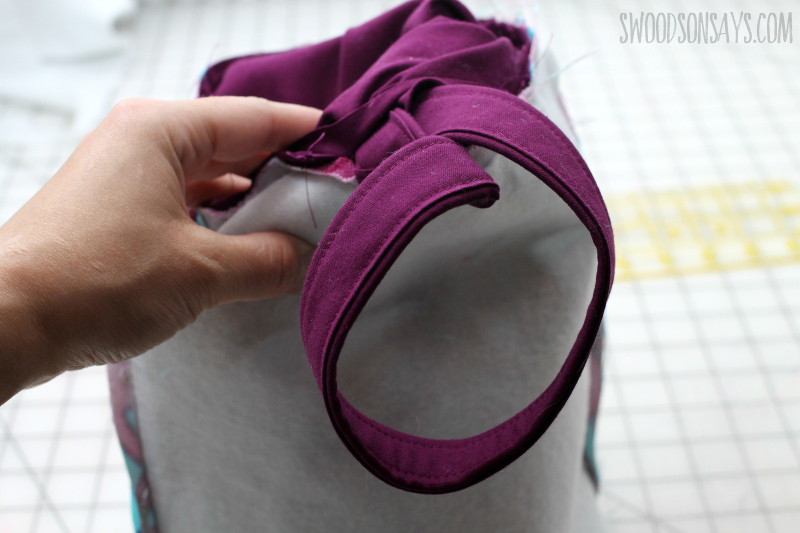
Step 8: Gently pull the bag through the opening you left, taking time not to stretch it out. Tuck the seam allowance inside and press the entire seam around the top.
Step 9: Top stitch around the top, securing the straps and closing the opening.
You’re done! Please leave a comment if you try this tutorial, I’d love to see your finished project!
Terri
Monday 2nd of December 2024
Thank you so so much. I searched the internet to find a very simple lined bag to make all my friends for Christmas This is it!!!!!!
Stephanie - Swoodson Says
Wednesday 4th of December 2024
aw yay! happy sewing!!
Peggy
Thursday 25th of July 2024
I like this tutorial. Easy to follow
Stephanie - Swoodson Says
Monday 12th of August 2024
glad to hear it Peggy :) thanks for leaving a comment!
Kelly
Wednesday 13th of March 2024
I see ‘sew’ many bags with step by step instructions but seldom with the sewing machine settings…. Stitch length and width and tension. For us newbies, this would be a huge help.
Stephanie - Swoodson Says
Sunday 24th of March 2024
hey Kelly! I agree - and I have definitely shared settings on other tutorials but for this one it is all standard, no adjustments needed!
barbara
Monday 4th of March 2024
I did NOT see any pattern
Stephanie - Swoodson Says
Monday 4th of March 2024
correct, I guess, there is no printable pattern of rectangles - there is a full tutorial with measurements though?
barbara
Tuesday 6th of February 2024
I did not see any pattern for this project, please don't advertise that there is a free pattern if you are not going to put an actual pattern in your site because that is VERY misleading and very disappointing
Stephanie - Swoodson Says
Monday 4th of March 2024
why do you keep commenting on the same pattern? I have had dozens of people thank me for this tutorial and send photos of their cute totes. Hope you find what you're looking for out there, but leaving complaints on my blog post isn't going to move me to create a downloadable PDF pattern for this project of rectangles for you.