
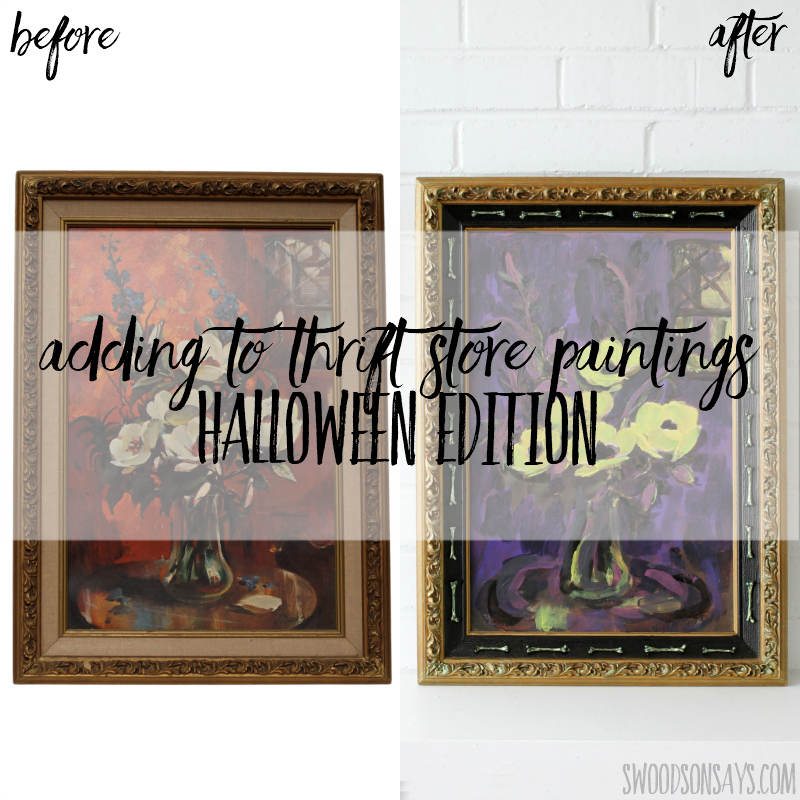
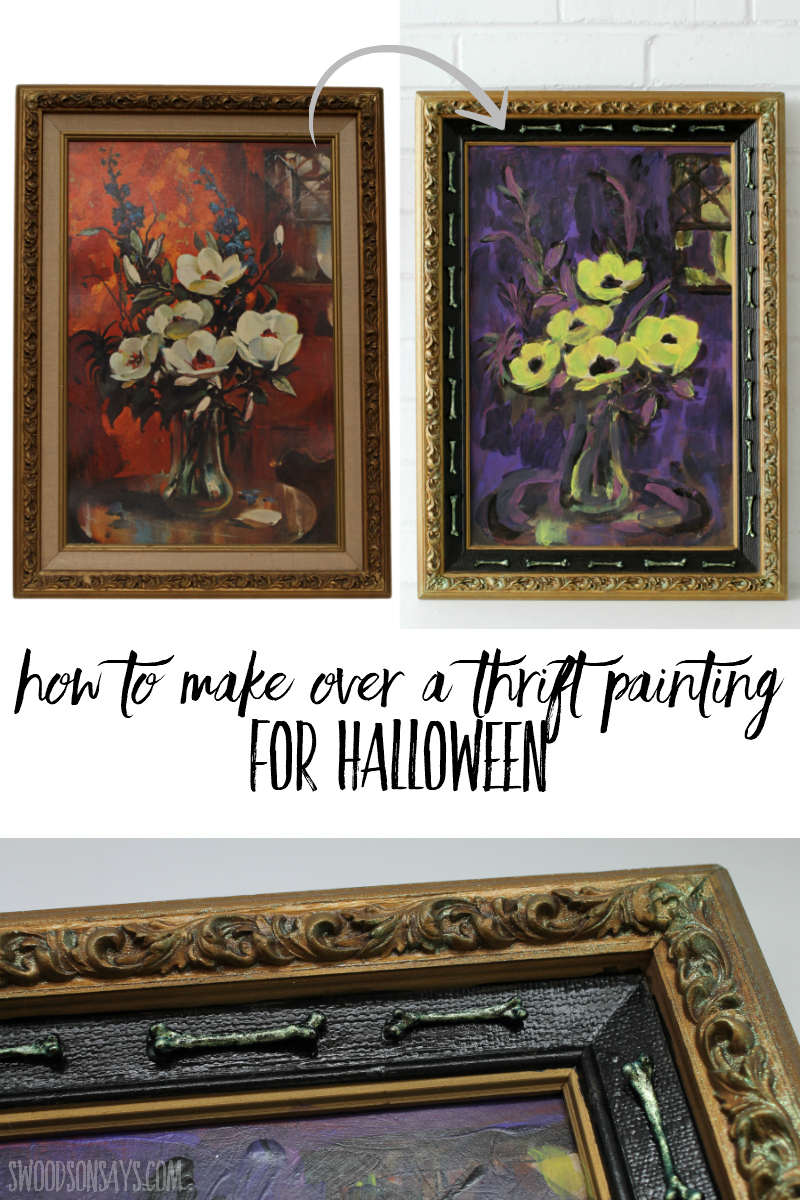
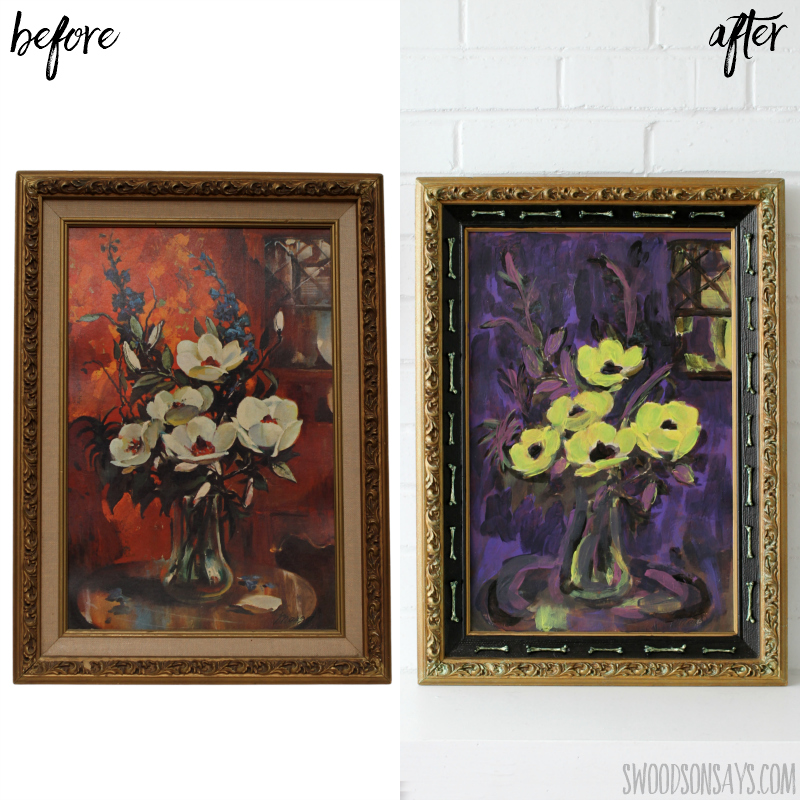
Adding to thrift store paintings – Halloween edition! This is a 3-year-long upcycle craft project, which is embarrassing because it did not take that long if you added up the actual hours put in. But, the message to take away, is that it’s never too late! I had a lot of fun making this boring floral into a gothic, spooky death bouquet that will be perfect DIY Halloween decor! Keep reading to see the steps I took; I would love to hear if you try it! Rescue all the generic art!
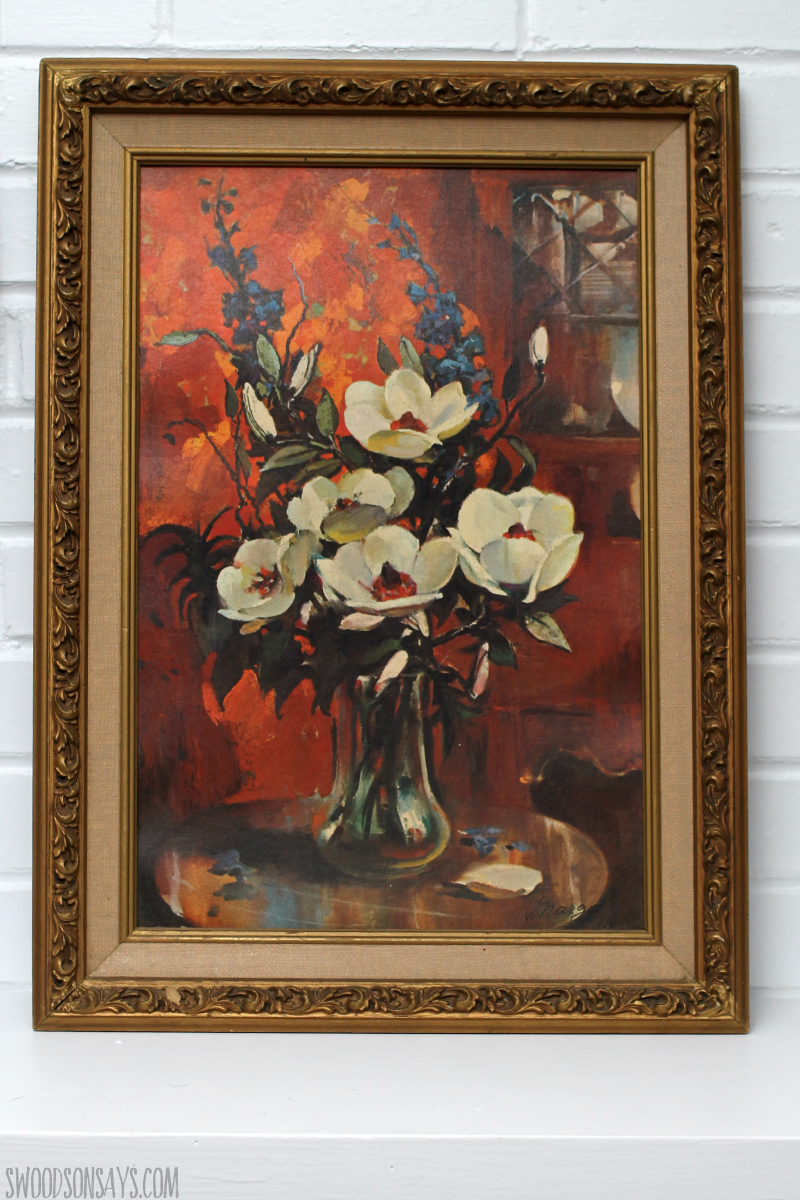
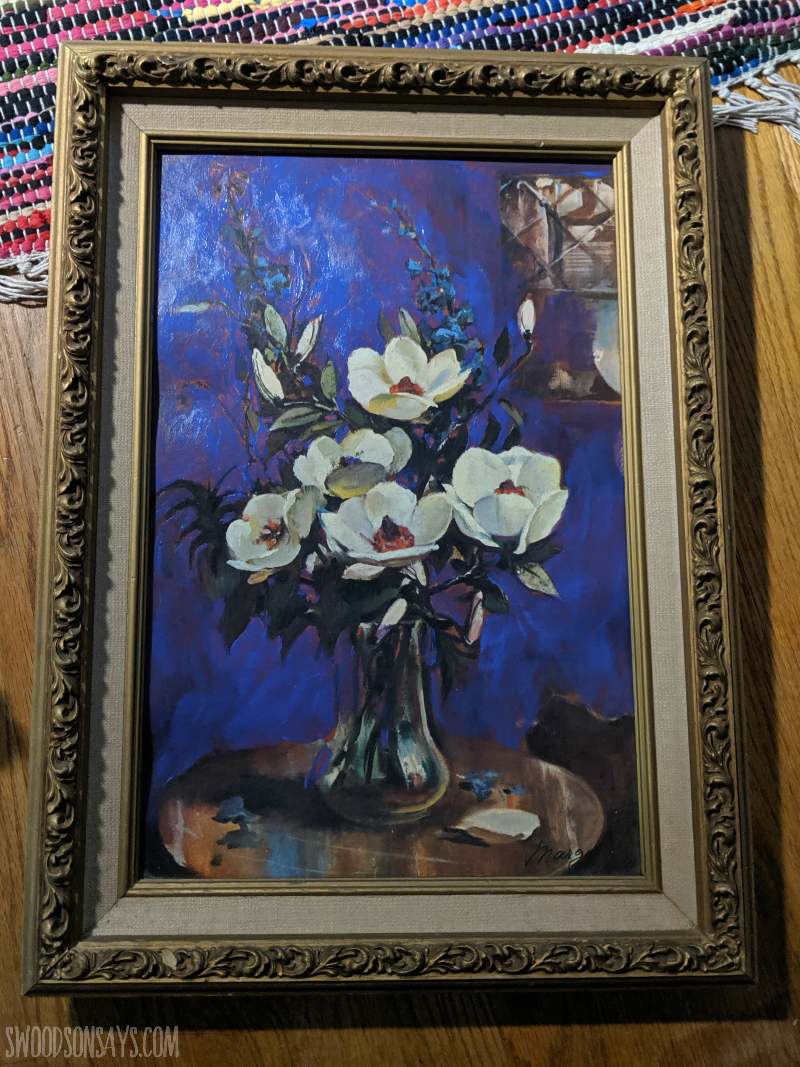
Here is the full ‘before’; the back is all ripped up and there are little rips all over the cardboard painting so I didn’t feel very guilty about making it over.
If you like this post, check out these others while you’re here!
- 25+ Halloween sewing projects
- 15+ modern halloween cross stitch patterns
- 20+ Halloween hand embroidery designs
- 31 Modern Halloween quilts
- 20+ thrift store painting makeover ideas
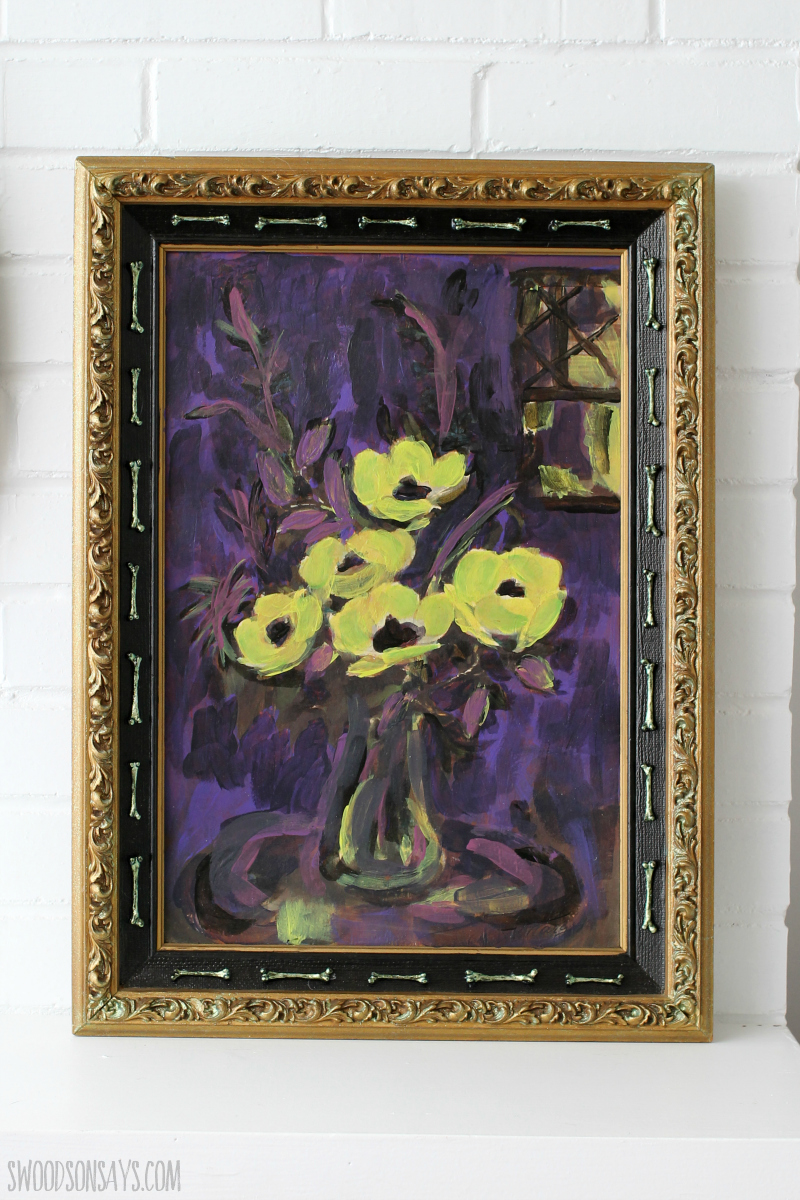
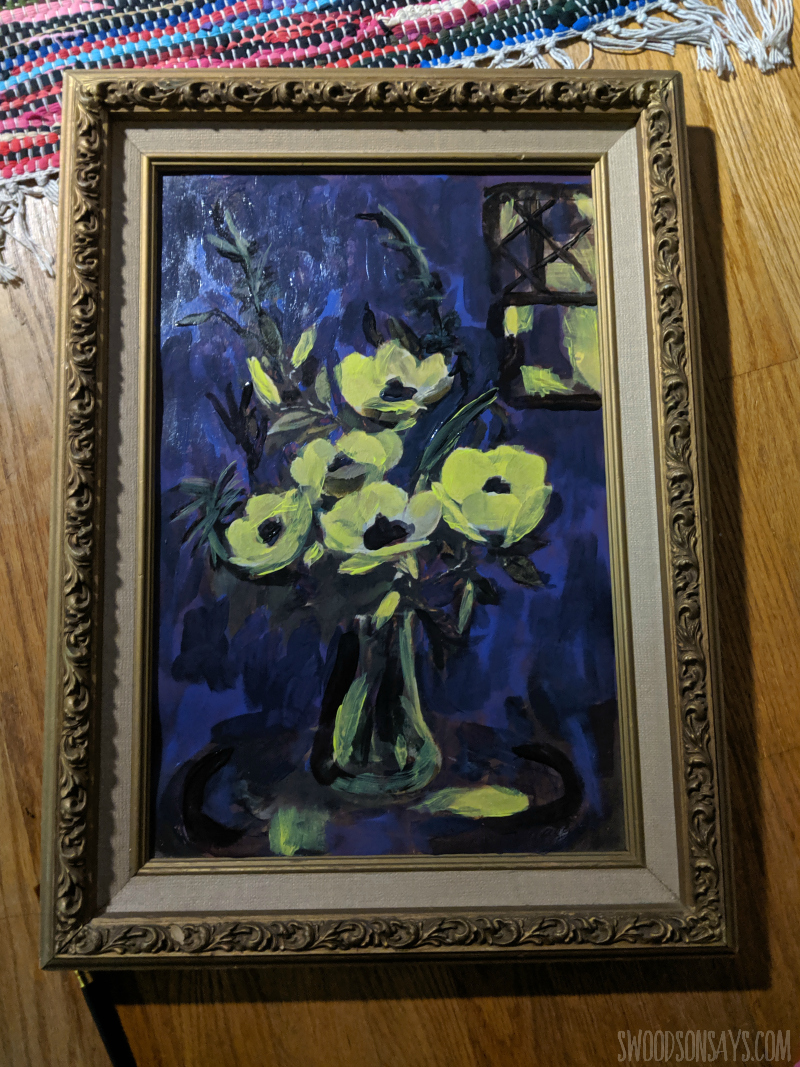
Here’s the finished ‘after’! I’ve never done anything like this or even painted really, so this was a fun experiment. I bought it with the idea in 2018 but ran out of time before Halloween, painted it in 2019 but then couldn’t find bones in the right size, cue 2020 when I finally found mini bones, in time for Halloween, and here we are!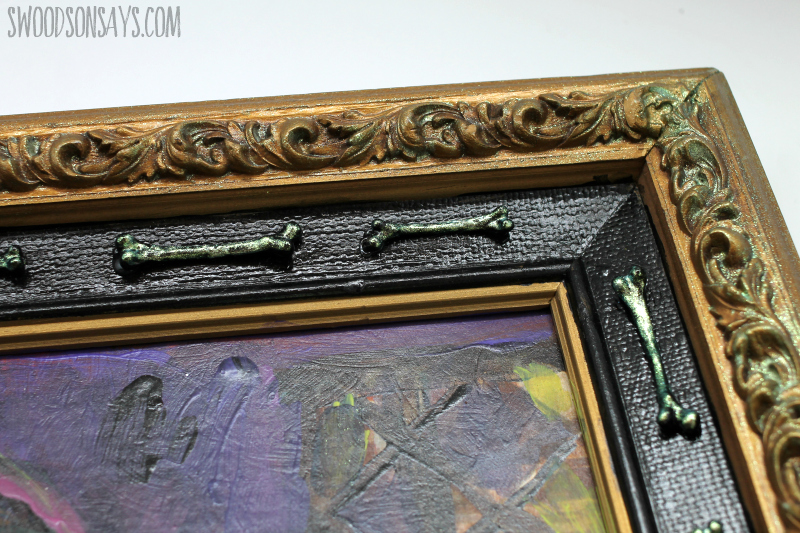
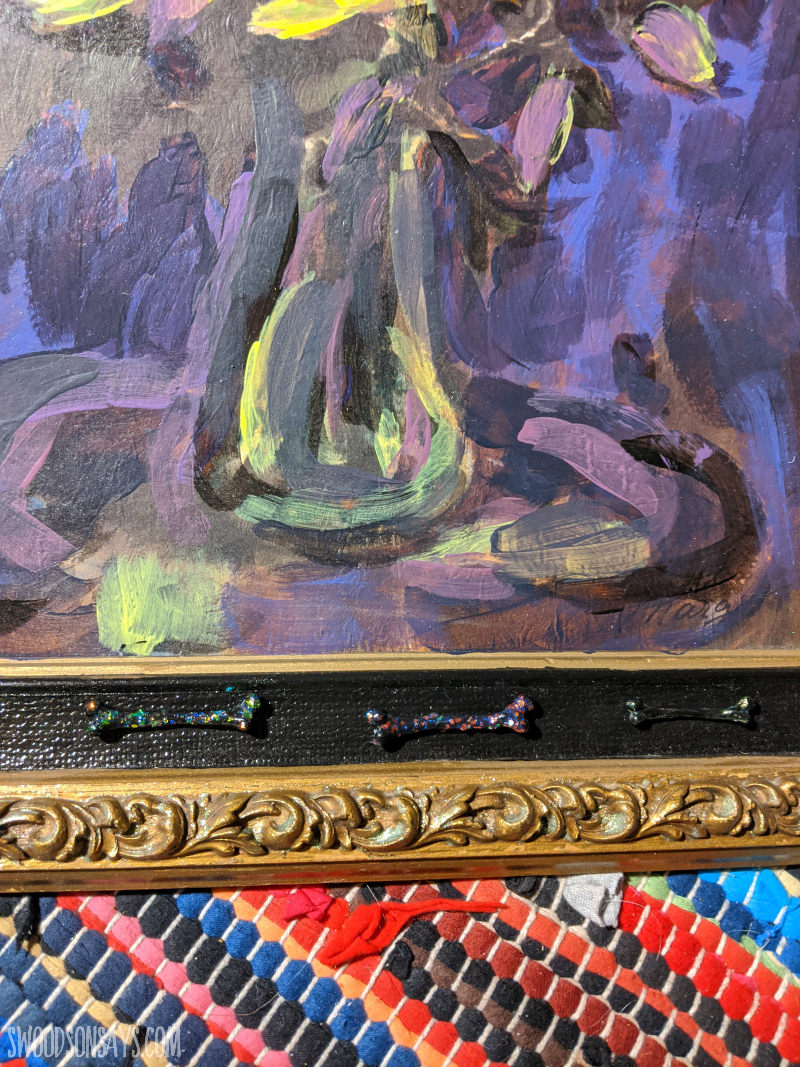
Those suckers are hard to photograph with the iridescent layer, but here you get a better feel for them at least. I used the same color changing paint on the gold frame in addition to the bones.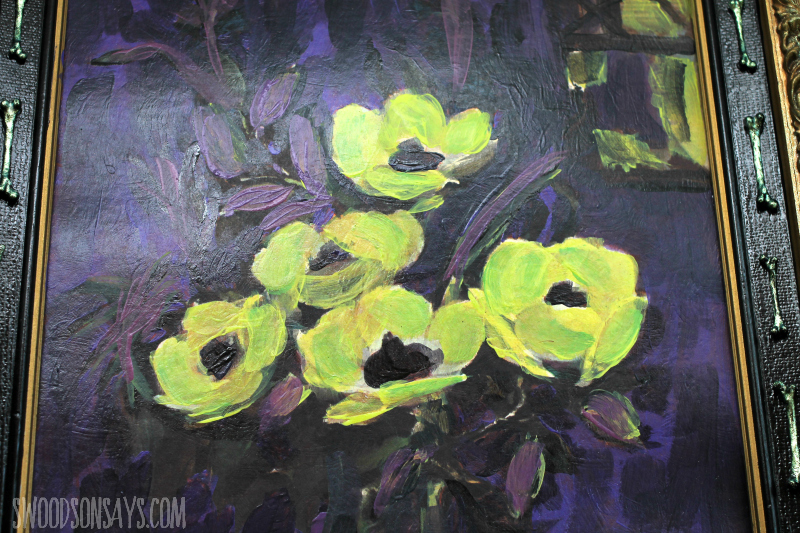
Here’s a closeup of the flowers! In retrospect, a huge mistake I made was not painting in layers. I was impatient and wanted to just do it all at once, which led to some muddying of colors and not as much depth. But who knows, maybe even if I’d let it dry properly, I still would’ve struck out. I’d love to learn more about how to actually paint!
Pin this upcycle tutorial for adding to thrift store paintings – Halloween edition with this link or collage image below:
Adding to thrift store paintings – Halloween edition
Supplies
- Painter’s tape
- Small resin bones
- All surface acrylic paint in desired colors (shop- Amazon)
- Iridescent paint (shop – Amazon)
- Paintbrushes
- Hot glue
Steps
Step 1– Just giving visuals as I went; here you can see what a big difference just the background take with some new colors.
Step 2– Room for improvement here, but you can see all the colors filled in. I also added some glow in the dark layers but they never glow particularly brightly so I’m not recommending it as worth the extra money or time.
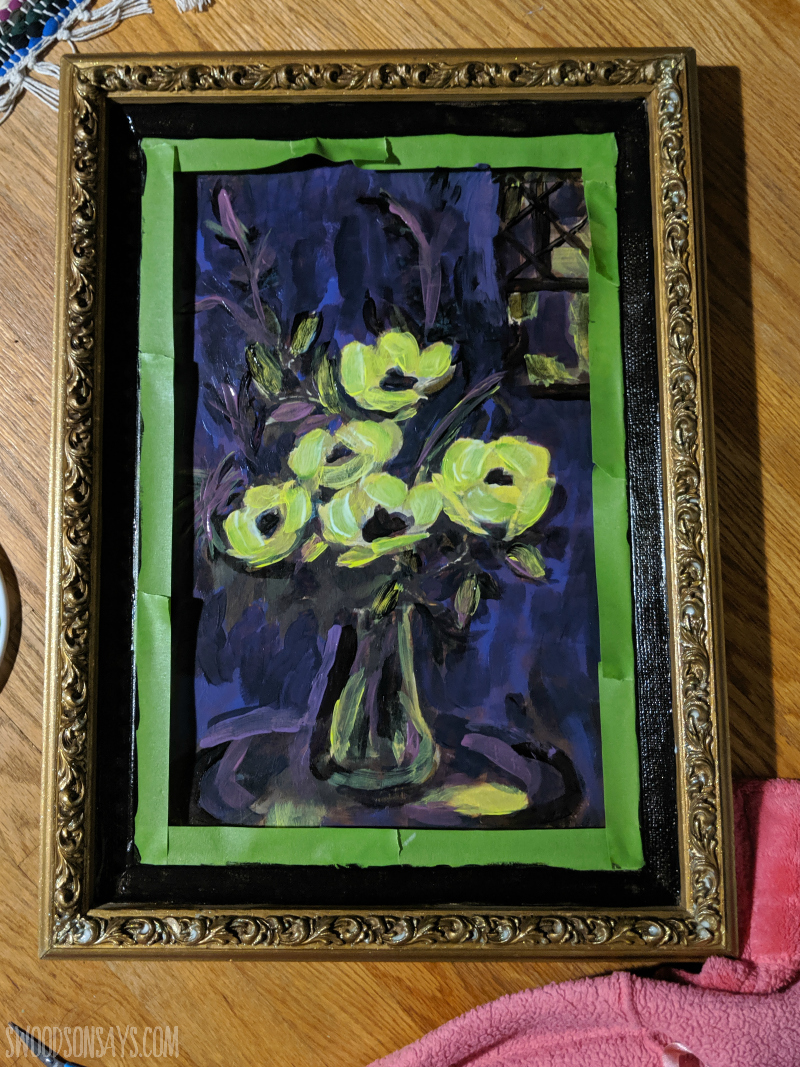
Step 3– Next I used painter’s tape to tape off the border and paint it black. Here is also where I ued the iridscent paint on the frame.
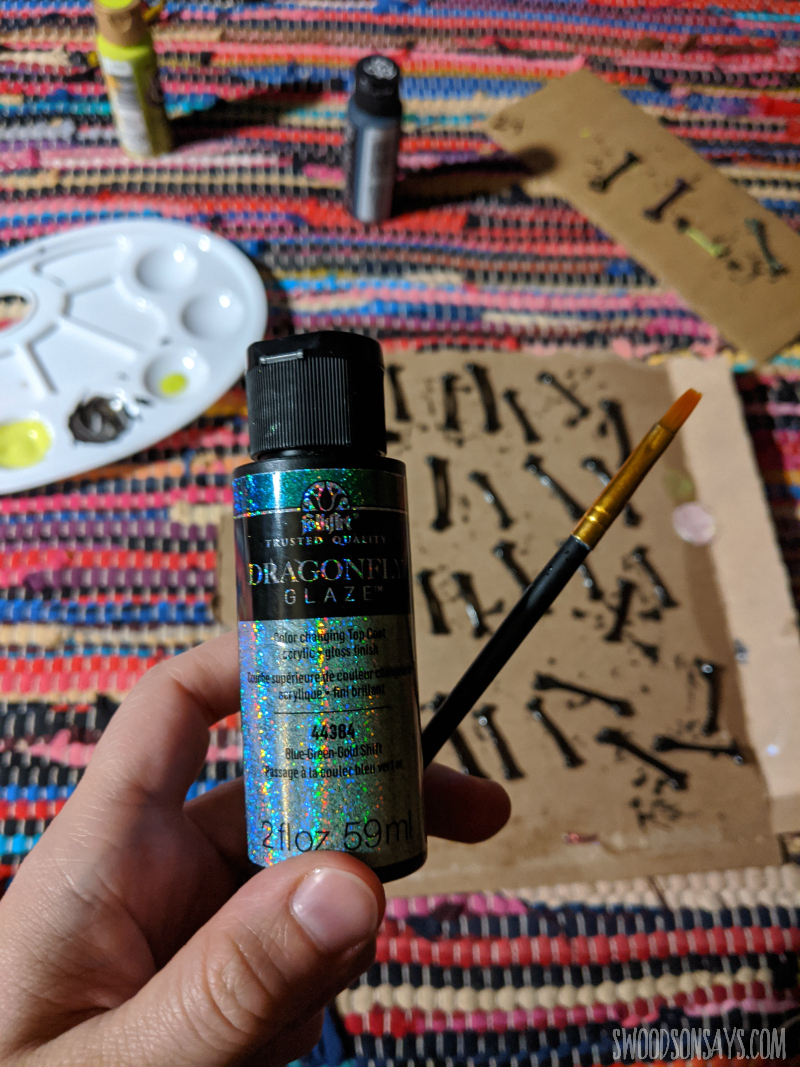
Step 4– Time to paint bones! I did 2 coats of black first, then ended up experimenting with iridescent and glitter paints. After a trial, I opted for the iridescent.
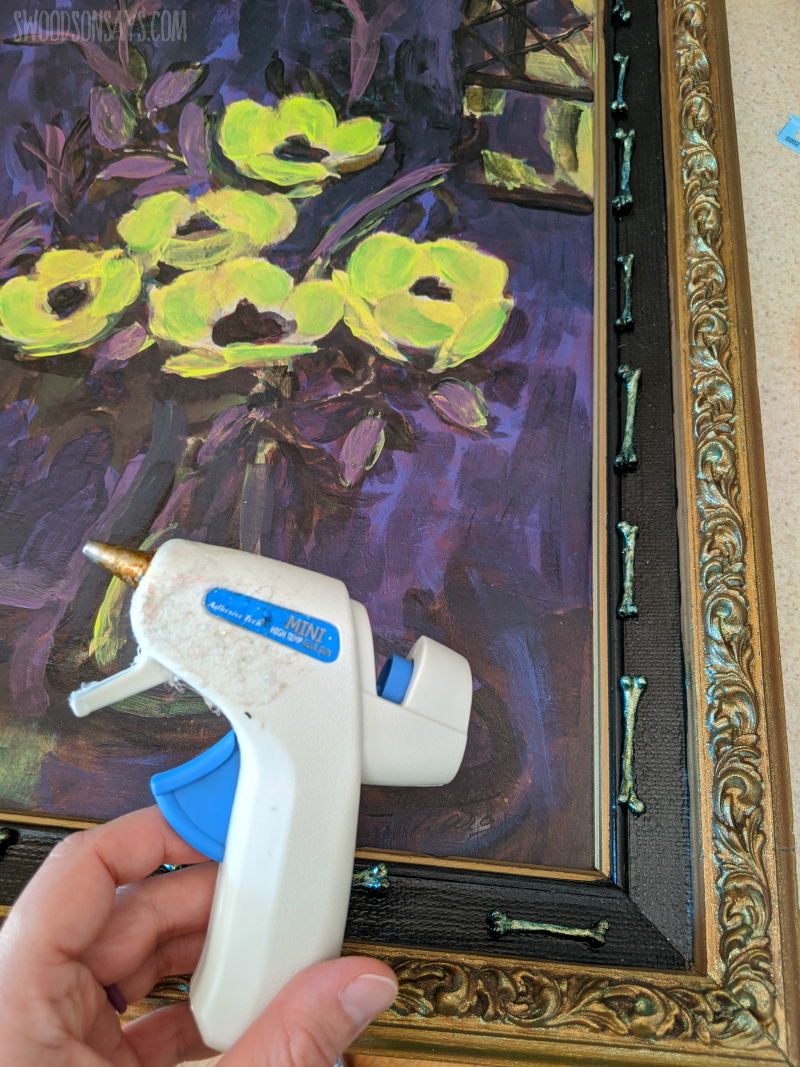
Step 5– I laid them out, hot glued them down, and I’m done!
Janie
Saturday 30th of September 2023
Love this idea!!! I’m going to have my eye out for some cheap paintings. Yours turned out so good!!!
Jenn
Monday 26th of September 2022
Love this upcycle! What a great idea. I always skip stuff like this when thrifting but will not overlook them going forward. Thank you for the inspiration :D
Stephanie - Swoodson Says
Friday 7th of October 2022
Love to hear that Jenn :)
Amanda Lake
Friday 1st of October 2021
Cute idea. Nice upcycle and not too scary.
Stephanie - Swoodson Says
Friday 1st of October 2021
thank you Amanda!!
Susan Lindeman
Wednesday 23rd of September 2020
I love it! Almost looks like it could glow in the dark. The tiny bones are the perfect accent.
Stephanie - Swoodson Says
Friday 25th of September 2020
Thanks Susan!! I was delighted to find them, finally.