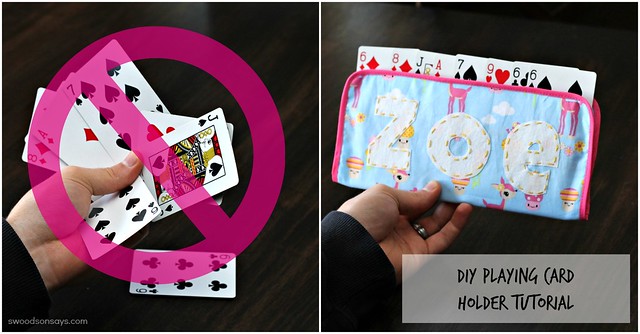
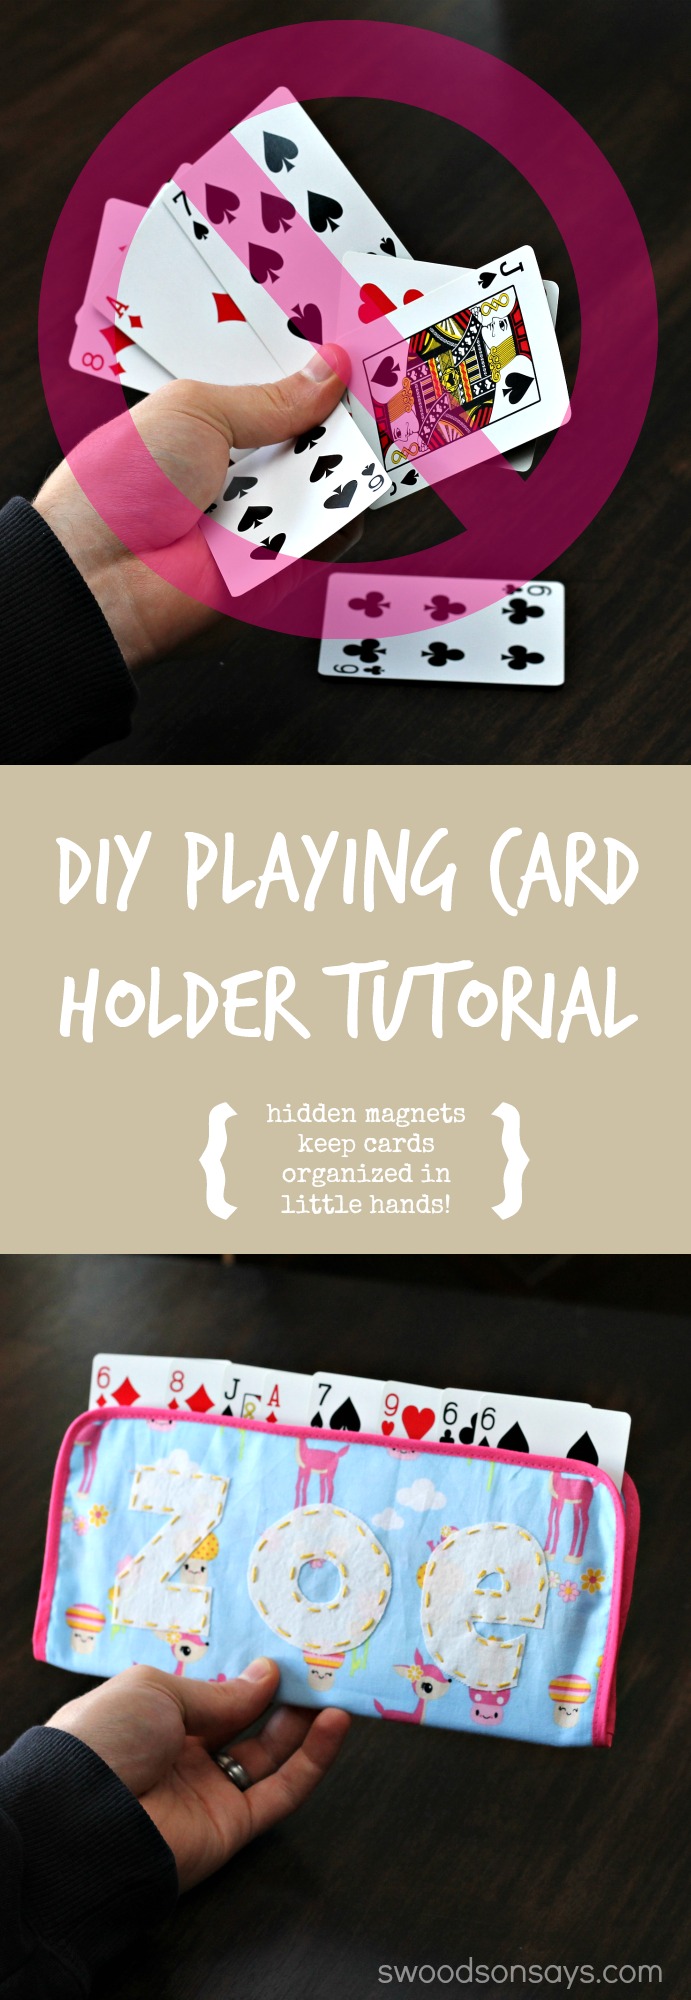
We love board games in my family! My niece is 4 and has been complaining about not being able to hold all her cards at once, so my brother asked if I could come up with a solution. This DIY playing card holder tutorial is the result! Lots of opportunity for personalization with fabric, applique, colors, etc. and you have a great, unique gift for a kid.
The cards are held in place by magnets, so I want to be very clear that you need to remember to be careful! Not only are they dangerous if kids ingest them, but they can also damage laptops and electronic sewing machines. I was cautious to keep mine away from the machine’s control panel and am confident my niece is old enough to avoid cutting this up and snacking on the magnets.
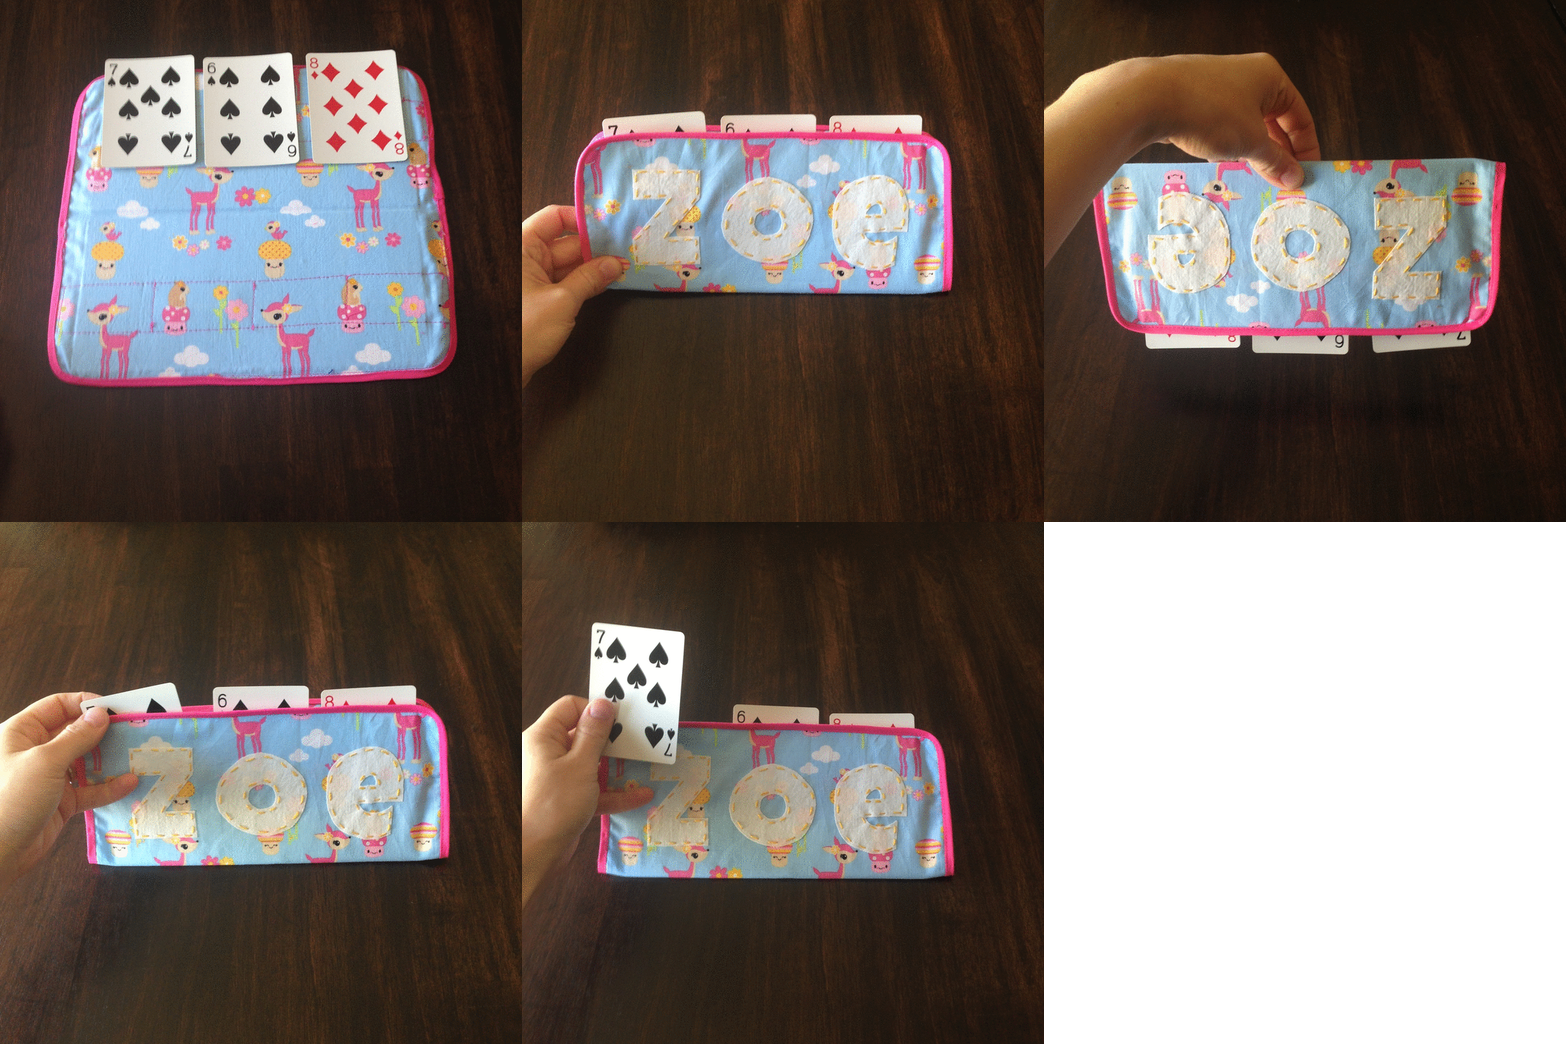
Here is a gif that does a better job of showing how it works – the interfacing tempers the magnets’ strength so the cards are held in place but easy to pull out as well.
{This post contains affiliate links, indicated by an asterisk*. Please refer to ‘legal stuff’ in the top menu for more info.}
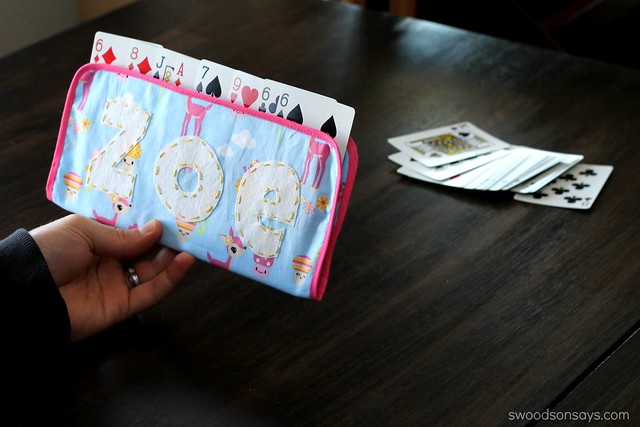
Perfect for fending off would-be peekers as well!
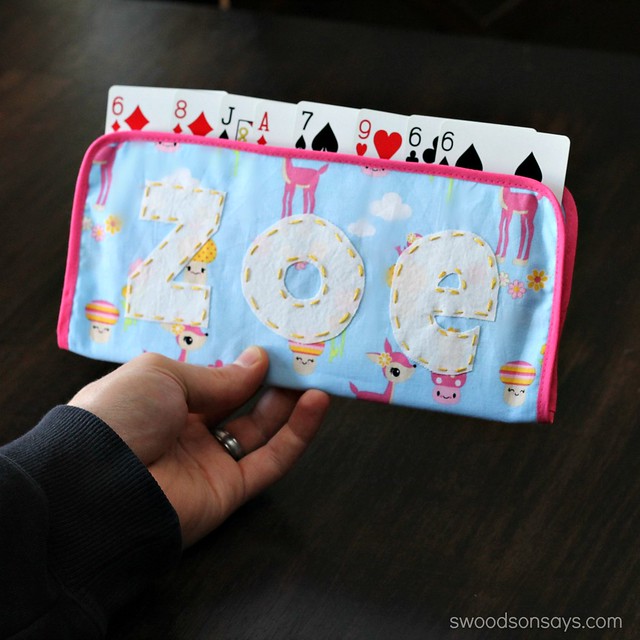
DIY Playing Card Holder Tutorial
Supplies
- 50″ of single fold bias tape (1 package will cover it)
- 3 rectangles of cotton woven fabric 10″ wide X 9″ tall (two of ‘pretty’ fabric and one can be scrap since it isn’t visible)
- 2 rectangles of double-sided, extra stiff fusible interfacing (like this) 8.5″ wide X 4″ tall
- 2 strips of cotton woven fabric 10″ wide by 2″ tall (not visible, can be scrap fabric)
- Iron
- 4 magnet sets – I used these name badge magnets* from Amazon
Steps
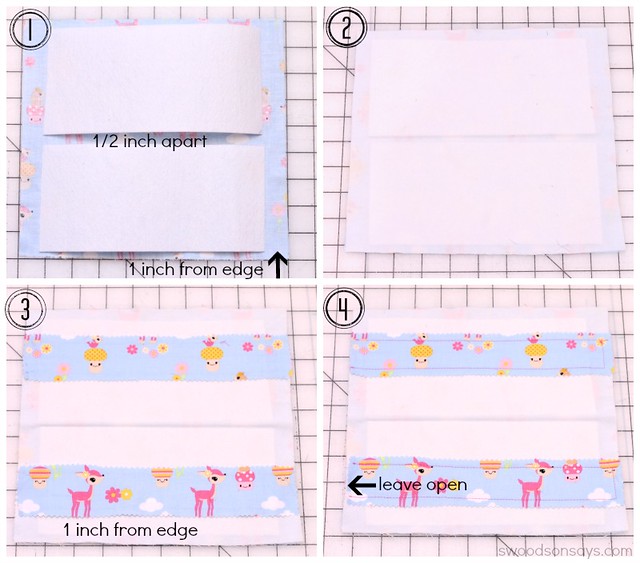
1. Lay one main rectangle wrong side up and position the two interfacing rectangles on top, spacing them so there is about 1/2 inch between the two interfacing rectangles and 1 inch of space from each edge.
2. Place the scrap/not-visible main rectangle on top of the interfacing and press firmly, until both sides are fused.
3. Position the two strips evenly on top of the interfacing sandwich, leaving 1 inch from each end.
4. Stitch with 1/4 inch seam allowance along 3 of the 4 edges, leaving the same short end open on each rectangle.
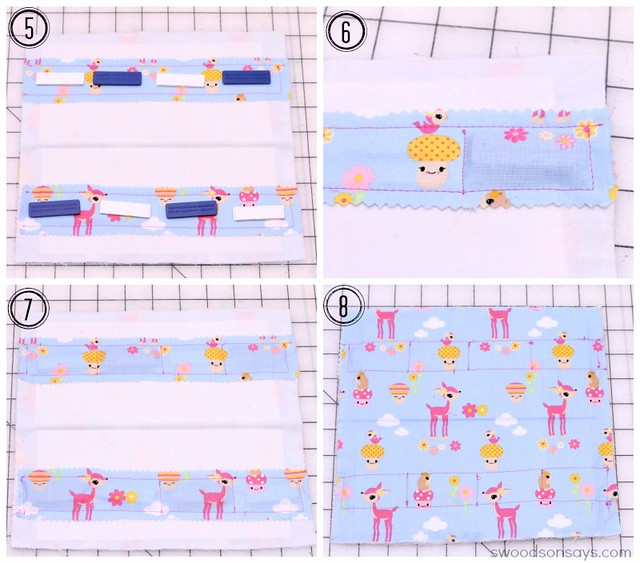
5. Lay out your magnets, making sure to keep opposites next to one another along each strip and matching up when the folder will be closed.
6. Slip one magnet in, being conscious to put it strength side down, and stitch a short line next to it so it’s in its own little pocket. The white fabric in the example will be covered up and represents the outside (embroidered ‘Zoe’ in the finished product) of the folder. So the magnets should be strongest when you’re folding it half, with the white fabric out.
7. Continue down the line until all eight magnets are secured.
8. This is what the other side looks like; this will be the inside of the card holder.
9. Showing you how the card holder is folding inwards.
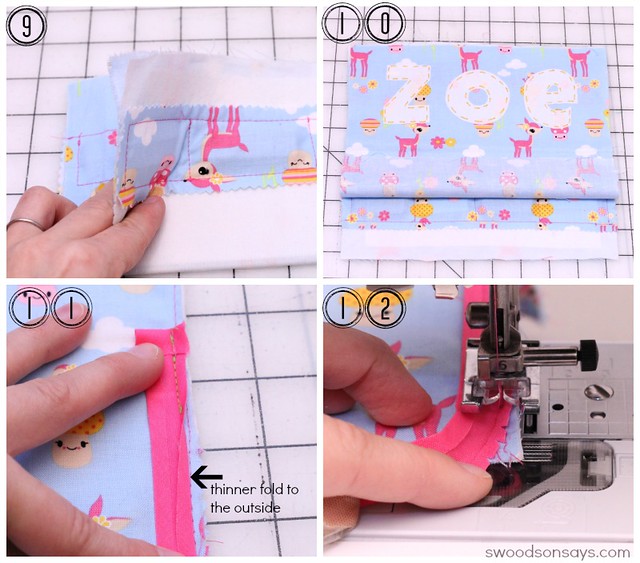
10. Layer your other ‘pretty’ fabric rectangle, right side up, over the top of the white layer. If you plan on decorating it, now is the time! Baste around all four edges, keeping all 3 layers aligned.
11. Fold over the top of your bias tape 1/4 inch and lay it, right side down, with the thinner folded side towards the outside of the card holder. Stitch in the crease all the way around.
12. Gently curve the tape around corners, clipping the outer edge to help it flex.
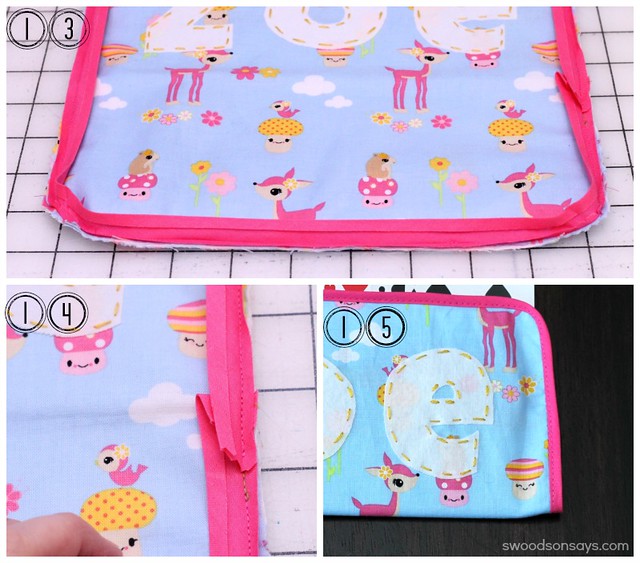
13. Sew all the way around the holder and trim the corners and edges.
14. Layer the bias tape end over by about an inch, leaving no raw edges.
15. Fold the bias tape over the edge and sew right along the top side, checking every few inches to make sure you are catching the bottom fold of the bias tape. Press and you’re done!

Joanie Mills
Friday 12th of December 2014
This is great for seniors as well, my mom is an active 99 yr old, playing bridge still, and will love this, I plan to make 4, one for each partner! Wonderful idea!!!
Stephanie - Swoodson Says
Sunday 14th of December 2014
Joanie, you are so right. I am not a senior, I just have shaky/small hands and I think I'll be making one for myself once my kids are old enough to play games with us :) So glad that you're going to make some!
Pam @Threading My Way
Tuesday 9th of December 2014
Brilliant idea, Stephanie!!!
Stephanie - Swoodson Says
Tuesday 9th of December 2014
Thanks Pam!!
Vickie B
Tuesday 9th of December 2014
What a great Idea. what child could not use one of these.
Stephanie - Swoodson Says
Tuesday 9th of December 2014
Thanks so much Vickie!
Abigail Jones
Tuesday 9th of December 2014
I think this is BRILLIANT! Great idea for children that would allow them to feel less confused when playing card games.
Stephanie - Swoodson Says
Tuesday 9th of December 2014
Thanks so much Abigail! Truth be told, I could use one too - I have tiny hands, ha!
Katie @ On the Banks of Squaw Creek
Monday 8th of December 2014
This is genius!
Stephanie - Swoodson Says
Tuesday 9th of December 2014
Thanks Katie! Hope you're staying warm this December :)