
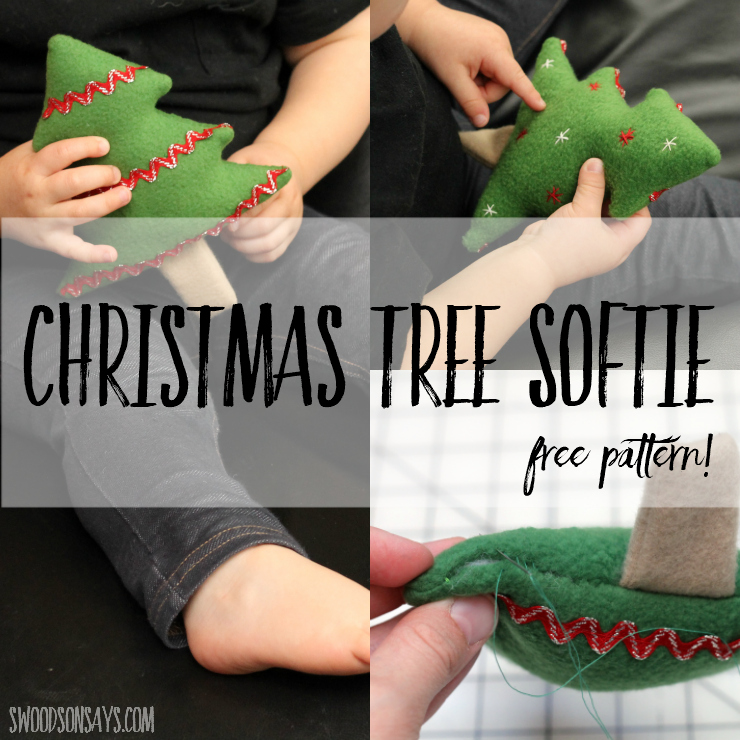
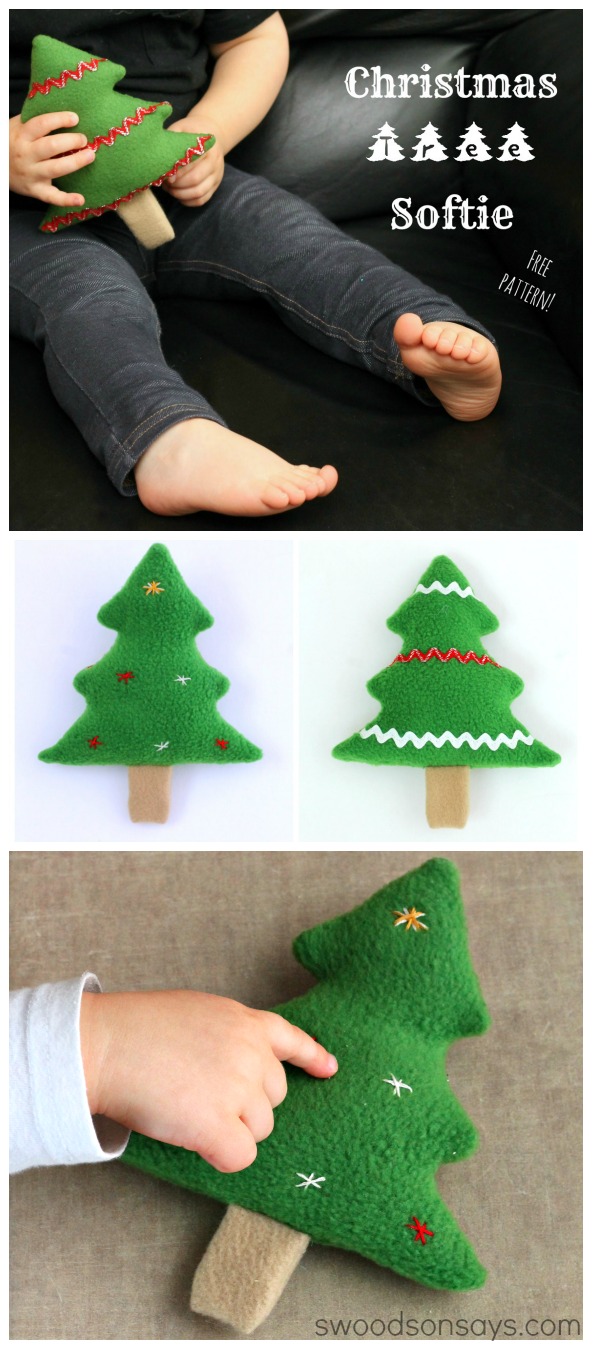
This is a super quick and easy free Christmas tree softie pattern that is so much fun to sew. We put up a Christmas tree and my son fell in love! He literally couldn’t stop hugging it, talking about the lights, wishing he could sleep with it. I decided to make him his own little Christmas tree buddy to carry around, isn’t it cute?
It’s just the right size for toddler hands; it would also be an adorable baby rattle, an ornament, or an applique stencil. Can’t you see a bunting of these hanging over a mantel?
Be sure to check out my other toy sewing patterns for kids while you’re here!
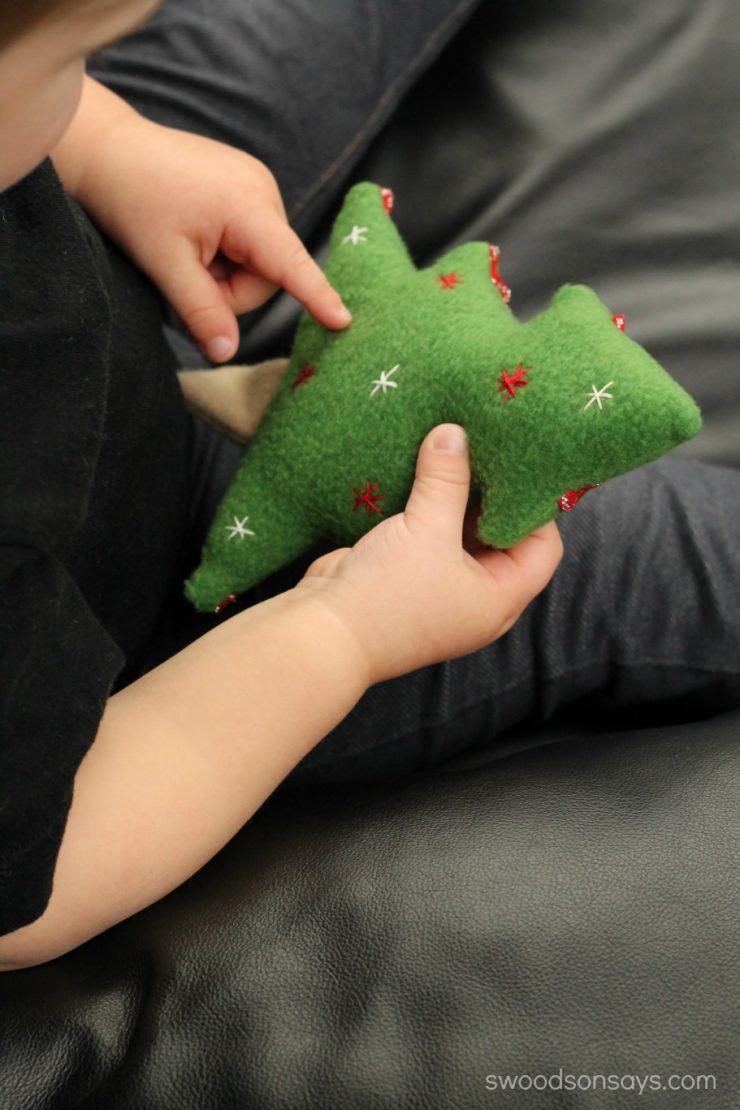
We did lots of star-counting on one side and then used it as a throwing toy (how cute would these be as bean bags!). I used basic stitches to add stars to one side.
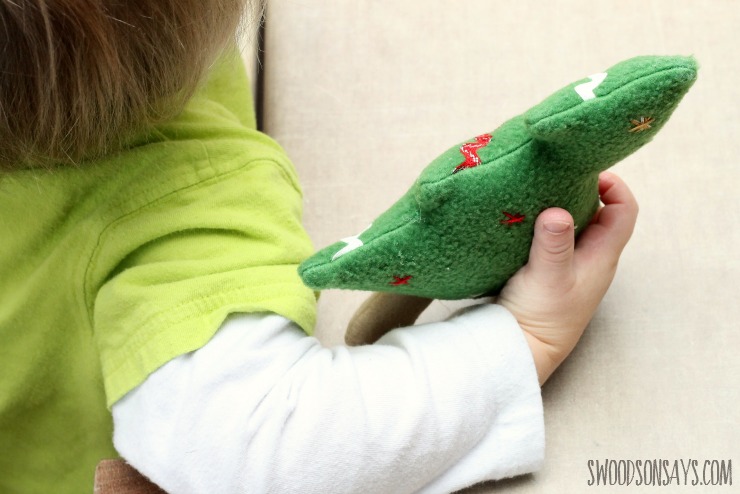
This is how he carries it, nestled against him like a baby animal, it is so cute.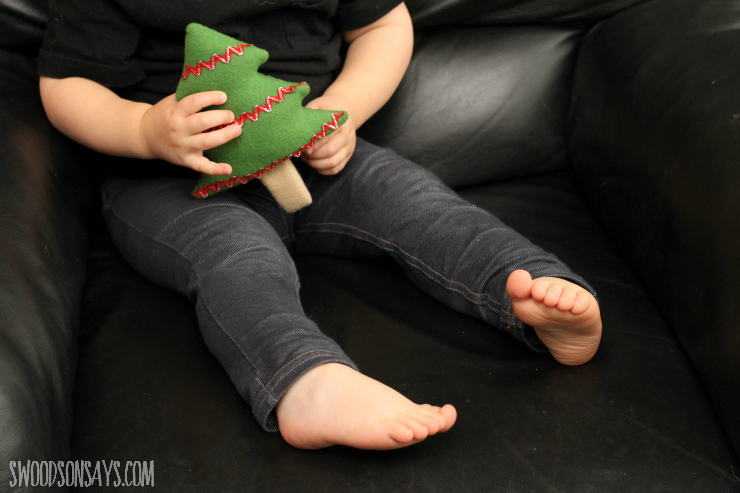
I added some festive ric rac to the other side, but the sky is the limit for embellishment. Ready to make your own Christmas tree softie?
Pin this free Christmas tree pattern for later, using this link and image:

How to sew a Christmas tree softie
Supplies:
- 1/4 yard green fleece(Fleece fabric is used throughout; woven cotton could also be used but would be best with added interfacing)
- Tiny brown scraps for the stump
- Coordinating thread
- Sewing machine
- Hand sewing needle
- Scissors
- Poly-fill or other stuffing
- Embroidery floss, ric-rac, or other embellishments
-
Free Christmas tree softie pattern – sign up for my newsletter and get the full pattern once you confirm your subscription! If you’re already a subscriber, you can access the pattern with the password in each newsletter, in the resource library.
Steps
Sewing tips:
- A shorter stitch length & slower stitch speed will make angles easier.
- Be sure to backstitch a few times at the beginning and end of sewing to secure it.
- Due to the thick fleece layers, you may need a thicker needle and to adjust your machine’s presser foot pressure as you sew. If you have a walking foot it makes things easier!
- Scant 1/4” seam allowance throughout, unless noted.
Cut:
- 2 main tree pieces
- 1 rectangle, 11/4” wide X 3” tall
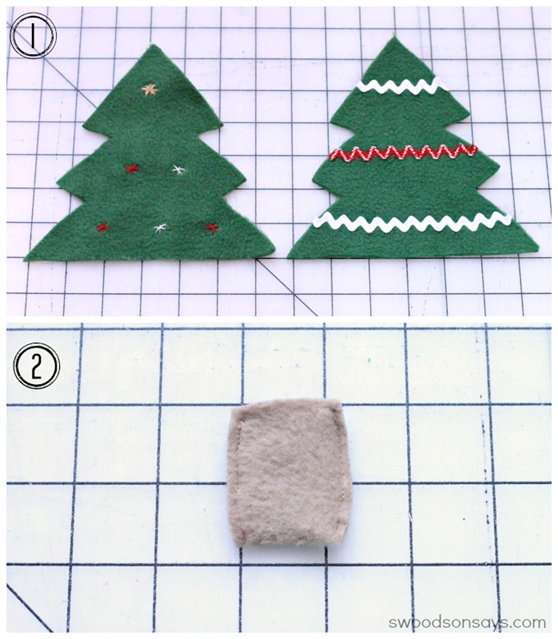
Step 1
Embellish each side of the tree! Keep in mind child safety if you’re making it as a toy. I embroidered a few stars on one side and sewed on ric-rac to the other.
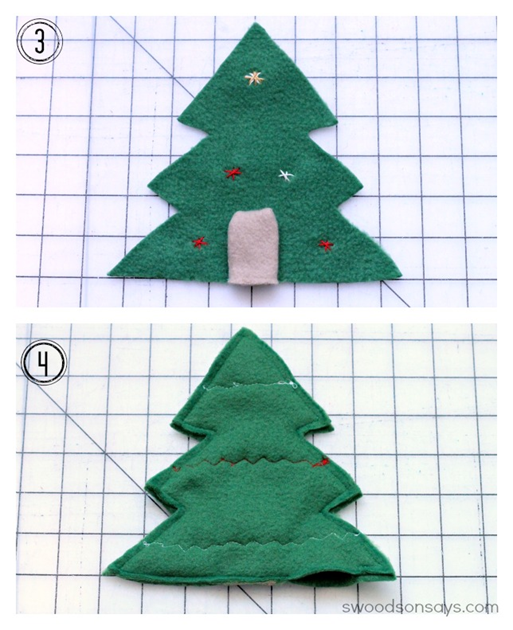
Step 2
Fold the brown rectangle in half and sew down each long end, curving slightly at the closed end. Turn right side out.
Step 3
Position the trunk on the right side of the tree, facing up, with the sewn end at the top. Sew along the open end of the stump, making sure to keep all edges aligned.
Step 4
Place both trees right side together, with the trunk sandwiched in between. Sew with a scant 1/4” seam allowance around the entire tree, leaving a 11/2 inch opening at the bottom to turn it inside out.
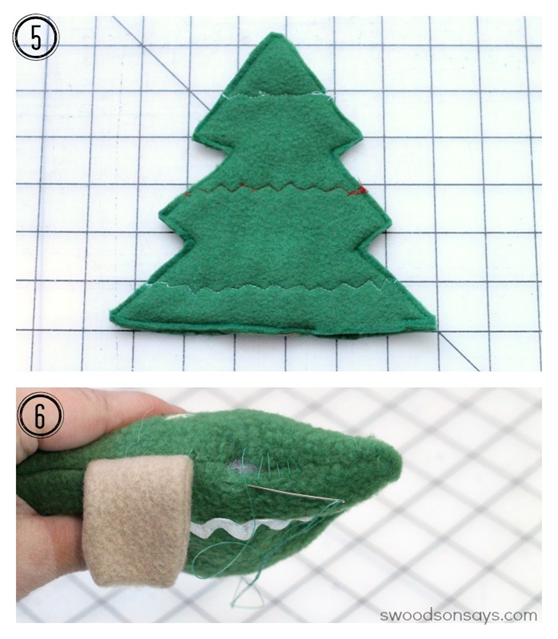
Step 5
Trim down the seam allowance, cutting slits on the inside of each angle (being careful not to cut through the stitching). Turn right side out, stuff firmly.
Step 6
Use a ladder stitch to close the softie’s opening! Voila!
Emily
Saturday 6th of December 2014
very cute!! My boys would love these as bean bags.. they would be found all over the house! You are being featured today on Nap-Time Creations! Hop on over and check it out! Emily
Stephanie - Swoodson Says
Sunday 7th of December 2014
Thanks so much for sharing my post Emily, you're the best!
olu
Thursday 4th of December 2014
Bean bags!!!!! Yes! That's exactly what I need for my tots racket skills class. For the Christmas special. Thanks for the inspiration.
Stephanie - Swoodson Says
Friday 5th of December 2014
Yay!! Bean bags are so fun. I need to make some for my son.
Coco
Tuesday 2nd of December 2014
So cute! Also, wanted to let you know that there is a link party on Wednesday at my blog - hope to see you there! Can't wait to party with you @ http://homeschoolapalooza.wordpress.com
Stephanie - Swoodson Says
Wednesday 3rd of December 2014
Thanks for stopping by & the invite Coco!
Chelsea @ GYCT Designs
Monday 1st of December 2014
This is really adorable! Would make a great stocking stuffer too!
Stephanie - Swoodson Says
Monday 1st of December 2014
Thanks Chelsea!!
Ajaire
Monday 1st of December 2014
Simple, adorable, and squishy! The perfect stocking stuffer for little ones. Great job Stephanie!
Stephanie - Swoodson Says
Monday 1st of December 2014
Thanks Ajaire!!