
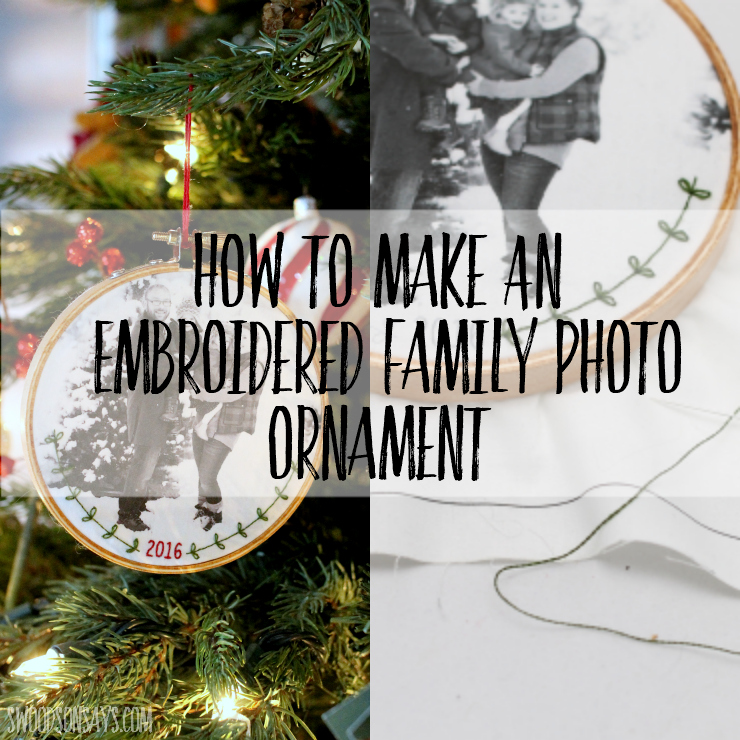
Ready to make the sweetest embroidered family photo ornament? I saw a blog post with an almost identical project, didn’t save it, and never could find it again. I’ve searched with a few key words and not found it, but if you have seen this before, please tell me where and I’ll link my original inspiration. They just sketched out their little leaf flourishes but I have a free pattern for the overlay you can download!
I think this would be a lovely family tradition to stitch up each year, what better way to celebrate Christmas than looking back on past winters? It would be easy to customize the style according to your tree or your recipient, if you’re gifting, by painting the hoop, adding trim, and choosing different colors. The download includes 2016, 2017, and 2018 text!
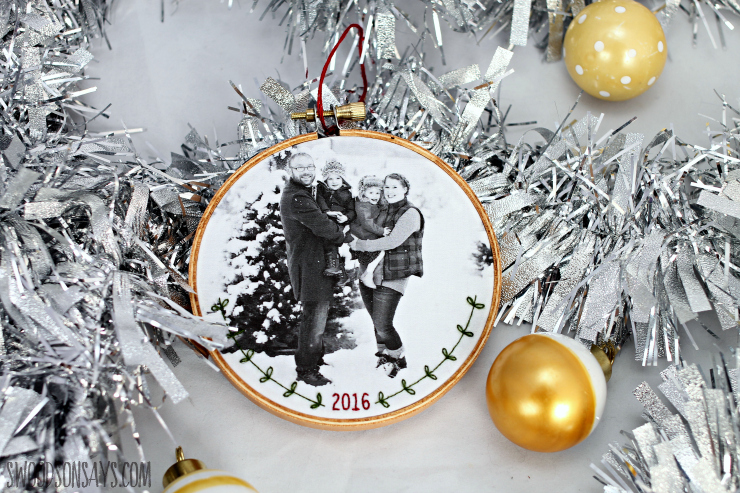
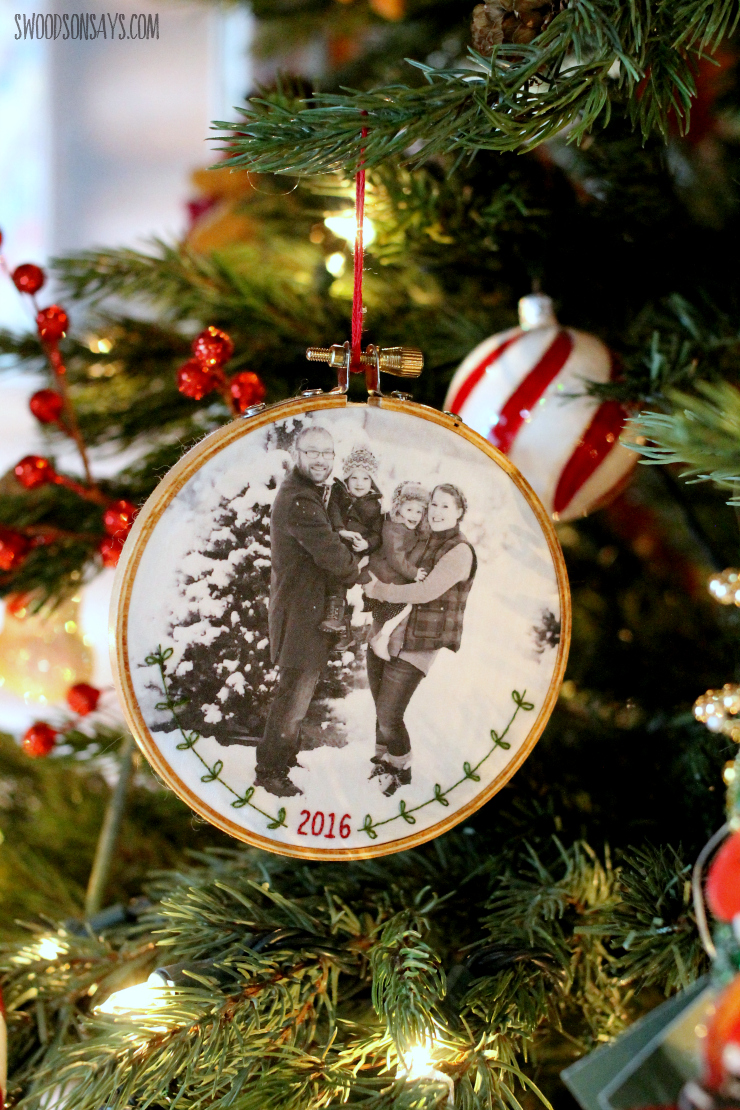
I stitched up this version for a friend, isn’t her family adorable?
I am loving these little embroidery hoops for ornaments, buy a bulk pack and then check out this post for more ideas: 14+ embroidery hoop Christmas ornaments.
Pin this tutorial for later with this link and image:
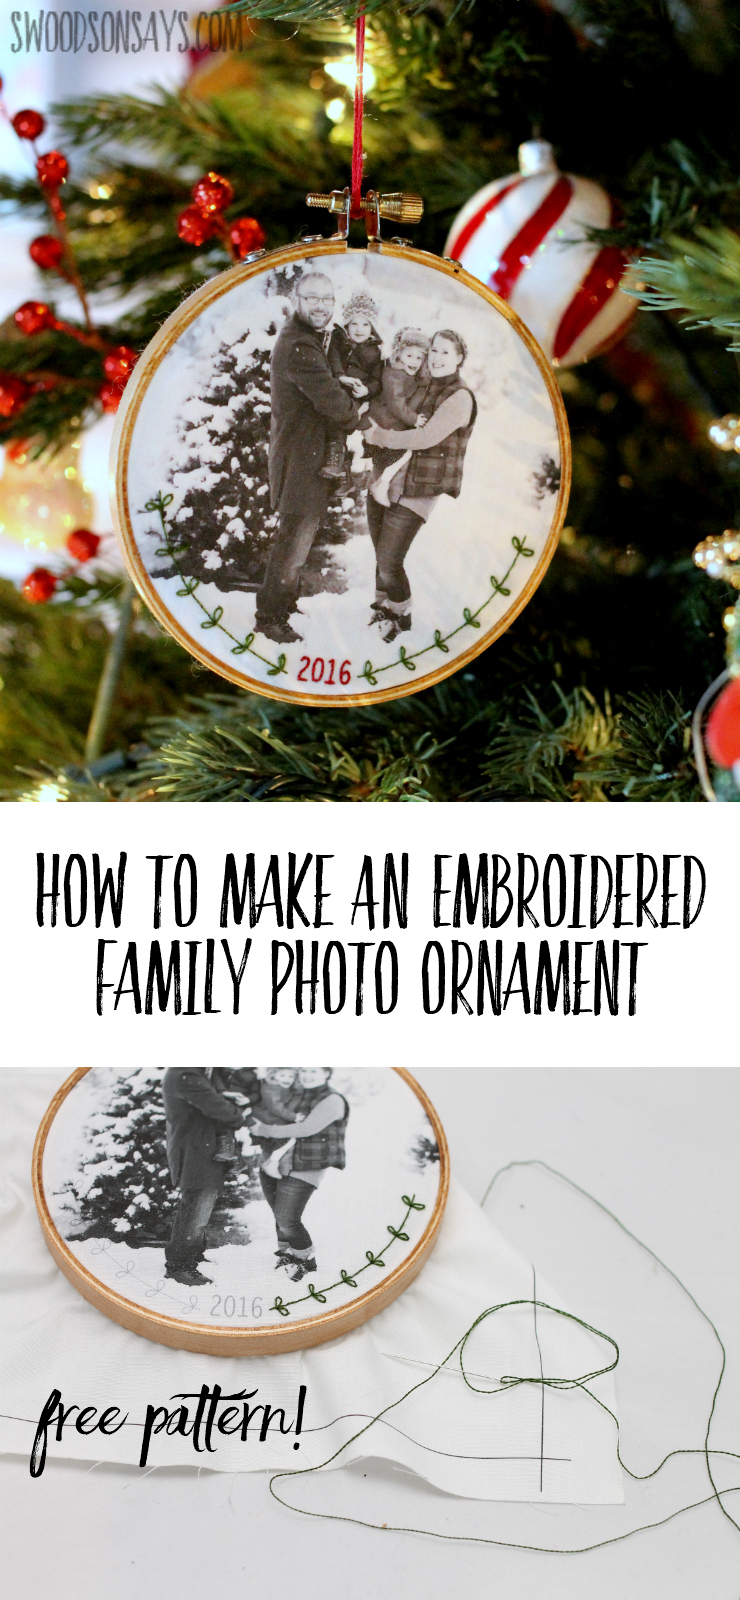
How To Make An Embroidered Family Photo Ornament
Supplies
- Printable fabric sheets* (and an inkjet printer)
- 4″ embroidery hoop*
- 1/4 yard 906f pellon fusible sheerweight*
- Embroidery floss – I used DMC 3345 green and DMC 816 red
- Embroidery needles*
- 6″ felt scrap square
- Hot glue gun
-
Downloadable leaf/year (2017 or 2018) pattern (PDF or PNG files) –sign up for my newsletter and get the free download once you confirm your subscription! If you’re already a subscriber, you can access the pattern with the password in each newsletter, in the resource library.
Steps
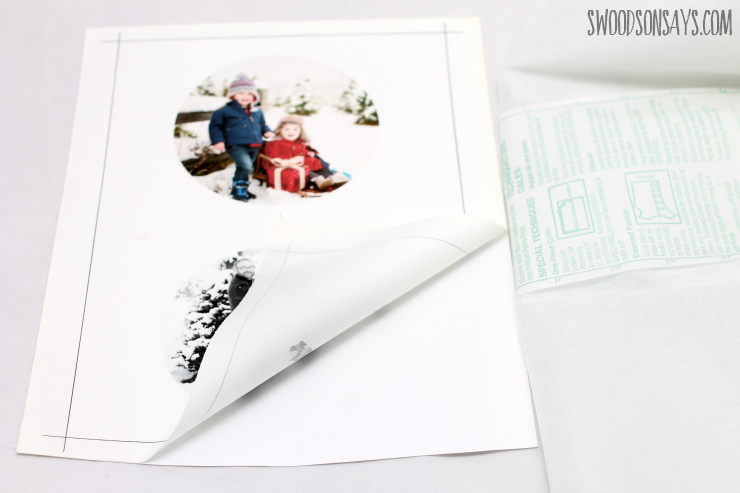
Step 1- You’ll want to edit your photo into a size that has the portion you’d like visible roughly 4.44″ high and wide (400 pixels), there needs to be approximately 6″ of a square, leaving enough material to tuck up and glue, but the 4.44″ circle is what will be visible; I digitally edited my photo into a circle that size using Picmonkey and added an overlay but you could also resize it and print it as a square easily. Print on an inkjet printer, and peel off the backing.
I used a ‘faint’ version of the vines and year, placing it on top of the picture I was printing since it would show up. If you have a darker picture or would prefer it, you could also print your photo and then print the vines on to Fabri-Solvy for a transfer method, you can see here how to use it and download the PNG or PDF files above. If you want to add your own numbers in an overlay, I used a free font Winterthur Condensed in size 41.
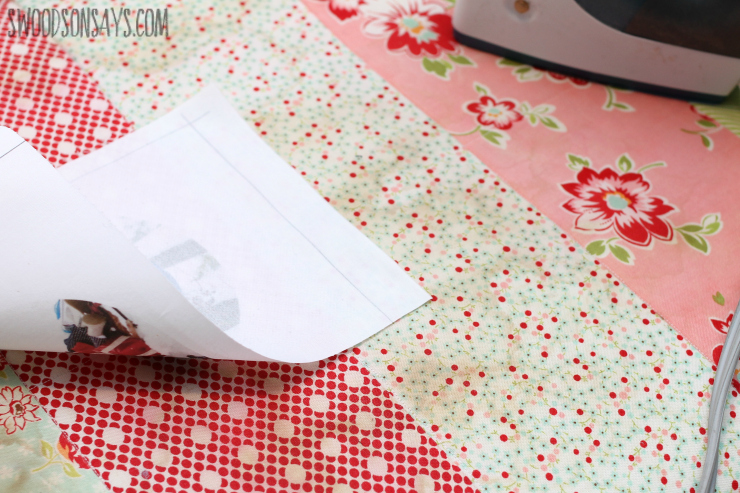
Step 2-Apply the fusible interfacing to the wrong side of the photo fabric, following the packaging’s instructions

Step 3- Use the embroidery hoop and tighten up the fabric until it is taut. Stitch the design! I used a single strand back stitch for the plain curve and a detached lazy daisy stitch for each ‘leaf’. I used a double strand with tiny back stitches on the numbers.
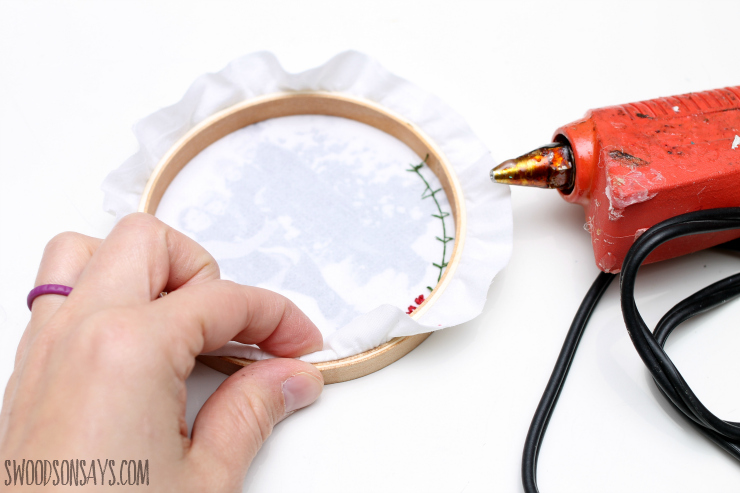
Step 4- Trim around the edges of the fabric in a circle, leaving roughly 1/2″ around all sides. You’re then going to pull the fabric up in tucks, hot gluing it to the back edge of the embroidery hoop.
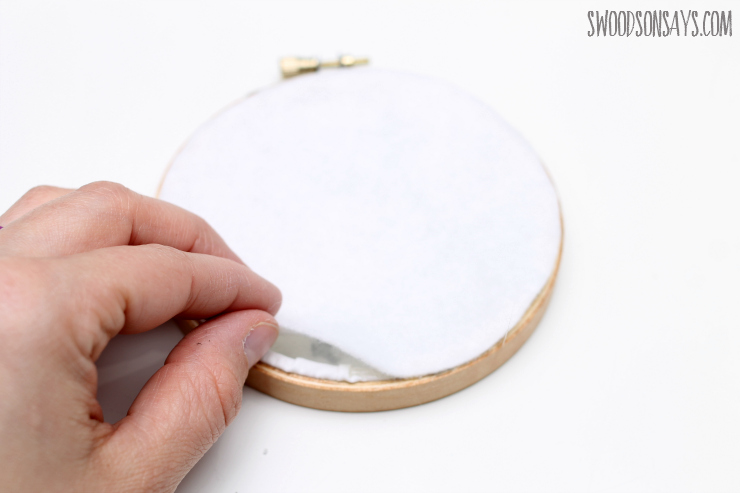
Step 6-Use the outer circle to trace and cut out a larger felt circle and hot glue it on the back, hiding the ragged edges and backing.
Step 7- Tie embroidery floss to hang the ornament and enjoy.
Robin
Wednesday 10th of August 2022
I want to try these for my sons and their families. Can you add a 2022 template? And how would I be able to move the template over my photo when printing?
Robin
Thursday 11th of August 2022
Thank you! I just got the file, I can't wait to make these! So sweet!
Stephanie - Swoodson Says
Thursday 11th of August 2022
emailing you the file now directly, and it is now in the resource library as well!
Stephanie - Swoodson Says
Wednesday 10th of August 2022
Oh wow I cannot believe it has been that long since I posted this tutorial! I will work on adding the next few years ASAP. There are a few ways you can transfer the template over - I did it digitally in picmonkey, or photoshop would work. You can print it on Stick N Stitch and stitch through it that way, or depending on the photo, you could print it, hold the photo on fabric over top, and trace. I hope this helps!
Desiree
Friday 6th of November 2020
Could I use cotton fabric to transfer the image? Why the fusible fabric? Thanks!
Stephanie - Swoodson Says
Saturday 7th of November 2020
Hi Desiree! I'm not sure I follow. This isn't fusible fabric, it is just printable fabric so you peel off the back once it's printed on, but it's not sticky or anything. Let me know if that is helpful?
Jamie Frendewey
Wednesday 28th of October 2020
Any idea if these printable sheets would have any issues being in the weather? I am making an outdoor ornament (for a community tree) and would love to do this idea. But not sure if it would hold up in rain/snow?
Stephanie - Swoodson Says
Sunday 1st of November 2020
Hi Jamie! Hmm. I think that they would hold up, ink wise, because you can wash them after use but I would worry about mold/mildew on the fabric & wood hoop. You could maybe make a plastic overlay of some sort and paint the hoop with water resistant/outdoor safe paint???