
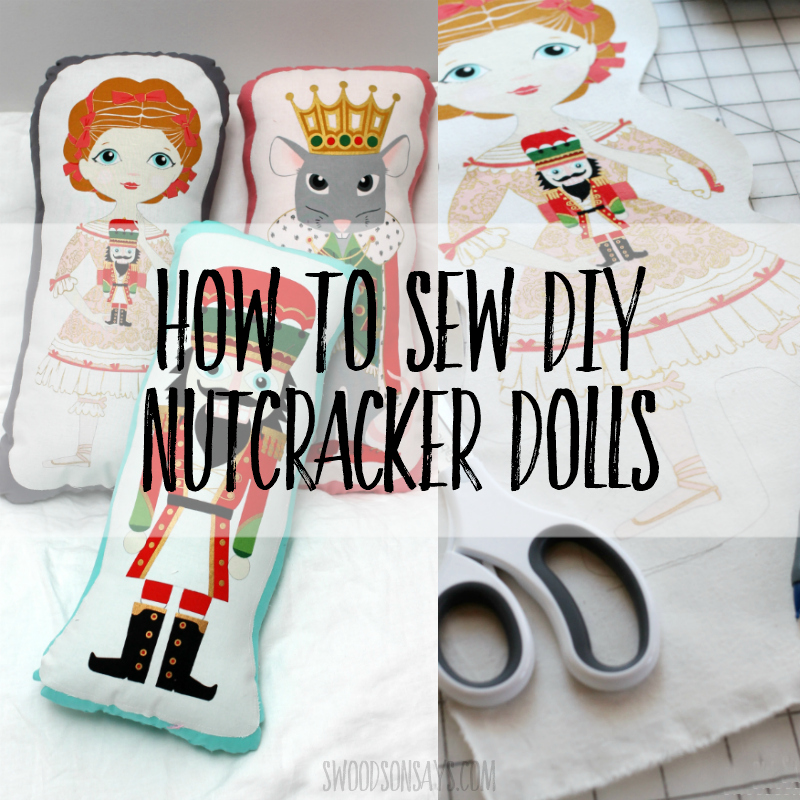
What Christmas traditions does your family have? Growing up, I always went to see The Nutcracker because my best friend danced in it, so it feels extra special to start taking my own kids now! I jumped at the chance to share how to sew stuffed toys with nutcracker fabric because we’re going next weekend, and they were a fun way to surprise them.
[2024 edit – these panels are no longer sold! Check out this option for a nutcracker panel from a different designer!]
This post was sponsored by JOANN, which means they supplied The Nutcracker fabric panel, supplies, and compensated me for my time, but all opinions are my own.
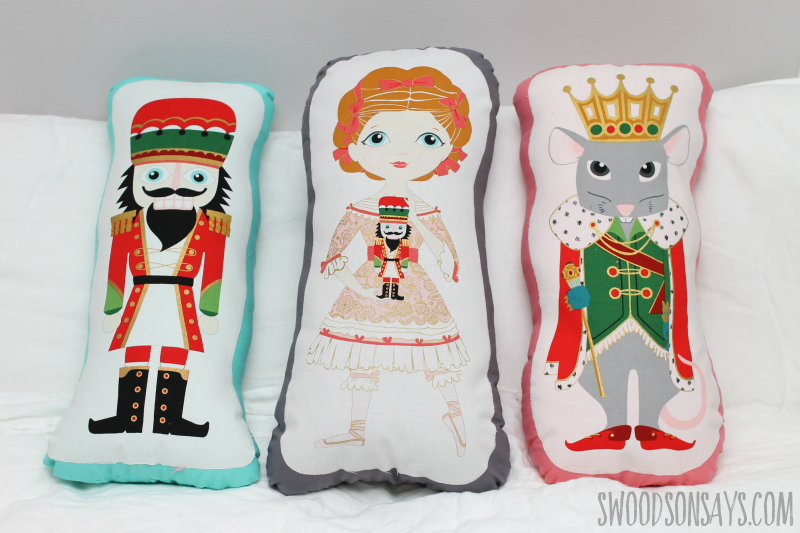
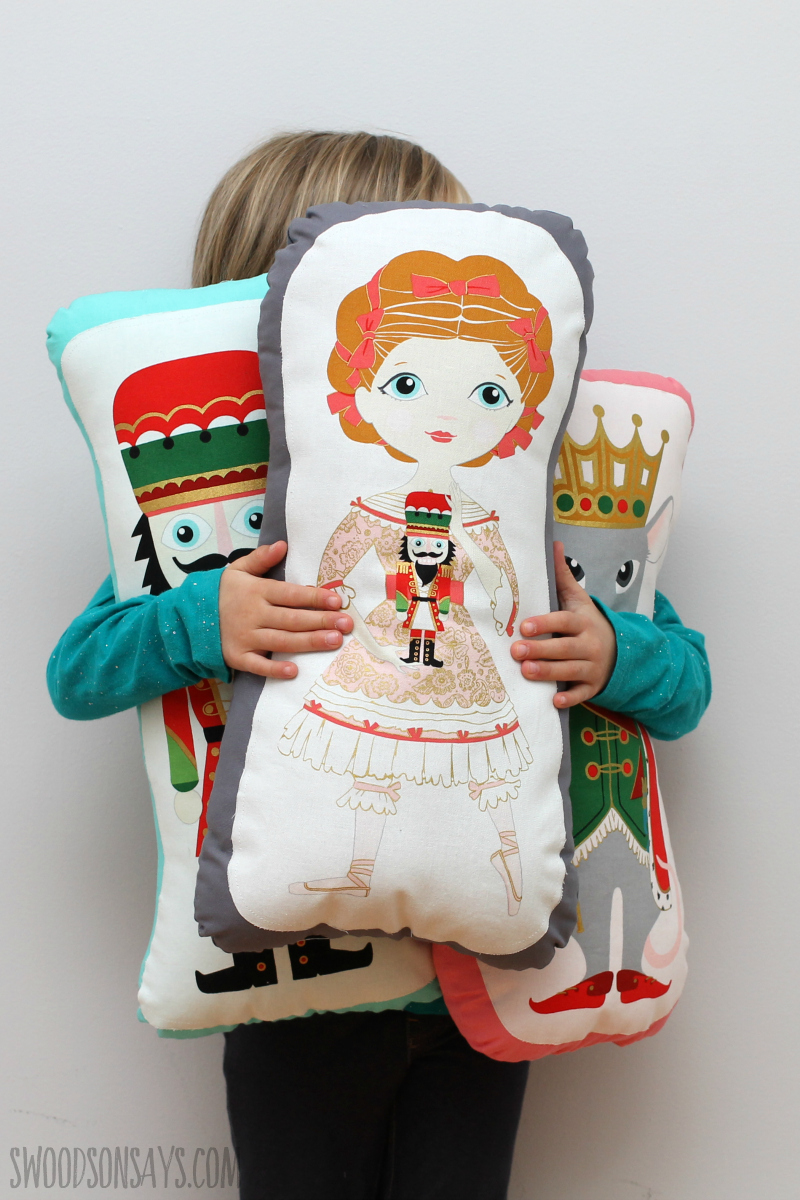
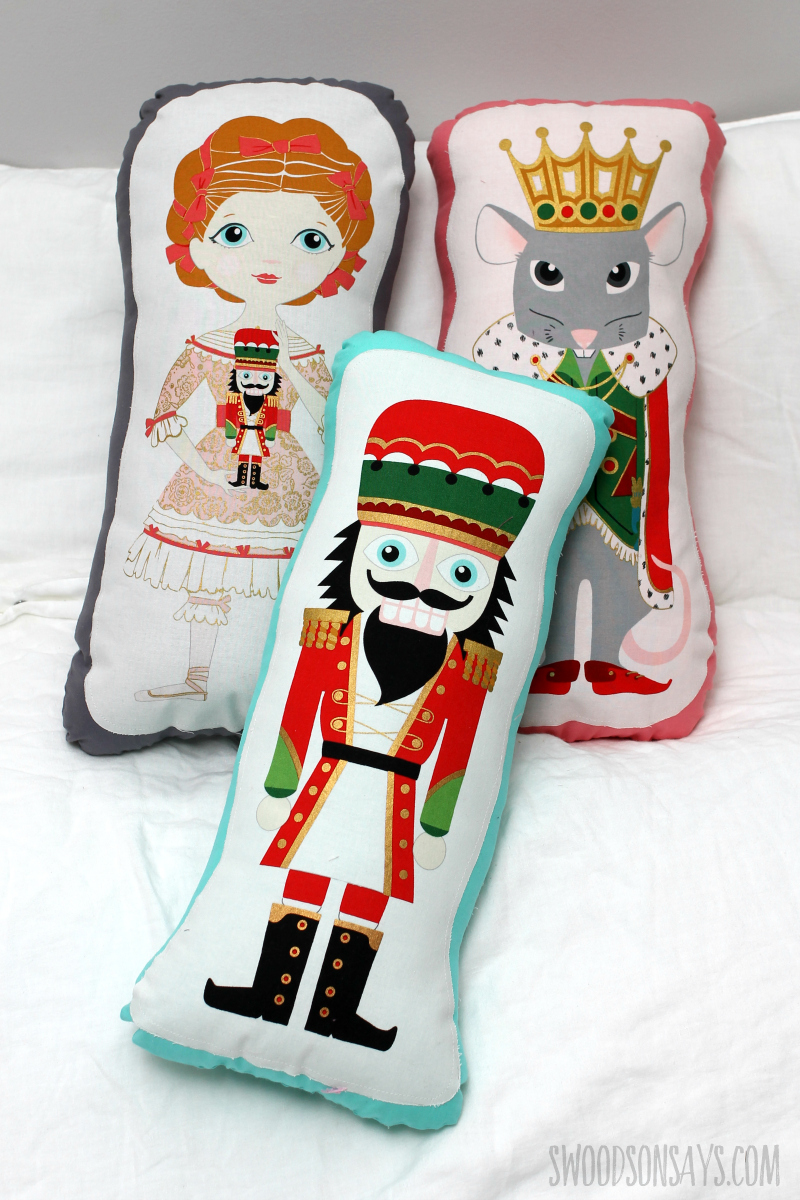
We now have a Nutcracker, Clara, and Rat King hanging out in the kids’ beds and they’re begging to bring them to the play with us.
This is a great way to try out sewing stuffed animals because it’s so easy! Keep reading to see how to sew stuffed toys with nutcracker fabric, I have a photo for each step.
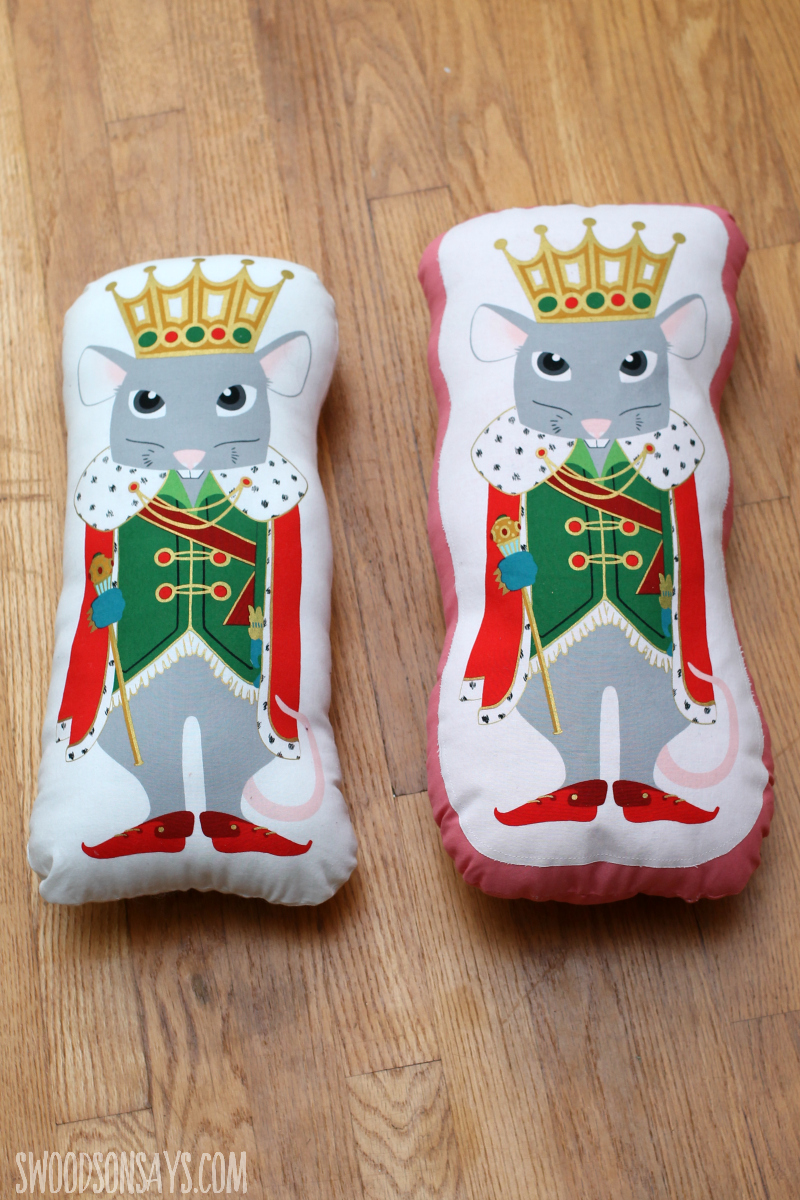
You might be wondering why I didn’t just sew them from the fabric, adding an accent background instead. I just prefer how it looks! I sewed up a quick example to show the difference above, it’s just personal preference.
If you like this post, check out these other posts while you’re here!
- 20+ super fun Christmas sewing projects
- 50+ free printable stuffed animal patterns
- I used a similar technique for this project – how to upcycle a t-shirt into a stuffed animal
Pin this how to sew stuffed toys with nutcracker fabric tutorial for later using this link or collage image:

Ready to make your own?
How to sew stuffed toys with nutcracker fabric
Supplies
- 1/2 yard of the nutcracker fabric, for 1 set of doll faces
- Heat n bond lite
- 1/4 yard per color of kona cotton
- Polyfill or other stuffing
- Iron – I used my Cricut Easypress
- Pencil
- Scissors
- Hand sewing needle
- Coordinating thread
Steps
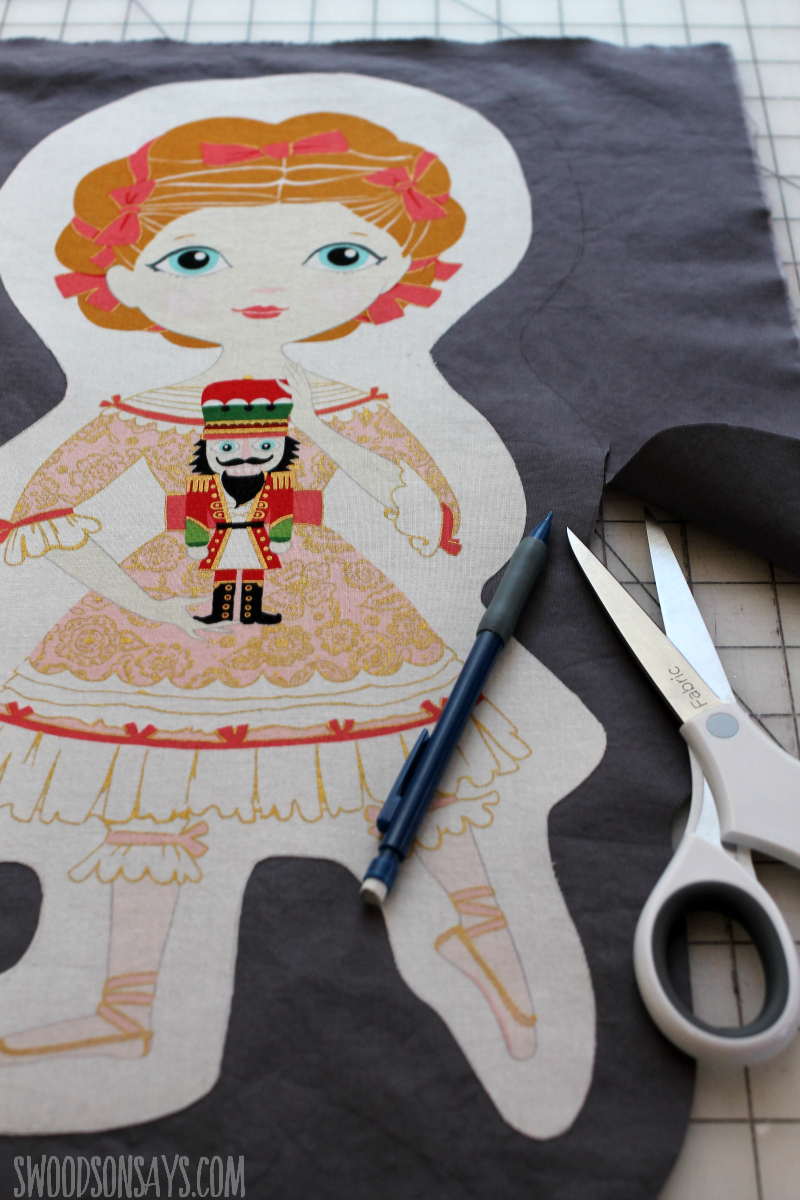
Before anything else, prewash your fabrics! Also, it should be noted that I took the pictures cutting more precisely around Clara and didn’t love the finished doll, so the finished doll is a different version where I traced more loosely around her legs.
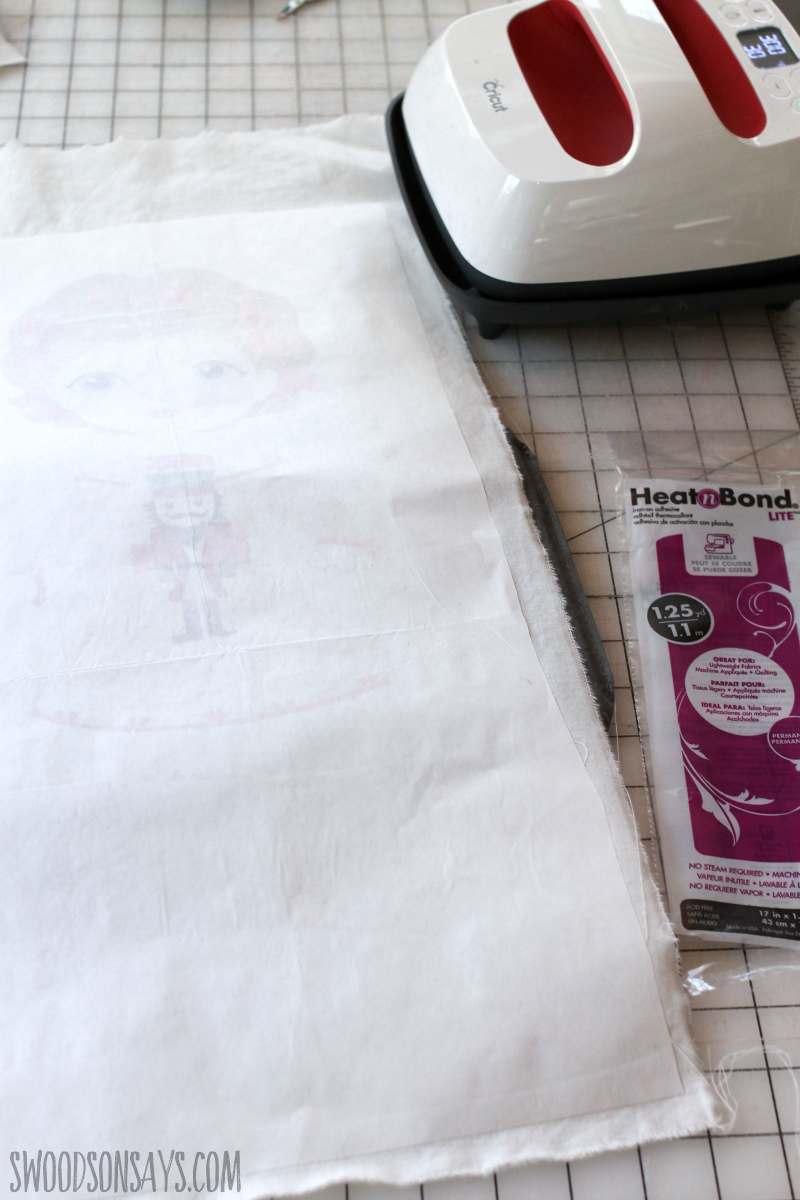
Step 1- Cut a piece of the Heat n bond that is larger than the doll and adhere according to packaging instructions, to the back/wrong side. Let cool.
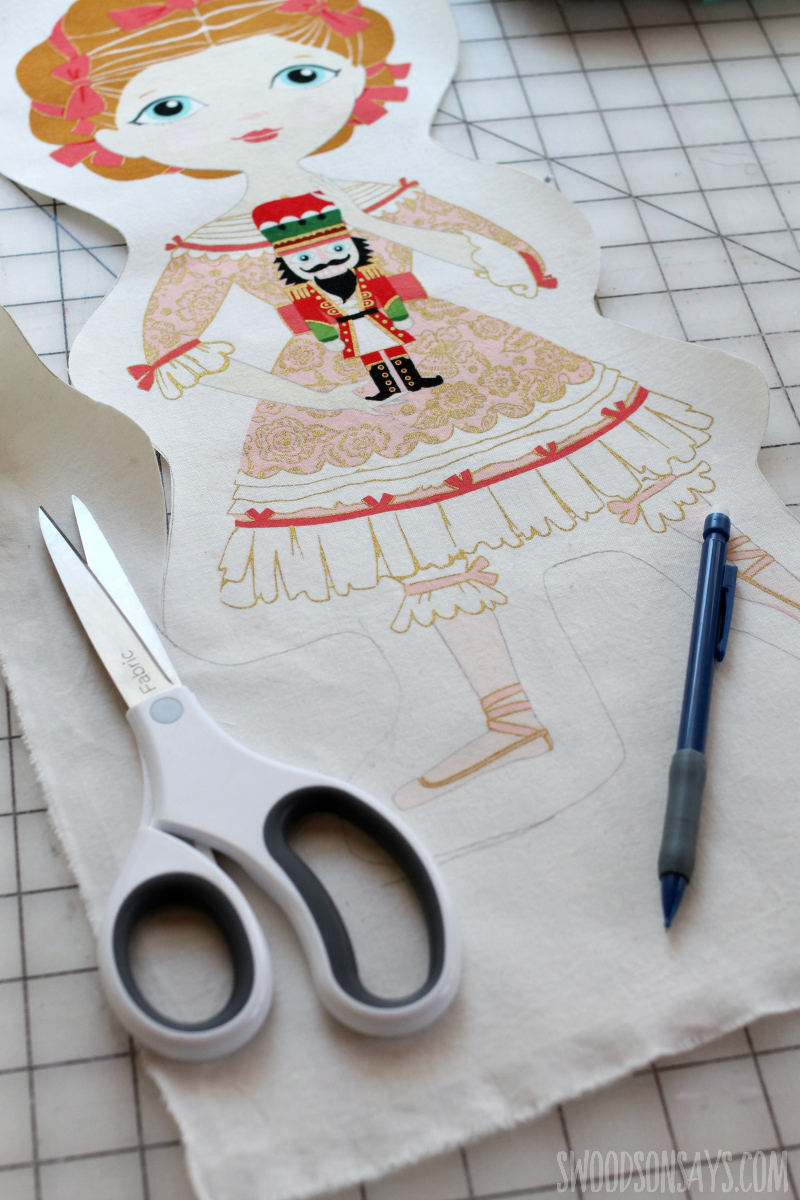
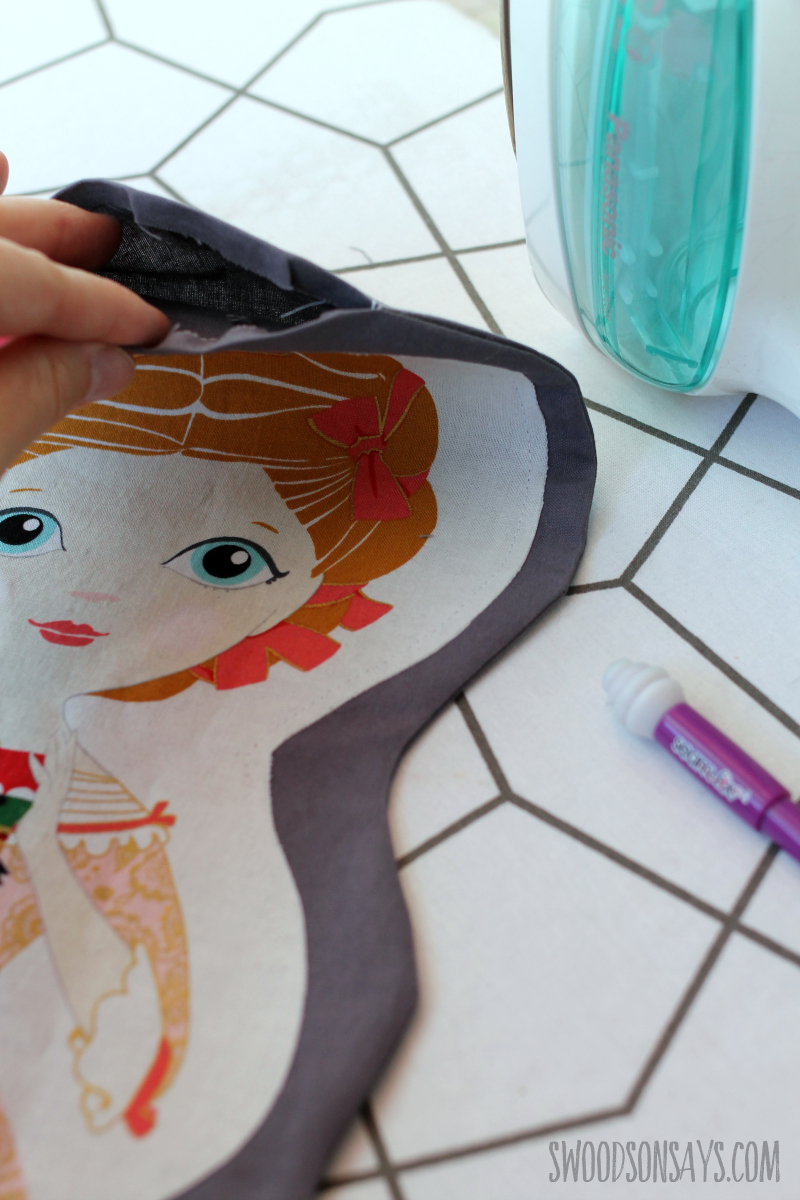
Step 2- Sketch loosely around the doll with a pencil or marking pen. I just eyeballed it, you could measure around to be precise if you wanted, too. Then cut along your line, peel off the paper backing.
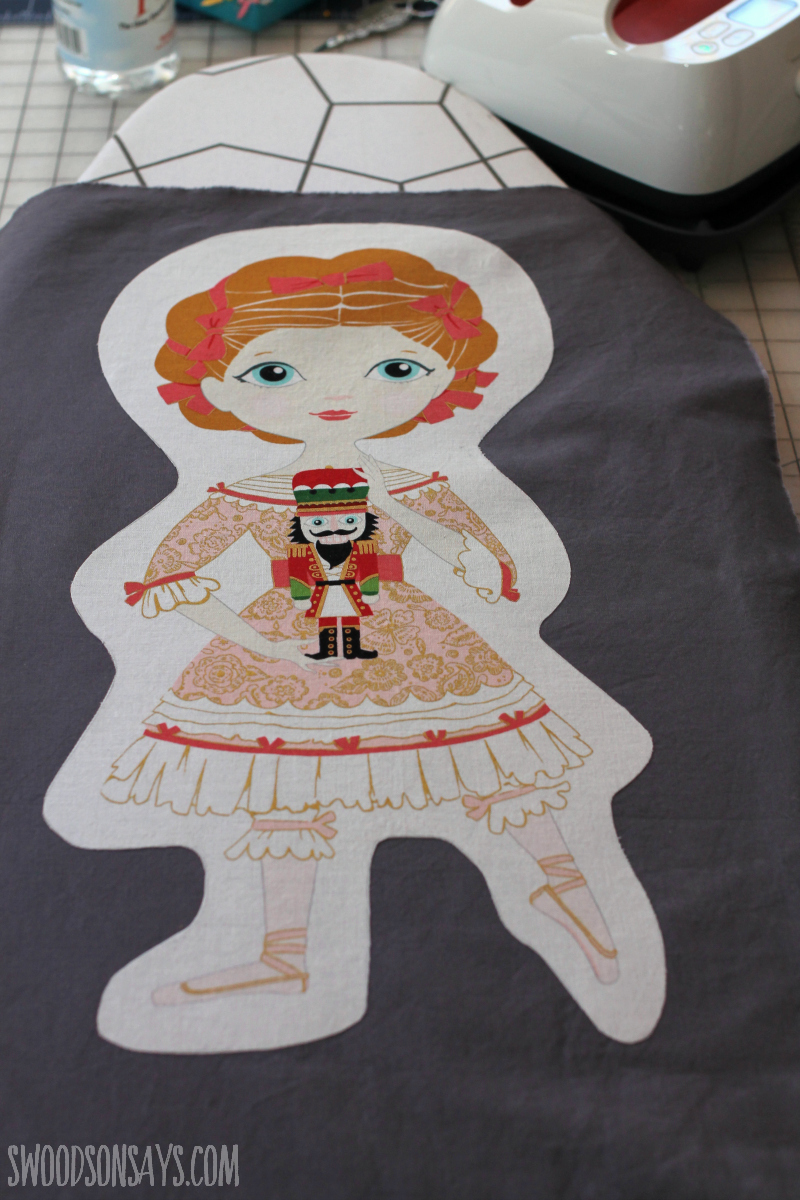
Step 3- Use the iron again to adhere the doll to the backing cotton, let cool.
Step 4- Repeat step 2, keeping in mind you will have a seam allowance as well, so leave space to sew the edges together.
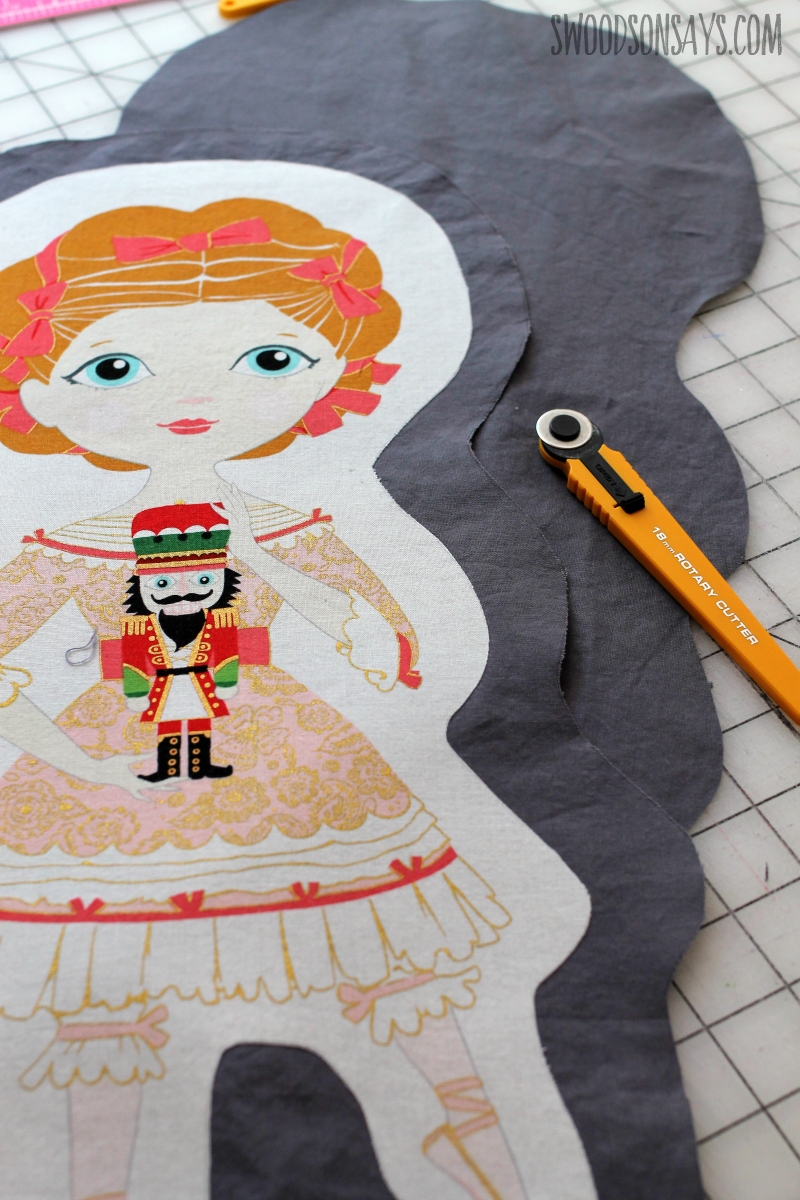
Step 5- Use the top piece as a template, cutting out a mirrored image of the same cotton.
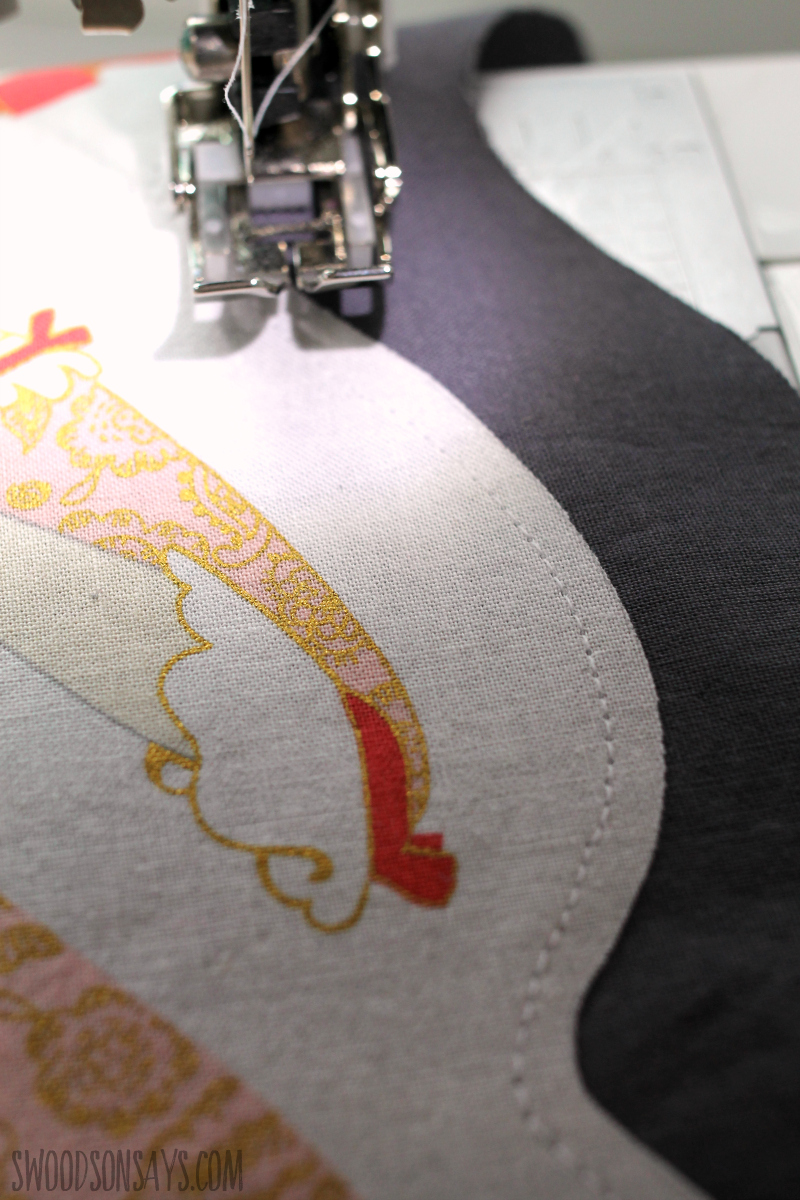
Step 6- Stitch around the raw edge or with a zigzag over the edge. Lay the body pieces right sides together and stitch with 1/4″ seam allowance, leaving a 3-4″ gap open.
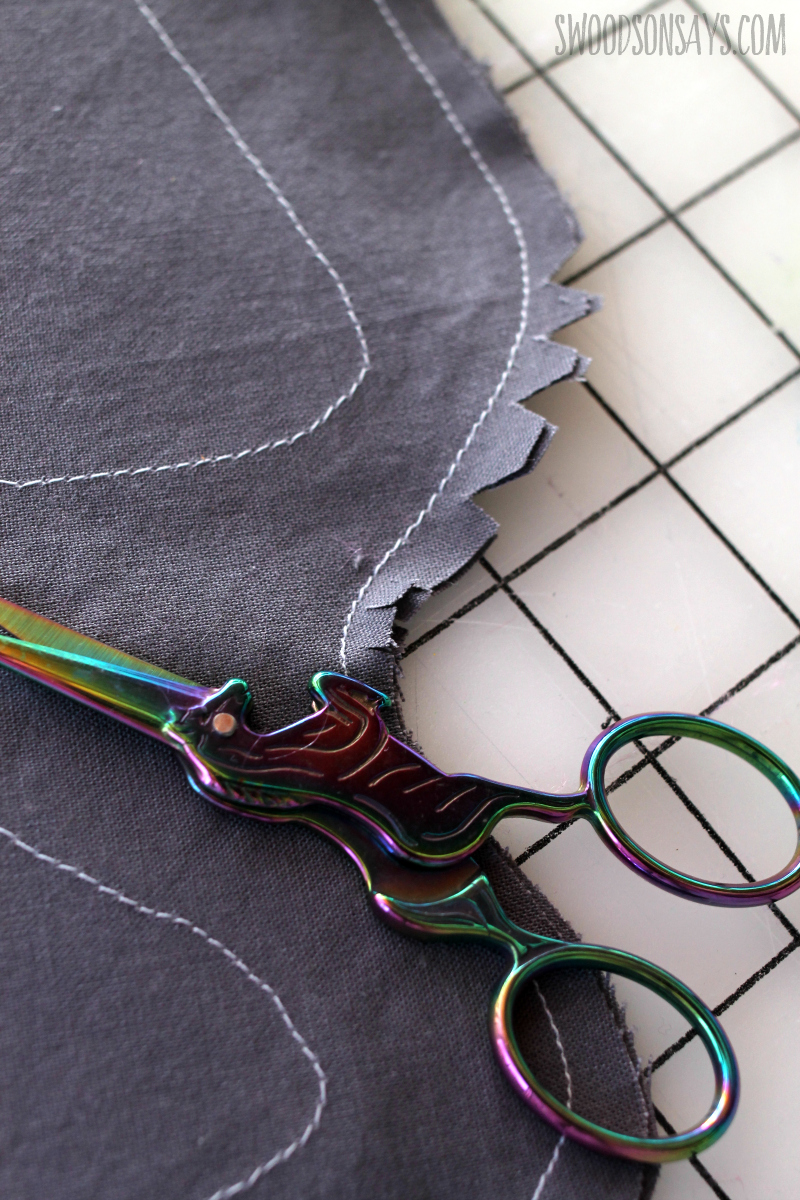
Step 7- Clip the curve and dips!
Step 8- Turn right side out and press, add stuffing.
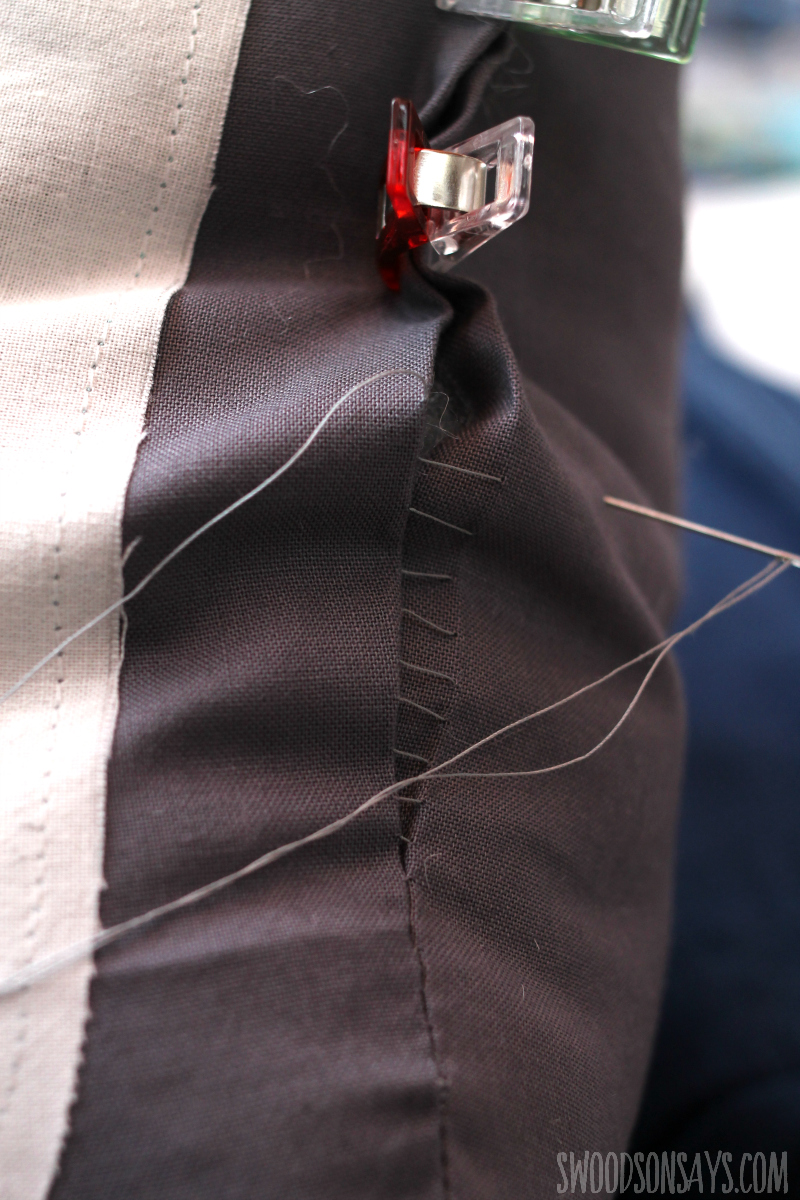
Step 9- Use a ladder stitch to close and you’re done!
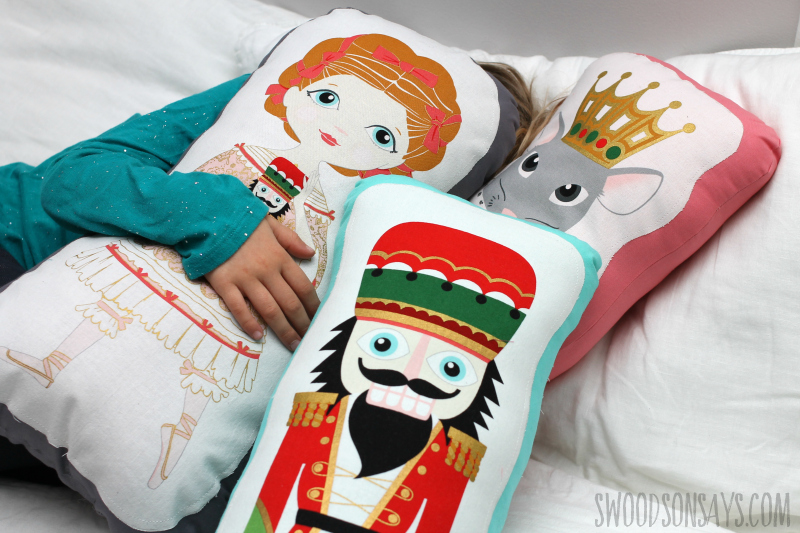
Nice, squishy Nutcracker soft dolls!