
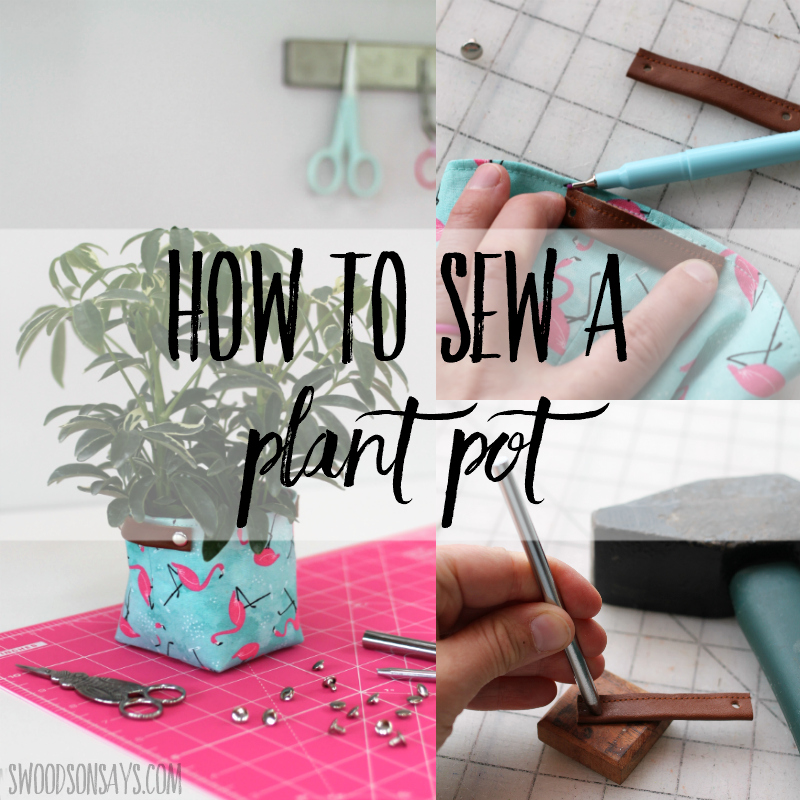
 Who else can’t stop buying plants!? My local grocery store has the cutest little $5 pots and they always sneak into my cart. I jazzed up the boring black container with this sweet little fabric plant pot. It’s easy to sew but instead of guessing at all the measurements, I’m sharing an easy round fabric basket tutorial so you can sew up your own!
This post was sponsored by JOANN, which means they supplied materials and compensated me for my time, but all opinions are my own.
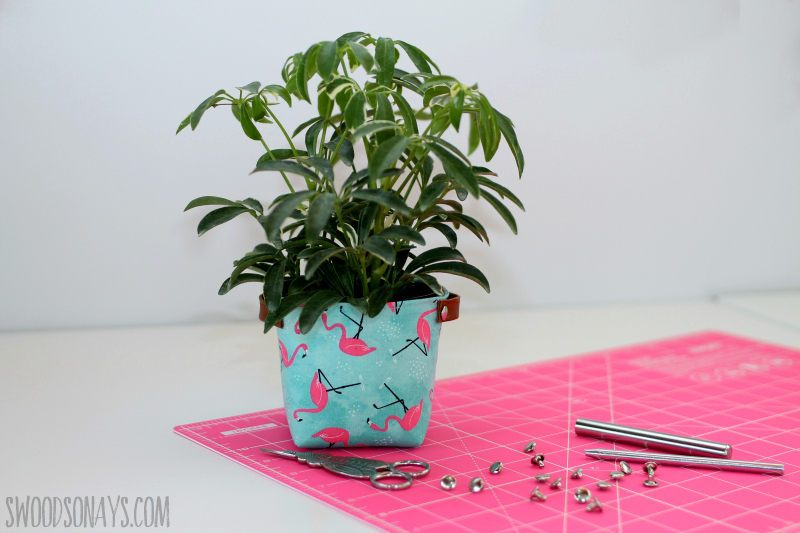
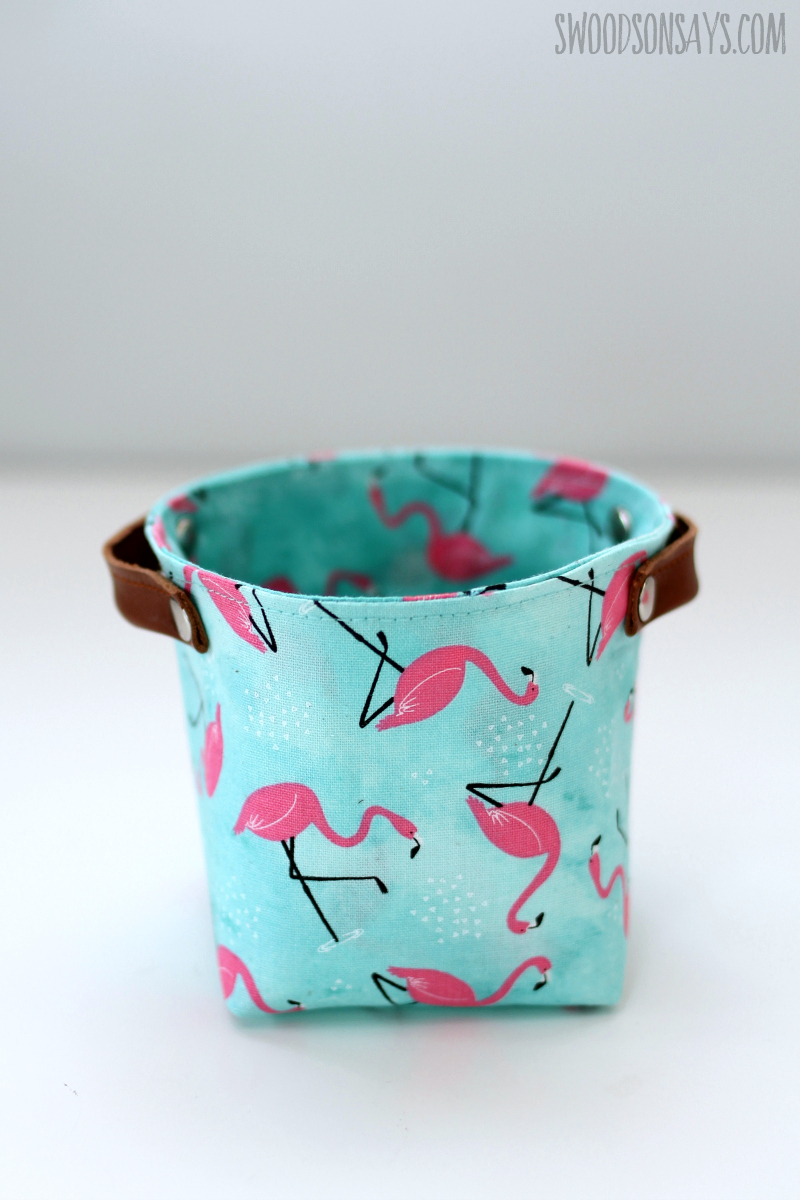
I’m excited for summer weather so I thought I’d bring some summer vibes into my house with this cute flamingo print. Leather scraps add a finishing touch and a rivet setting tool makes it super simple to put together.
If you like this round fabric basket tutorial, you might also like these posts!
- How to make a fabric tray
- 30+ best fabric scrap sewing projects
- 20+ great beginner sewing projects
- How to sew an upcycled DIY fabric planter
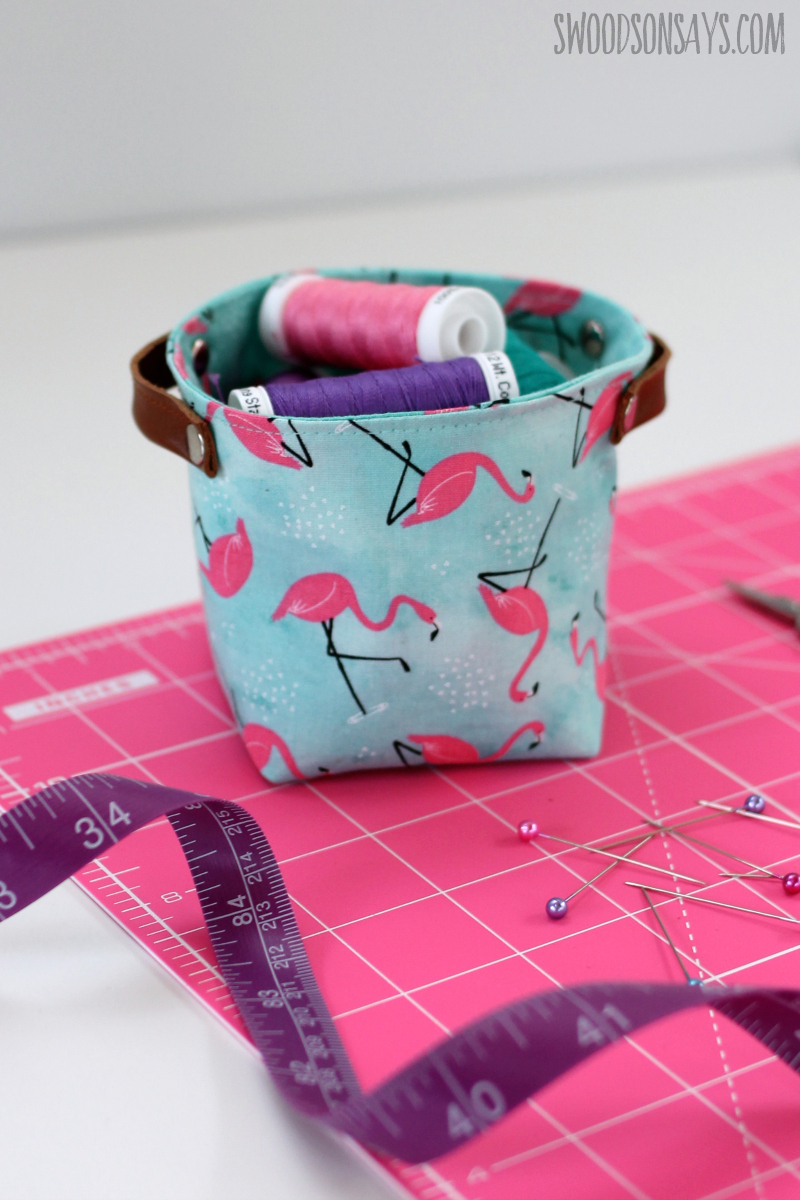
If you aren’t into plants, you could also use it to hold notions! I need to make a second one to hold my sewing clips. Wouldn’t this be a cute gift filled with candy, too?
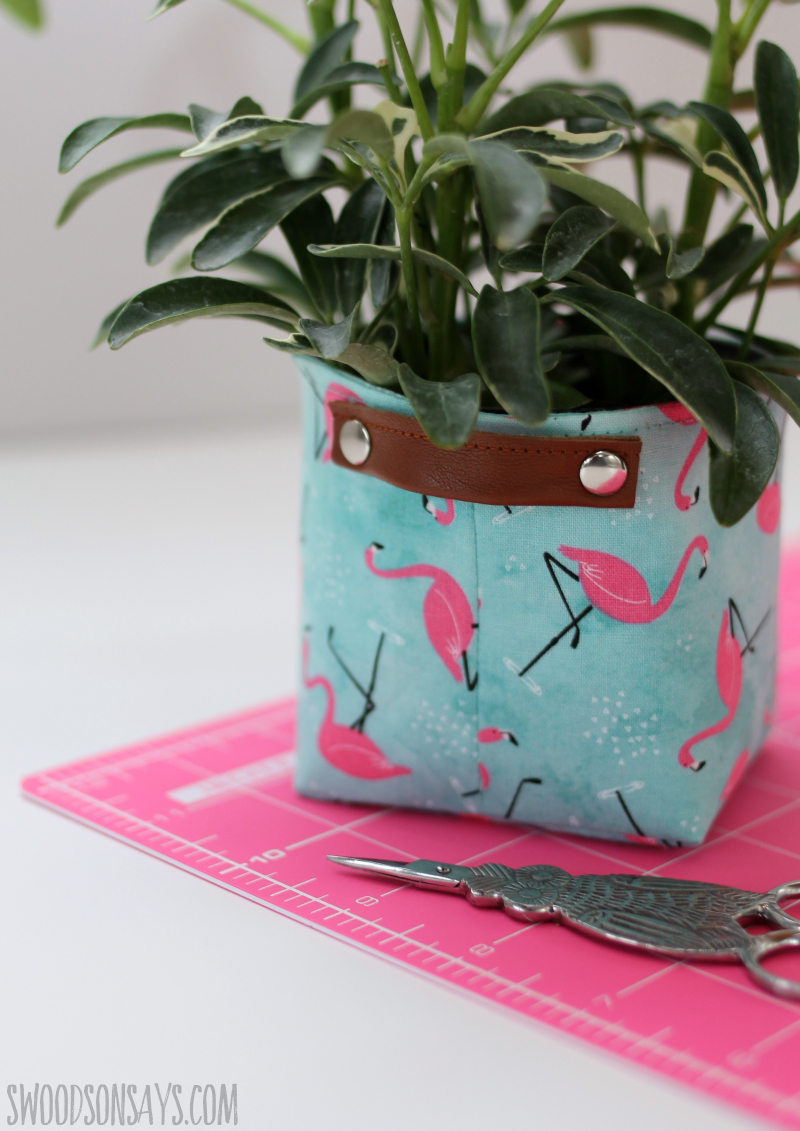
Rivets look fancy and professional, but they’re actually super easy to apply with the right tools. Have you tried them?
Save this post for later by pinning it with this link or the collage image below!
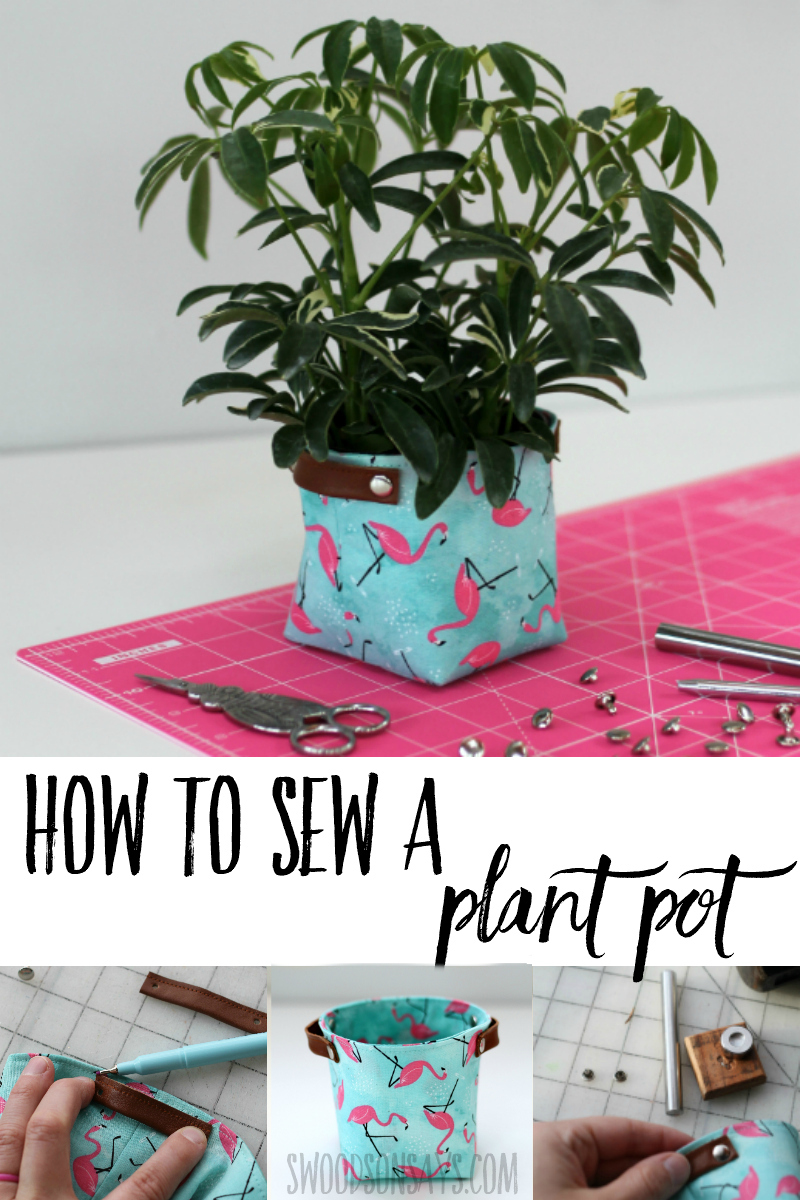
Ready to make your own?
Round fabric basket tutorial
Supplies
- Leather scraps
- 1/4 yard of woven cotton (I used this cute flamingo print!)
- Rivet setting tool
- Mallet
- Pen
- Rivets
- Iron
- Sewing clips
- Medium weight fusible interfacing
- Acrylic ruler
- Rotary cutter
Steps
All seams are sewn with 1/4″ seam allowance!
Step 1-
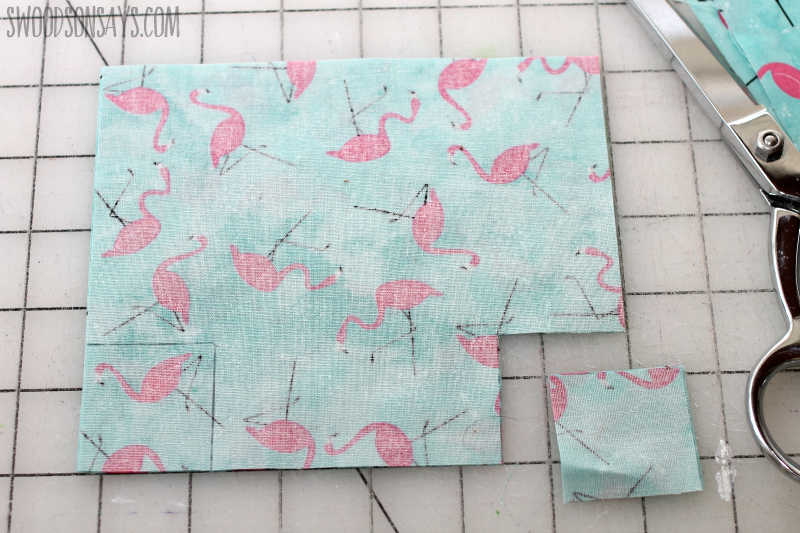
Cut 4 squares of woven cotton measuring 6.25″ wide X 5.5″ tall. Cut a 1.5″ square out of each bottom corner, on all 4.
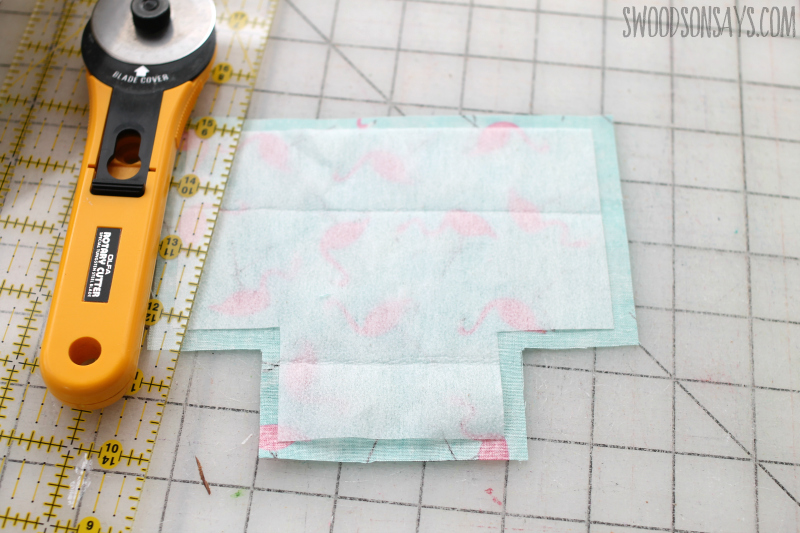
Step 2- Use the finished shape to cut 2 matching interfacing pieces and then optional, trim 1/4″ off each edge. This will keep the interfacing out of the seam allowances and make it easier to turn right side out, but isn’t necessary.
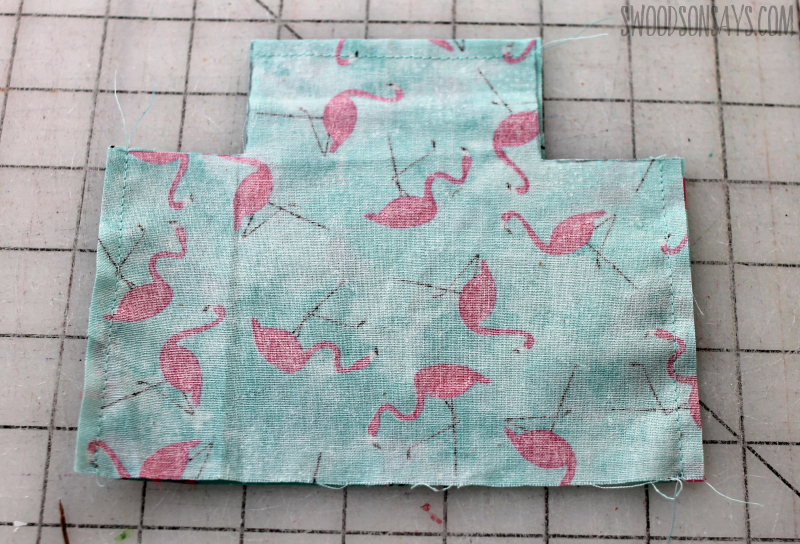
Step 3- Place the two pairs right sides together and sew as shown above, creating 1 set of interfaced & 1 set of plain cotton. 
Step 4- Press all seams open. Then fold the open square in half, raw edges meeting together, so the two seams you just pressed open meet in the middle, right sides together. Sew this new seam, creating a “boxed” corner on both side. Repeat for the other set of body pieces. 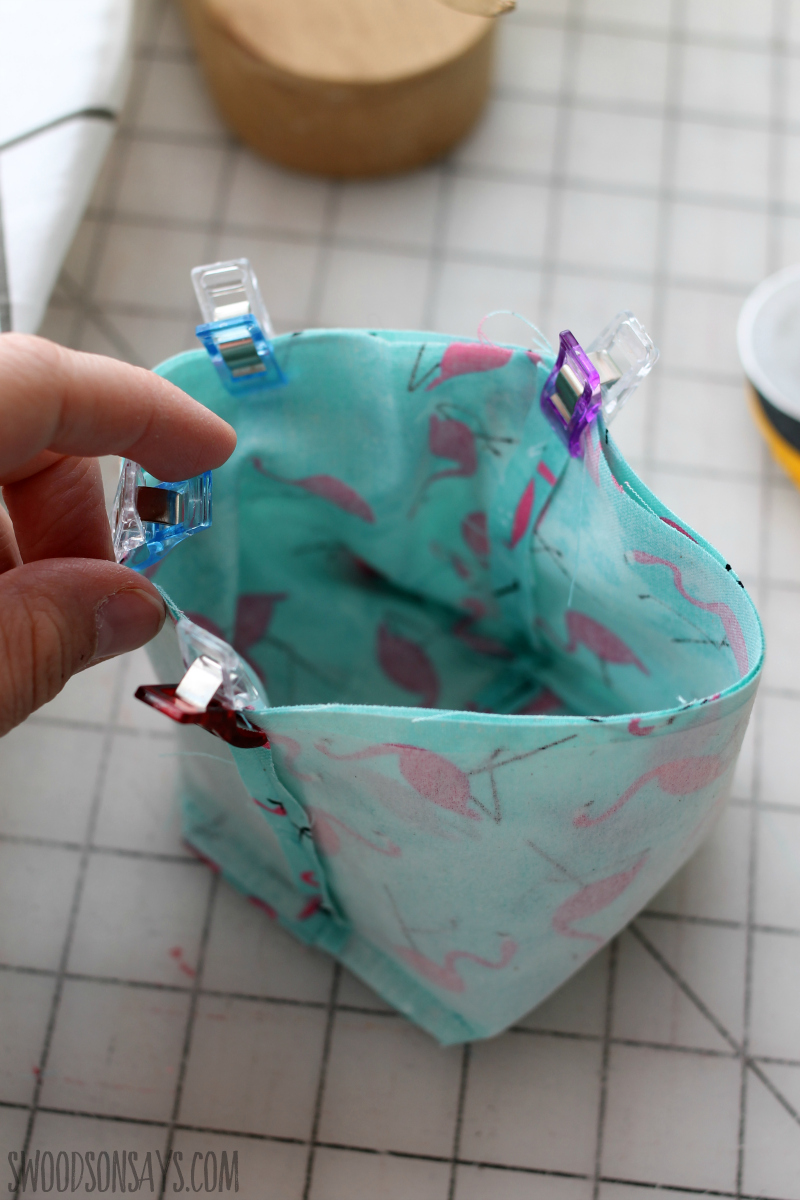
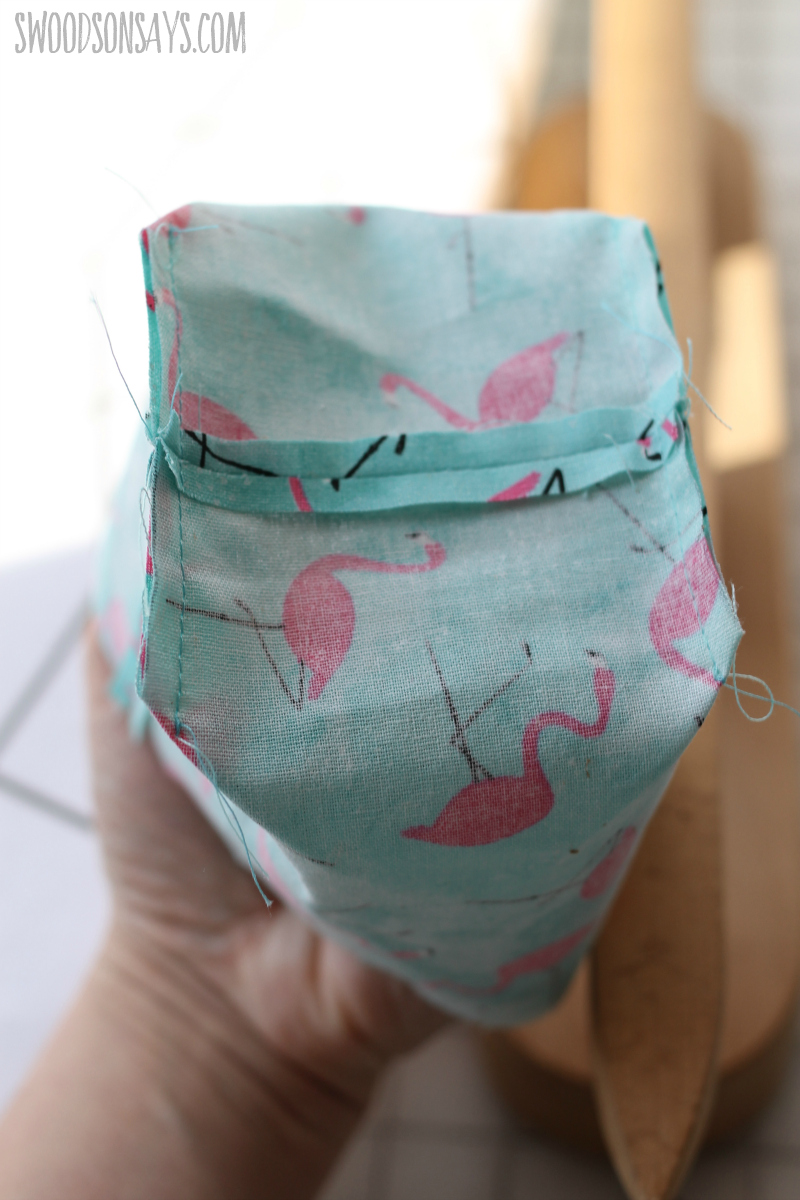
Step 5- Leave the interfaced piece, wrong sides out and layer in the plain piece, right sides together. Match the seams and clip around the top, leaving a 2″ gap on one side. 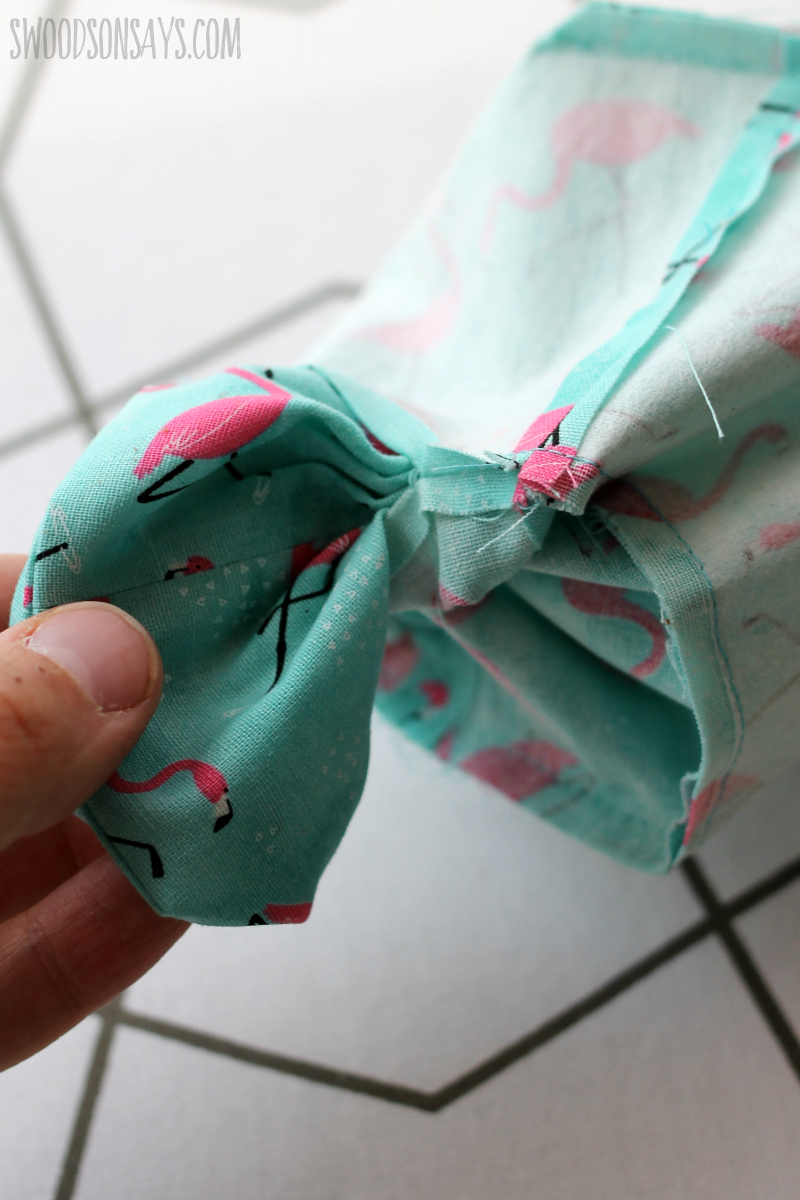
Step 6- Pull the lining out through the gap, turning it right side out and encasing all of the seams. 
Step 7- Topstitch around the entire top, tucking in the raw edges back through the gap you left open for turning in step 6.
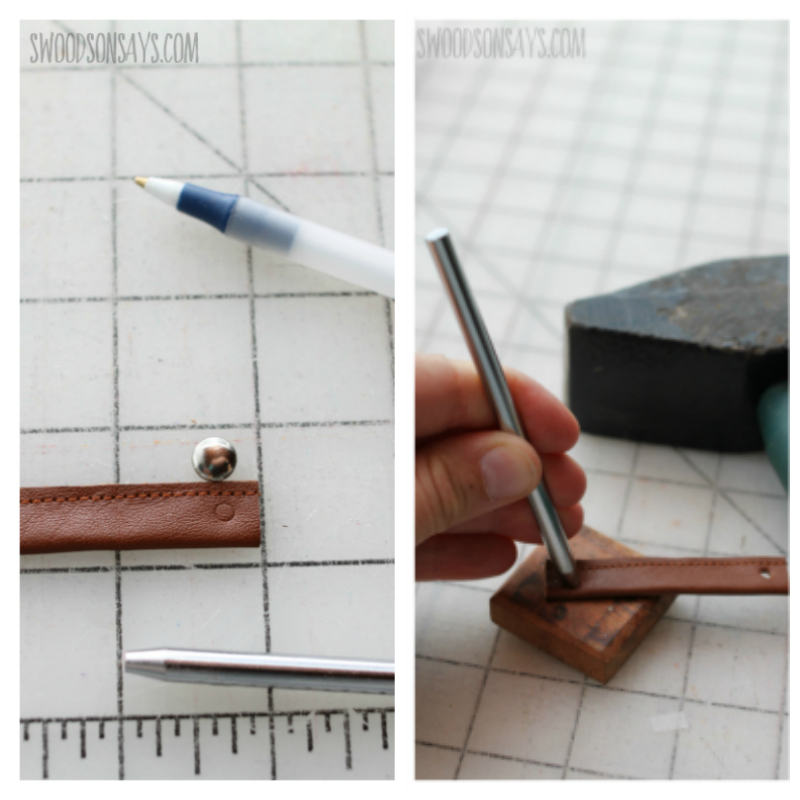
Step 8- Time to add leather! Cut 2 strips 3/4″ wide and 3.5″ long, and sew with the wrong sides touching, 1/8″ from the edge. Take one end of the rivet and press down 1/8″ from the outside, leaving a mark. Use the rivet tool to create a hole over the mark you left, repeat on the 3 other leather piece ends.
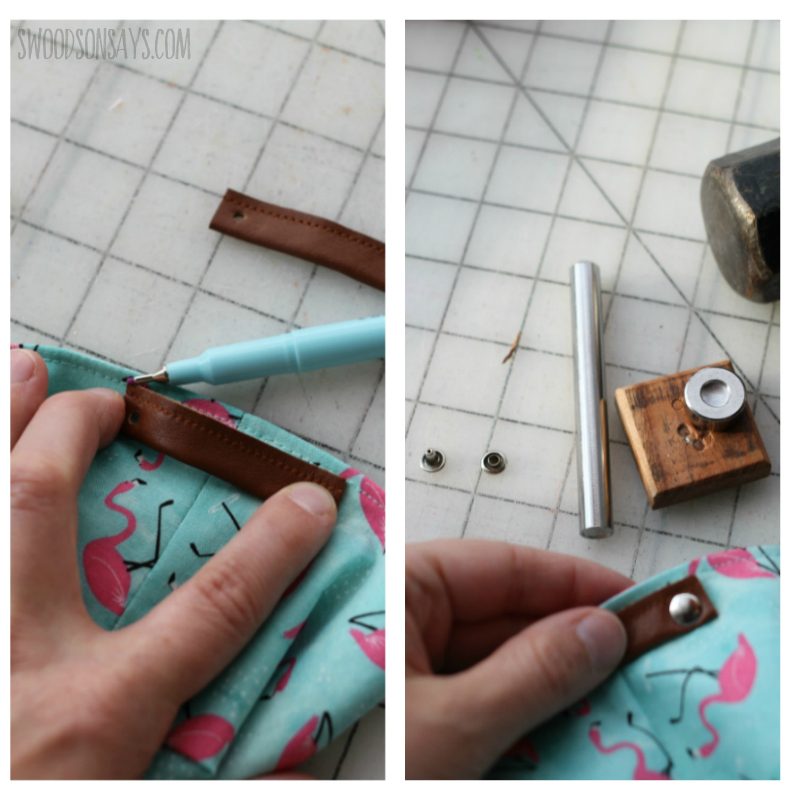
Step 9- Place the piece of leather right under your topstitching line and slide the ends slightly closer to one another so it isn’t tight against the side of the fabric. Use a marking pen to mark in each hole, cut it with the rivet tool, and then insert the rivet through the fabric and the leather, hammering to close. You’re done!
Kathie
Tuesday 17th of September 2024
I'd like to make this project to use for a plastic forks and knives. Can please tell me the finished size? I love the way you made this one with the boxes rather than a round bottom.
Stephanie - Swoodson Says
Friday 20th of September 2024
I'm glad you like it!! I am trying to find the finished basket - it was a major oversight on my part to not include those measurements and I apologize! My daughter was using it for a while, so trying to find it in her room and will report back :)
Kimberly
Wednesday 15th of December 2021
Can you post a new link for the leather? I’d love to give these as gifts but I’m not sure which leather is appropriate! Thank you!!
Stephanie - Swoodson Says
Tuesday 4th of July 2023
I can't seem to find it! My best advice is to go to a thrift store and put your hands on whatever is thinner and easier to sew, cutting up from a purse.
Heather
Friday 17th of May 2019
The handles give it such an nice touch! And I love the flamingo fabric!
Stephanie - Swoodson Says
Friday 24th of May 2019
Thanks Heather!