

I love freezer paper stencils. Freezer paper is dirt cheap and practically magic, a super easy way to make custom tshirts, totes, etc.! My apologies to non-American readers, I have heard it is impossible/difficult to find outside the states (please let me know if you have other tips for non-USA sourcing!). You can iron the paper down on fabric and it adheres quite nicely, and then peels away without leaving a trace. I also use this to cut out tiny felt pieces sometimes, but today I’m sharing a tutorial for how to stencil with freezer paper.
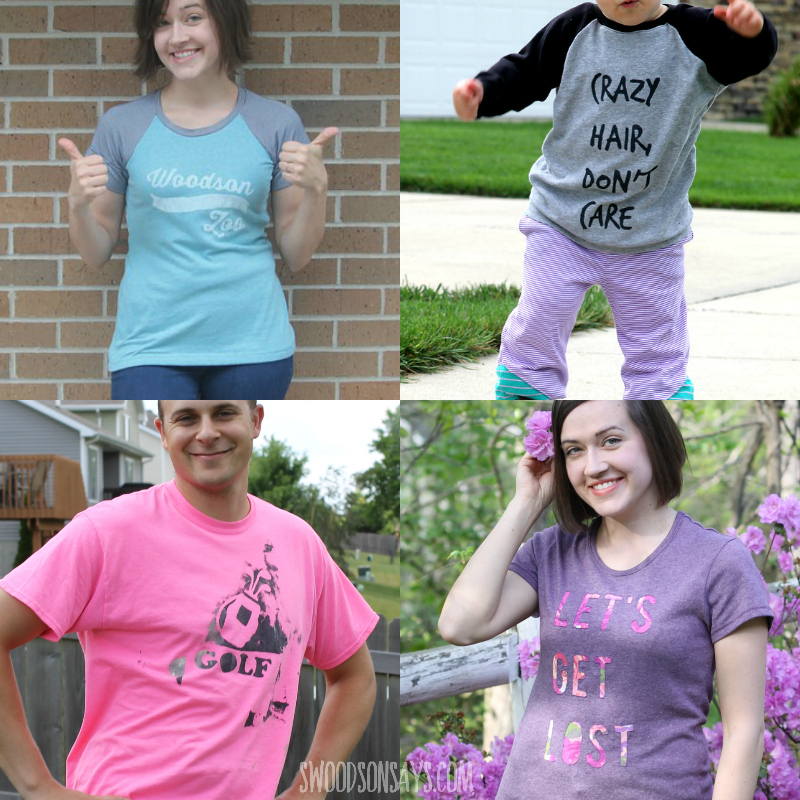
See some of the other freezer paper stencils I’ve made in the past!
- I used it in this freezer paper stencil Cricut tutorial if you don’t want to cut by hand, and my kids finger painted over it.
- I’ve used this technique to stencil another custom shirt
- I’ve also used it to stencil shirts for my son
- I’ve also used it to reverse applique, in a fun refashion tutorial
Pin this freezer paper stencil tutorial for later, using this link or image:
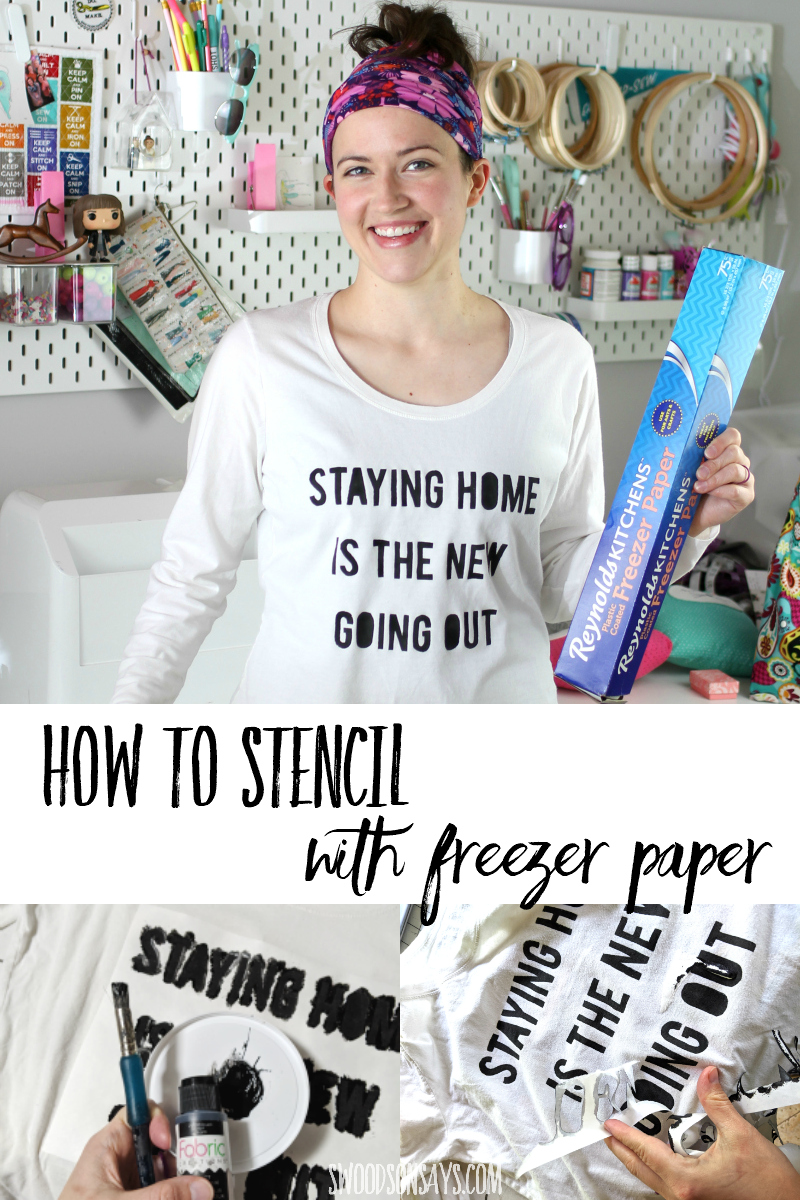
Freezer paper stencil
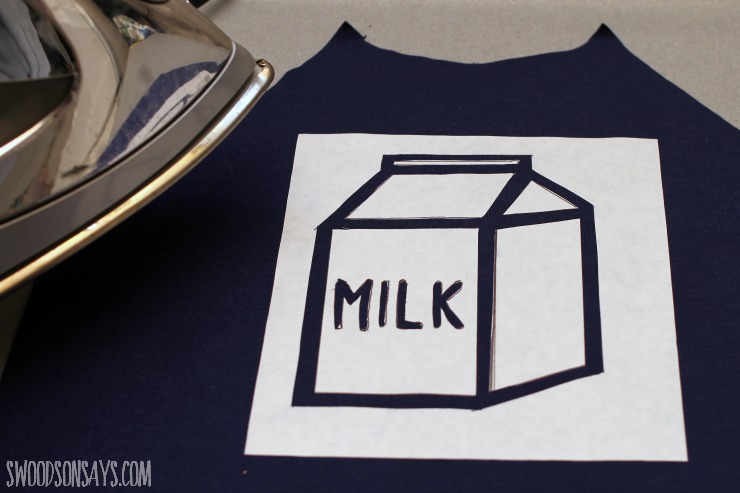
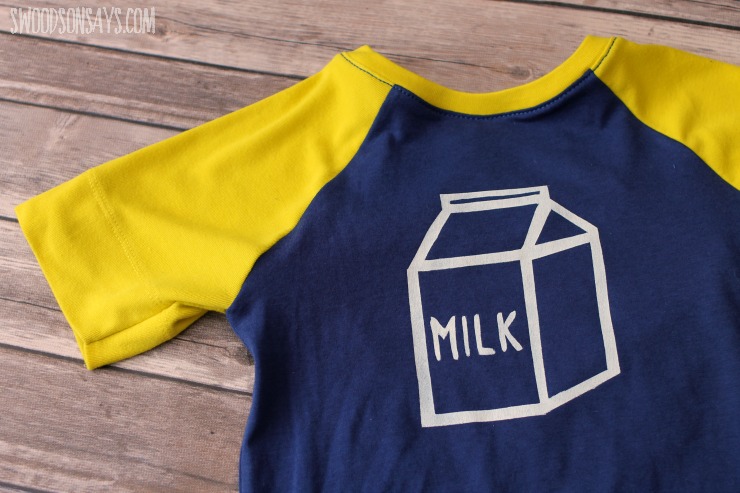
Do you want to make your own “Staying home is the new going out” shirt or use the Milk carton design shown below? Sign up for my newsletter and get the free download once you confirm your subscription! If you’re already a subscriber, you can access the pattern with the password in each newsletter, in the resource library.
Supplies
- X-Acto or craft knife
- Fabric paint – I really like Tulip soft matte but Plaid’s fabric creations works great too. If you already have paint you like, use fabric paint medium to mix in instead.
- Freezer paper (the regular roll is cheaper at your grocery store BUT Amazon has these fancy printable sheets, too OR my brilliant friend Amy remarked in the comments that she cuts the roll to printer size and uses them!)
- Pen
- Foam brush
- Thin cardboard
- Ruler (optional)
- Iron
Steps
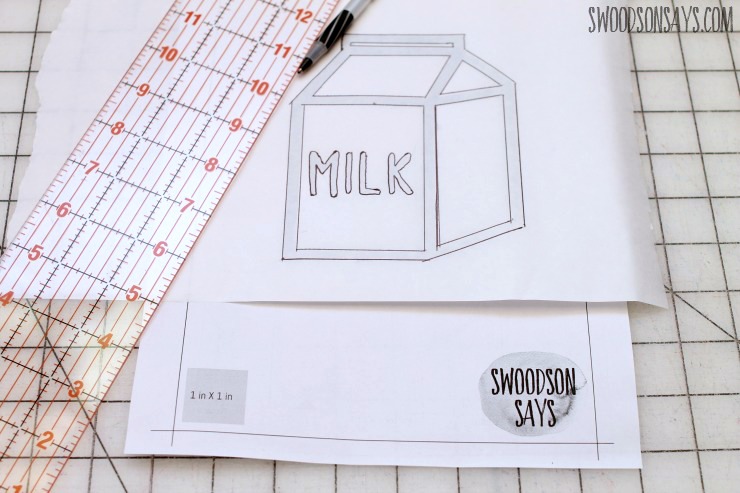
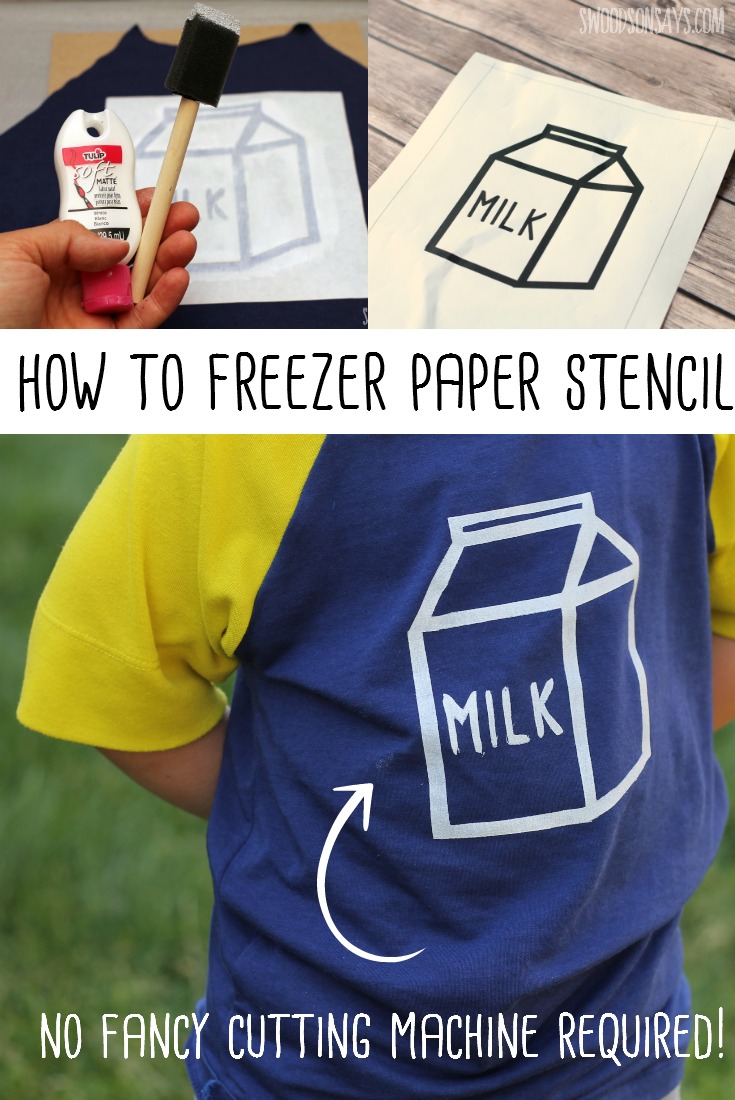
1 – Draw or print out the design you’ll be cutting and then layer the freezer paper over top, shiny side down. Trace.
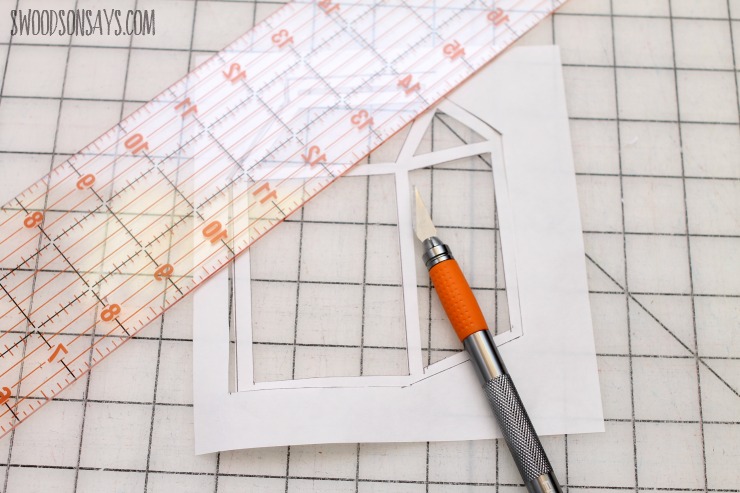
2 – Use your craft knife and cut out the outline, carefully preserving the corners.
3 -Lay all your pieces shiny side down on the shirt – iron with a high heat setting, making sure to catch all the edges.
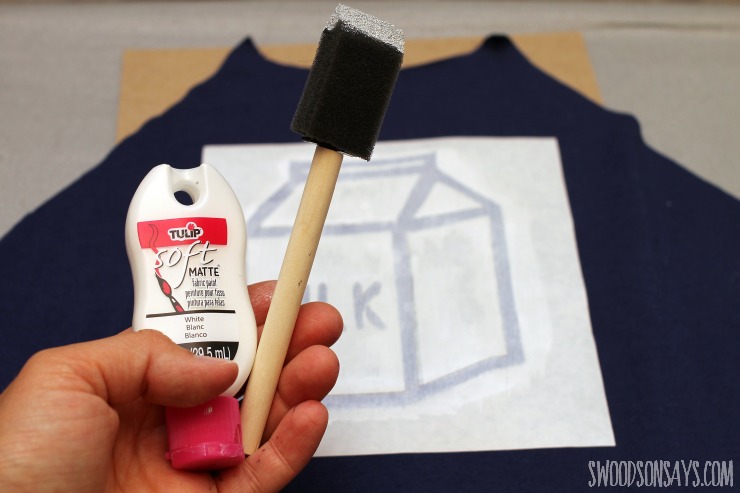
4 -Apply a light coat of fabric with your foam brush, painting with the grain of the fabric and watching out for bumps or lumps. Let dry, apply a second coat if necessary.
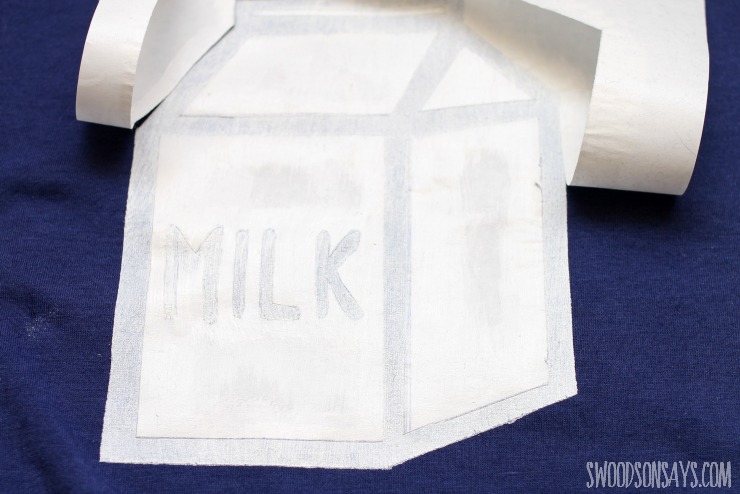
5 -Gently tease up one edge and pull all the freezer paper away!
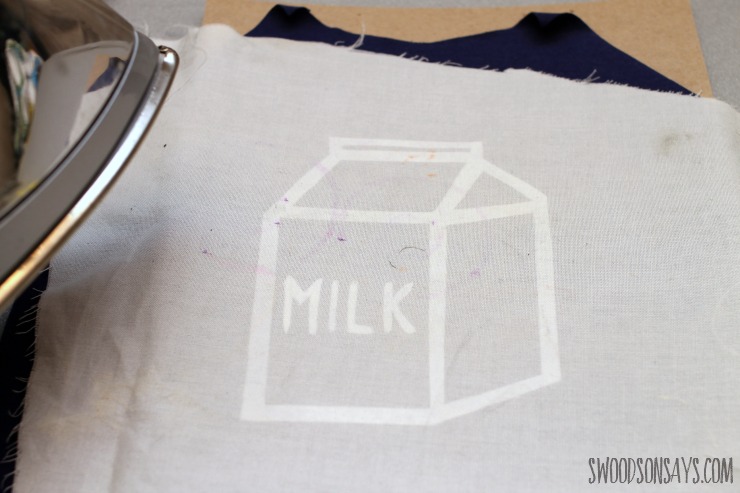
6. After the paint is dry, use an iron to ‘heat set’ the paint. Mine wasn’t 100% dry so I used a pressing cloth in between them, but this is optional.
Done! It took longer to photograph and write this tutorial than to actually do it – freezer paper stenciling is so satisfying. Have you ever tried it?
If you have never gone thrift shopping for t-shirts to upcycle, check out this post with tips on picking the best stuff! Then, freezer paper stencil it!
Doreen Nelson
Friday 28th of April 2017
In Australia we call freezer paper , "wax paper" and it is available in our supermarkets where we get plastic wrap and aluminium foil too...
Stephanie - Swoodson Says
Sunday 14th of May 2017
Oh neat, thanks for the tip Doreen!
Pam @Threading My Way
Friday 21st of April 2017
If only we could buy freezer paper by the roll at supermarkets! I've showcased your easy to follow tutorial, Stephanie... http://www.threadingmyway.com/2017/04/showcasing-how-to-stencil-with-freezer.html
Stephanie - Swoodson Says
Thursday 11th of May 2017
Thank you Pam!
Stephanie - Swoodson Says
Tuesday 25th of April 2017
Thanks so much Pam!
Sharon Martin
Tuesday 21st of June 2016
Great instructions. One of best I have seen on this. thank you. Will definitely try using your instructions. I already have the freezer paper with intent to try.
Stephanie - Swoodson Says
Tuesday 28th of June 2016
Sharon, that is the kindest thing to say! I'd love to hear how it works out for you, please email me and let me know :)
Cat
Sunday 19th of June 2016
Oh I'm pinning this. I will totally use it as I don't have one of those fancy silhouettes or cricuit machines. Thanks for sharing!
Stephanie - Swoodson Says
Monday 20th of June 2016
Thanks for pinning! It's a handy trick, I've used it for my own, adult, shirt designs too, not just kids!
Domenica
Saturday 18th of June 2016
I love freezer paper too. We can only get it in craft stores here in Australia. Love this technique. It's a great option if you don't have one of those expensive cutting machines.
Stephanie - Swoodson Says
Monday 20th of June 2016
When I worked with One Thimble, an AUS e-mag, the editor said it wasn't common there! I would miss it terribly!