
Fidget blanket pattern free tutorial for how to sew a small/lap busy quilt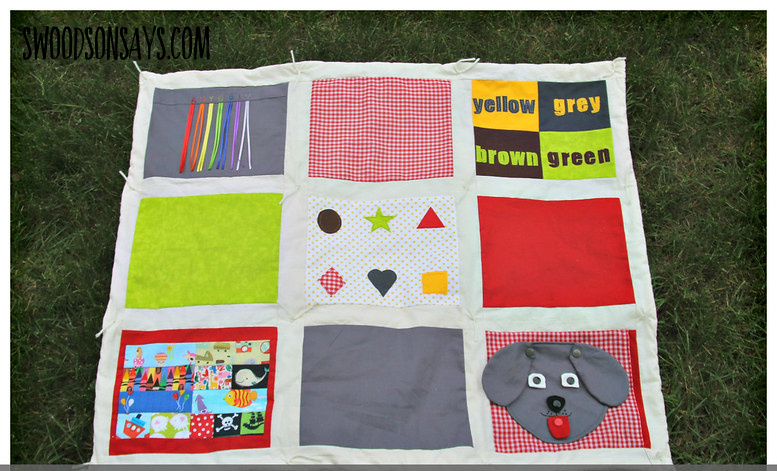
This project was originally on Sew Mama Sew as a free tutorial and I’m trying to resurrect it here since SMS was taken down! This tutorial is an older one and not the same quality as my more recent tutorials, but I think it’s very sew-able so sharing it in case anyone can use the inspiration. I was not able to recover all the photos from the original post, if it seems like something is missing.. that’s because it is! But I’ll fill in what I can, in case someone can use the bits and pieces.
Today I’m excited to share a secret project I’ve been working on – a toddler activity quilt! As I explained recently, my son has outgrown all of his baby toys but isn’t old enough to be interested in some of the more complex toddler favorites. In addition to reading his 5 favorites books 1000 times a day, I’ve been working on making some toys that fit his current interests and attention span. (In the effort of full disclosure, the coloring part is not enticing to him just yet – scroll to the bottom of this post to see what he ACTUALLY colored instead)
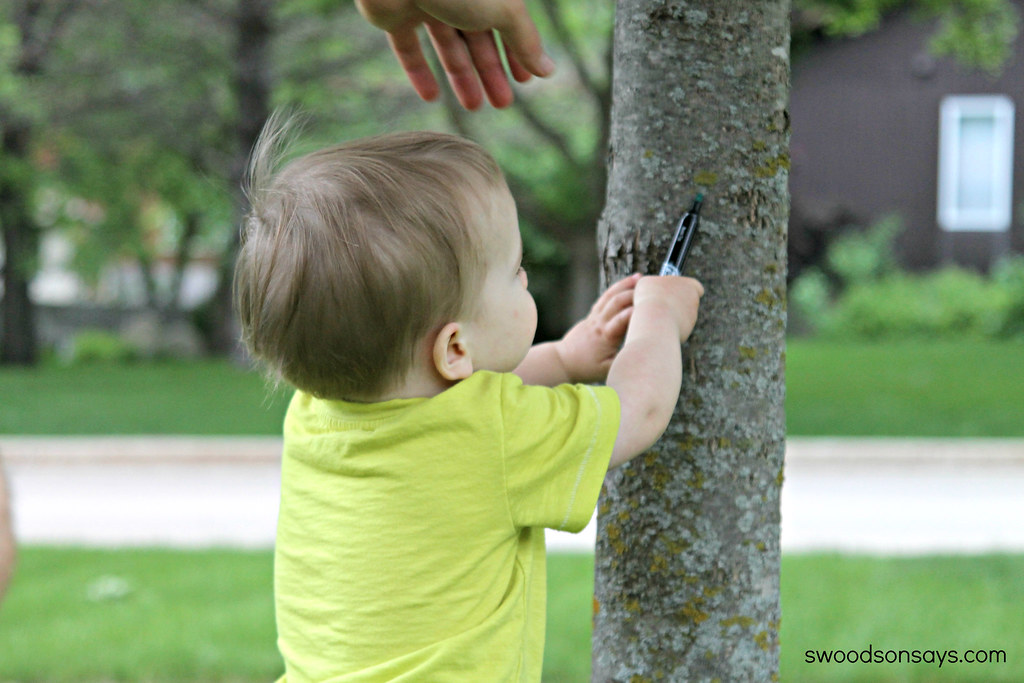
Why color fabric when you can color a tree?
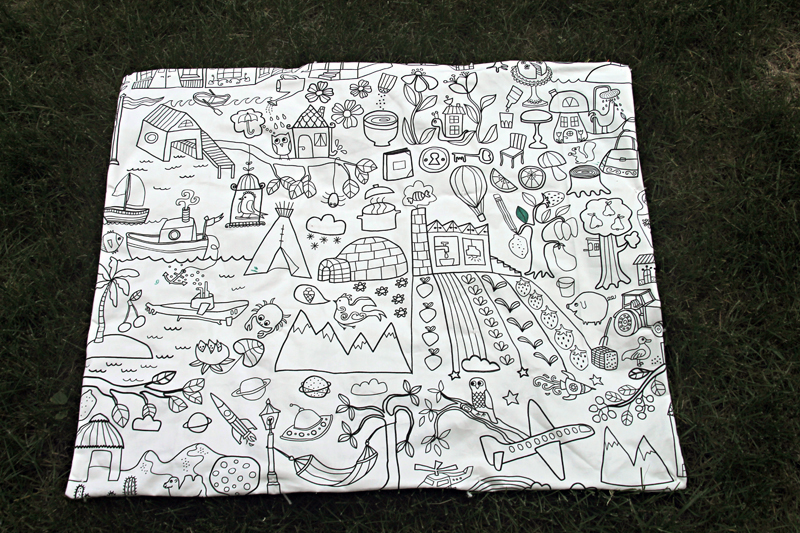
Isn’t this IKEA fabric fun!
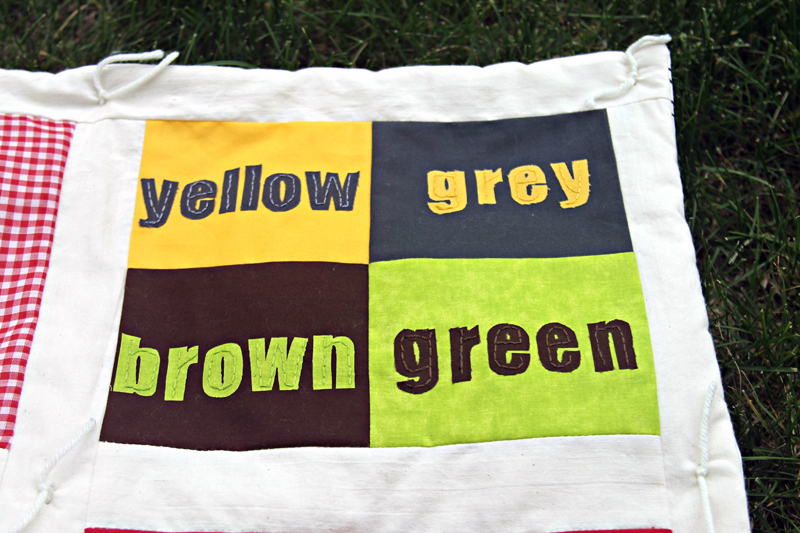
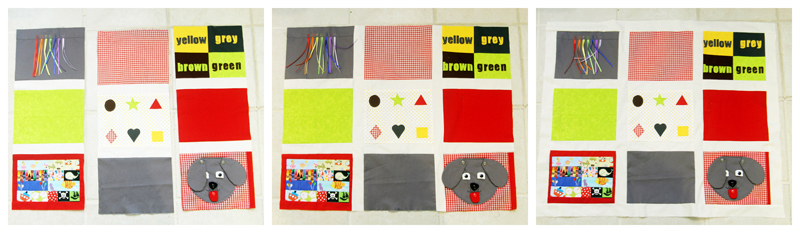
The nature color panel is designed so you can tap into the toddler tendency to scavenge and bring things back, matching up things they’ve found with the colors.
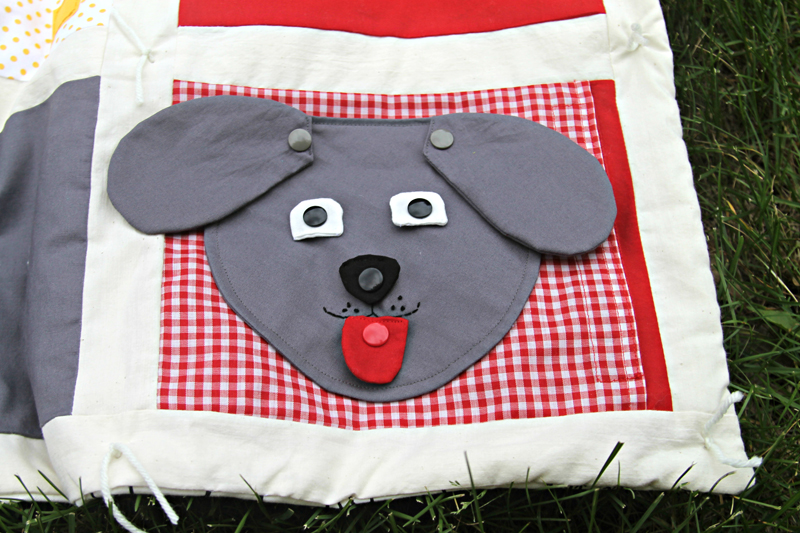
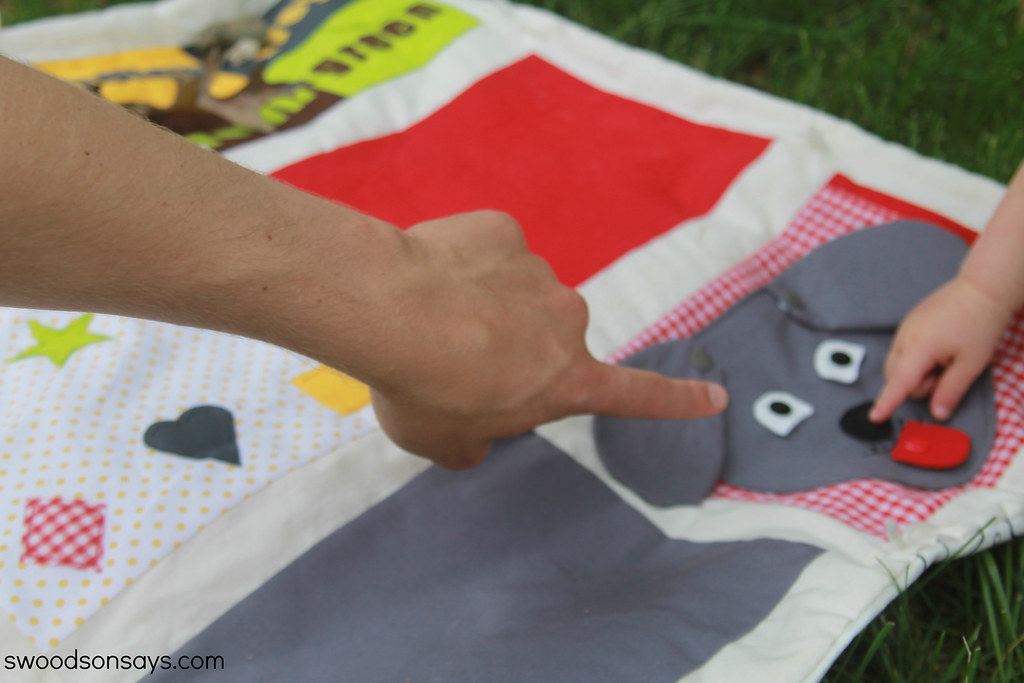
The puppy dog panel is a simple puzzle with a built-in pocket to hold the pieces before washing or during transport.
(not pictured)
The shapes panel can be used to talk about shapes you see outside or you can just pick them out on the quilt.
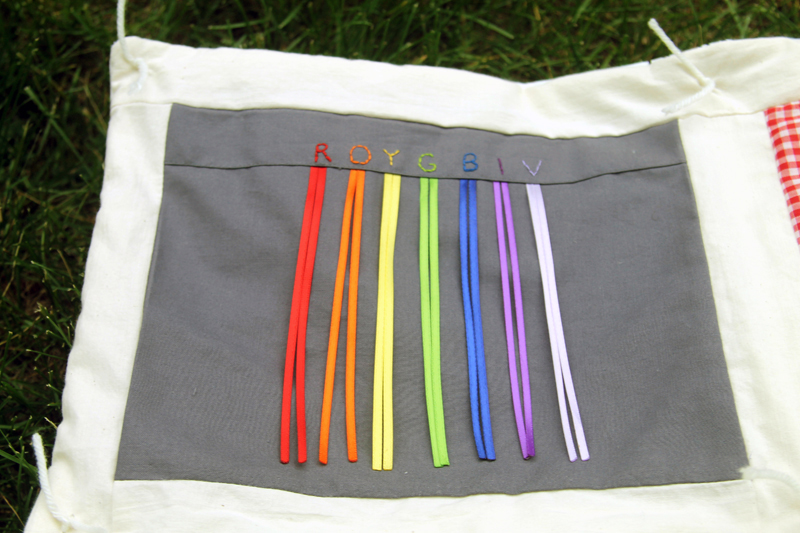
The rainbow panel can be used to pick colors outside, to practice simple braiding or for weaving beads on to the ribbon with an older toddler.
(not pictured)
The patchwork panel is a simple “I spy” activity, so kids can pick out animals, colors and shapes.
Fidget blanket pattern free tutorial
Supplies
- Crib-sized batting
- Safety pins
- 1 yard of neutral, solid fabric for the sashing, ripped or cut into 2″ wide strips by the width of the fabric
- 1 yard of fabric for the back of the quilt
- 5 finished activity blocks (instructions below)
- 4 plain fabric panels measuring 10″ X 8″
- Yarn
- Large darning needle (preferably curved)
- Hand sewing supplies
Steps
Instructions:
1. Lay out the blocks and make sure they’re all lined up and facing the same way.
2. Sew the 2″ strips between each panel with right sides together (RST), trimming at each end and pressing the seam allowances to form three columns.
3. Sew the 2″ strips lengthwise, joining each column. Trim and press, sewing the remaining strips along the outside borders. The finished quilt top measures 26″ X 24.5″
4. Roughly cut the batting to the same size as the quilt top and safety pin it to the wrong side of the quilt top, smoothing out any ripples.
 5. Pin the quilt top and backing together right sides together (RST) and sew, leaving a small opening to turn the quilt right side out.
 6. Turn right side out and press, press the raw edges inside along the opening and hand or machine stitch the opening shut.
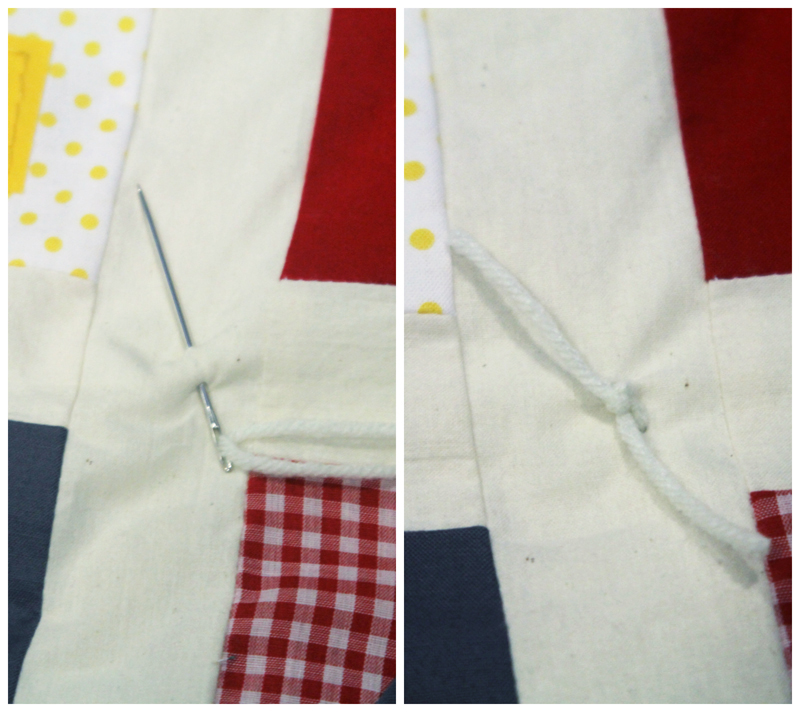
7. At each juncture, thread the needle with yarn and thread through, double knotting the yarn into a tie on the quilt top.
Puppy Dog Panel
Supplies:
- Puppy dog PDF pattern
- KAM snaps (6 total sets – I used 3 black, 2 grey, 1 red), plus attachment tools
- Embroidery supplies or fabric marker
- 6.5″ of Velcro
- Red fabric scrap for tongue
- Black fabric scrap for nose
- White fabric scraps for eyes
- 1/4 yard grey fabric for face and ears
- 1/4 yard fabric for the front and back panel (I used a red gingham and solid red)

Instructions:
1. Cut 2 rectangles 10″ X 8″, trace and cut all dog pattern pieces.
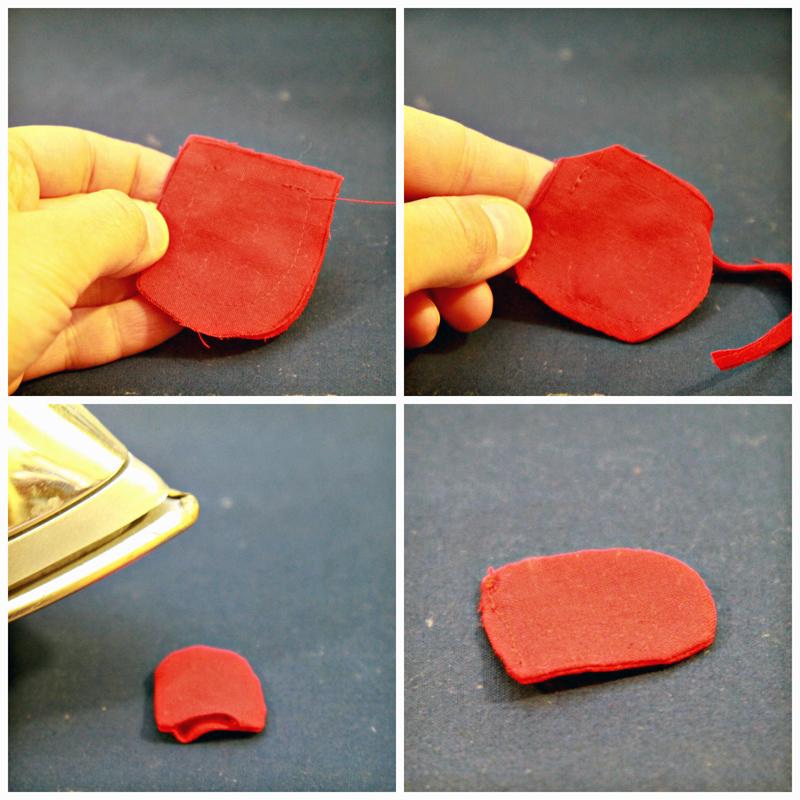
2. Sew dog pattern pieces RST, leaving a small opening to turn right side out. For each piece, trim seam allowances, flip right sight out and fold raw edges in. Then hand or machine stitch close. Press each piece smooth with an iron.
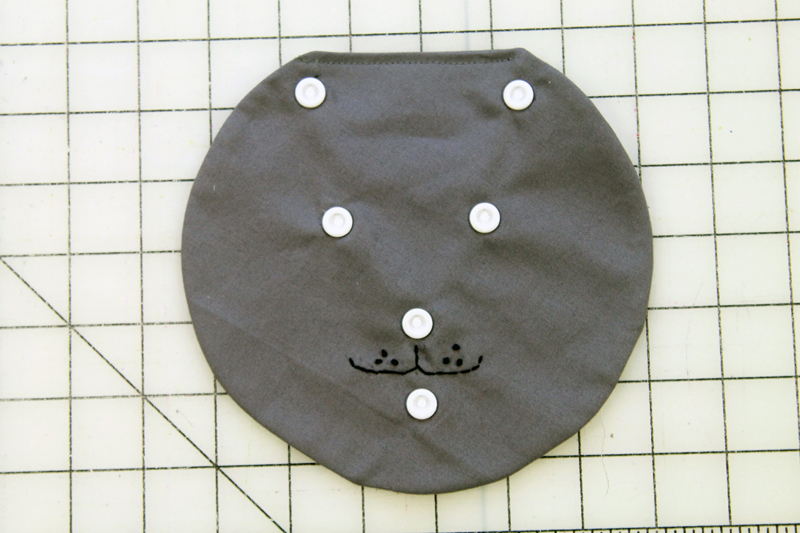
3. Embroider or use a fabric marker to draw the muzzle and whiskers on the face.
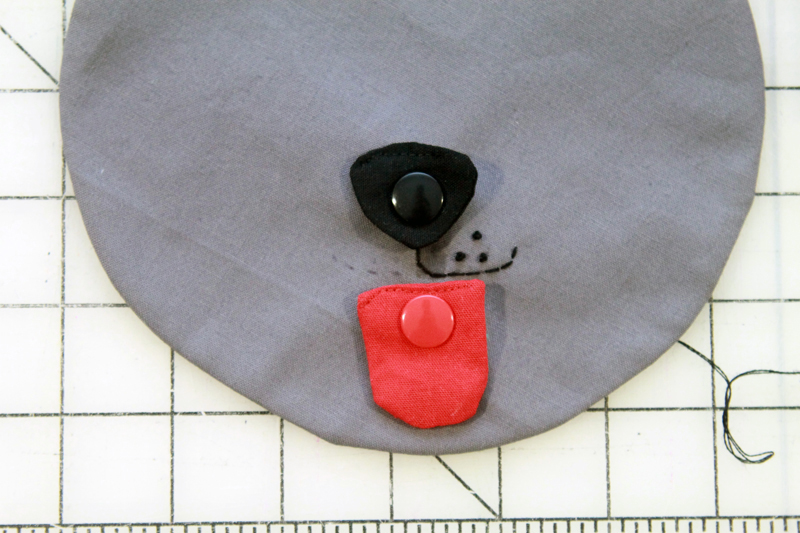
4. Insert KAM snaps, with the prong side on each removable face piece. Poke the awl through to the wrong side, using a fabric scrap as a stabilizer. Insert the cap, press the prong through and use the KAM press to close. Trim the fabric scraps around the edge.
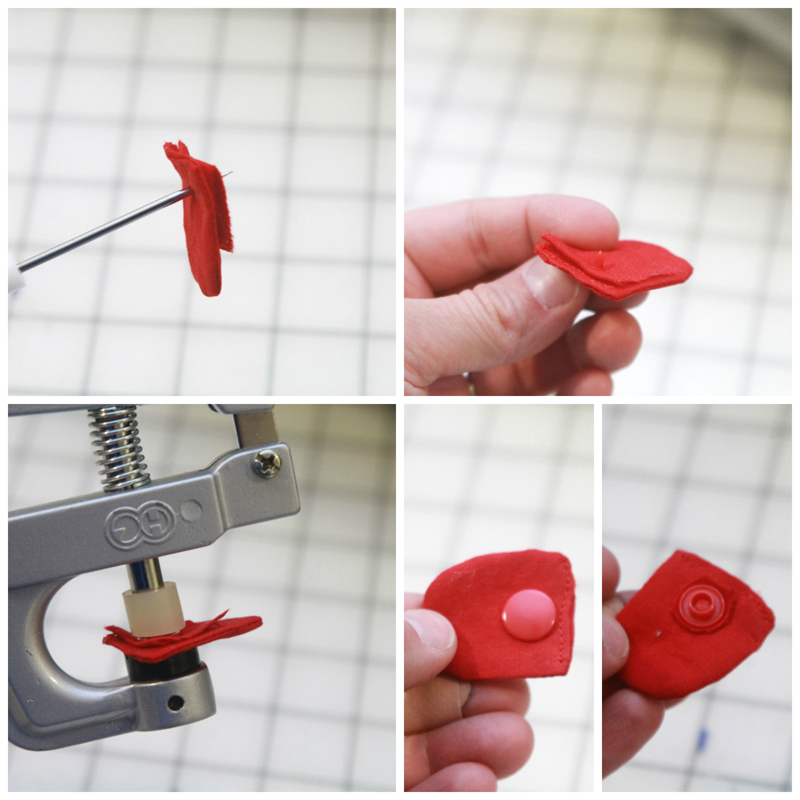
5. Use the same process and insert KAM snaps, with the socket side facing up on the main face piece.
6. Take the top panel and fold a vertical edge over 1/2 inch, press, fold another 1/2 inch, press and sew 1/4 away from the edge.

7. Sew one side of Velcro to the inside of the top panel and sew the other side of Velcro 1″ from the edge on the back panel.

8. Sew the head base to the top layer, leaving 3″ at the top of the head open (this allows you to put your hand in if you need to stabilize it while un-snapping the pieces).
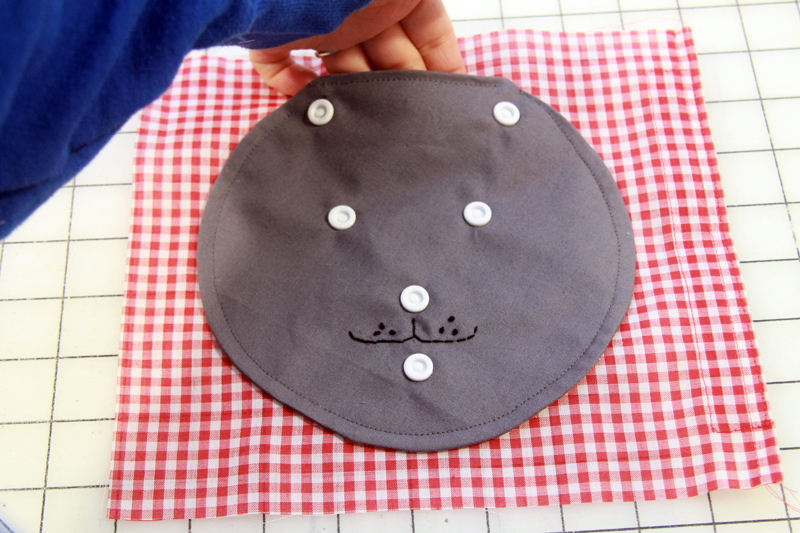
9. Attach the top panel to the bottom panel, aligning the Velcro, and stitch 1/8 from the edges along the three non-Velcroed sides. Attach the face pieces and admire!

Patchwork Panel
Supplies:
- 8 scrap pieces with interesting objects, larger than 5″ X 2″
- Scraps for outside sashing, 1″ X 6″ (2 strips) and 1.5″ X 10″ (2 strips)

Instructions:
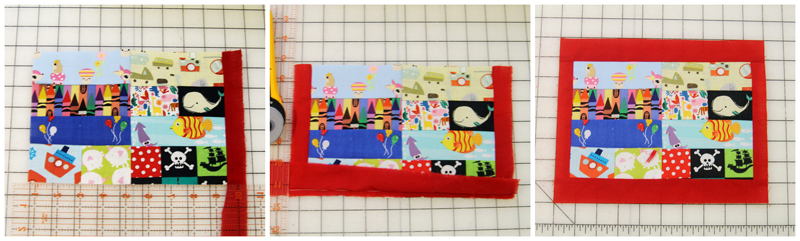
1. Cut 8 panels 5″ X 2″ (I split two- making each square 2.75″ X 2″). I used cardboard templates so I could easily center the designs.
2. Sew together and press all seam allowances to one side. Trim edges.
 3. Sew sashing borders and trim edges to match 10″ X 8″, and press.
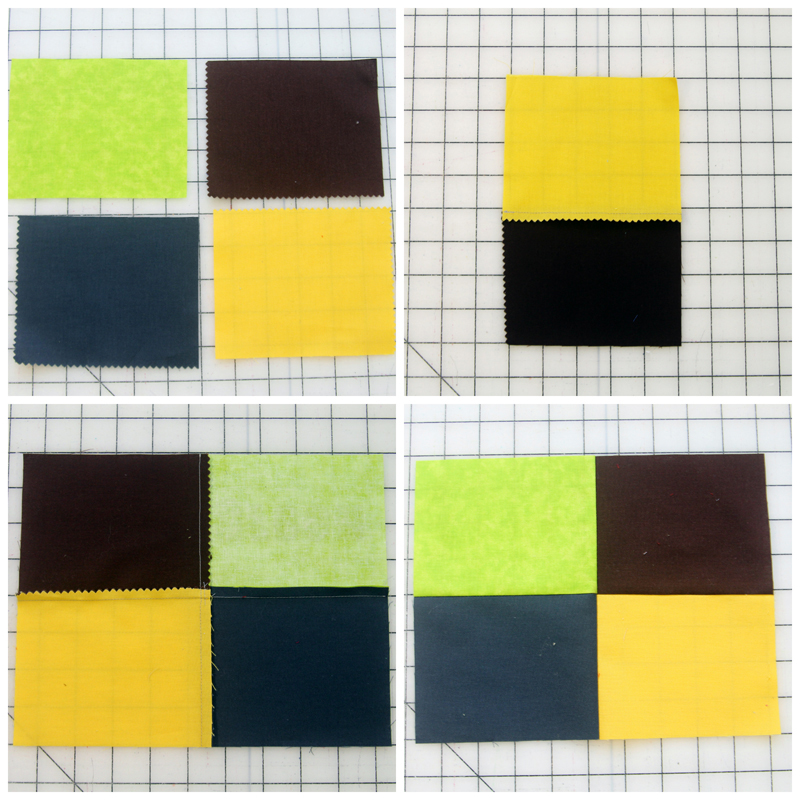
Nature Color Panel
Supplies:
- Scraps for 4 squares of 5.5″ X 4.5″ (I used green, brown, yellow and gray.)
- Mirrored text PDF template
- Scraps for lettering
- Wonder-Under or similar fusible webbing transfer product

Instructions:
1. Sew each square together, and press seam allowances. Trim 1/8″ of each edge so the final rectangle is 10″ X 8″.
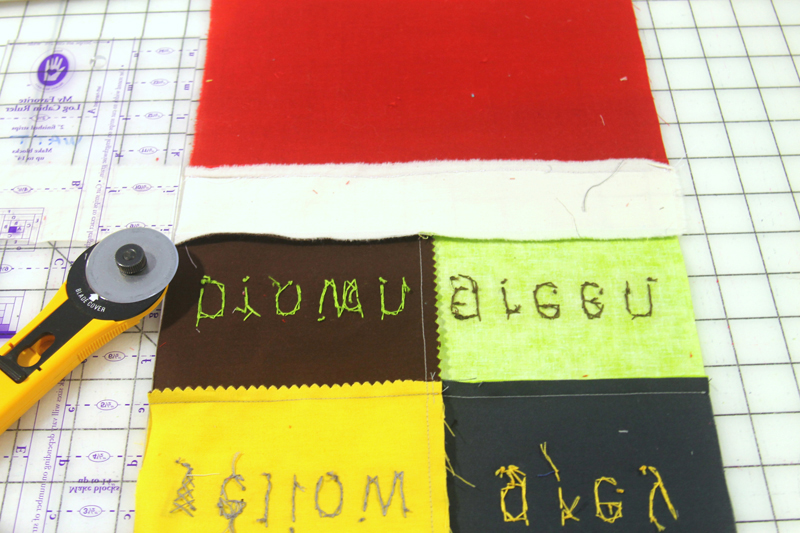
2. Trace the letters on to the Wonder-Under’s smooth side.
3. Roughly cut around each word, and iron on to the wrong side of the fabric scraps.

4. Cut out along the words precisely, peel the backing off, line up and iron on to the finished block. Take into consideration the 1/4″ seam allowance around the edges when you place the words.
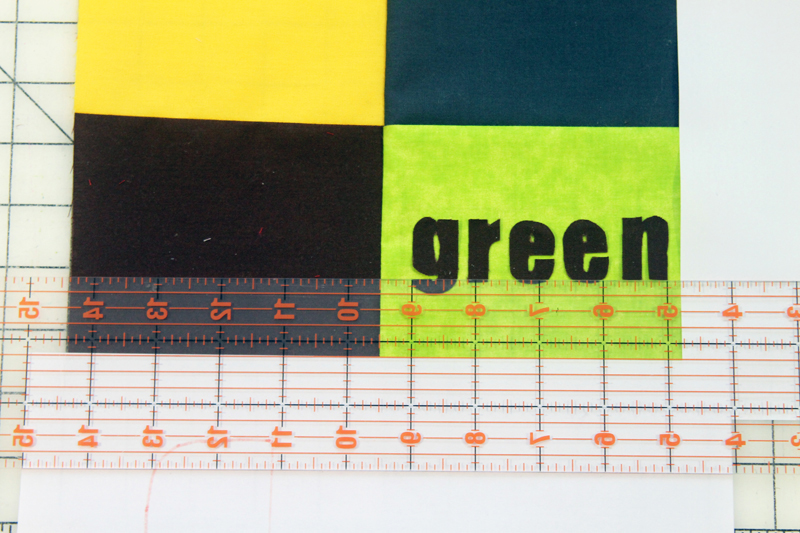
5. Embroider or machine sew the letters on.
Rainbow Panel
Supplies:
- 7.5″ strips of ribbon in rainbow colors
- Scrap of fabric for top panel, 10″ X 3″
- 10″ X 8″ fabric piece for panel
- Lighter or Fray Check
- Embroidery supplies or fabric marker

Instructions:
1. Fold the top strip in half, press and embroider or use a fabric pen to sketch out “ROY G BIV” along the edge.
2. Use the lighter to burn or apply Fray Check to the top edge of all ribbons.
3. Unfold and sew the ribbon to the bottom piece of the top panel, lining this up over each color letter.
 4. Lay the top panel over the back panel and stitch along the bottom edge of the top panel, right under the embroidery.
5. Trim along the bottom of all the ribbon to make the ribbons even, then burn or fray check the bottom edges.

Shape Panel
Supplies:
- Scraps of fabric for six shapes
- Shapes PDF template
- 10″ X 8″ fabric square for main panel
- Wonder-Under or other fusible web product
- Embroidery supplies (optional)
Instructions:
1. Follow the steps outlined in the nature block for tracing, transferring and ironing the shapes on with the Wonder-Under.
2. Machine stitch or embroider the shapes on to the main panel.
Salleigh
Saturday 25th of November 2023
I know this blog post is several years old, but is the pattern for the toddler activity mat still available? The "Sew Mama Sew" website doesn't seem to be functioning currently.
Salleigh
Tuesday 19th of December 2023
@Stephanie - Swoodson Says, Hi, Stephanie! I appreciate your taking the time to resurrect this playmat pattern and for replying to my question. Your tutorial is certainly helpful and I shall refer to it when I make a playmat. Thank you!
Stephanie - Swoodson Says
Monday 11th of December 2023
hey Salleigh, I was able to recover some of it from an internet cacheing catalog, but not everything :/ The text is all there & solid but some of the photos aren't. The files are too - there was never one full pattern, just the different files for the things that needed to be printed. Hope some of that helps!
Stephanie - Swoodson Says
Saturday 25th of November 2023
:( sew mama sew shut down, I didn't think about it not being accessible anymore. Let me see if I can dig around and put the tutorial and pattern pieces on here, but they might be gone forever.
Alicia @ Felt With Love Designs
Thursday 3rd of July 2014
This is really cute! I never would have thought to look at Ikea for fabric. I'm going to browse next time I'm there.
Stephanie - Swoodson Says
Thursday 3rd of July 2014
Oh gosh, do it!! It is so cheap. I love Ikea.