
Read this easy beginner sewing tutorial for how to make a patchwork doll sleeping bag with english paper piecing.
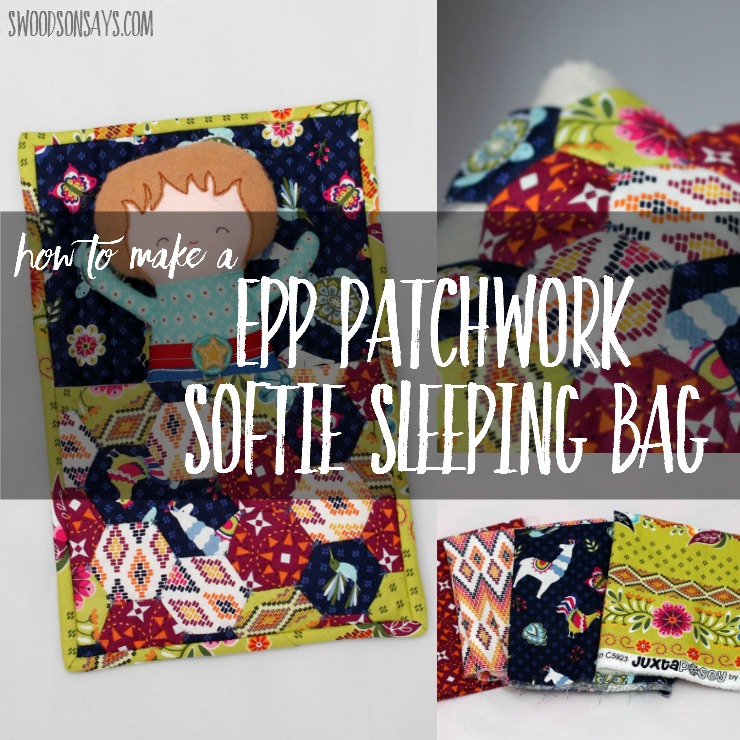
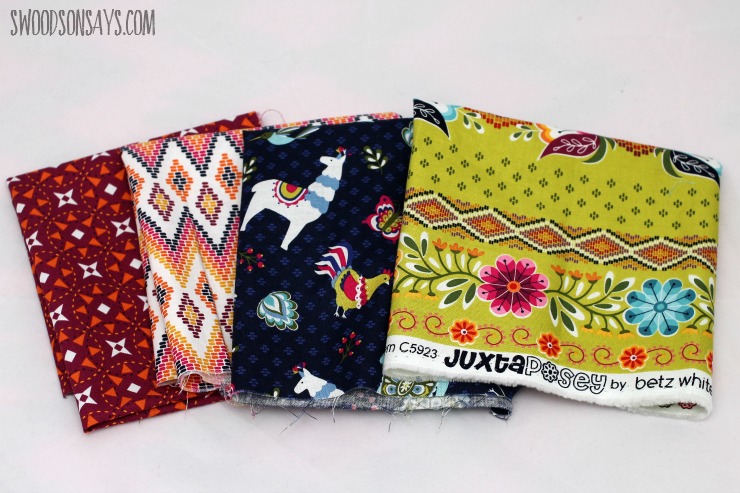
If you’ve been wondering how to make a doll sleeping bag, I have a patchwork twist on a simple bias-bound rectangle. This is an easy english paper pieced tutorial that just uses a few hexies, so it is perfect if you want to try EPP and have something done in a weekend instead of over a few months. I was excited to try out the new Juxtaposey fabric line, designed by Betz White for Riley Blake Designs, and they graciously sent me some to play with! It lent itself perfectly to EPP and I can’t get enough of those cute little animals.
My husband and I took a post-graduation trip to Peru and I’ve had an affinity for llamas and alpacas ever since; I recently organized a field trip to a local fiber farm to meet their alpacas and see their processing mill, it was so fun! The fuchsia, turquoise, and lime in these prints are three of my favorite colors.
The days that I worked on this were gloomy, so the bright colors were a nice change. I haven’t done much hand quilting, so it was fun to play with this smaller project and experiment. I ended up making these tiny little X’s after trying some french knots and stars as well. Normally I save handwork for during the week when I’m home with the kids by myself, but it was nice to just sit and sew while they played with my husband. I’m more of a hiker/craft organizer and not so much for the imaginative play, but he is a professional level make believe-r and it’s fun to watch! They checked in on me periodically, but mostly I sat in peace while watching them play hide and seek dressed up in crazy costumes.
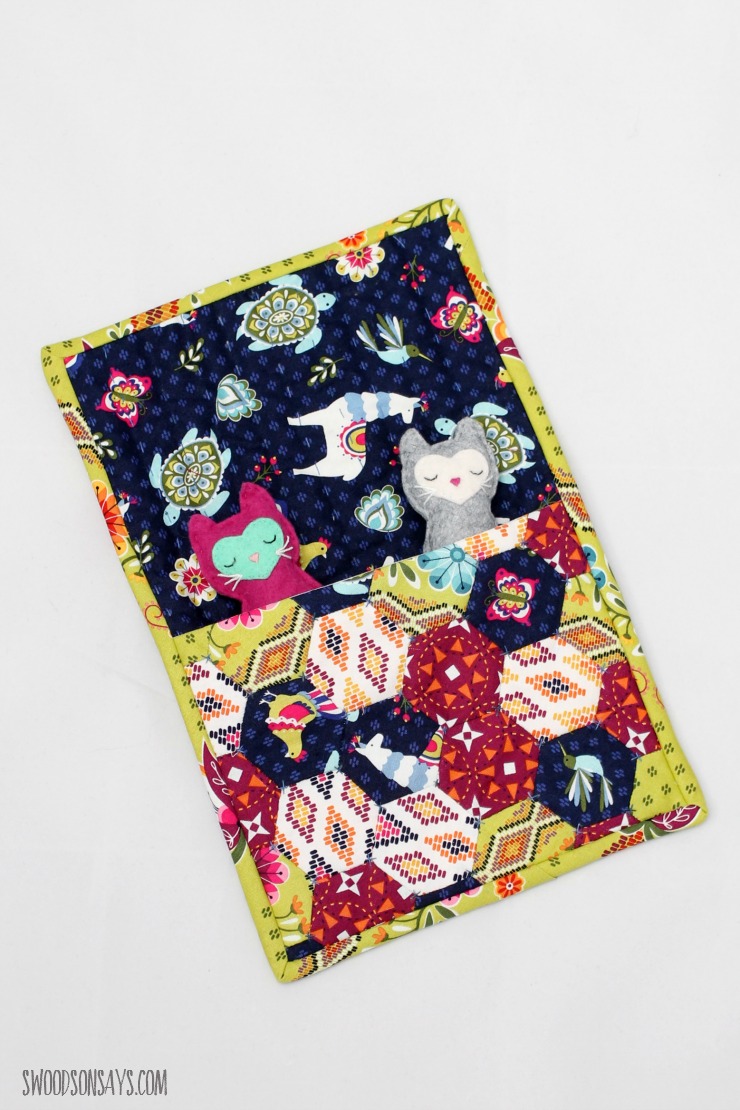
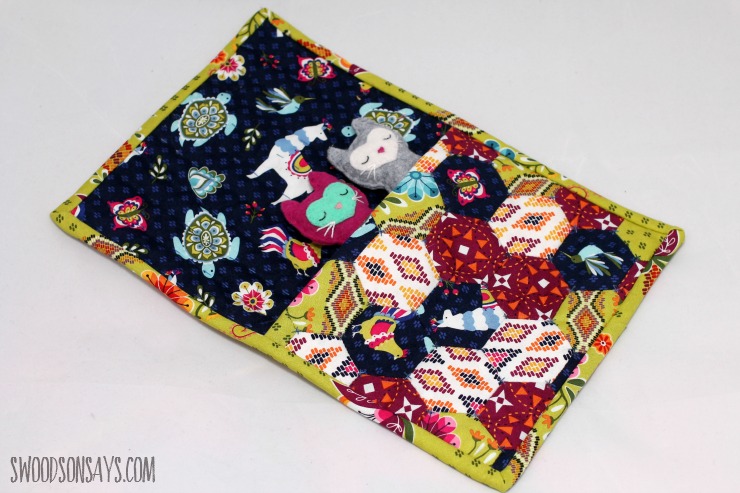
I know some people will think “why would I put all that time and effort into a kid’s toy!” and I totally get that. When spare time was few and far between and my babies were truly babies, I would’ve never dreamed of working on such an involved project, let alone for my children. Back then I was all about the quick finish, with simple clothes and softies. Now that we’ve shifted into the toddler/preschooler season, I feel less frantic to finish something the day I started it and I really enjoy sewing while they watch. It builds anticipation too, as they watch the project change shape and form until they finally get to actually play with it! Photographs usually come first; my first thought was to tuck our two little pocket kitties in, and they looked so cozy! There’s a free pattern to make them, here in this post.
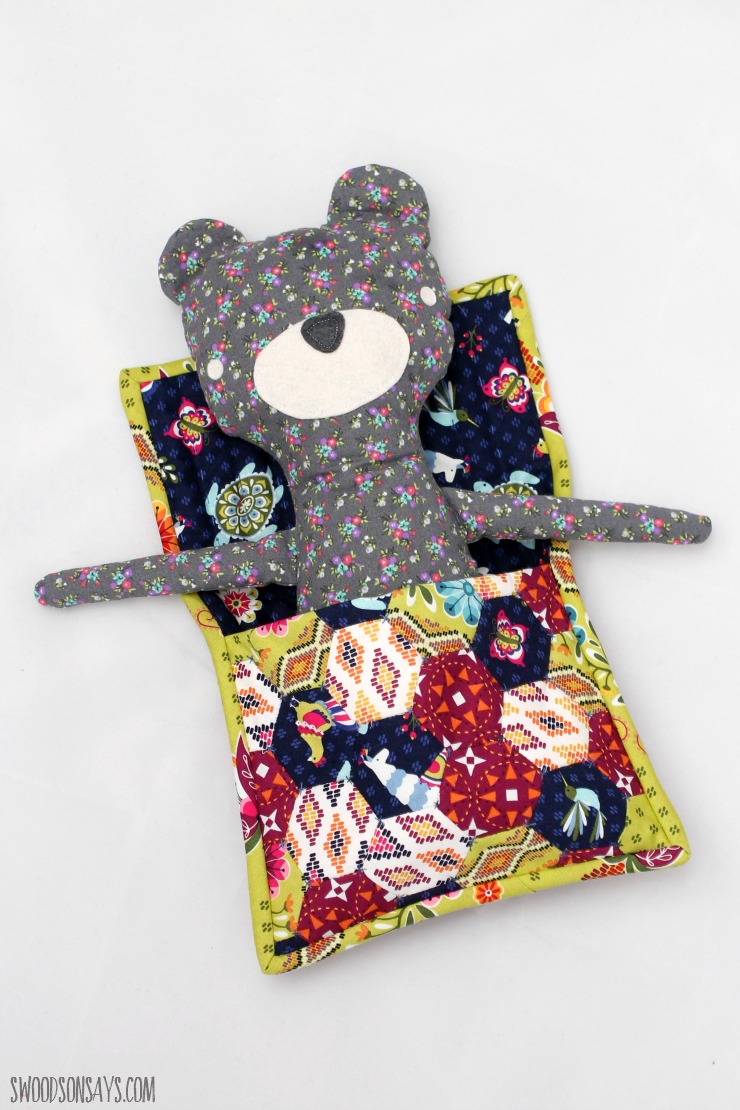
Next I tried my stuffie pattern, the Hipster Teddy Bear! I had to tuck her legs up, and it was a little snug, so I might need to make a bigger version.
If you like this post, check these other posts out while you’re here!
- 13+ english paper piecing small projects to try
- 50+ free printable stuffed animal patterns
- 30+ of the best fabric scrap projects
- The cutest 25+ toys to sew for kids
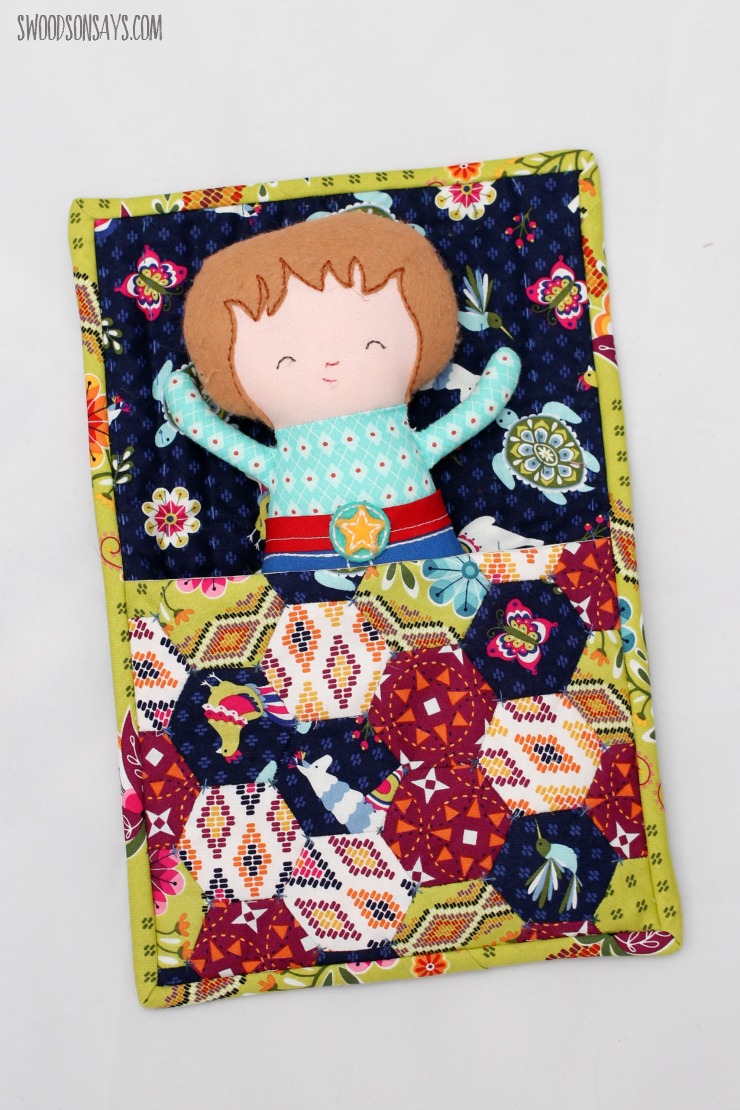
My Mom has an embroidery machine and made this adorable in-the-hoop softie from a Dolls and Daydreams pattern a while back, he fit in just perfectly!
Are you ready to make your own doll sleeping bag? It isn’t a super fast project with the patchwork and hand stitching, but I easily finished it in a weekend!
Pin this How to make a patchwork doll sleeping bag tutorial with this link or photo:

How to make a patchwork doll sleeping bag
Supplies
- 1/2 yard Juxtaposey cotton for hexies & binding
- 1/4 yard in 4 other Juxtaposey prints
- Quilt batting scraps
- Sulky petite cotton thread
- Hand sewing needle
- Clips or pins
- Rotary cutter & quilt ruler
- Free hexagon template pattern –sign up for my newsletter and get the free download once you confirm your subscription! If you’re already a subscriber, you can access the pattern with the password in each newsletter, in the resource library.
Steps
How do you make a toy sleeping bag? Let’s go!
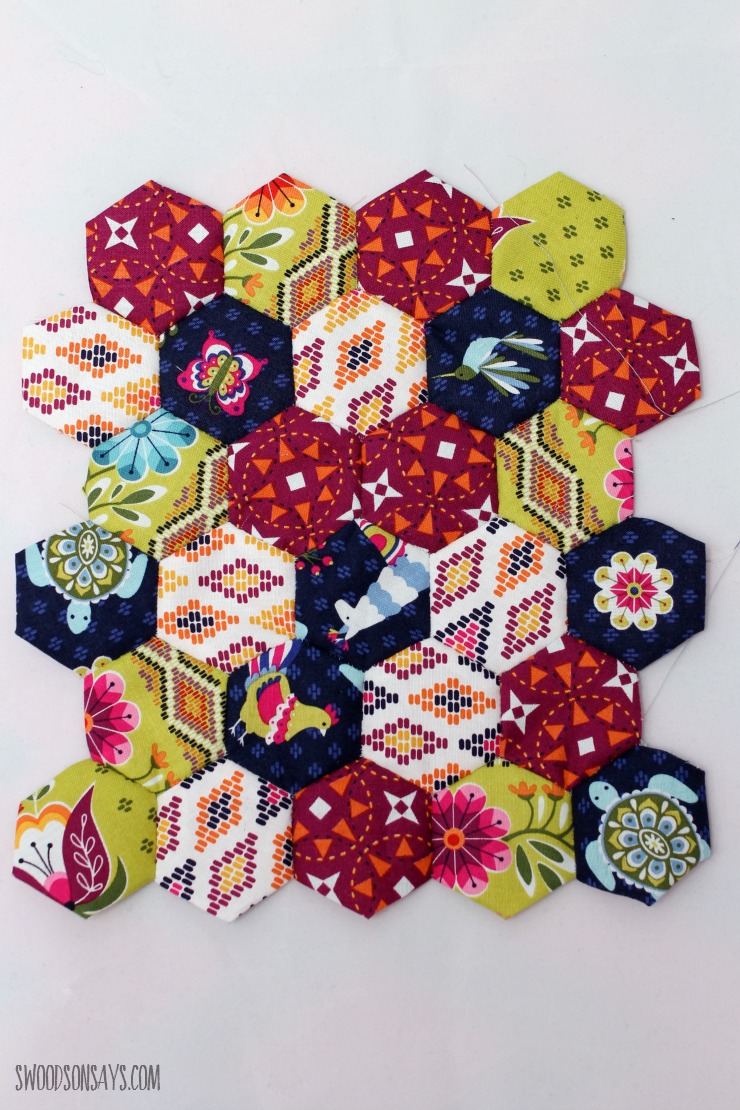
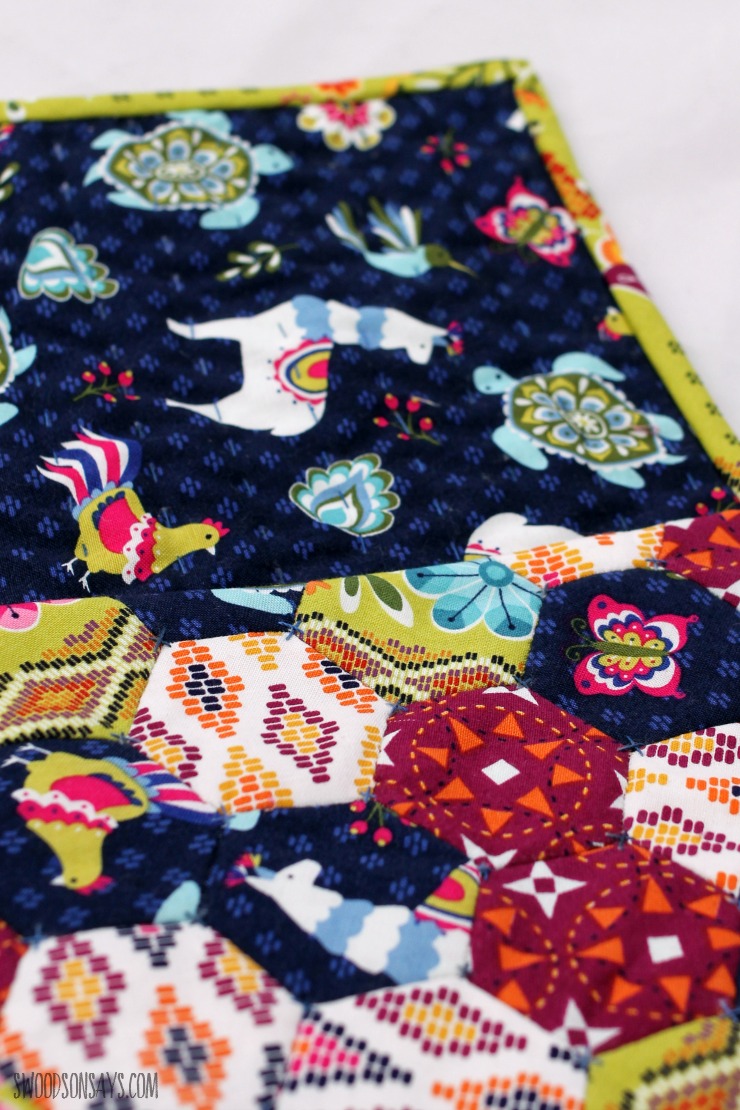
1- Make a 27-hexie rectangle! If you’re not familiar with EPP, I have details in this post. As you can tell, I used a slightly different method, not going through to the front to secure the sides, just to experiment.
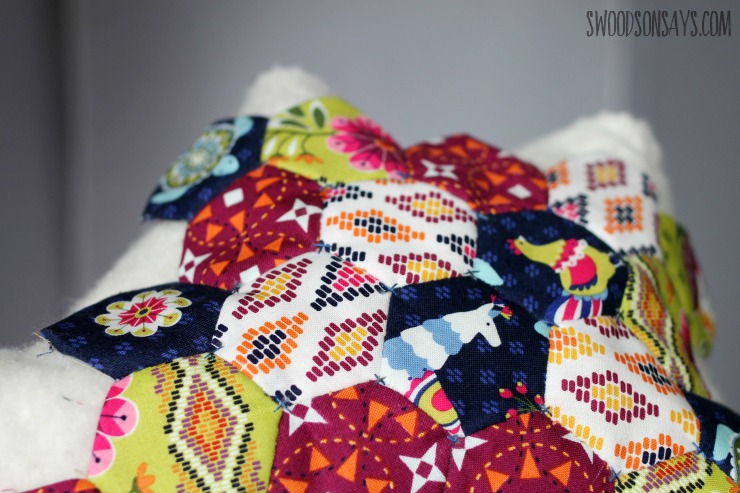
2- Take out the papers and lay it on a scrap of quilt batting slightly larger than the rectangle, and hand quilt. Sulky sent me some petite cotton threads to try and they were great for this project! I made little X’s near the intersections. Press and trim it to a rectangle with clean edges, measuring 8.5″ wide by 6.75″ tall.
 –
–
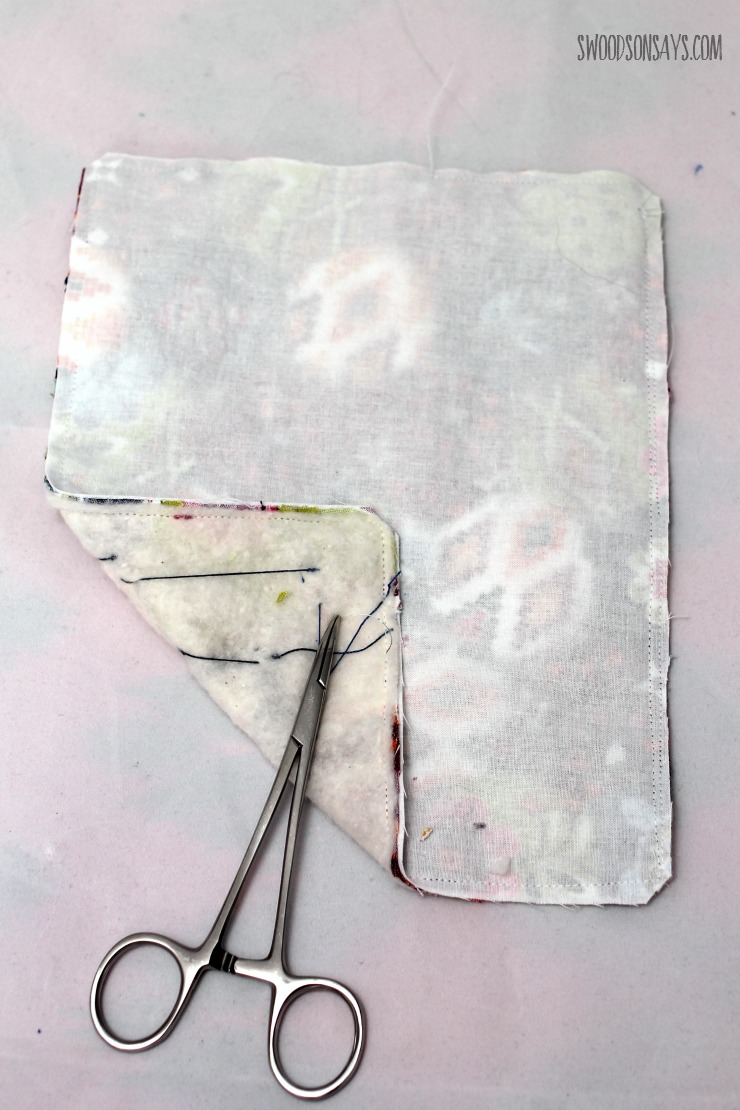
3-Cut a plain cotton rectangle the same size (I used white just to save the pretty Juxtaposey fabric for another project!) and sew it right sides together, using a scant 1/4″ seam allowance, leaving a small gap to turn.
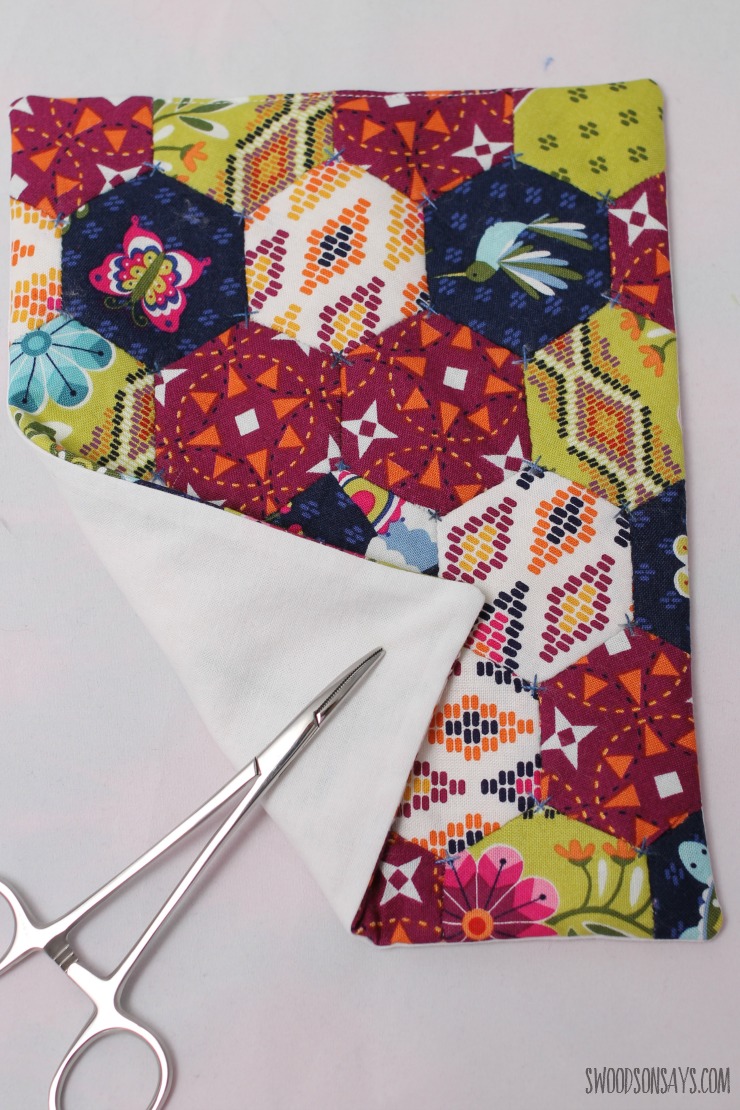
4-Pull it right side out through the hole, push the corners out with a chopstick, press, and baste the hole closed right along the edge. Press.

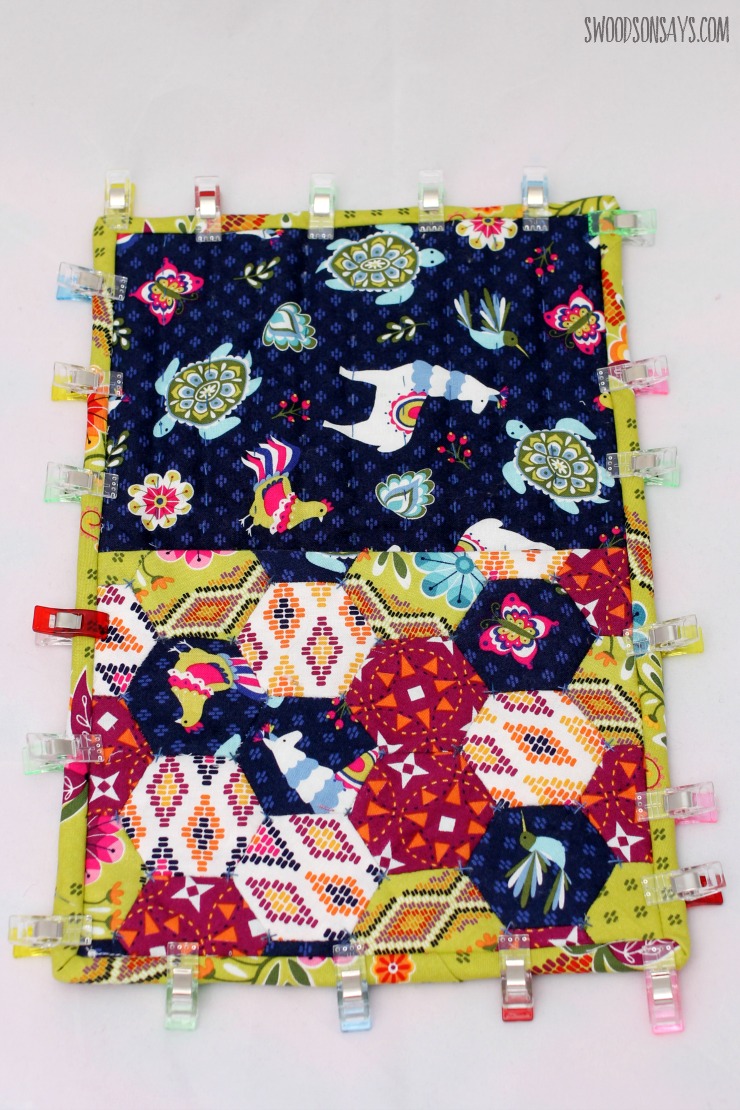
4-Cut out 2 rectangles of fabric for the back, measuring 10″ wide by 13″ tall. Lay it out on a larger quilt batting piece and quilt – I did rows of running stitches, sashiko style, following the print’s pattern. I used clips on two edges and smoothed it out towards the other sides as I went, probably not very professional but it worked for me! The clips you see are Wonder Clip knock-offs that were gifted to me. Once it is quilted, trim it to a rectangle sized 8″ wide by 12″ tall with clean edges and layer the finished hexie pocket on the bottom, basting the sides so it doesn’t slip.
5- Make bias tape and attach it! I use this tutorial and used 2.25″ strips, folded over like quilt binding. I made about a yard of binding, which was plenty. If you’ve never attaching binding, Wendi has a great tutorial here.
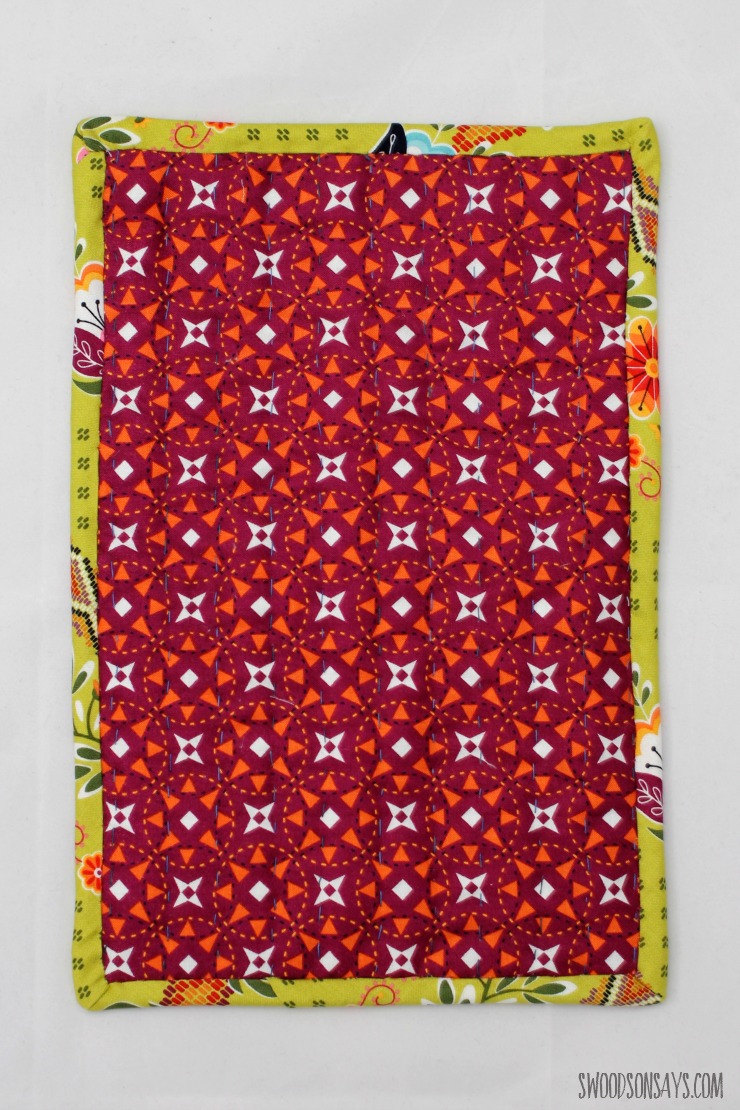
Here you can see the back! I love the hand stitching on the geometric print, I bet it will wash up really crinkle-y too.
Do you think the kids in your life would like a patchwork sleeping bag like this? I’m hoping only *one* of mine does, so I don’t have to make another one this week, my fingers need a break!
Pam @Threading My Way
Sunday 9th of April 2017
A super cute doll sleeping bag, Stephanie. Great for using up some left over hexies. Featured today...
Stephanie - Swoodson Says
Thursday 11th of May 2017
Thank you Pam!