
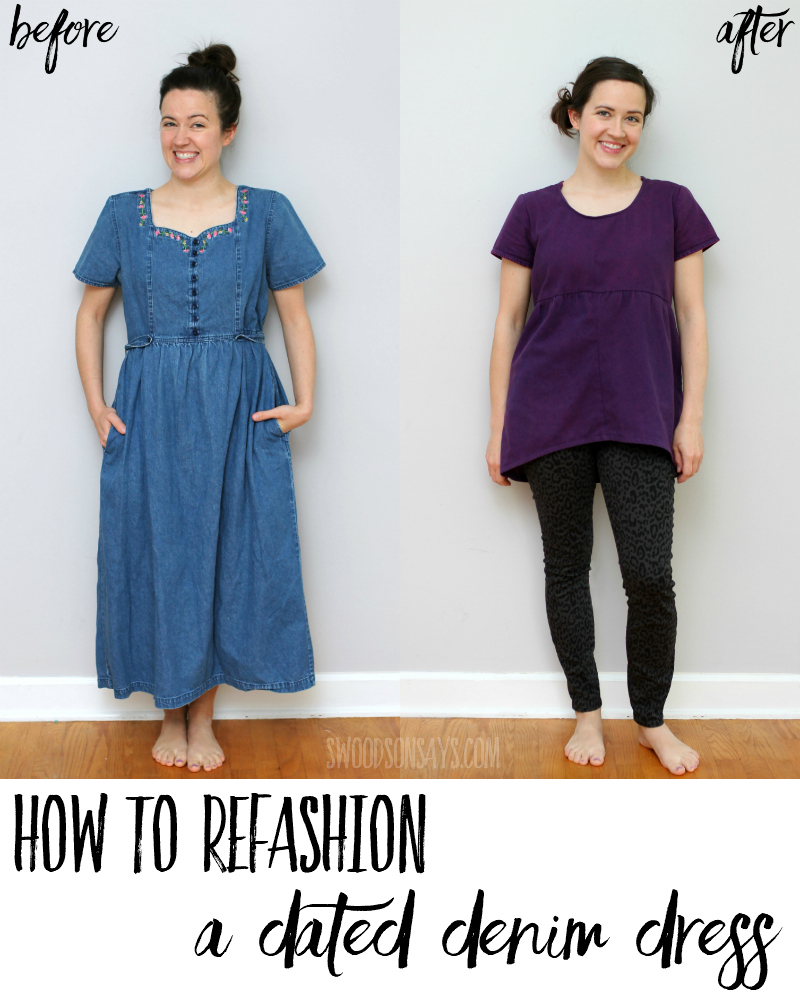
 Sometimes, it’s easier to shop FOR refashions/upcycles than it is to actually make them. It’s easy to justify scooping stuff up when I’m shopping at Goodwill Outlet, where stuff is on their last legs and only costs pennies. BUT I don’t feel great with a giant stash of “someday” projects! It’s fine if you operate that way happily, but UFOs weigh on me so I’m trying to channel some of my pandemic anxiety into creativity. First up is sharing this dated denim dress refashion to tunic top!
I’m always a little unsure about whether it’s helpful to share the steps I take in refashions like this, that aren’t necessarily easily duplicated in the sense that a making a tshirt bigger is, because everyone can find a tshirt that’s too tight. But I hope seeing some of the process steps can inspire you or guide you even if it’s not the exact same!
The process of this refashion reminded me why I love the process so much. With sewing from scratch, I feel like you have to have the final vision in your mind. Sure, things can change and you have to improvise, but usually only if you make a mistake. Cutting into an existing garment without a finished ‘after’ in mind is exciting and I love how my brain responds to such rigid boundaries. It also forces me to slow down! When you don’t have any extra yardage, every cut feels even more important.
At one point I was envisioning a different silhouette, but right after step 6 I stood in front of the mirror with a fantastic fitting… crop top that was so short I was in a panic that I’d ruined the whole thing, four letter words flying. I laid it down, walked away for a day, and came back with new energy (a process that can apply to so many other things than sewing, am I right?).
Along the same lines as feeling like every cut feels even more important, all the little details and decisions feel like risks. I loved the finished garment and then it came time to dye; there wasn’t a way to “get it back” if I hated the pink. I love the anticipation of seeing how choices like that play out! I don’t usually write much more than the tutorial, but hopefully this peek into my brain and why I love refashioning inspires some of you to try your hand at one.
If you love refashioning, check out these other posts too!
- 24+ Men’s button down shirt refashion ideas
- Five Tips for Thrift Shopping to Upcycle & Refashion
- 10 refashioning tips for successful sewing
- 13+ ways to refashion a plain t-shirt
- 12+ dress refashion tutorials
- Modern books on refashioning
Pin this dated denim dress refashion to tunic top for later, using this link or collage image below.
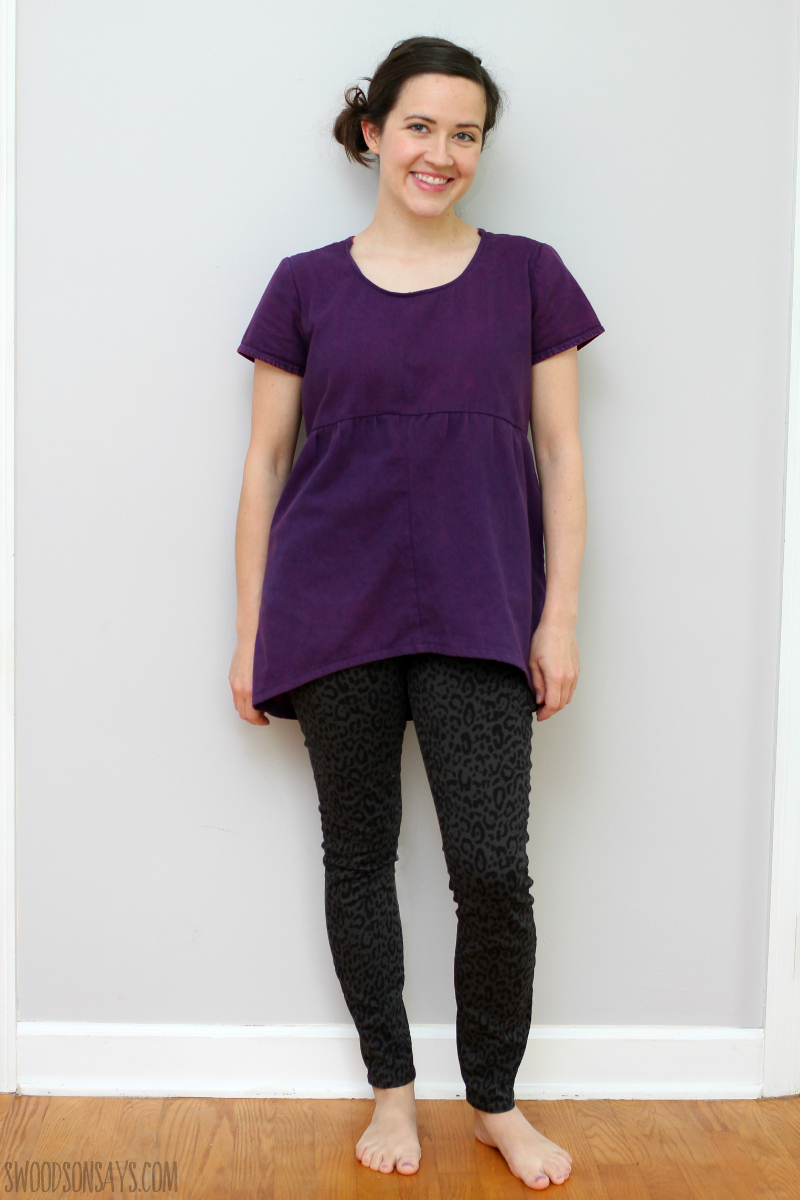
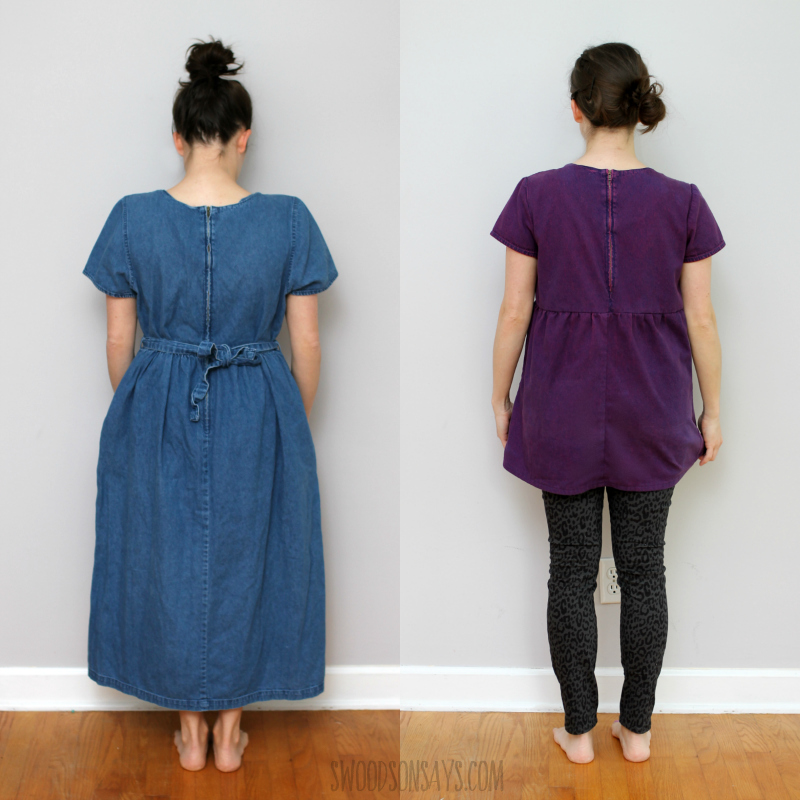
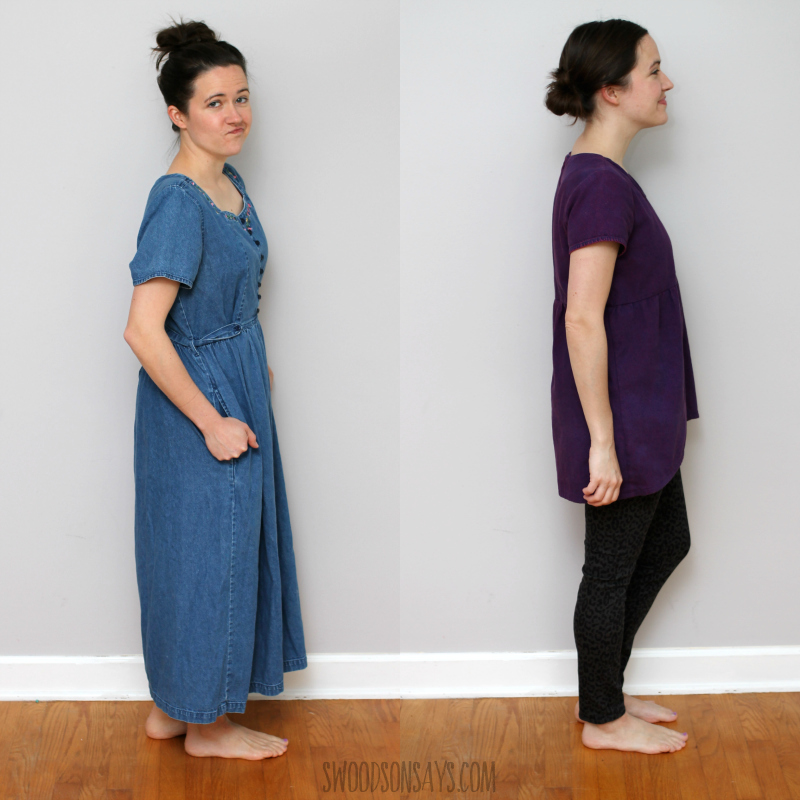
Dated denim dress refashion to tunic top
Supplies
- Sewing machine (I recommend this sewing machine for beginners!)
- Coordinating thread
- Scissors
- Iron
- Pins or clips
- Acrylic quilt ruler
- Chalk pencil or sliver of soap
- Rotary cutter or scissors
- Seam ripper
- Pink RIT Dye + dye supplies (plastic bin or big pot, gloves, stir stick)
Steps
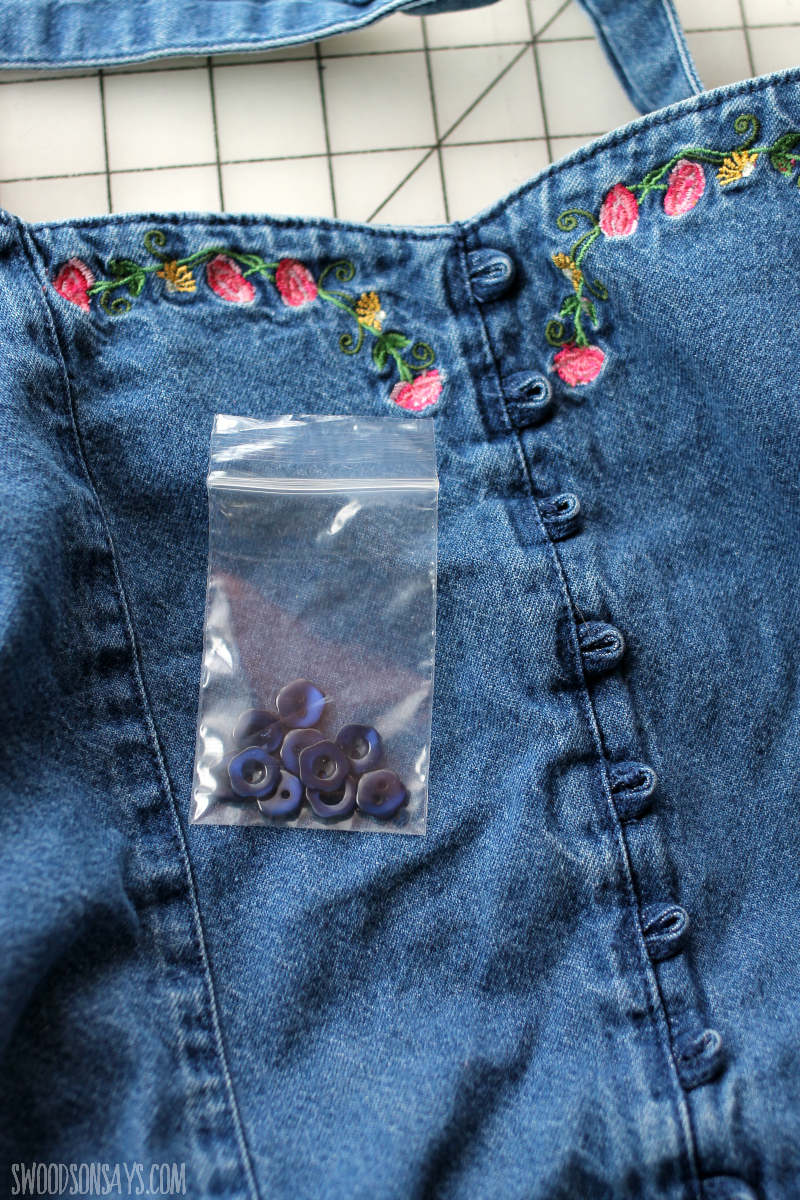
Step 1- First, I snipped off the buttons and stuck them in a little baggie! Harvesting pieces well so they can be reused is worth the time. I didn’t end up using these, but maybe some other project.
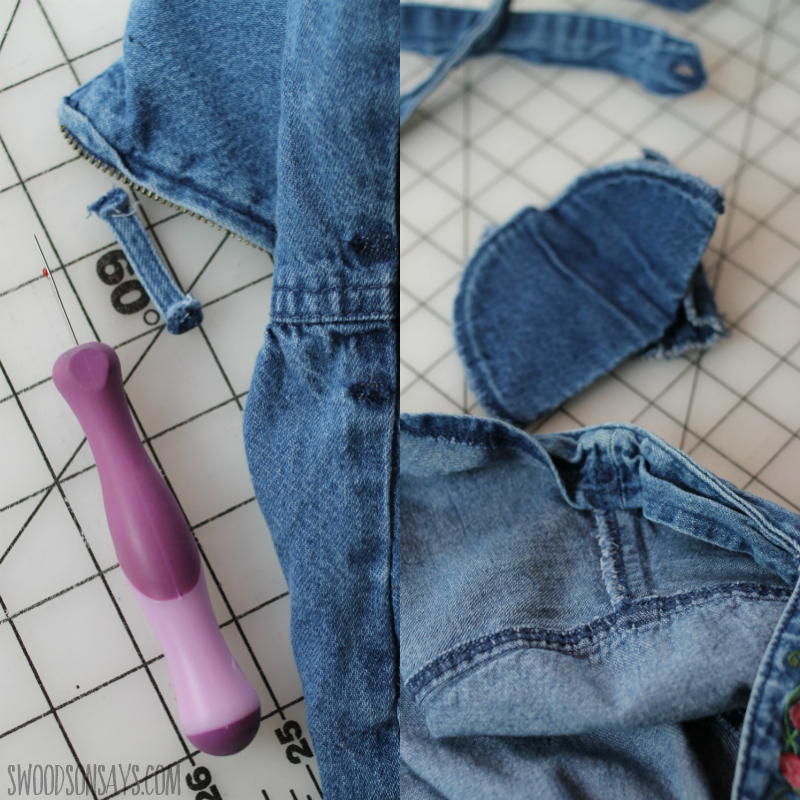
Step 2- More snips and thread rips, removing the belt loops, waist ties, and shoulder pads.

Step 3- I knew that I wanted to remove the skirt, so I seam ripped along the zipper up a ways so it was loose up into the bodice.
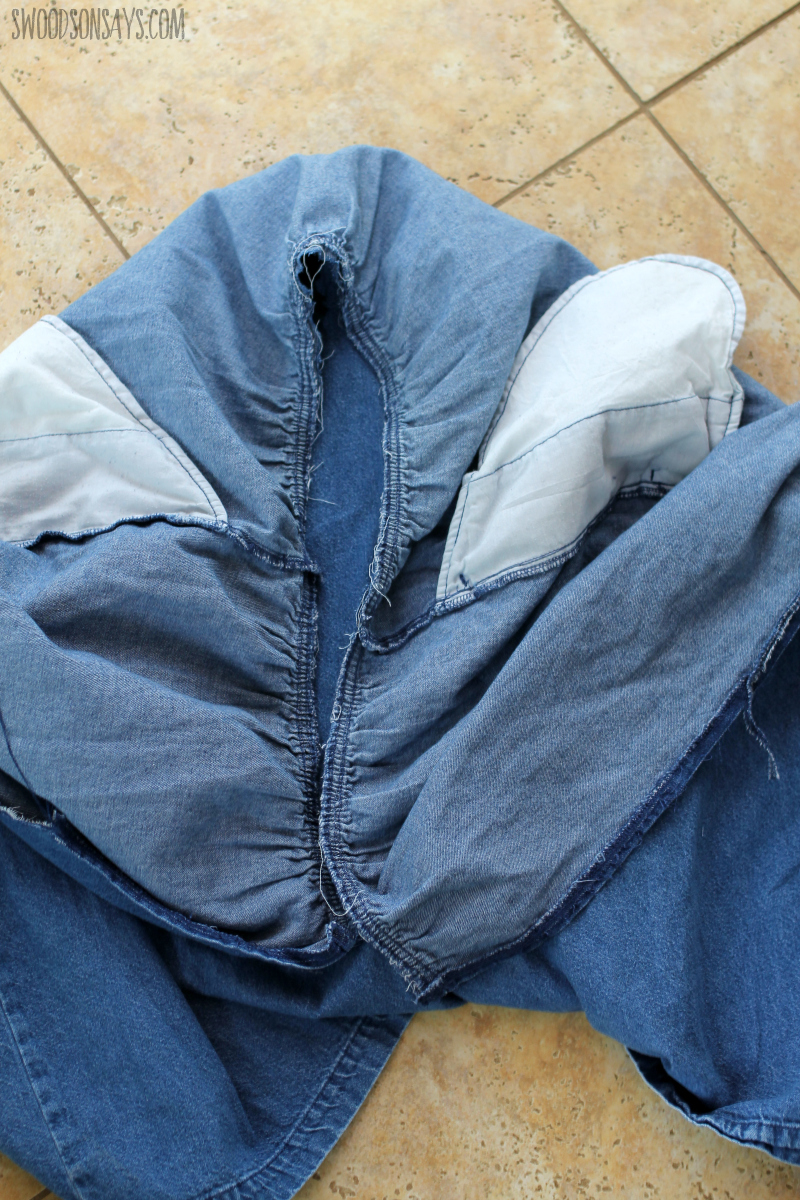
Step 4- Next I cut off the skirt, staying along the seam. If you cut under the stitching with a gathered skirt like this, you’ll lose all the gathering, so proceed with caution. I also seam ripped up the bodice sides and the sleeves off.
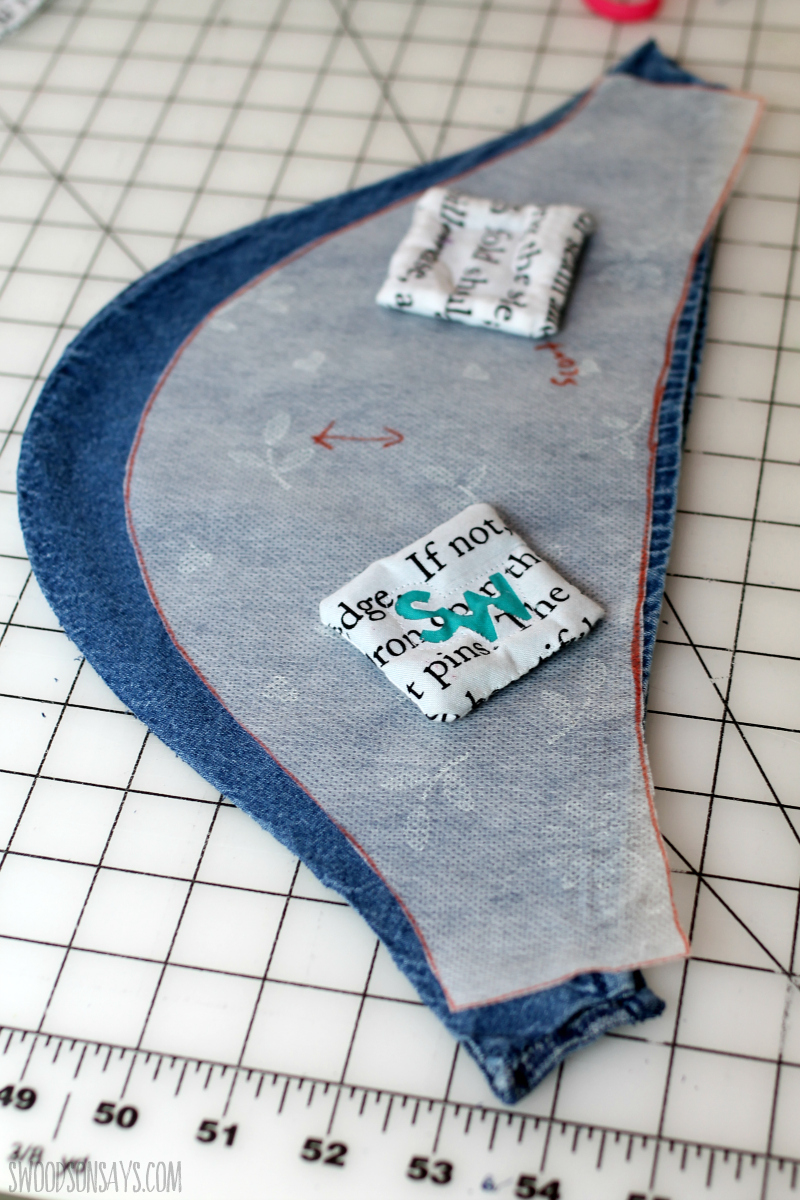
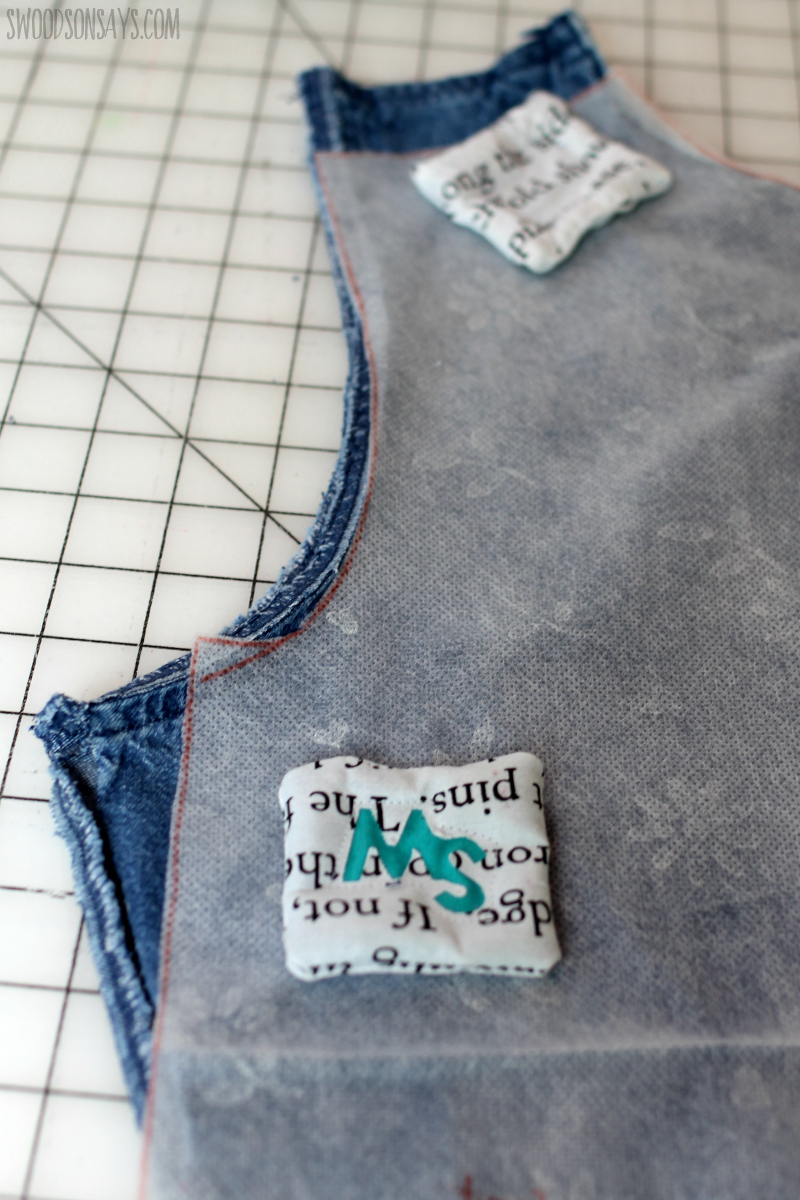
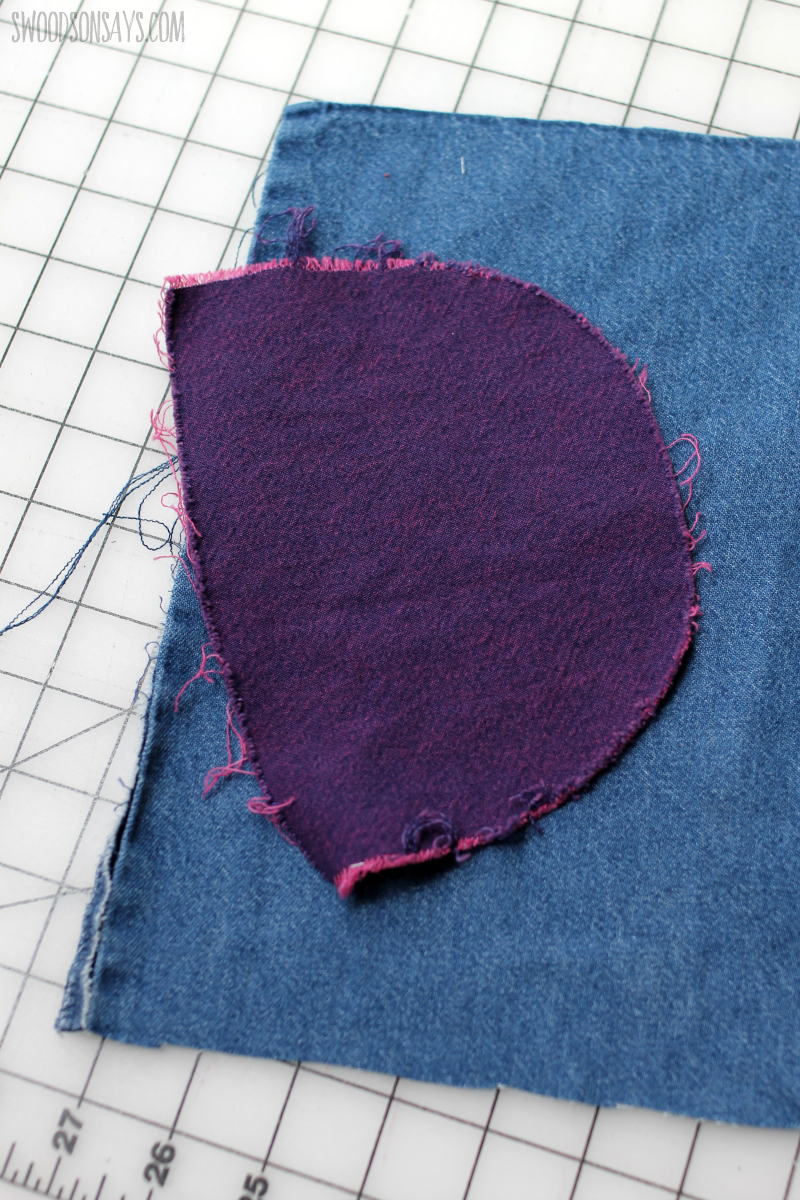
Step 5- Next, I used my trusty Grainline Scout woven tee pattern to cut new sleeves & a new bodice. I had to fully seam rip out the seams to make this work! As you can see, it wasn’t a perfect fit, but I just went with it. I used the same back bodice to cut the back shirt bodice and then part of the skirt for a new front bodice.
Step 6- As much as I love pockets, I did not love the bulk and weight they added, especially with a shorter skirt. I chopped them and sewed new seams. The picture doesn’t show this well, but the skirt originally had 3 seams (2 sides, 1 center back); I chopped a fourth one up the front of the skirt so all four panels could be cut to be even, and then sewed them all back up together for a new, even, gathered skirt.
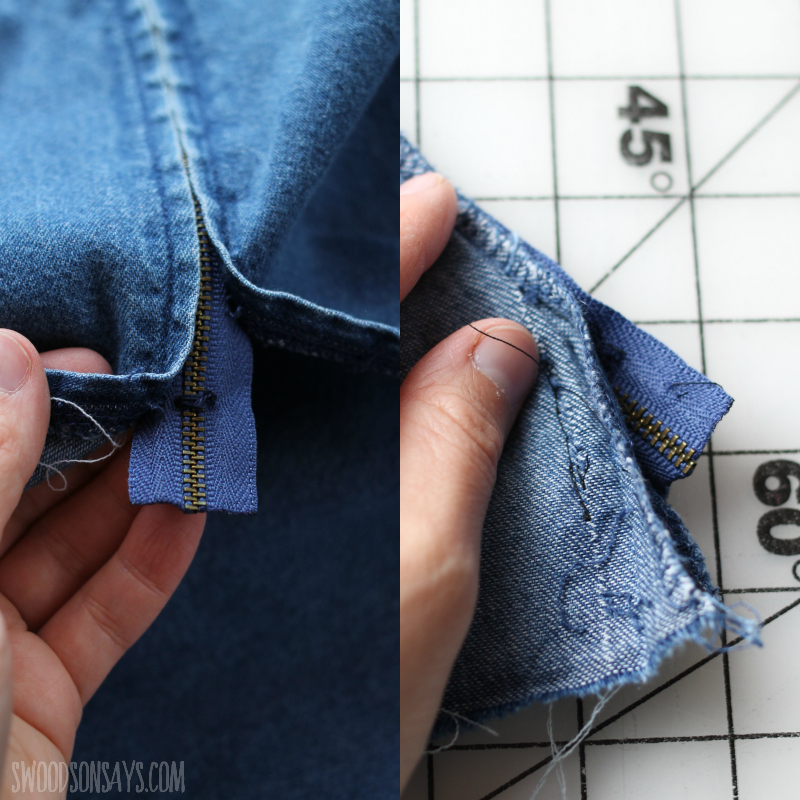
Step 7– I had left the zipper hanging until this point; I hand stitched a new zipper stop and chopped the extra length so there would be space to sew a new bodice seam. I then sewed to cover the zipper end, as shown on the right.
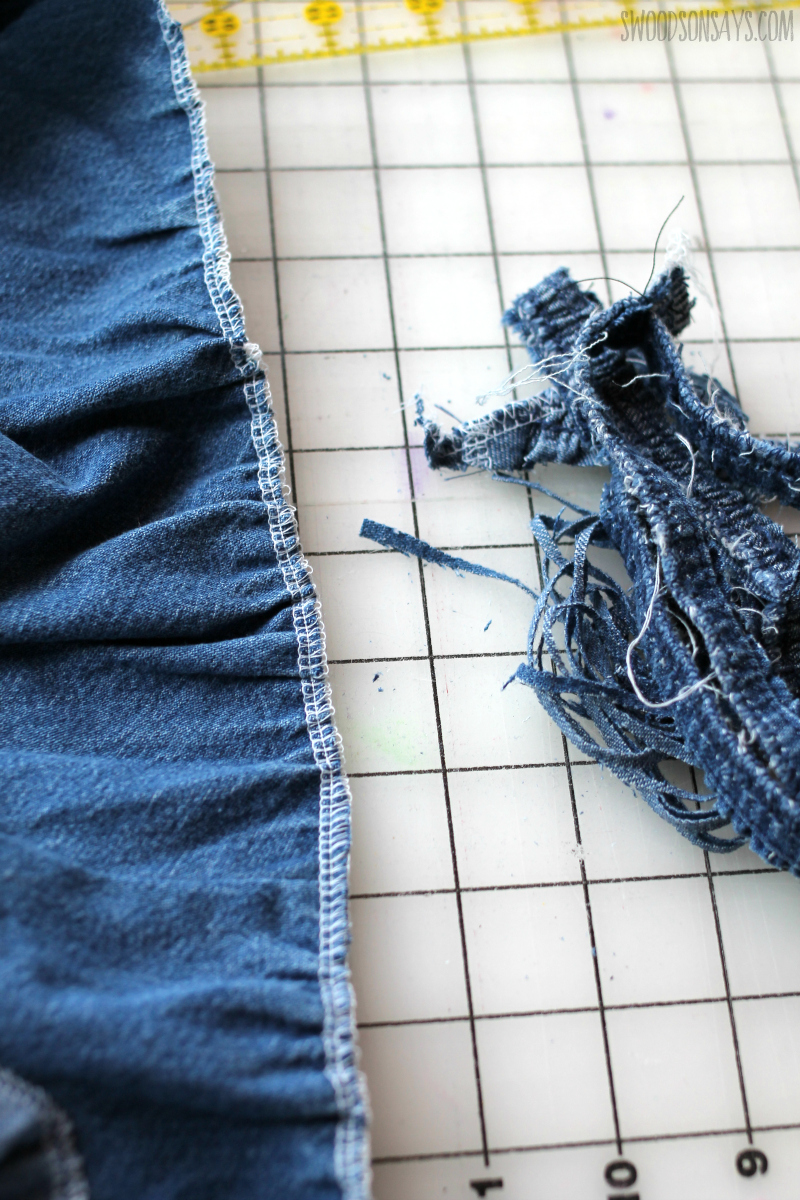
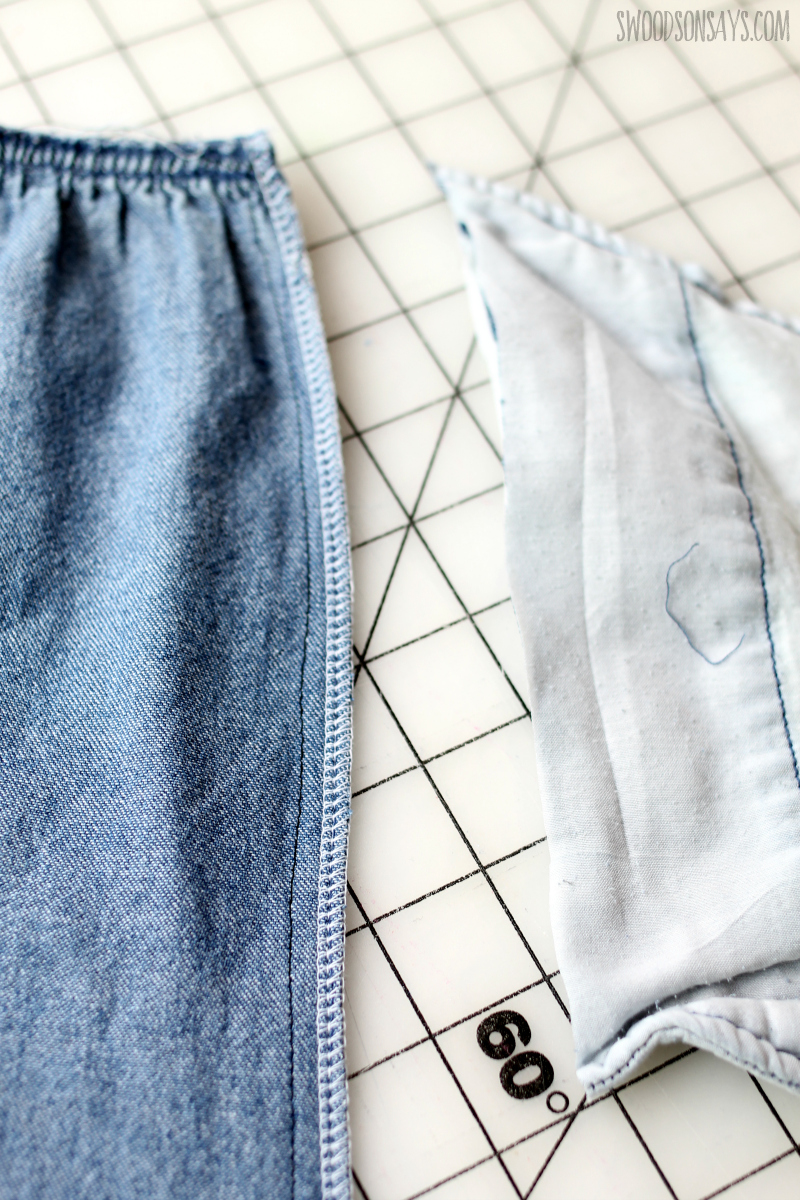
Step 8– Time to chop the bulky seam off! I used my beloved serger and made sure not to “pull” the fabric down as I sewed, so the gathering stayed intact.
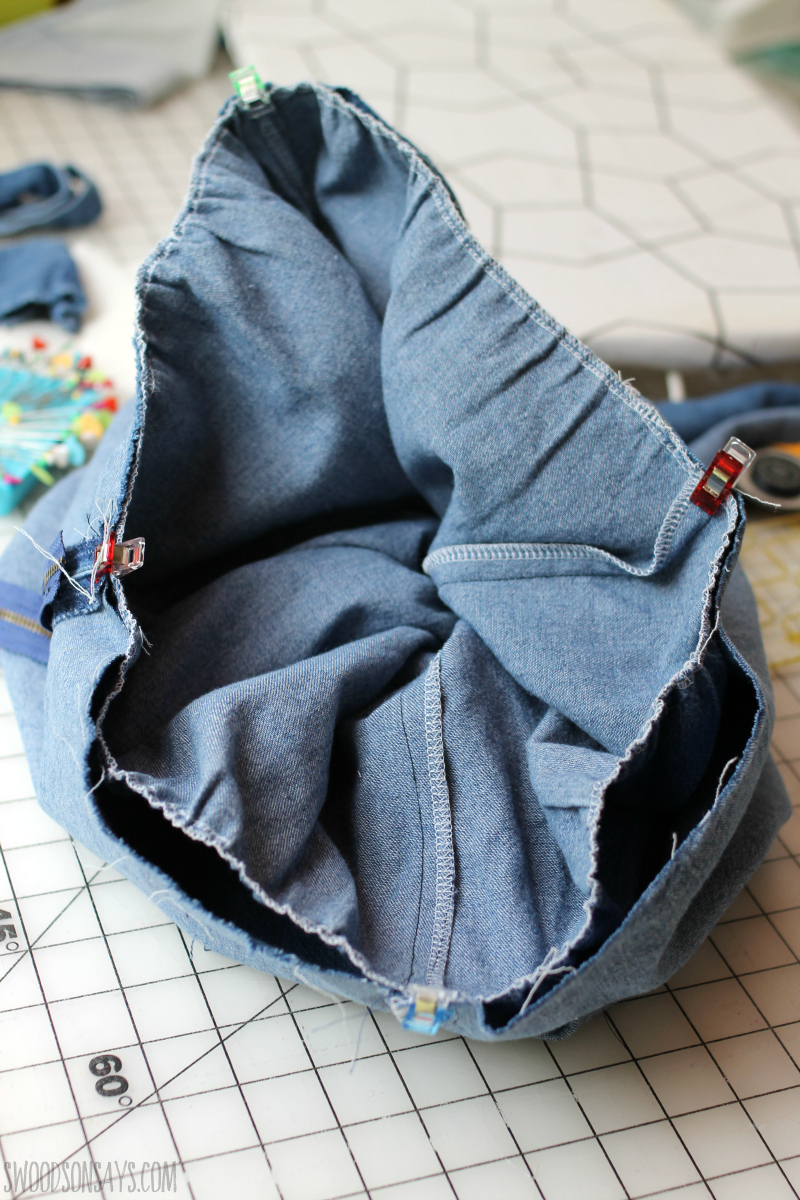
Step 9– I used clips to match up the bodice & skirt. You might be thinking, how did it fit, if nothing was actually measured! But, I didn’t change a ton, just shifted it around. In a loose style like this, it works. I then sewed this seam.
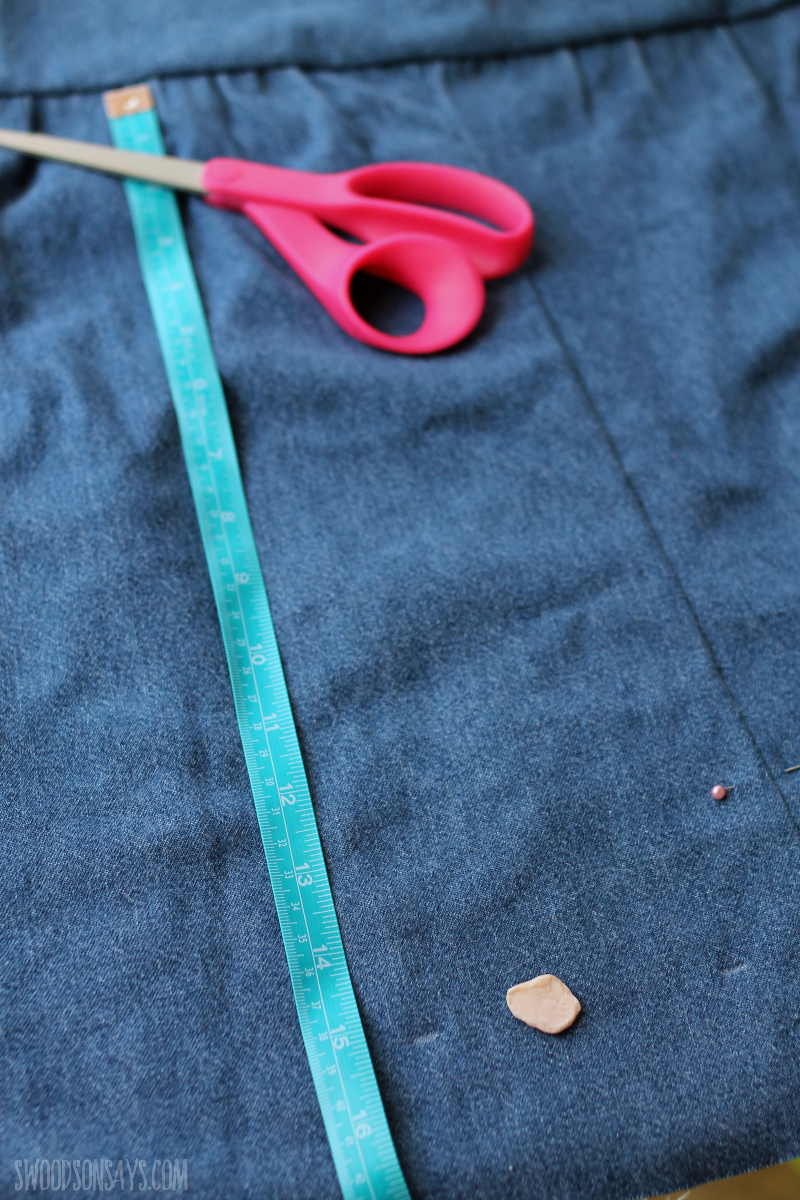
Step 10– Next, I tried the top on, and used that pin to mark where I wanted the front hem to end, and then a sliver of soap to mark where the cut needed to be with a hem allowance. I then measured down from the bodice seam every few inches, marking it.
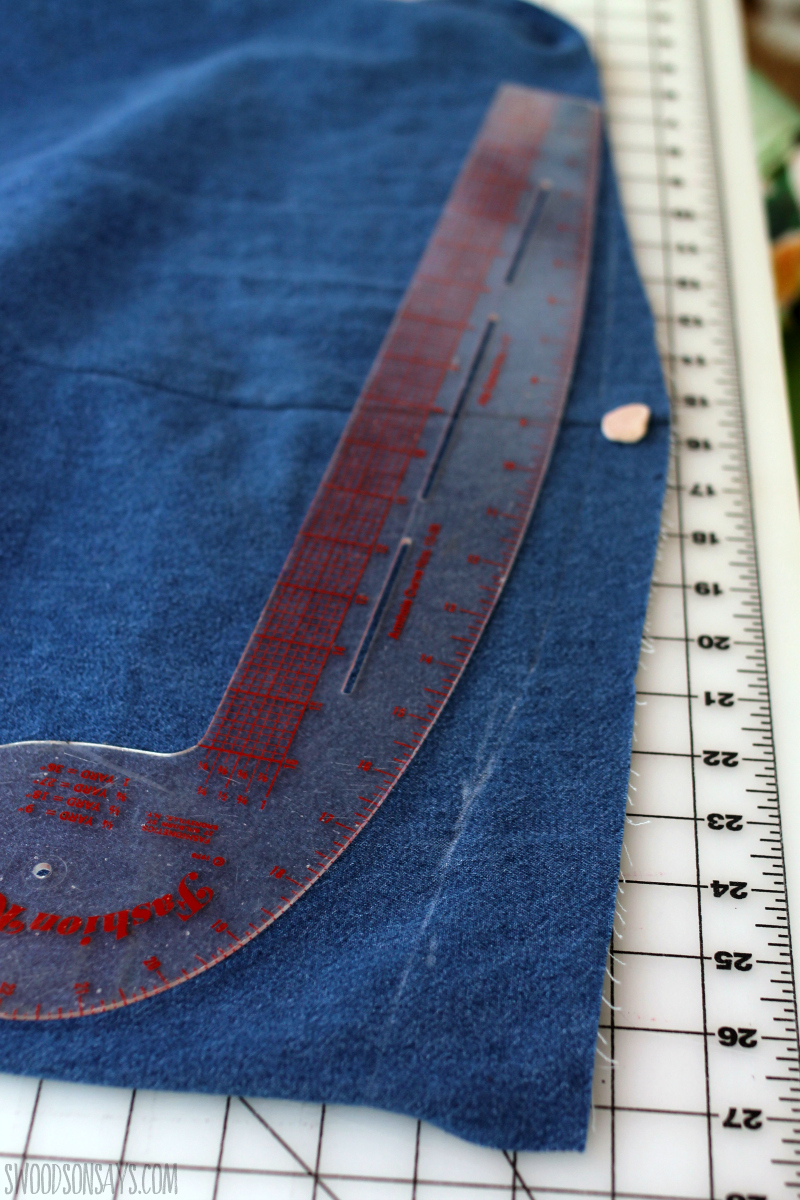
Step 11– I used this french curve ruler, incorrectly I’m sure, to gently curve back to the back hem. I tried it on to double check, then hemmed it!
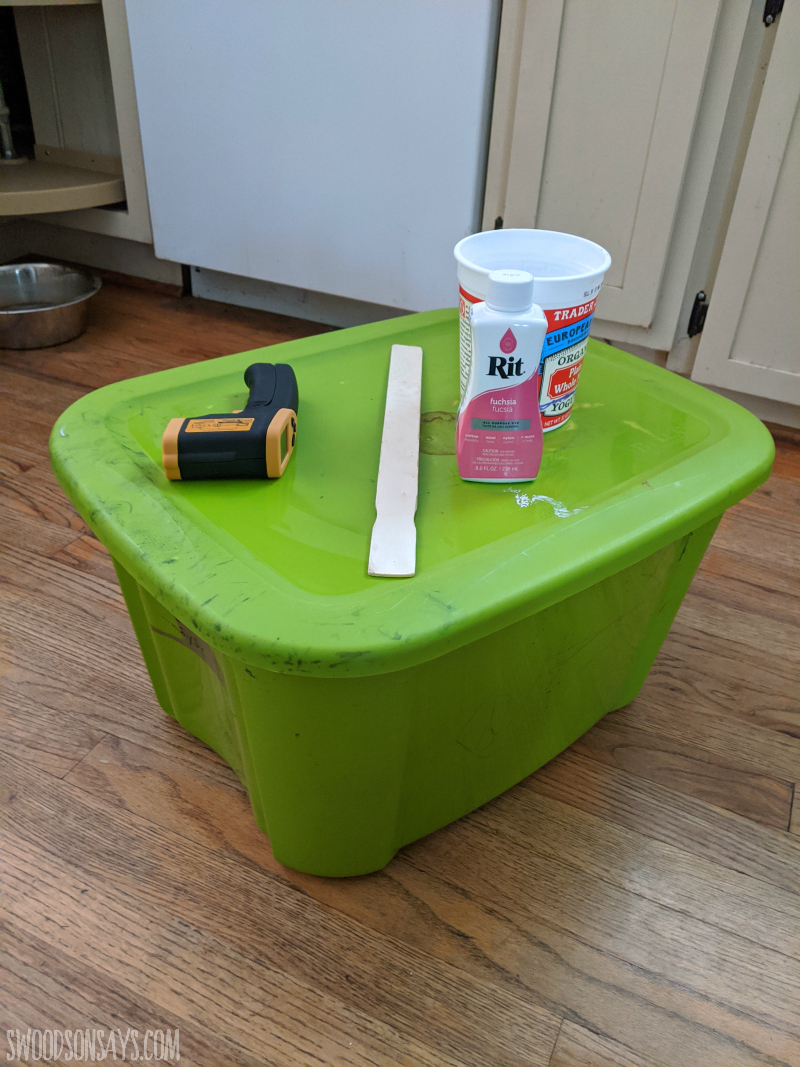
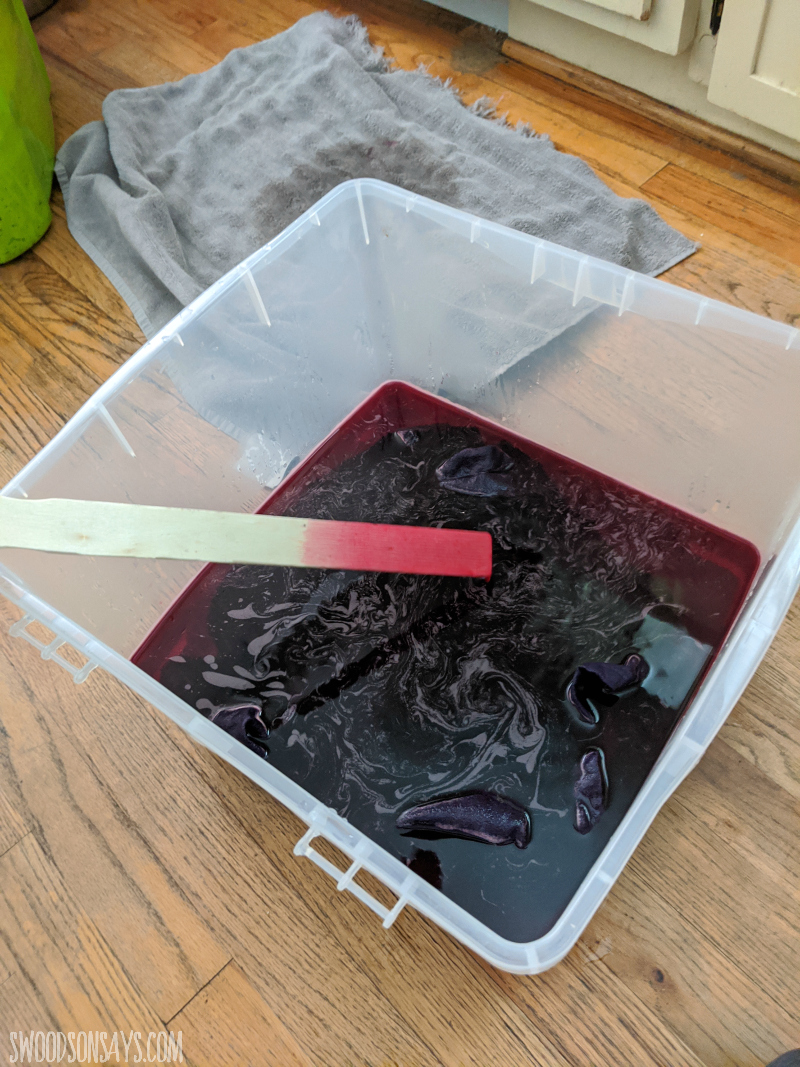
Step 12– Dye time! I ended up switching to a new tub when I realized my green bin still had dry blue dye from my last indigo project. That yellow thing is a heat gun, I was trying to get my water to the temp they recommended on the bottle instructions but it didn’t get that hot on the tap. I only used half the bottle measuring out the right amount of water into the old yogurt cup, marked where that filled, and then filled to that line with the dye. More pink for another day! If you want to experiment with stamping or any other embellishment, be sure to dye some of the original fabric’s scraps at the same time.
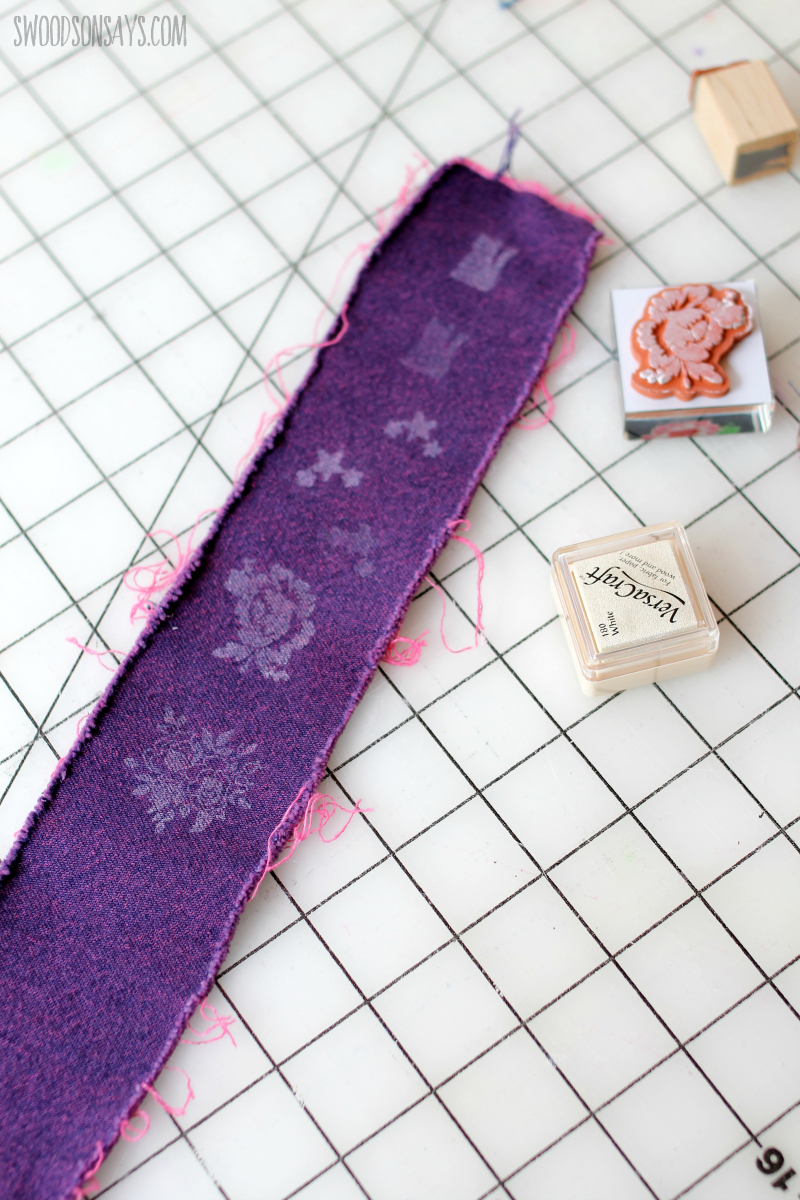
Last, I’ll share what I did with one of those fabric scraps, some stamping! Ultimately I decided I wanted to keep my top plain, but here is an example of an idea I tried out, with my favorite fabric ink. You could also consider fabric paint stamping like I did on this skirt, too.