
Check out this easy DIY needle felting to mend holes in wool tutorial! An easy way to mend by hand.
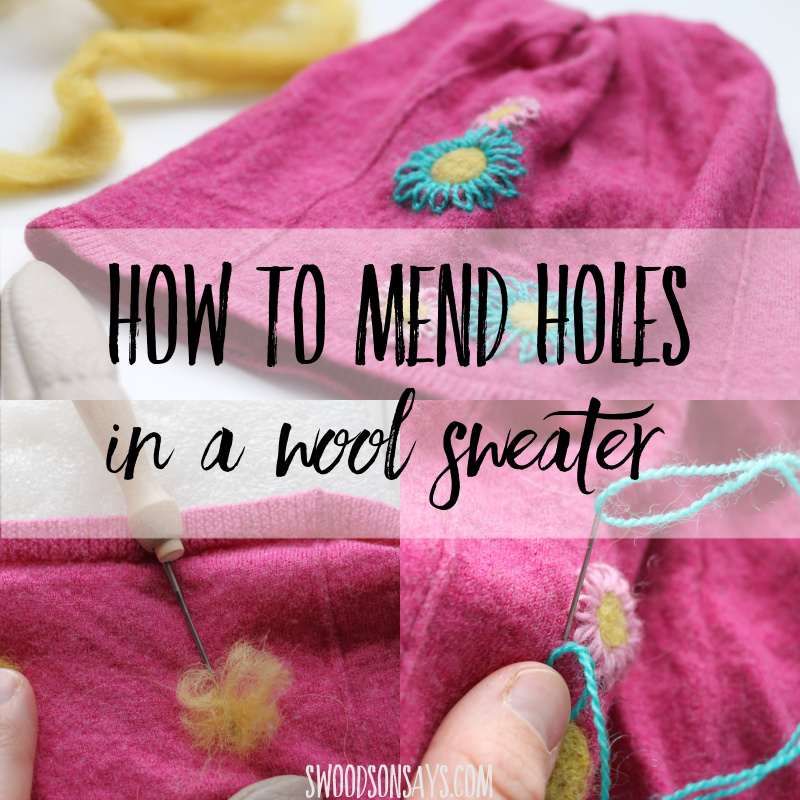
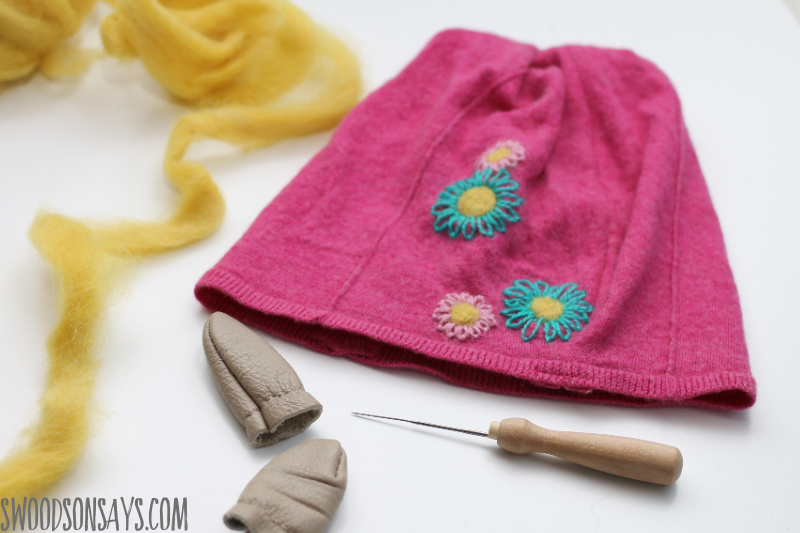
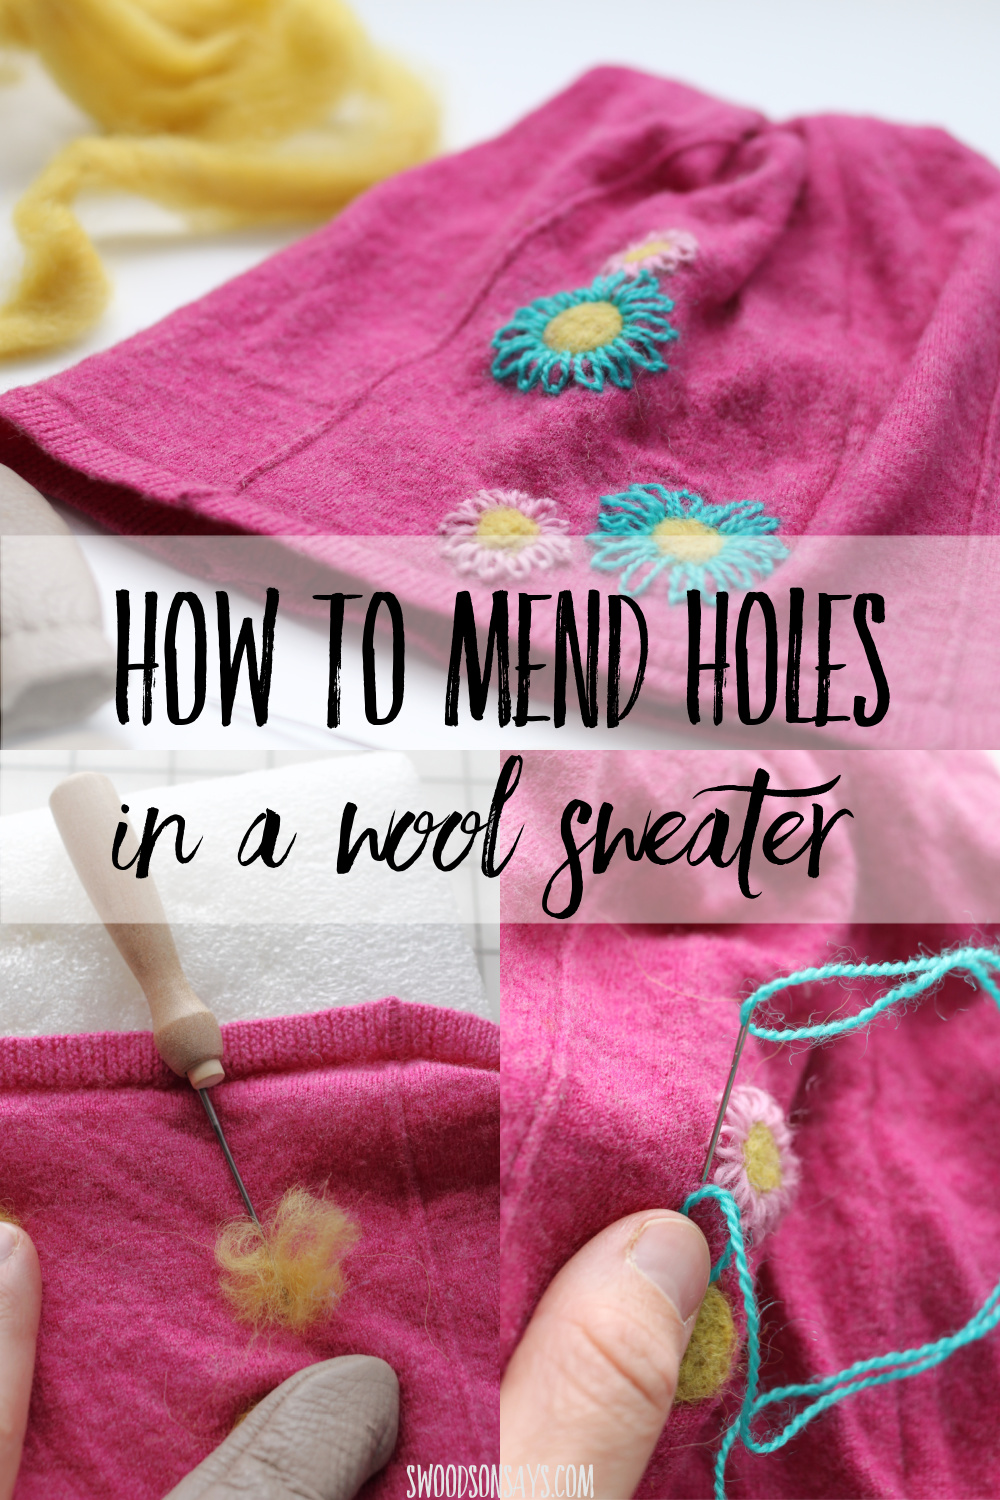
If you’ve never tried needle felting, it’s so much fun! You basically just stab fuzzy wool roving until it firms up, making it a fantastic way to mend holes that pop up in wool sweaters. I made this hat out of a wool sweater several years ago and it’s held up great until this past year when we got a puppy. I turned some annoying little tooth-holes into flowers with just an hour and some stitching, you could use this same technique to make all sorts of shapes and critters and save hole-y sweaters from the trash.
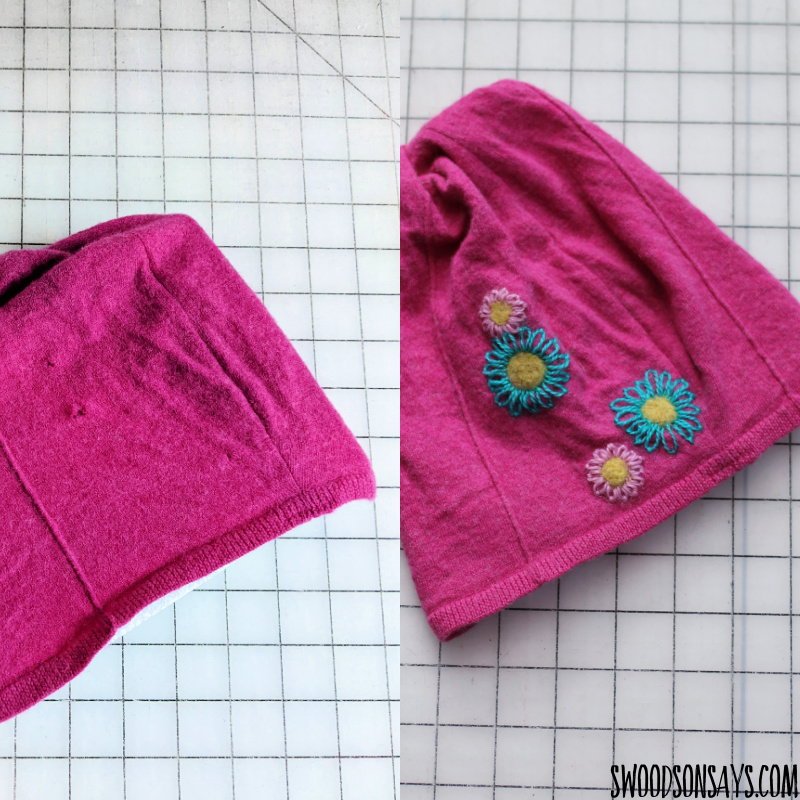
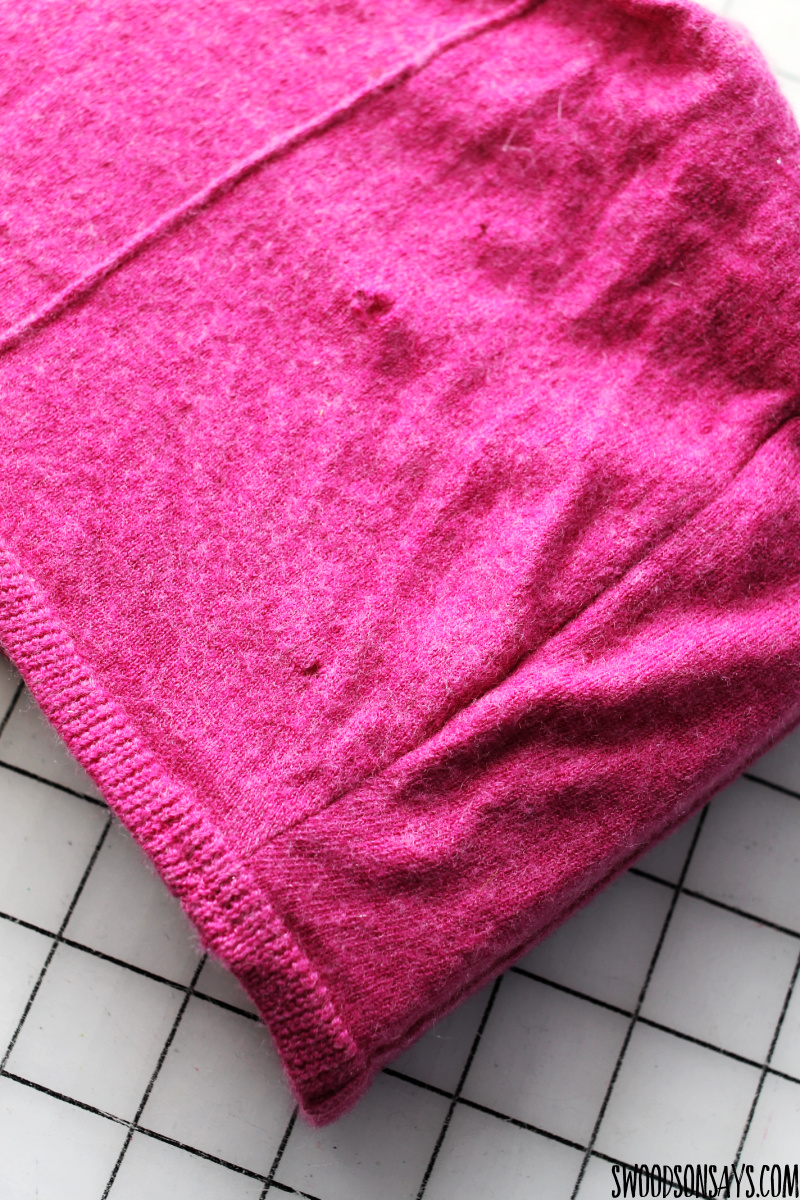
Here’s the official before and after! It was hard to see the holes when it was laying flat but they stood out every time my daughter wore it. I upcycled this hat right before our trip to Rocky Mountain National Park, you can get sneak peeks of it on my travel blog post about that trip.
If you like this post, check these posts out too!
- 15+ sweater refashions to recycle old sweaters into new clothes
- 40+ ways to upcycle sweaters into something new
- How To Patch A Hole with Wonder Under & Sashiko Stitching
- Kid clothes mending techniques for holes & stains: “Make It Last” e-book
- Needle felting tutorial ideas
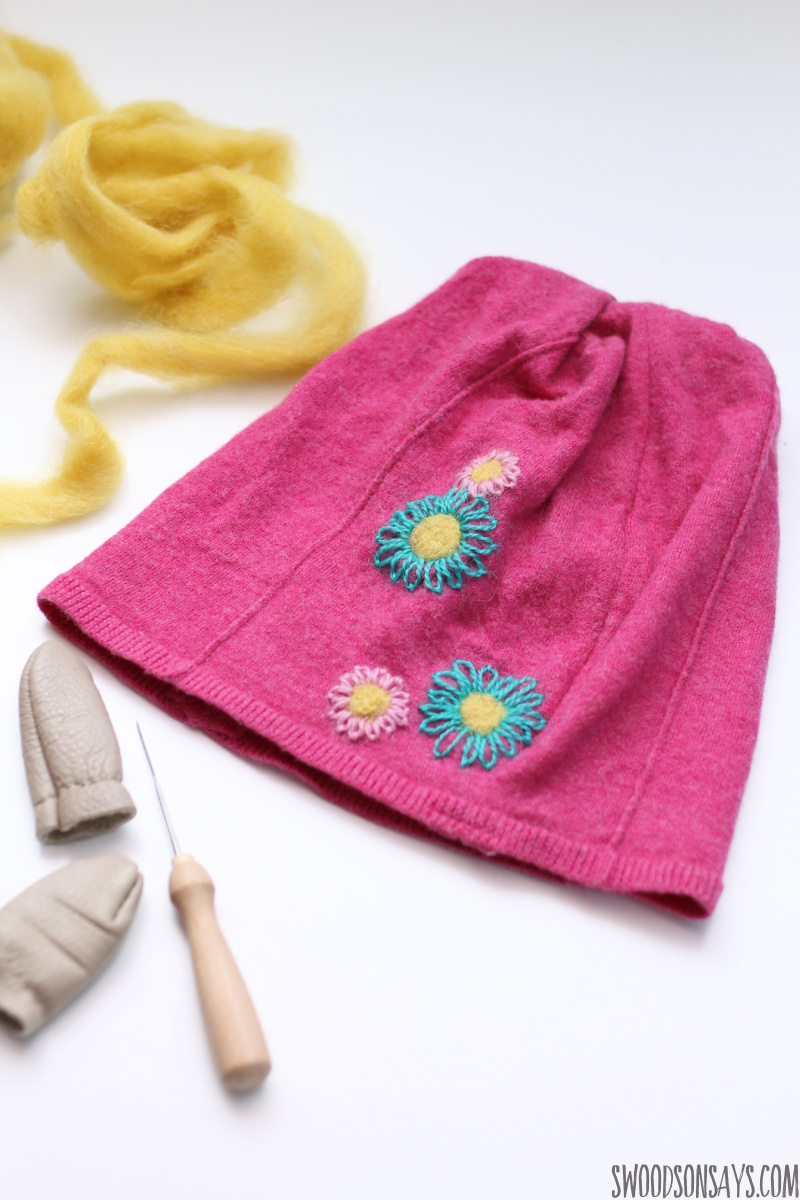
These tools are pretty cheap, the finger guards are just a bonus for people who are clumsy or have shaky hands (me!).
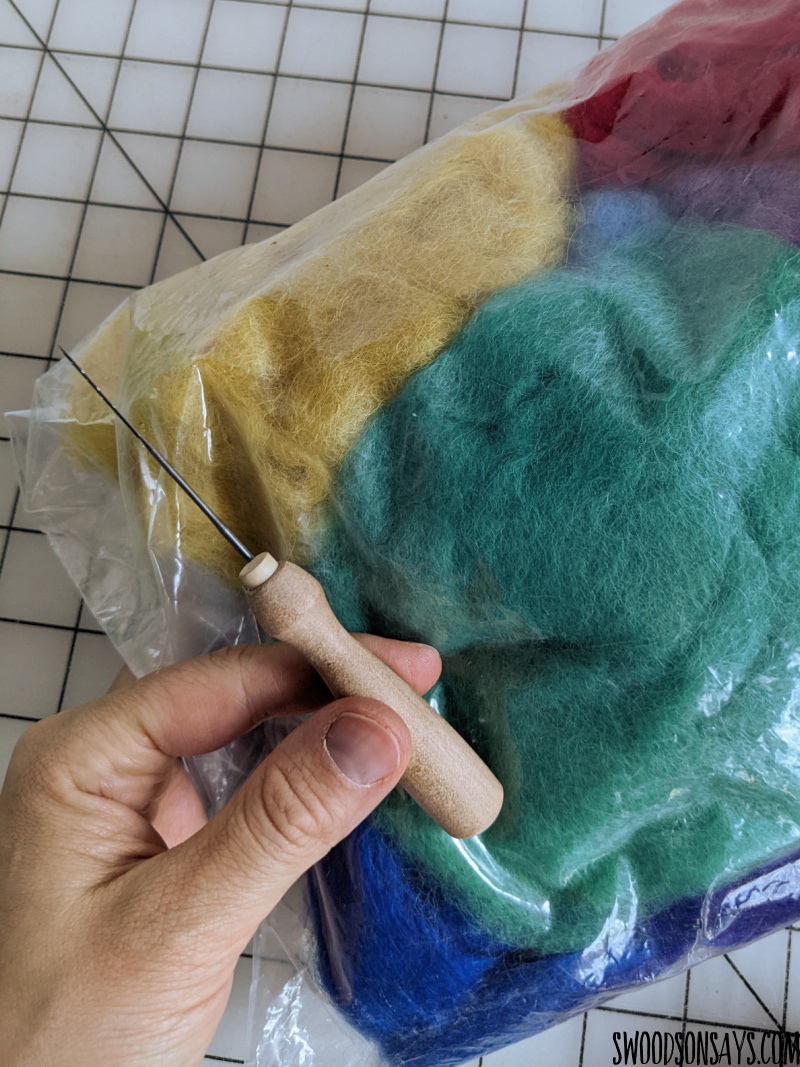
I’ve had this bag of alpaca wool roving since my eldest was a toddler and never used it, we took a tour of an alpaca farm with our playgroup. I need to brainstorm some other ways to use it up!
Literally anyone can do this mend, I’ll be on the hunt for other hole-y sweaters to mend and try different shapes with felting and stitching!
Pin this DIY needle felting to mend holes in wool tutorial with this link or collage image:
Ready to try it yourself?
DIY needle felting to mend holes in wool tutorial
Supplies
- Needle felting kit: Etsy – Amazon
- Wool roving: Etsy – Amazon
- Wool mending floss: Etsy – Amazon
- Needle
- Sweater that needs mending – needs to be high-content wool! This one was 90% wool; I haven’t experimented lower than that.
Steps
The beginning! Stretched out on a styrofoam block that came with my needle felting kit.
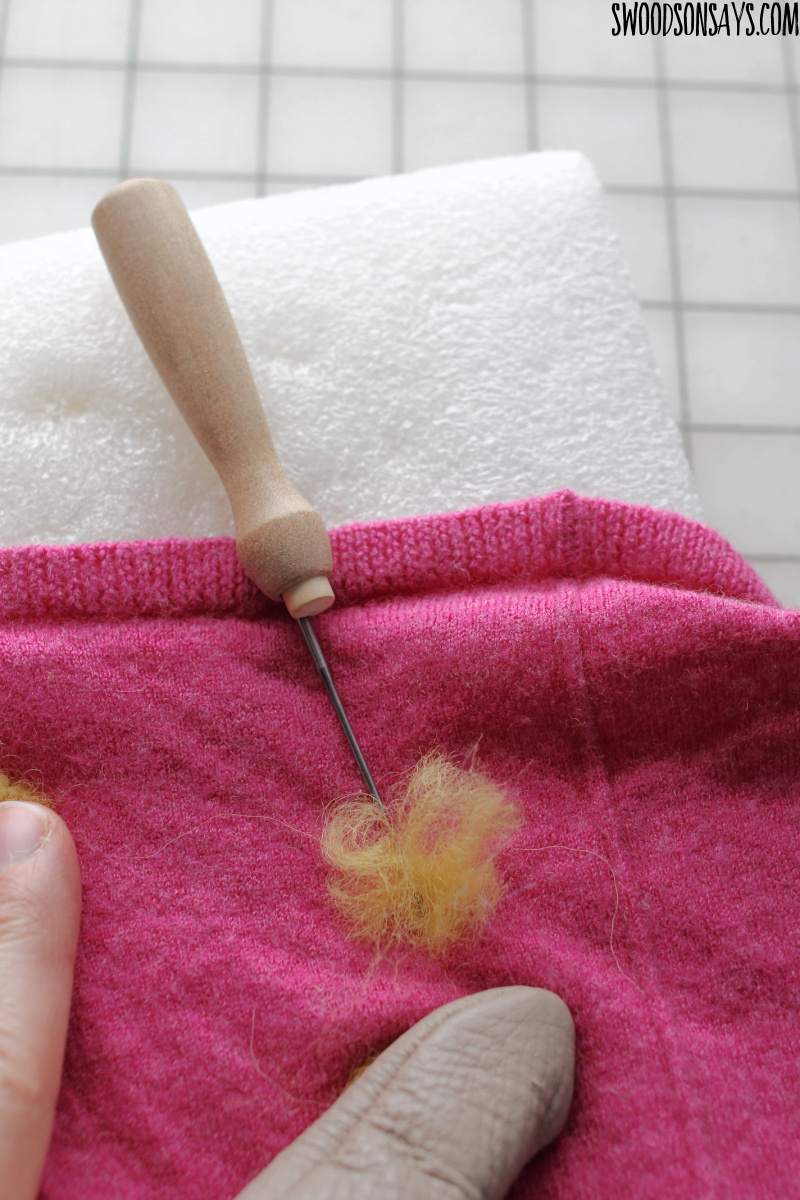
Step 1- Shove small bits of roving straight through the hole so you’re sure it gets all plugged up, and start stabbing. Keep adding roving, and hold it up to the light to make sure no light shines through.
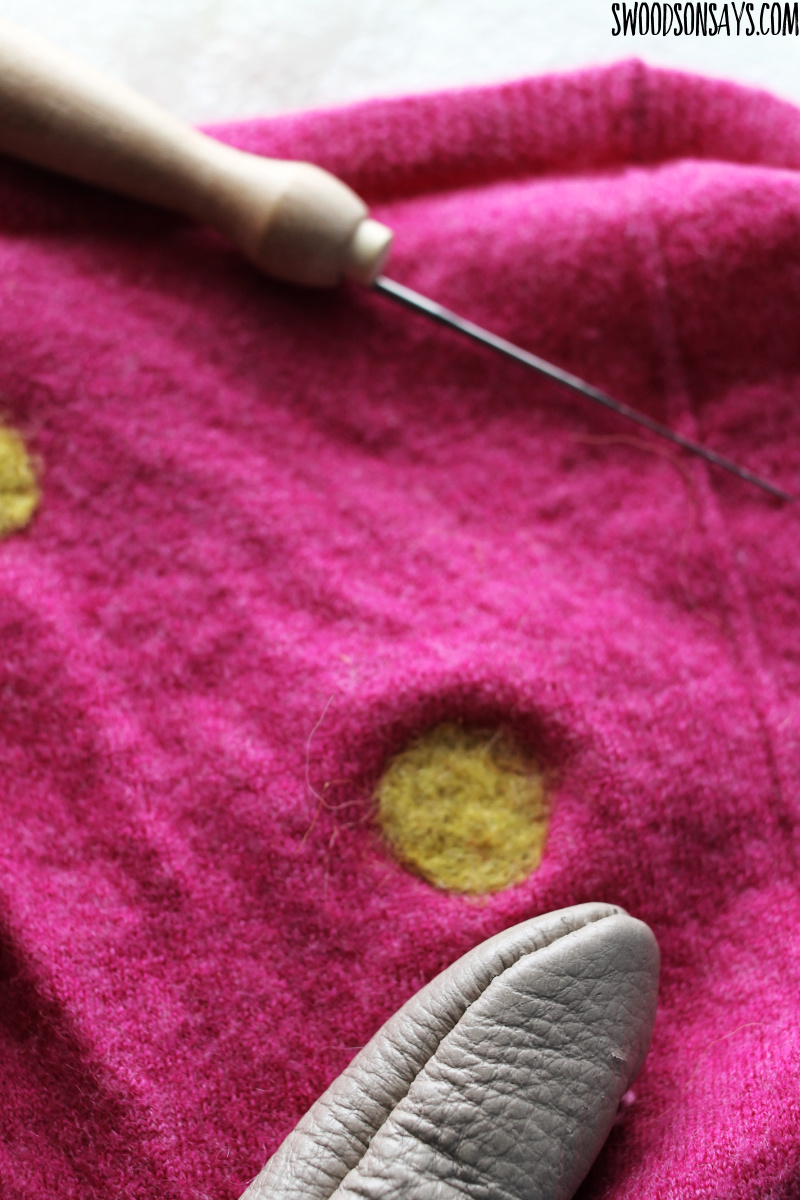
Step 2- Flip it inside out and add more roving on this side if needed, until it feels even.
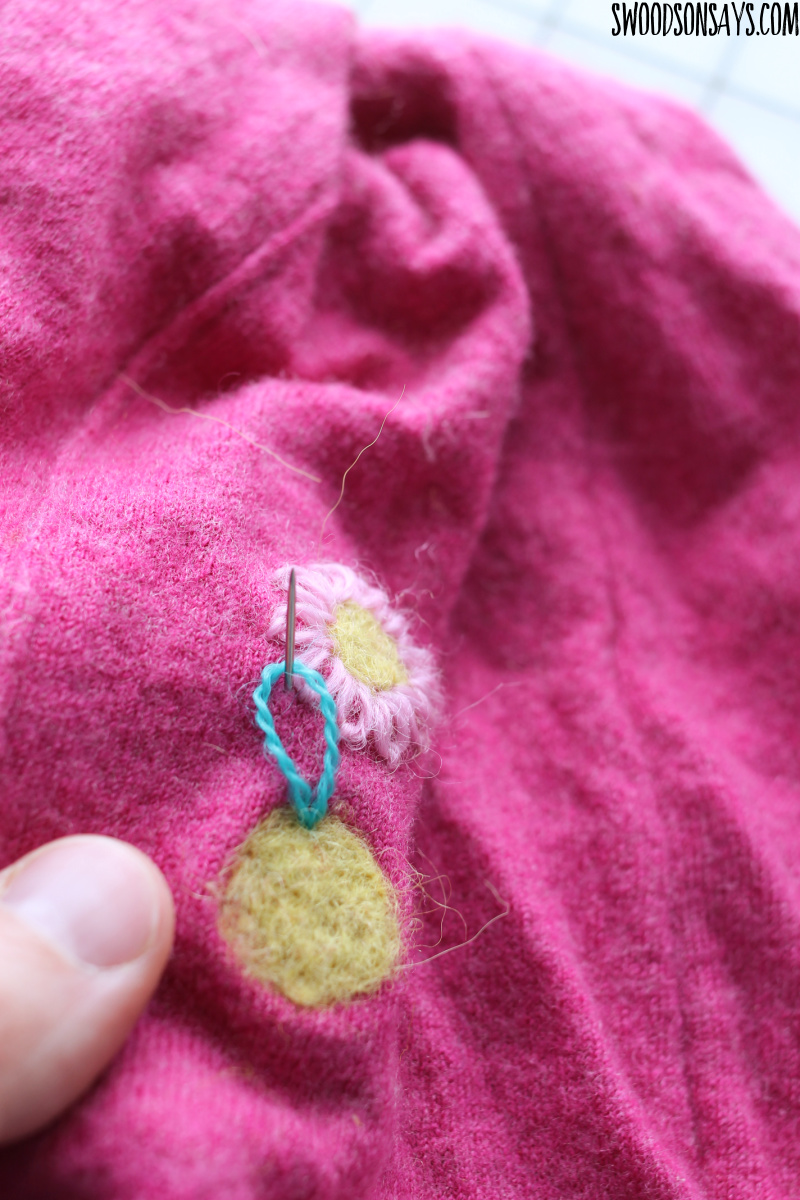
Step 3- Time for a lazy daisy stitch! Knot the end of your floss; come up and go down in the same hole, but don’t pull tight, leaving a loop hanging out.
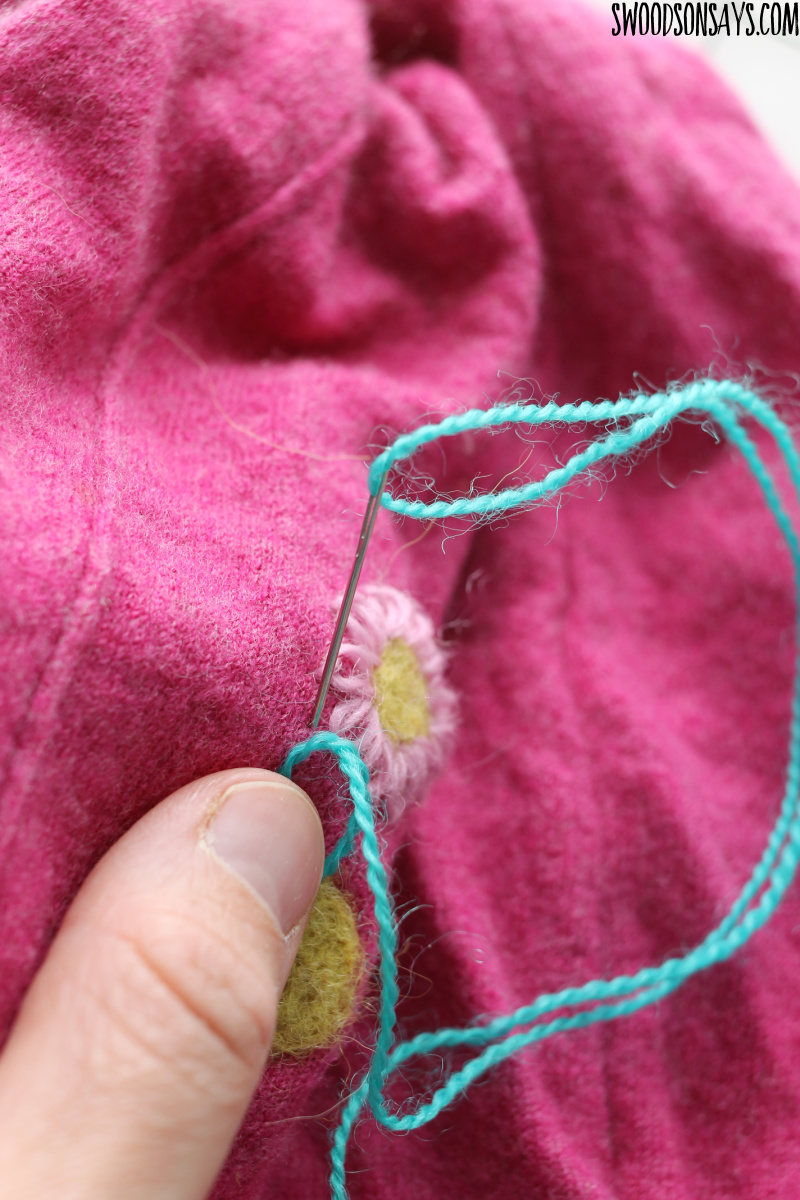
Step 4- Gently come up under the underside of your loop and then go back in over the top, making a little secure spot to anchor the loop.
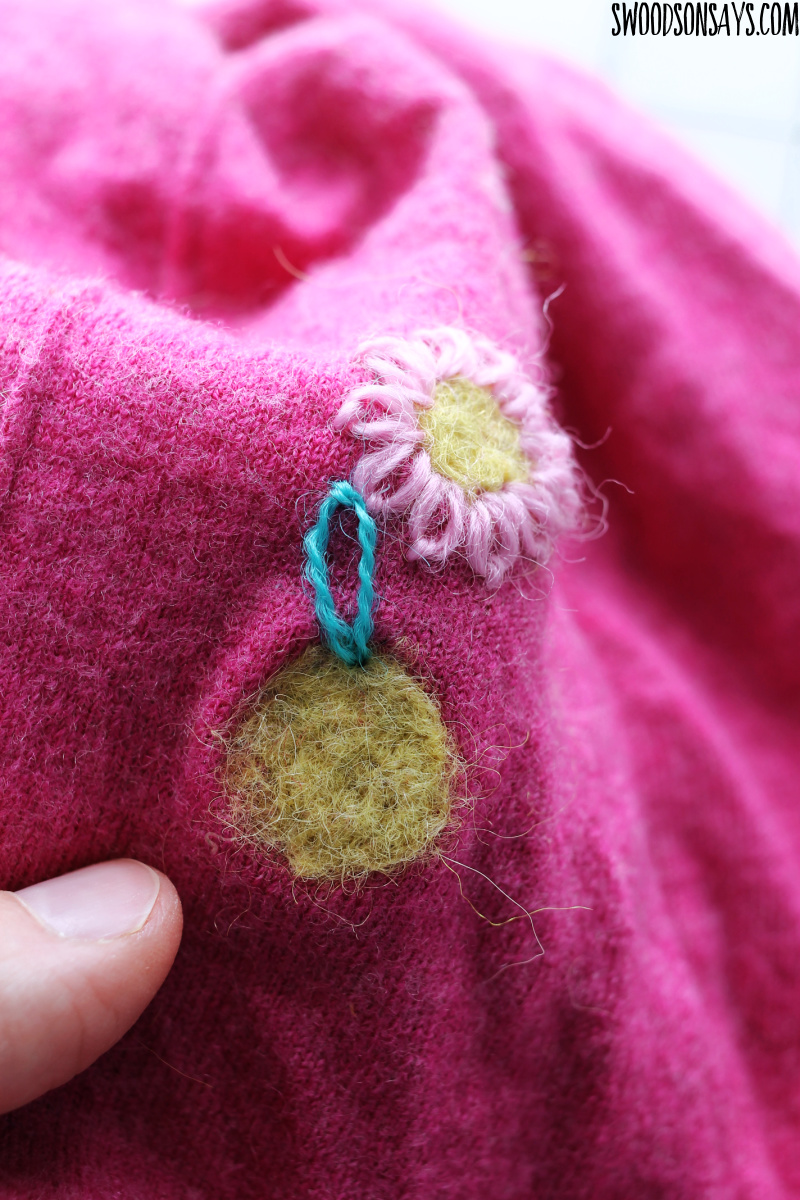
You’re done! Repeat all around the center! This is what one petal will look like.

I had 3 holes but decided the lone flower at the bottom looked weird so I added a fourth flower for decorative measure. I love how this turned out! You’ll want to wash on delicate and hang dry so it doesn’t mess with your stitching, happy mending!