
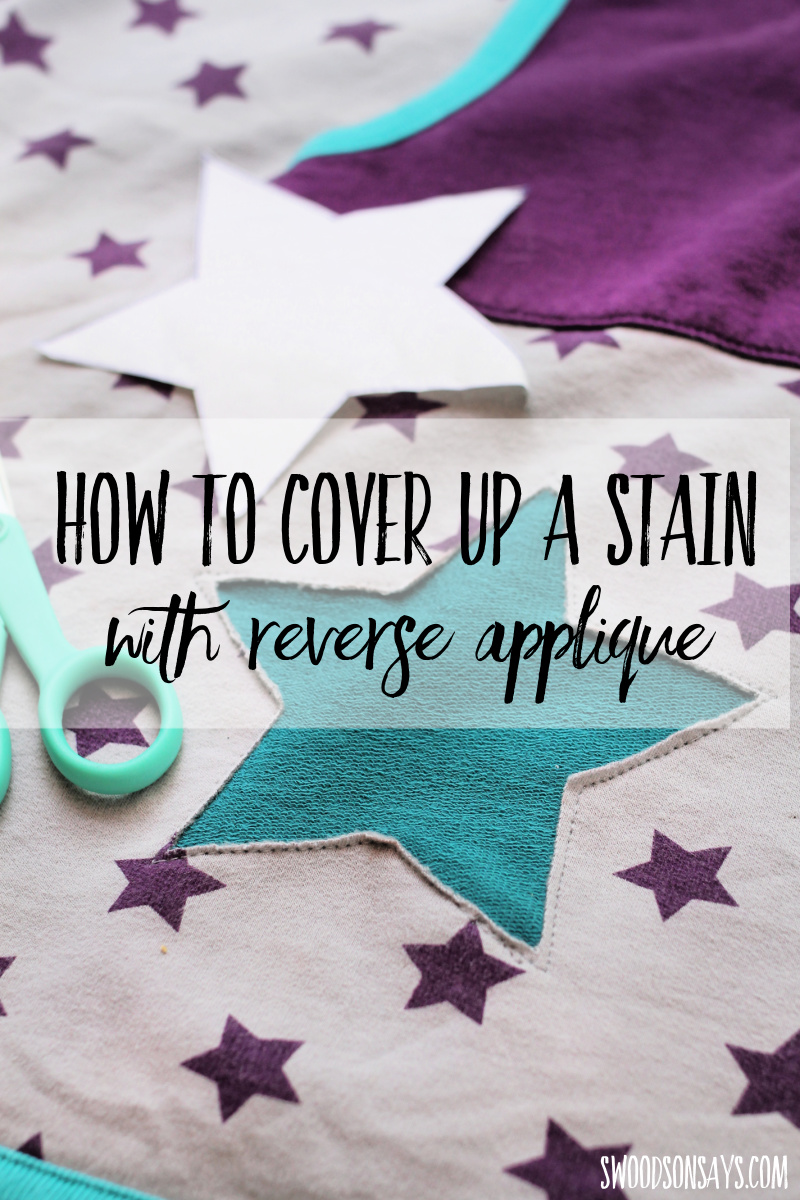
Follow this easy reverse applique tutorial and cut a stain or hole right out of the middle!

I love patching over stains but sometimes the print or location doesn’t look right – reverse applique is actually even faster! What is the difference between applique and reverse applique? Applique puts a design/layer on top and reverse applique cuts off the top layer to reveal a bottom layer. This technique is often used in quilting but this tutorial is for raw edge reverse applique with knit fabrics. It’s also a perfect way to use up scraps from other projects!
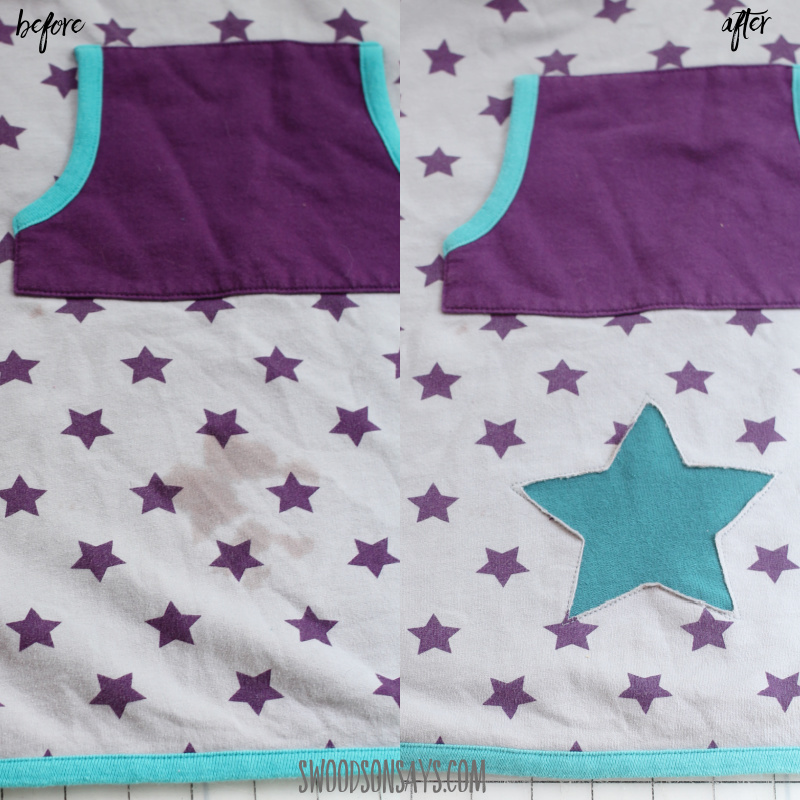
I thrifted this super soft, high quality cotton dress back when my daughter was maybe 2 or 3. She’s finally old enough to wear it so I figured I’d better fix it! My original intention was to just chop off the bottom and add binding so it was a hoodie but she’s actually really into sweatshirt dresses so I needed a plan B.
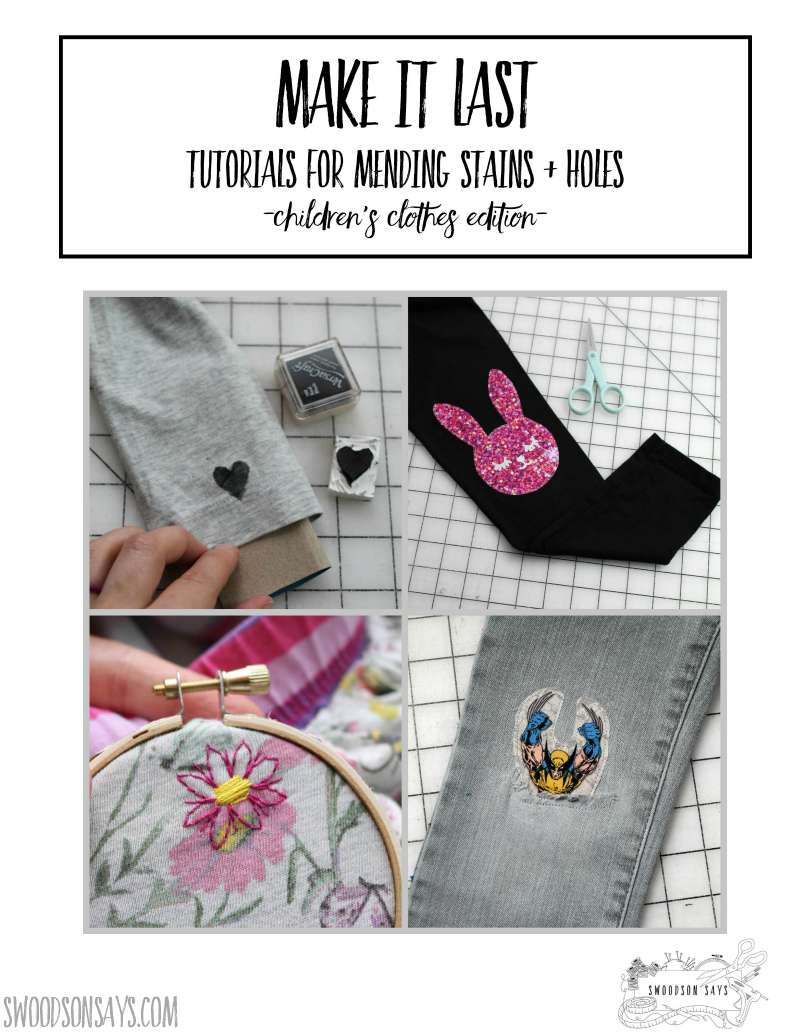
If you want more mending ideas & patterns check out my e-book, Make It Last!
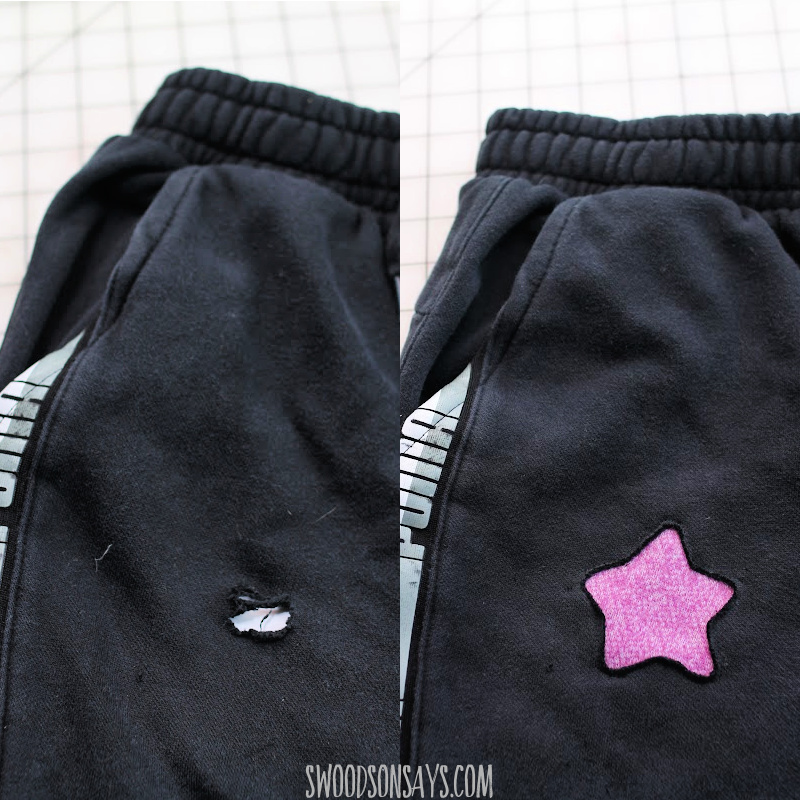
Here’s another example!
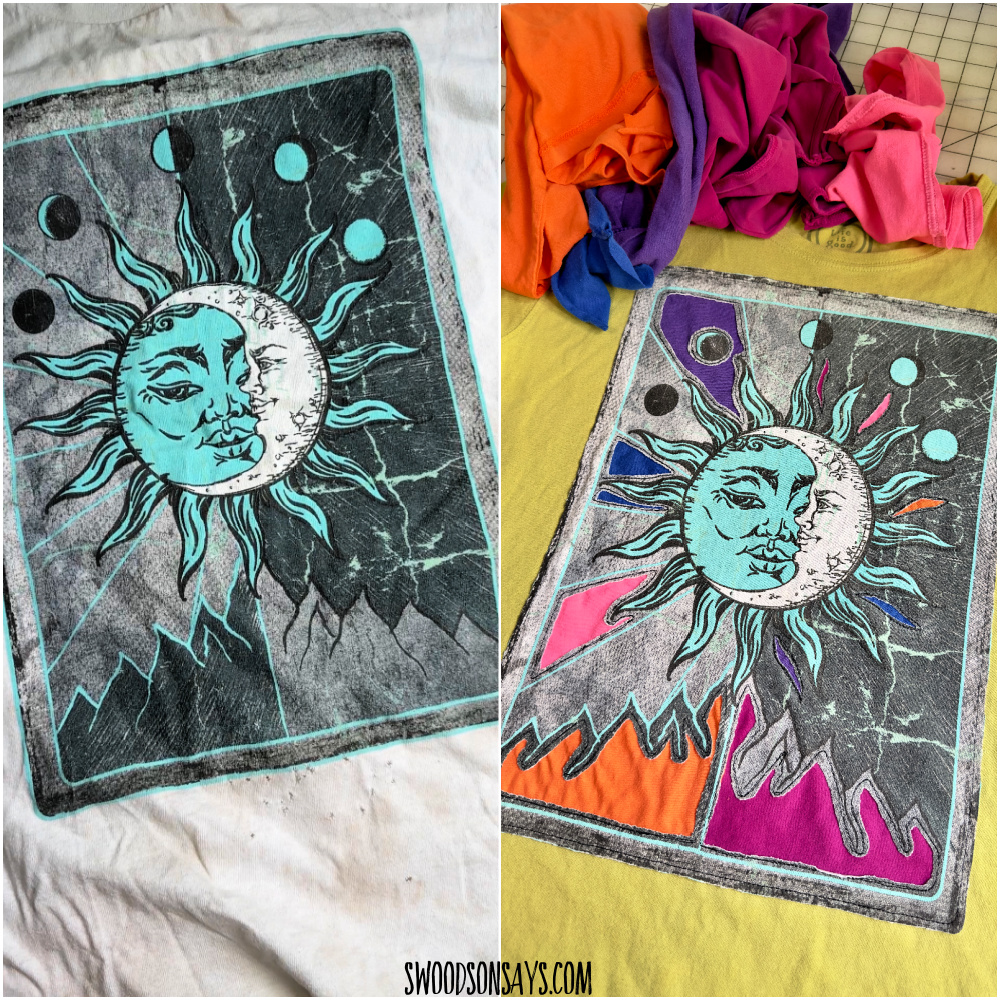
Here is a larger refashion where I cut around a bunch of old holes!
If you like this post, check these out while you’re here!
- Reverse applique t-shirt refashion – with text!
- 20+ creative ways to hide a stain
- 15+ sweater refashions to recycle old sweaters into new clothes!
- Embroidered reverse applique snowflake pincushion tutorial
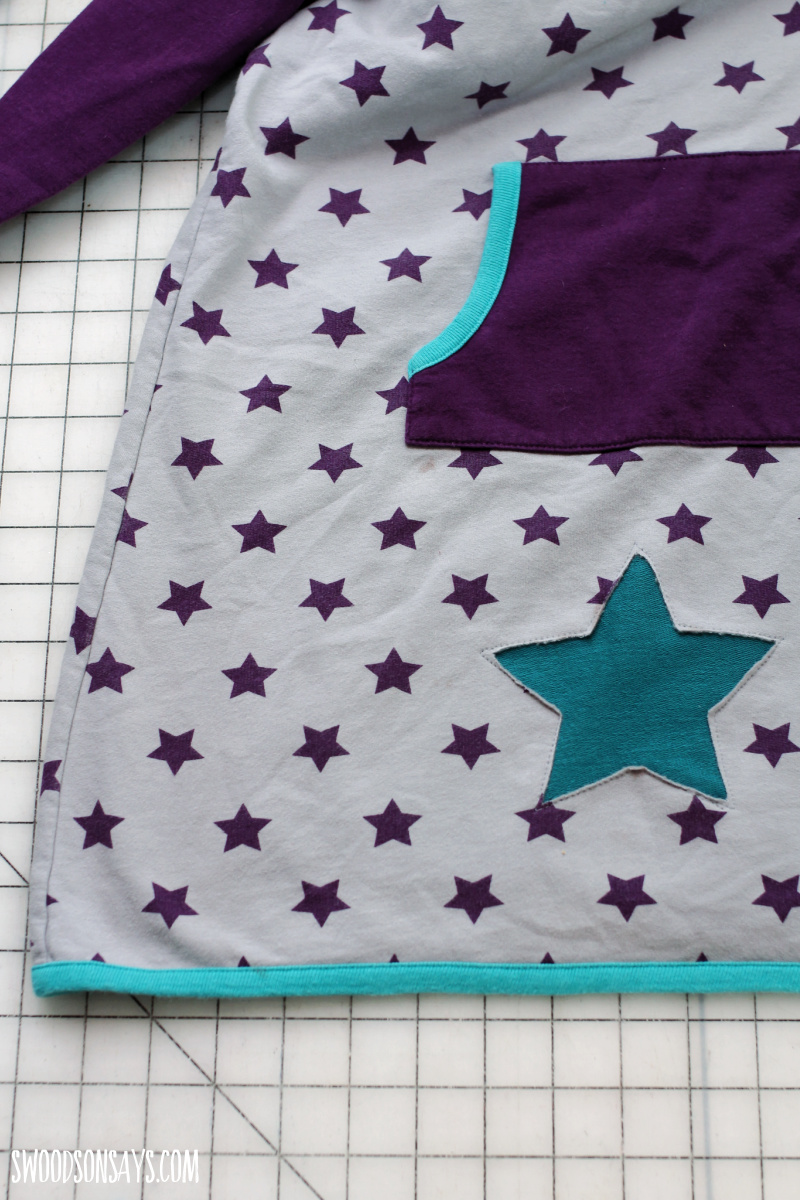
You could also use this reverse applique tutorial just to add style – I’m wondering if I should make more random stars all over so it looks more intentional, what do you think!

Pin this reverse applique tutorial post with this link or image:
Ready to make your own?
Reverse applique t-shirt tutorial
Supplies
- Freezer paper
- Ballpoint needles (you always want to use these when you’re sewing with knit (read: stretchy) fabric!)
- Thread
- 2 tshirts – one for the fabric peeking through, one for the top
- Pins
- Iron
Steps
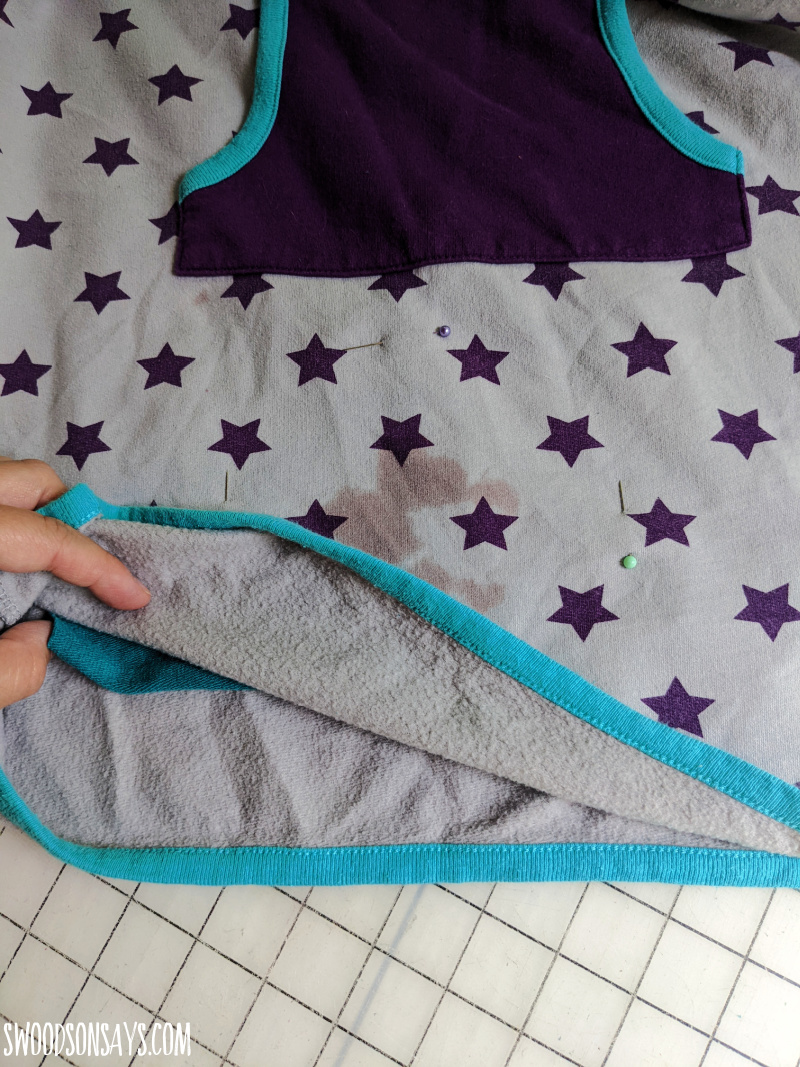
Step 1- Layer the scrap you want peeking through underneath the stain and pin around the edges. Make sure not to catch the bottom layer and that it covers the entire stain area, as well as smoothing it out nice and flat.
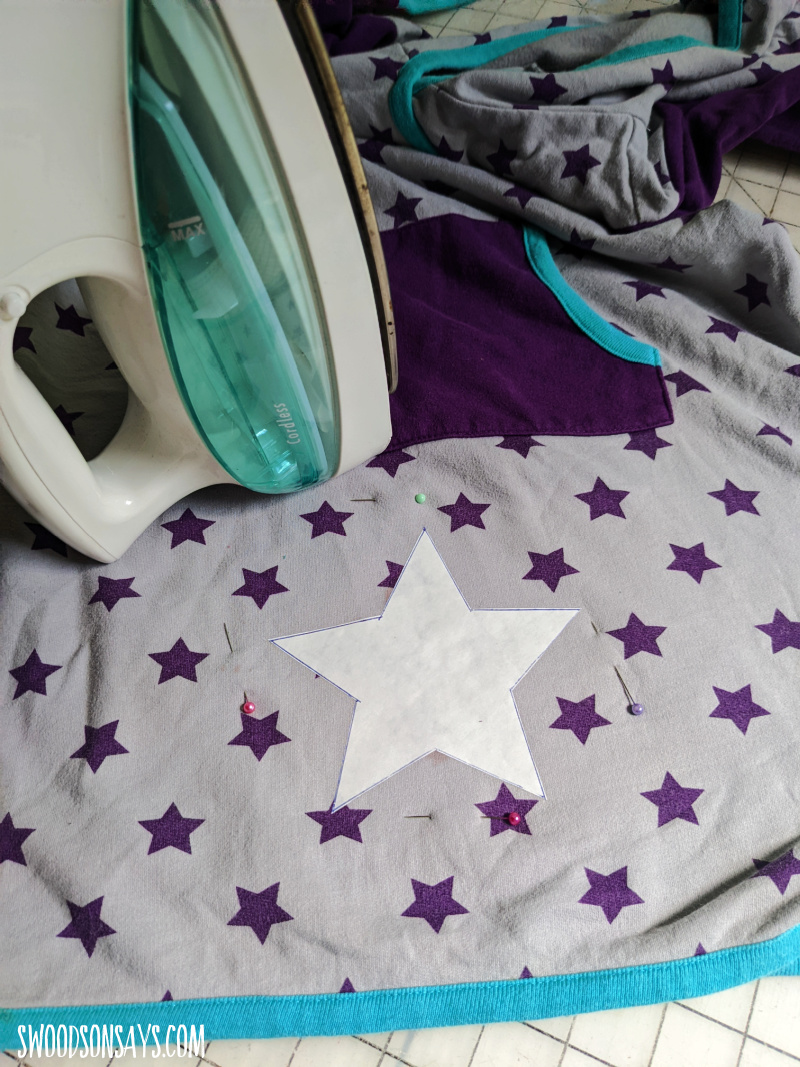
Step 2- Draw or trace the shape on to the freezer paper and cut it out, making sure it is big enough to cover the stain. Iron it on to where you want cut out, shiny side down.
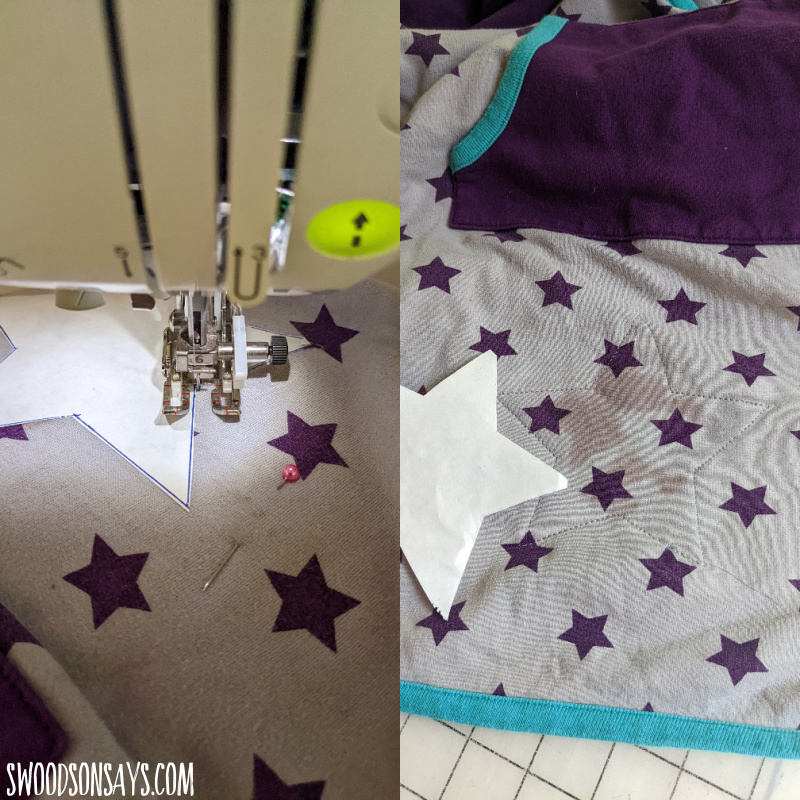
Step 3- Time to sew Use your ballpoint needles and sew right along the edge of the shape. I used a walking foot, which has little feed dogs that move the layers along at the same pace. Don’t forget to take a few stitches back & forth at the beginning and end – peel off the pattern to see the shape and make sure there aren’t any bumps in the bottom layer.
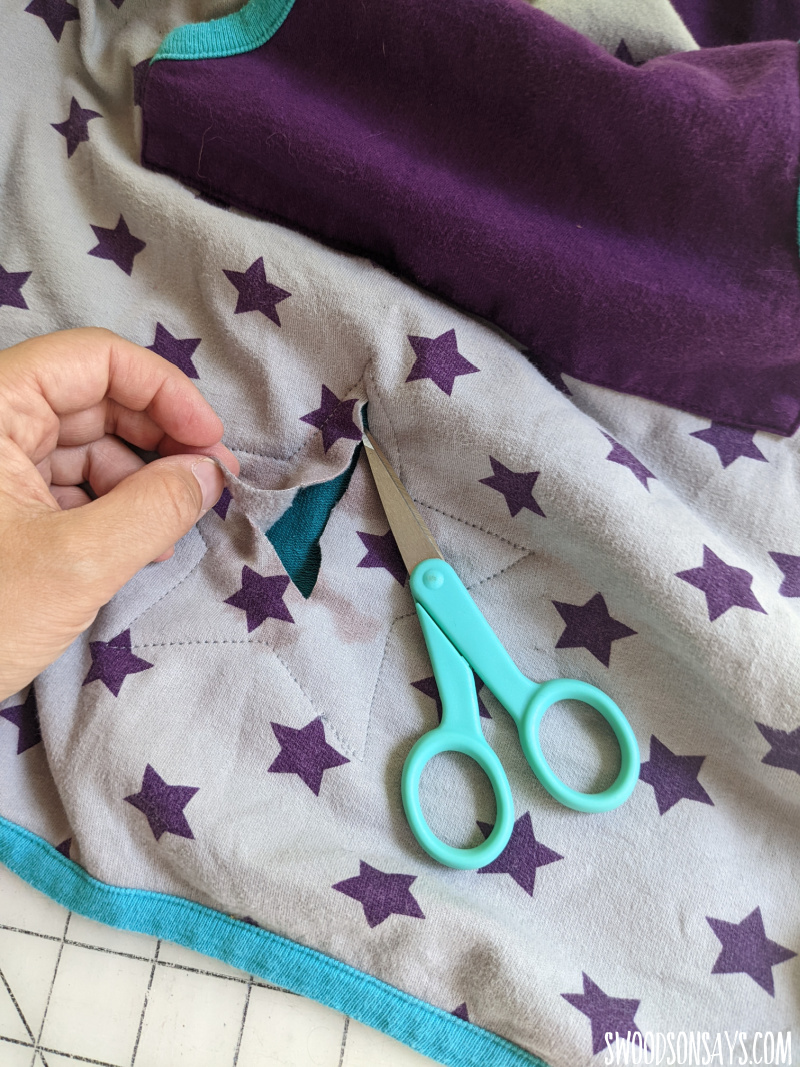
Step 4- Time to cut! Very carefully, use your sharp scissors to cut through the top layer, and trim slowly around the edges. You don’t want to cut through the stitching but just along it works best. You can always cut off more but you can’t add it back on! .
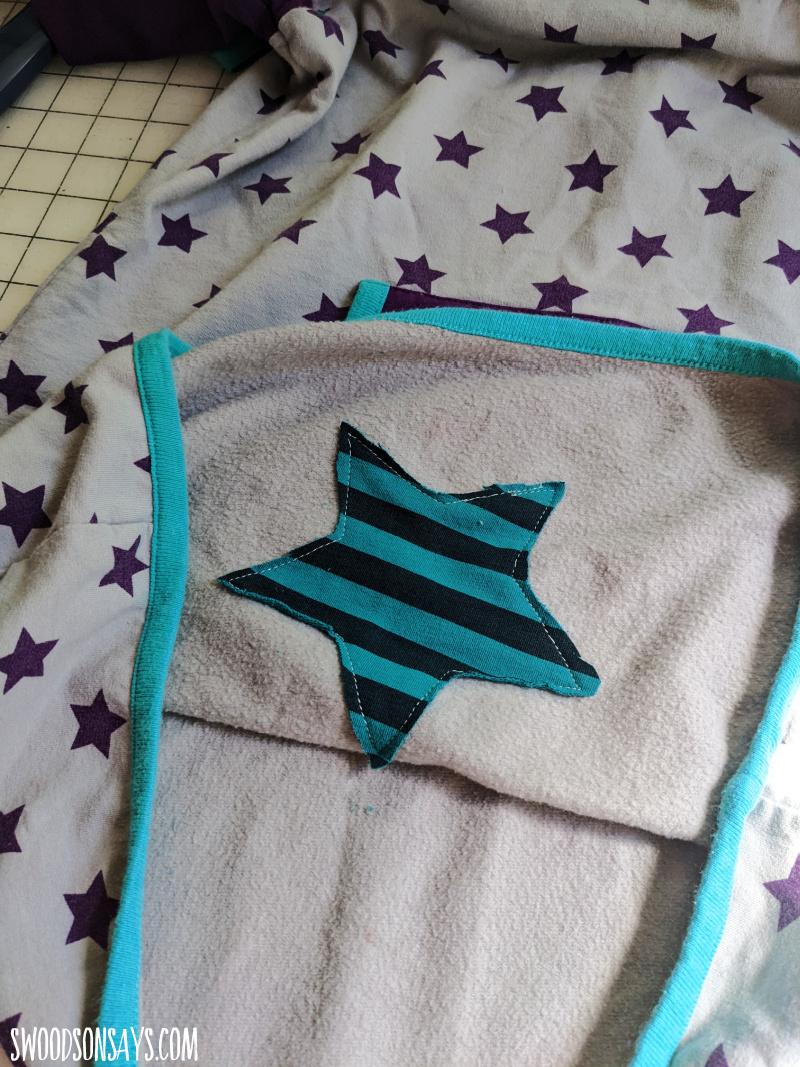
Step 5- Optionally turn it inside out and trim the threads & excess bottom layer, and you’re done!
Amelie
Tuesday 25th of October 2022
I followed this tutorial and the explanations and photos were helpful. Thank you.
Stephanie - Swoodson Says
Friday 2nd of December 2022
Yay!! Love to hear that, thanks for taking the time to come back and say so, you made my day 🙂