
Get read, set, stitch these free felt reindeer ornaments to make! The cutest decoration to hang on the tree or use as a gift tag; these are simple enough that kids can sew them too.
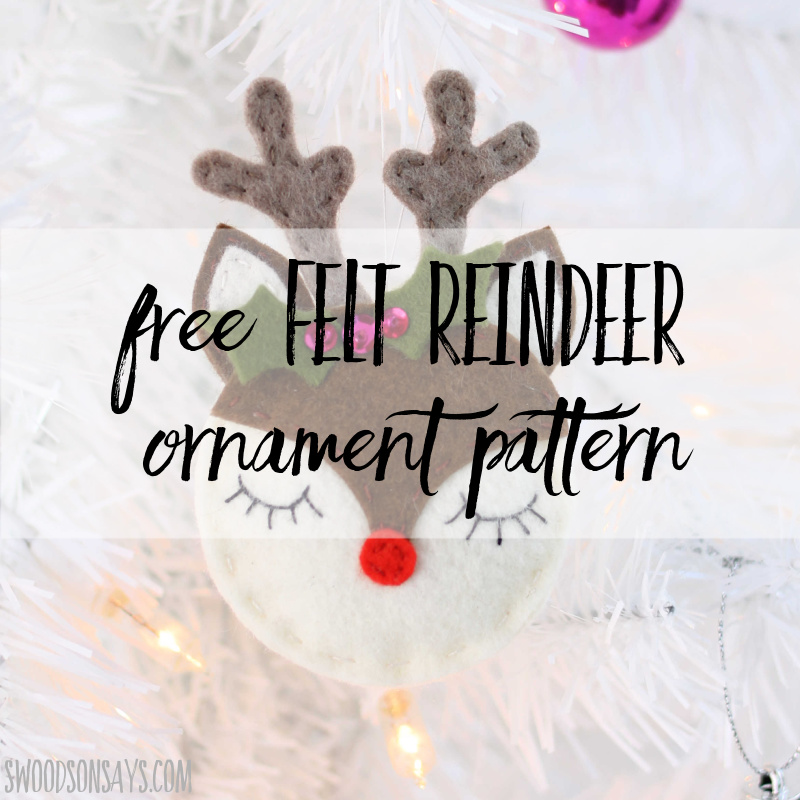
My 6 year old saw a cheapie plastic ornament similar to this style that wouldn’t have survived the drive home, but I promised her I’d design a felt one that would hold up over the years and now I’m sharing it! Anyone can stitch these fun little reindeer faces with a little patience; I’d love to see them used as gift tags too! Ornaments make a great gift, especially if they’re handmade; they’re cheap to mail and quick to make.
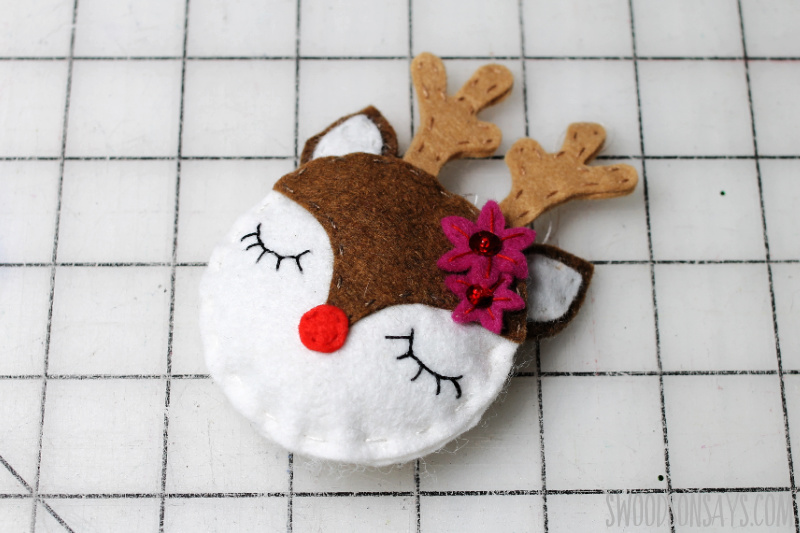
Version #1 I stitched has a simple flower pair accent, I freehanded some extra stitches to make the flower a little more interesting.

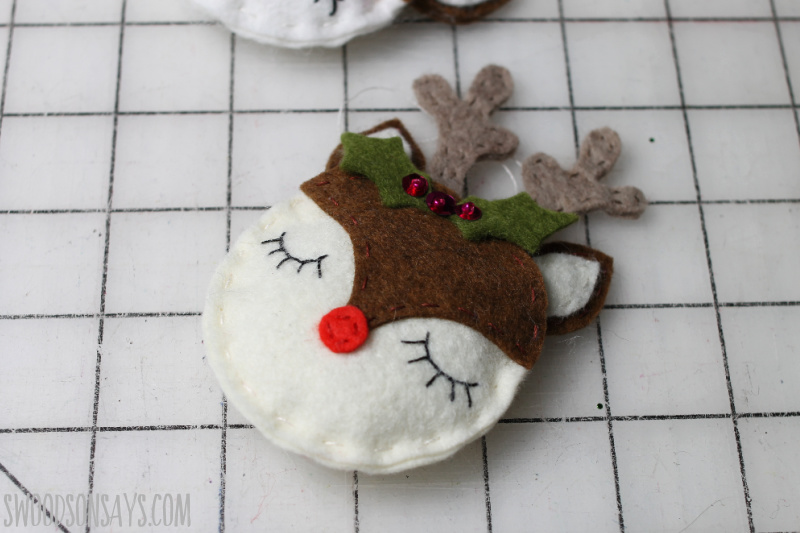
Version #2 has sweet holly leaves and sequins! This is my favorite; unfortunately using up old scraps means I can’t recreate it exactly again.
What do you think, do you want a Rudolph on your tree this year? I’m thinking of trying a third option without the red nose and adding some more stitching accents on the face, there’s so much room to embellish.
While you’re here, check out some of these other posts too:
- 10+ upcycled christmas ornaments to make from old clothes
- 15+ prettiest fabric Christmas ornaments tutorials
- The cutest animal Christmas ornament patterns
- 14+ tutorials for embroidery hoop Christmas ornaments
- 20+ free felt Christmas ornament patterns
- 20+ photo ornaments diy tutorials
Pin this felt reindeer ornaments pattern tutorial for later with this link or collage image:
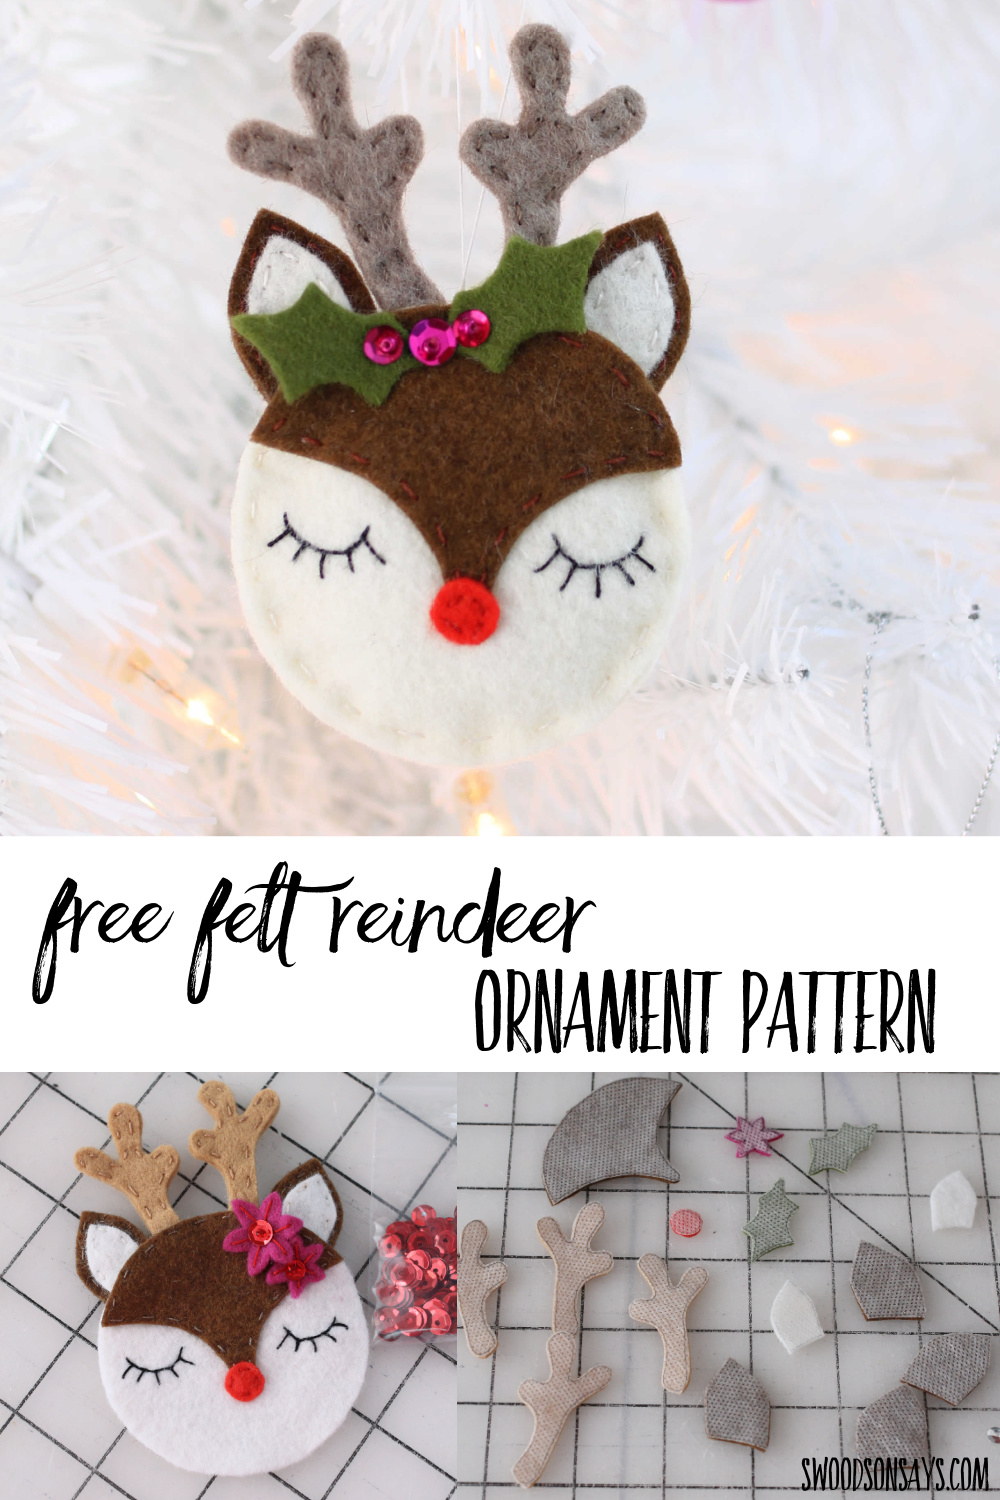
Free felt reindeer ornaments to make
Supplies
- Wool blend felt – I use this shop’s stuff all the time
- Fabri-solvy/stick & stitch: Sulky – Amazon – Etsy
- My favorite embroidery needles: Amazon – Etsy
- Embroidery floss – I’m using Sulky petite cottons here: Sulky – Amazon – Etsy
- Microtip scissors: Amazon
- Stuffing
- Seed beads: Amazon — Etsy
- Sequins – I used 5mm size: Amazon – Etsy
- PDF pattern-sign up for my newsletter and get the free download once you confirm your subscription! If you’re already a subscriber, you can access the pattern with the password in each newsletter, in the resource library.
Steps
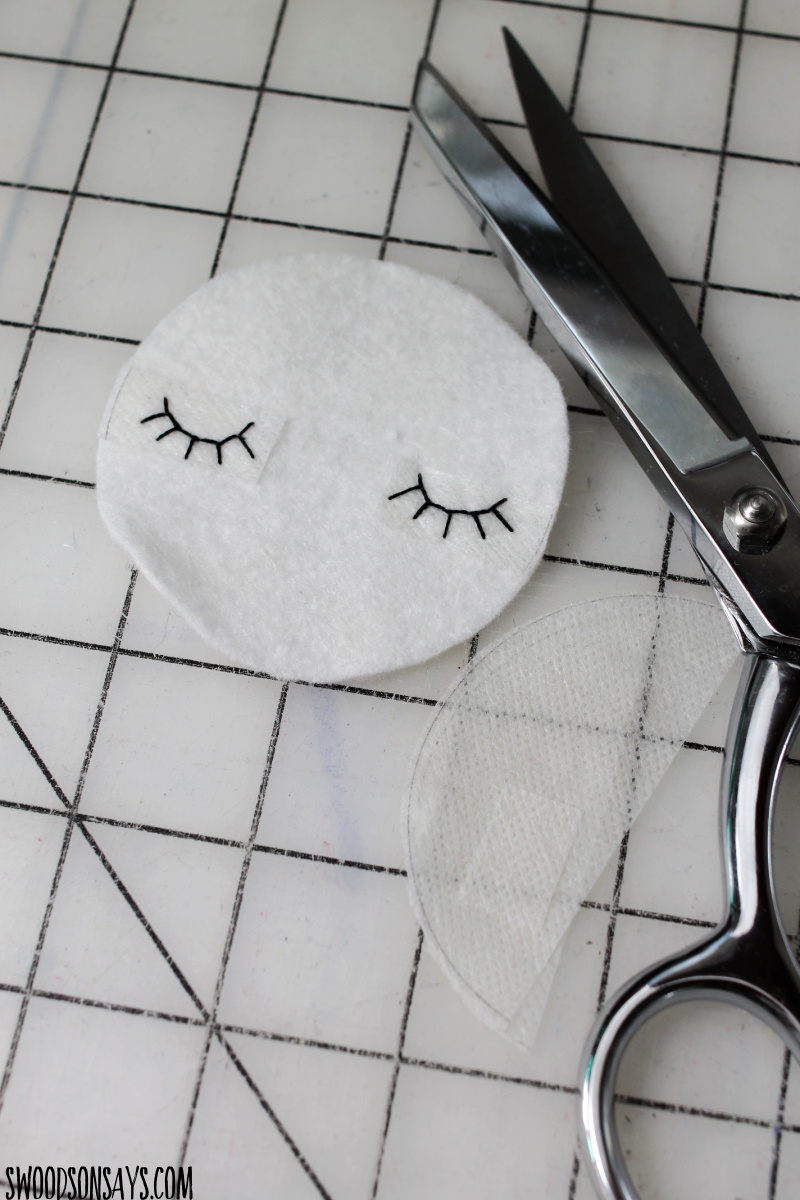
Step 1-You can use your favorite pattern transfer method; I am using Fabri-Solvy aka Stick and Stitch. Print, peel off the backing, stick on, stitch. Cut cleanly around the pattern line. If you’re new to embroidery, check out the basic embroidery stitches this pattern uses here! Stick the face on with a simple back stitch, trim off the excess transfer paper.
I printed the whole pattern on the transfer paper, which wasn’t necessary since I didn’t stitch anything else, but it makes it easy! Freezer paper is a great tool to cut out felt shapes if you don’t want to do it this way.
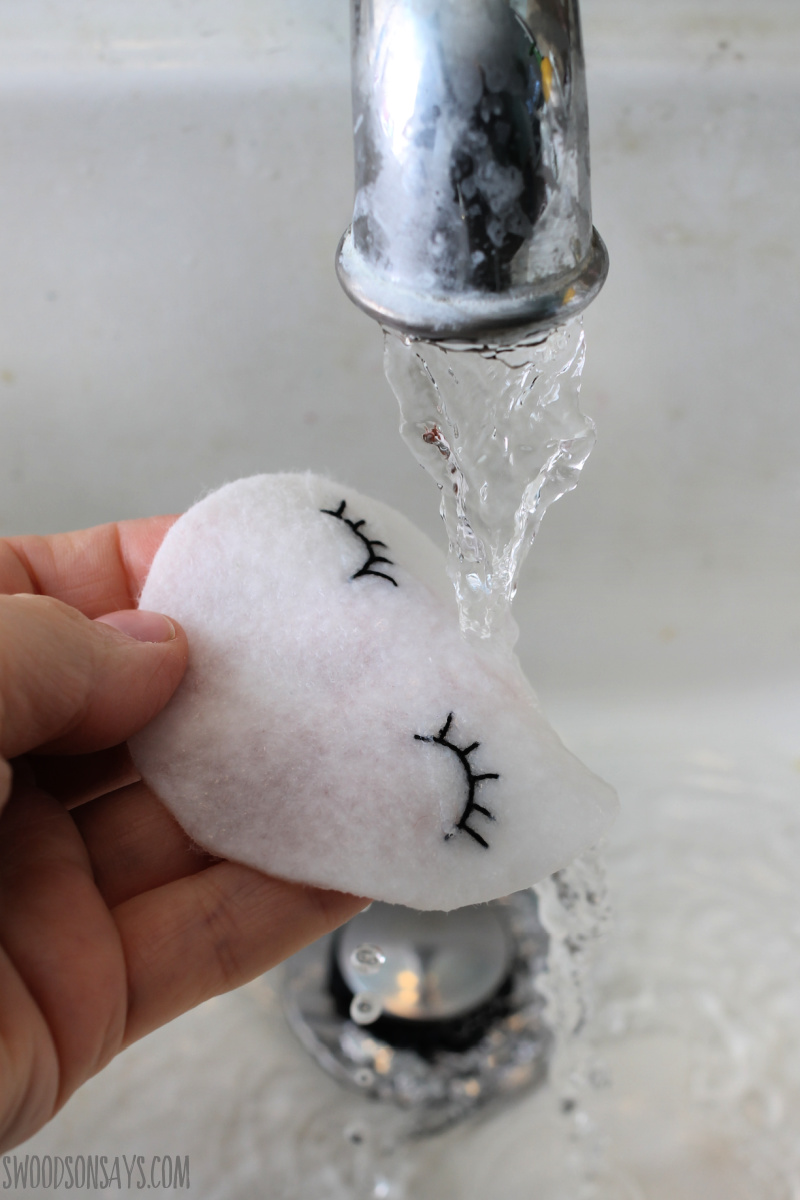
Step 2- Wash it gently in warm water to dissolve the rest of the paper and lay flat to dry (if you want more pictures of this process, check this post out!)
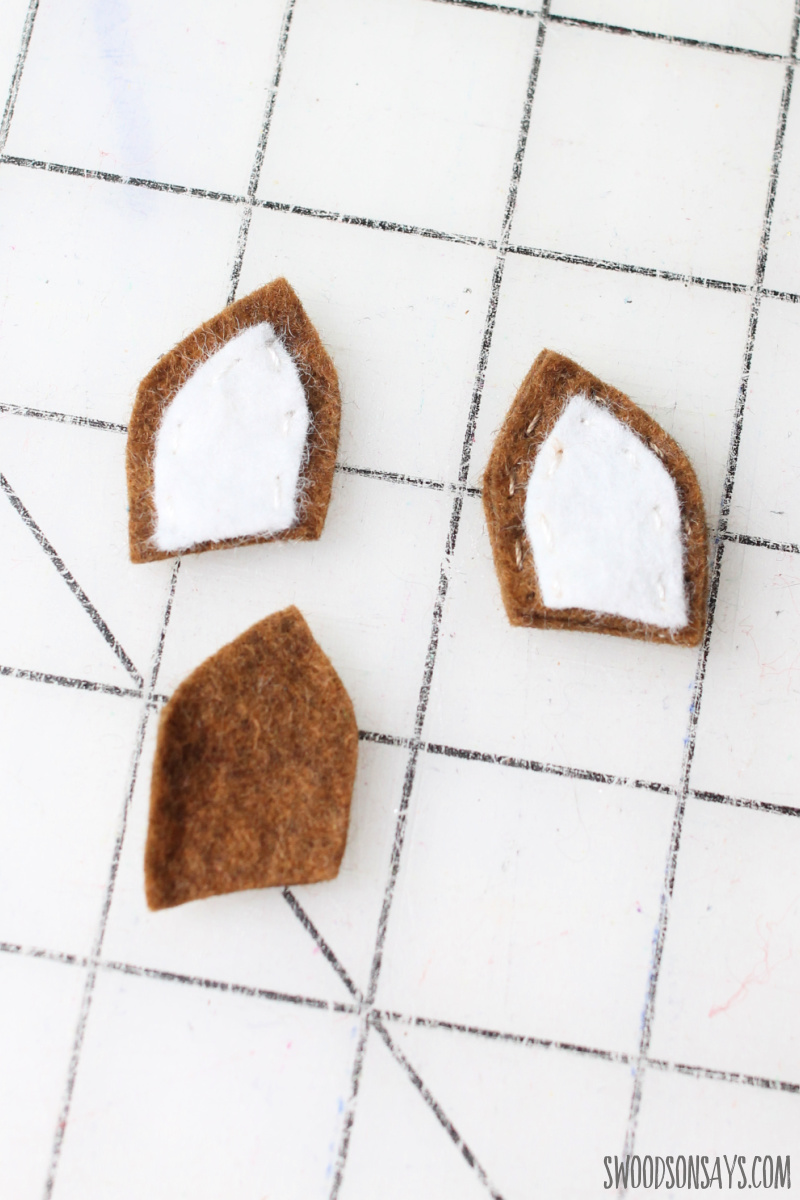
Step 3- Stitch an ear front to an ear, then stitch that ear to a plain backing. Repeat for the right ear, making sure that it is facing the right way for a mirrored image.
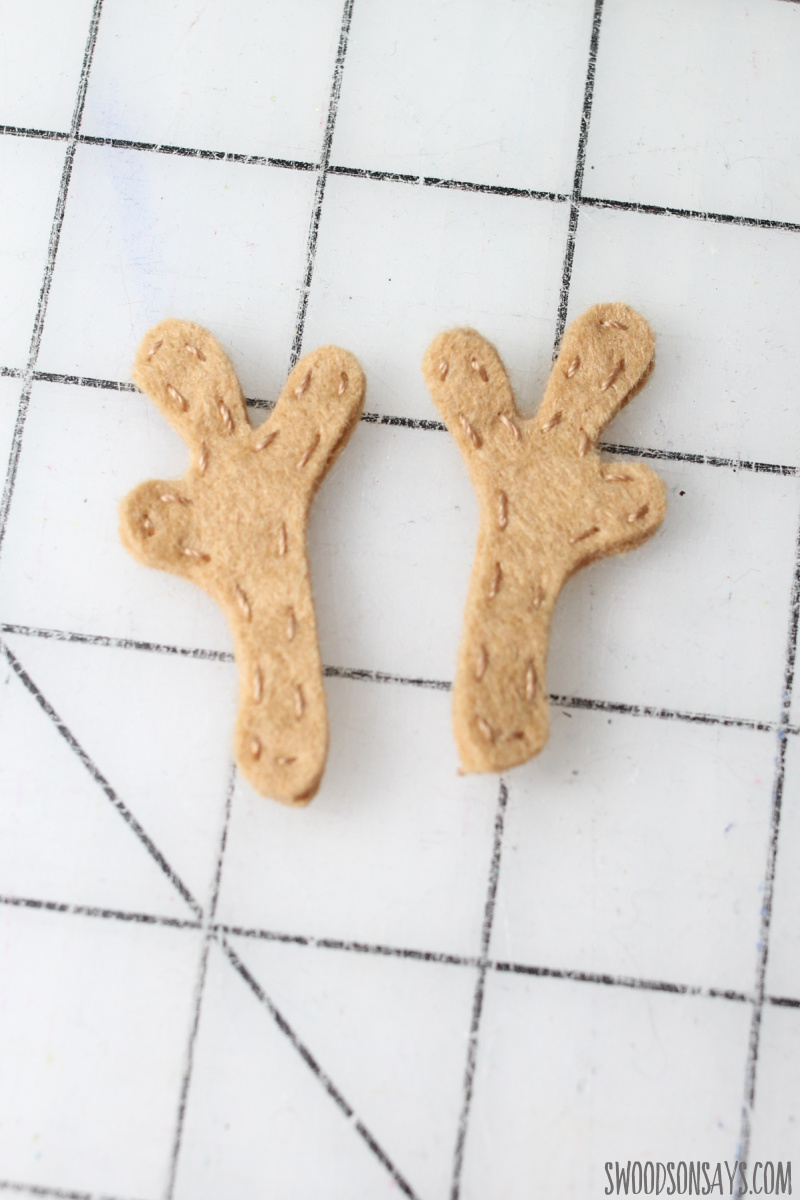
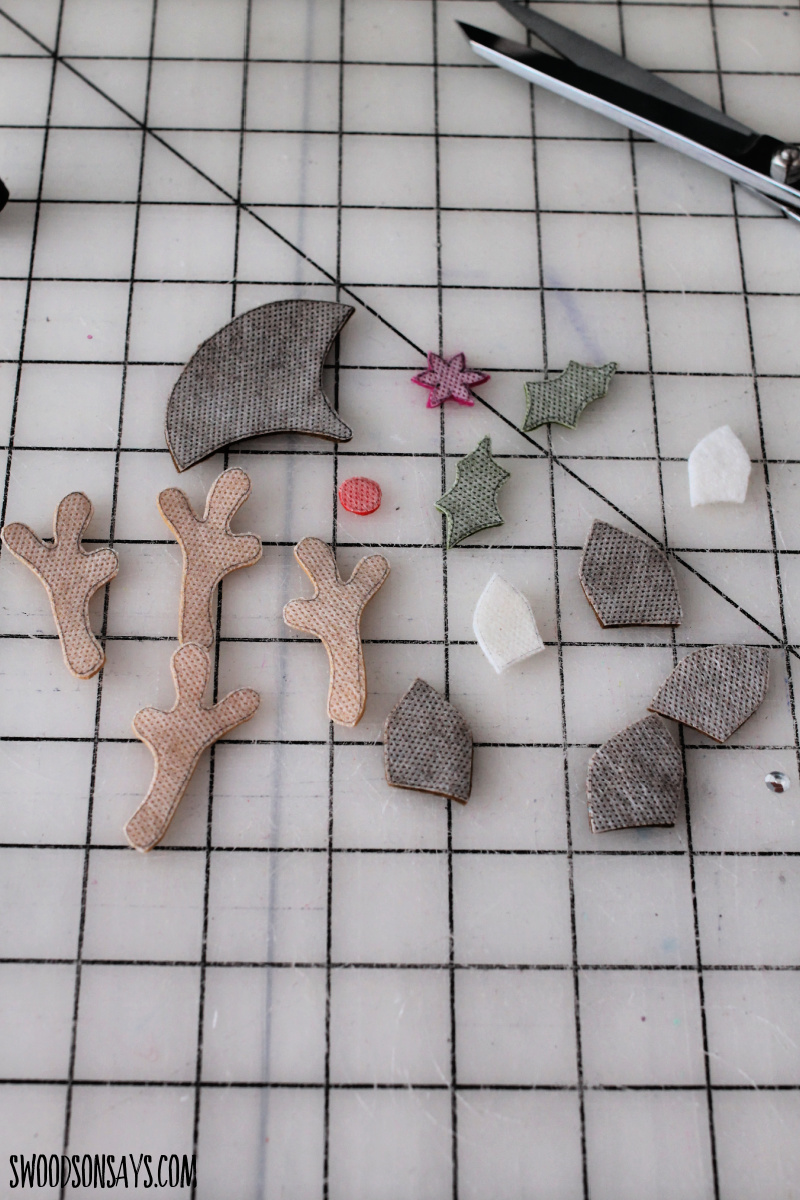
Step 4- Stitch each pair of antlers together.
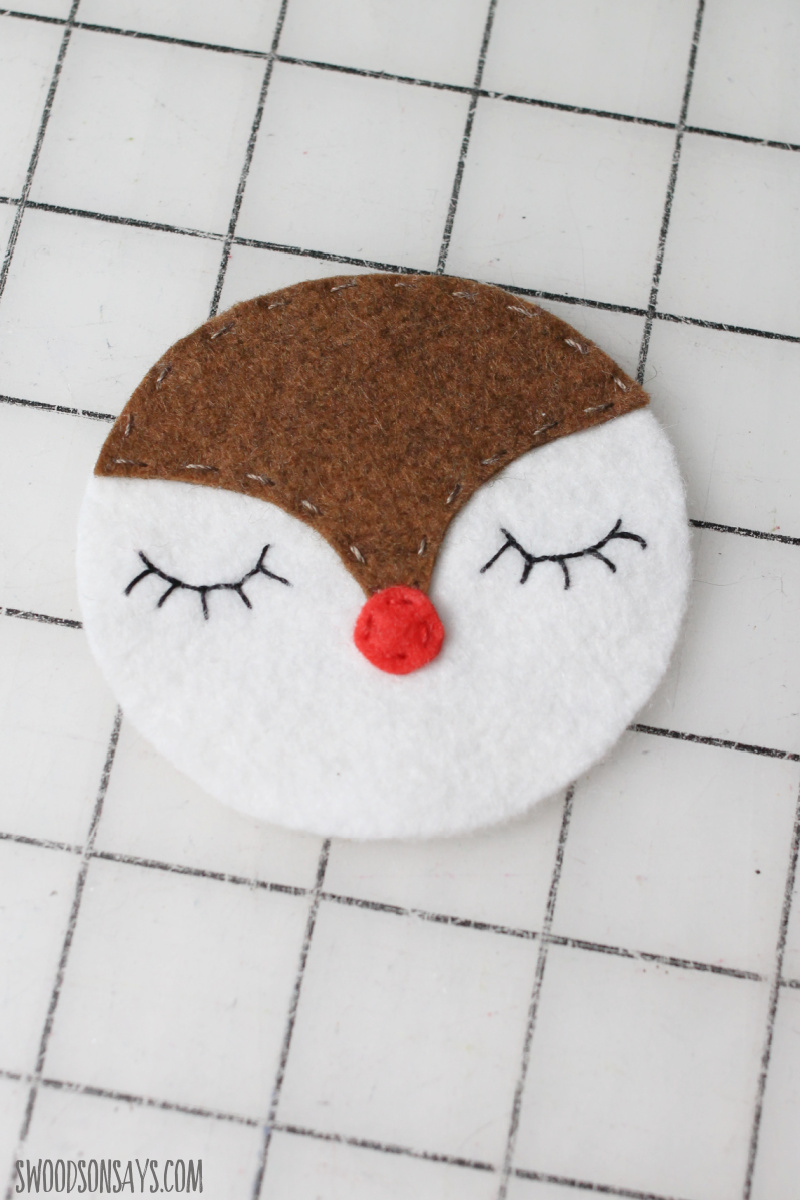
Step 5- Stitch the face accent to the face and then the nose over top the tip of the face accent.
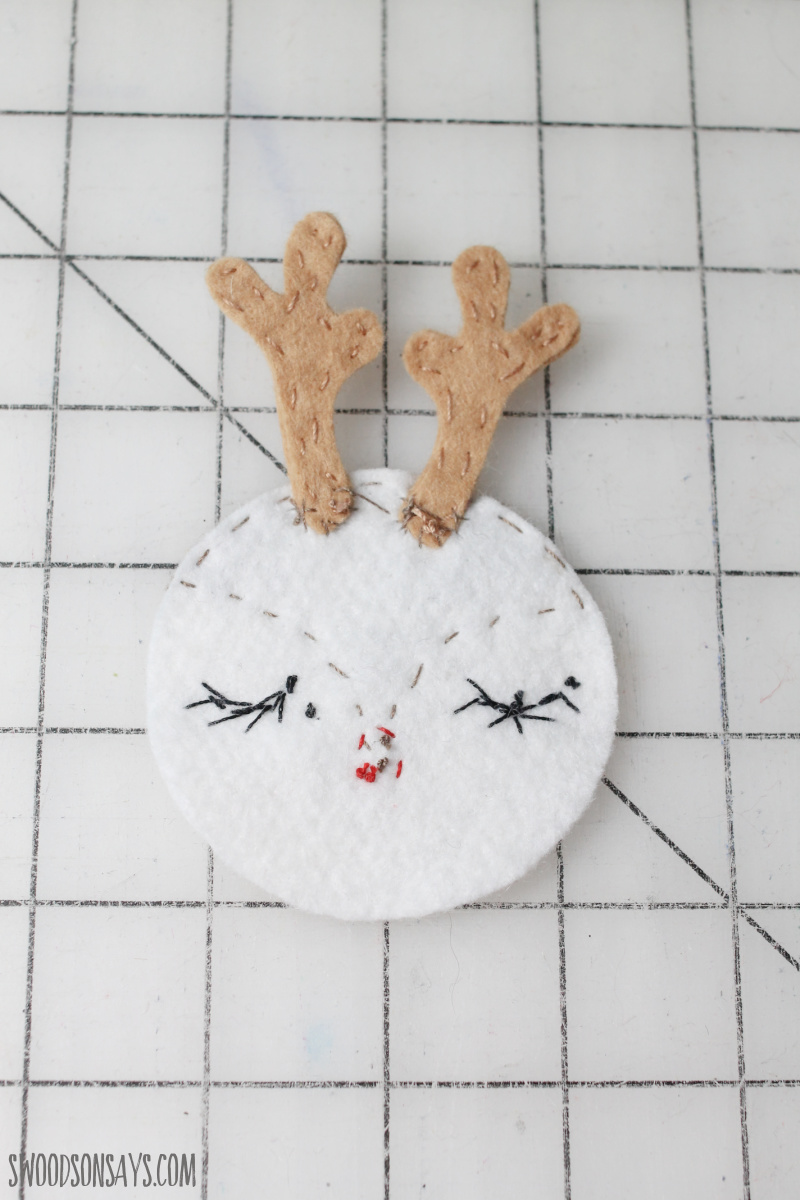
Step 6- Time to stitch on the antlers! Make sure they’re centered over the face accent and stitch on. You’ll carefully only go through the white felt layer, not piercing through the brown face accent, taking shallow stitches. Repeat the same method with each ear placed right outside the antlers.
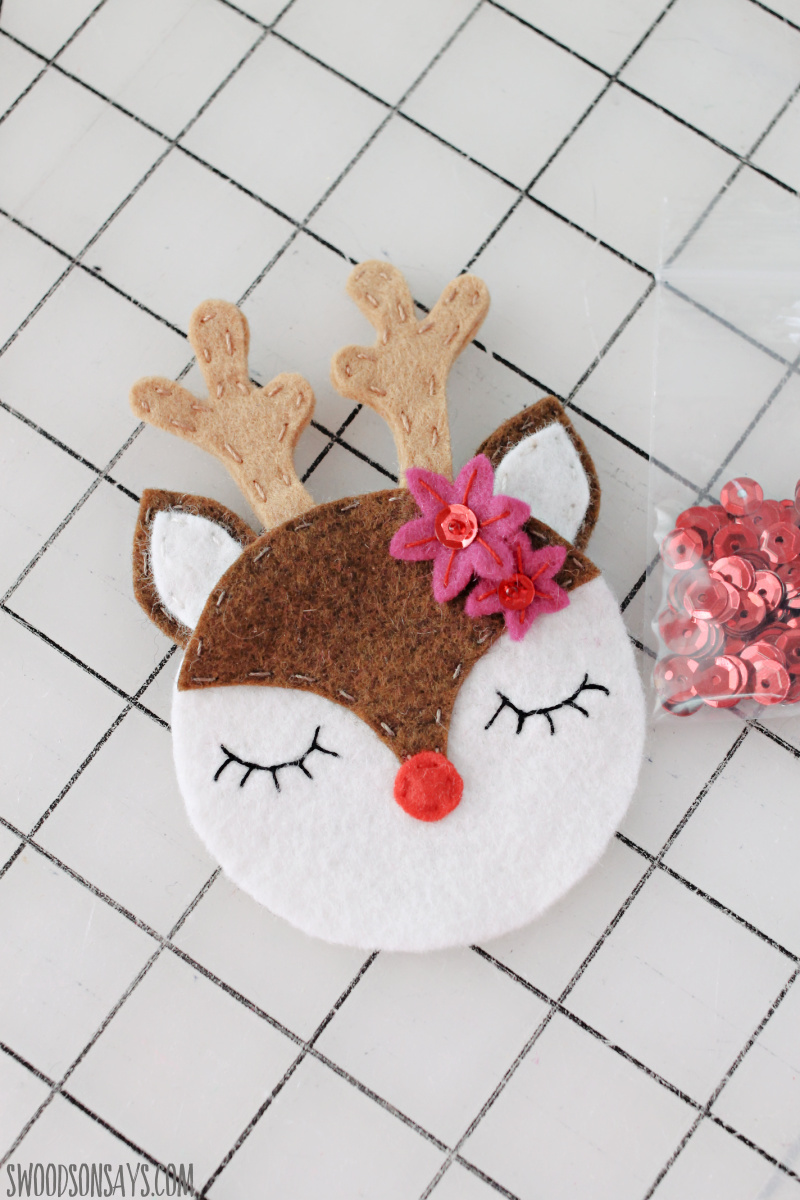
Step 7- Now’s the time to add any accent pieces! I freehand added some decorative stitches to the flower petals; make sure to use a little seed bead to secure a sequin so it doesn’t slip back off! Same goes for the felt holly.
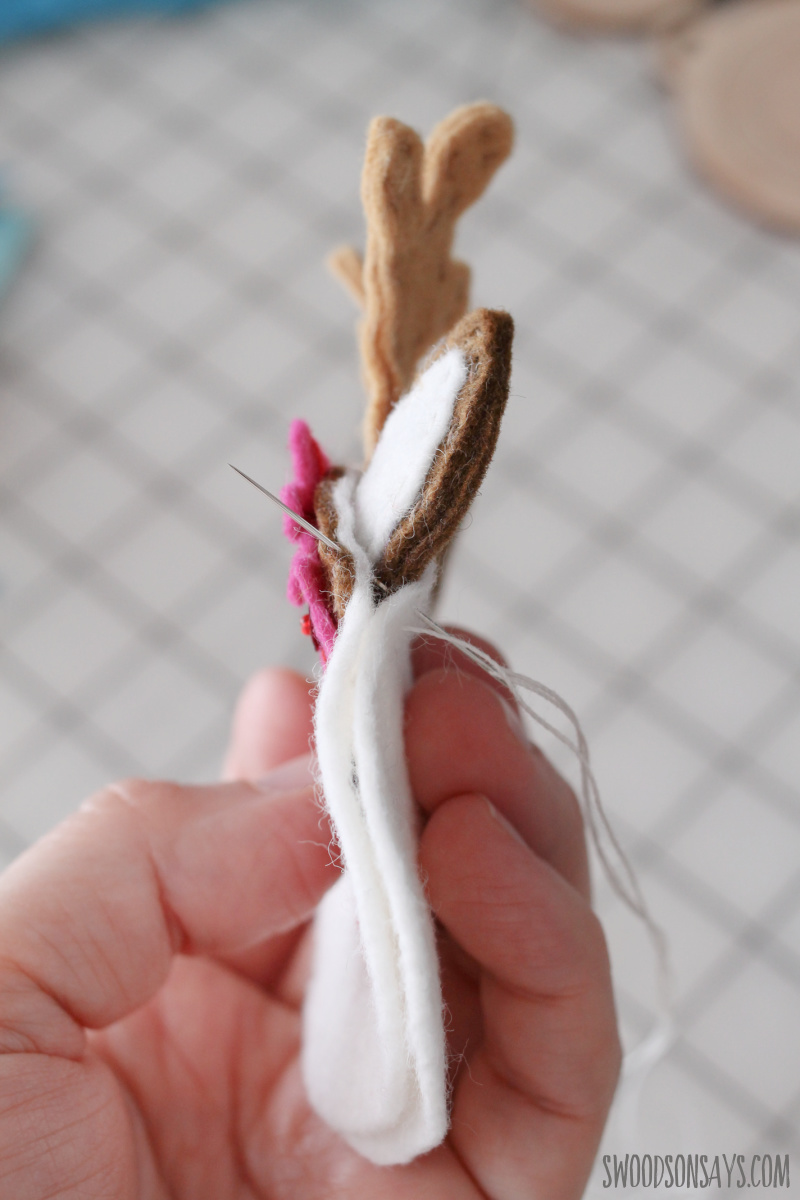
Step 8- With the pretty stitching facing out, line up the face front and back and use a running stitch to secure them, only coming up through the white layer again so the stitches don’t show on the face accent piece. Pause with a roughly 2″ gap left.
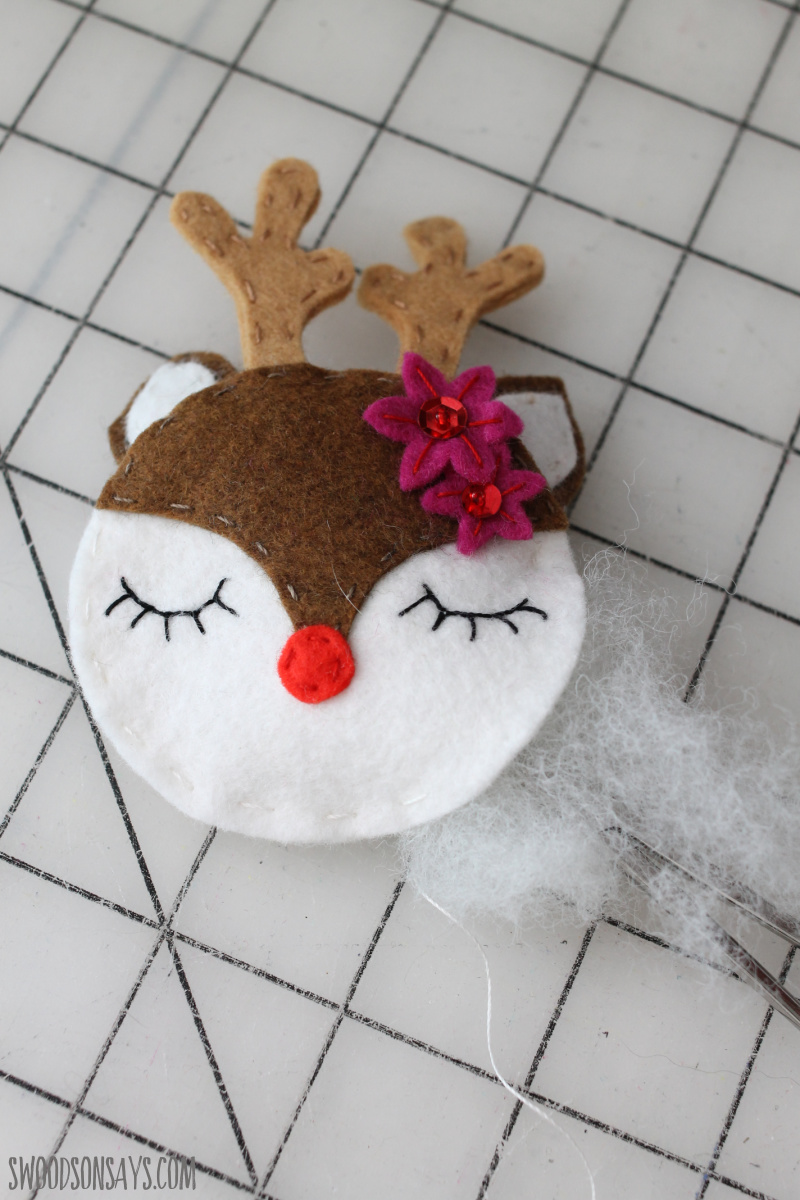
Step 9- Gently add stuffing and finish stitching around the edges. Add a loop of floss at the top to serve as a hanger and you’re done, how do you like your new reindeer face!
Maria
Friday 6th of February 2026
I would love the dear tree decoration please.x
Stephanie - Swoodson Says
Monday 9th of February 2026
The pattern is for nesletter subscribers, linked under 'supplies'!
Brenda
Friday 11th of October 2024
Would love the deer ornament pattern. Thank you.
Stephanie - Swoodson Says
Saturday 12th of October 2024
hi Brenda! it is free for newsletter subscribers - did you get signed up? The link and instructions come automatically when you do that but I can help if you're stuck.