
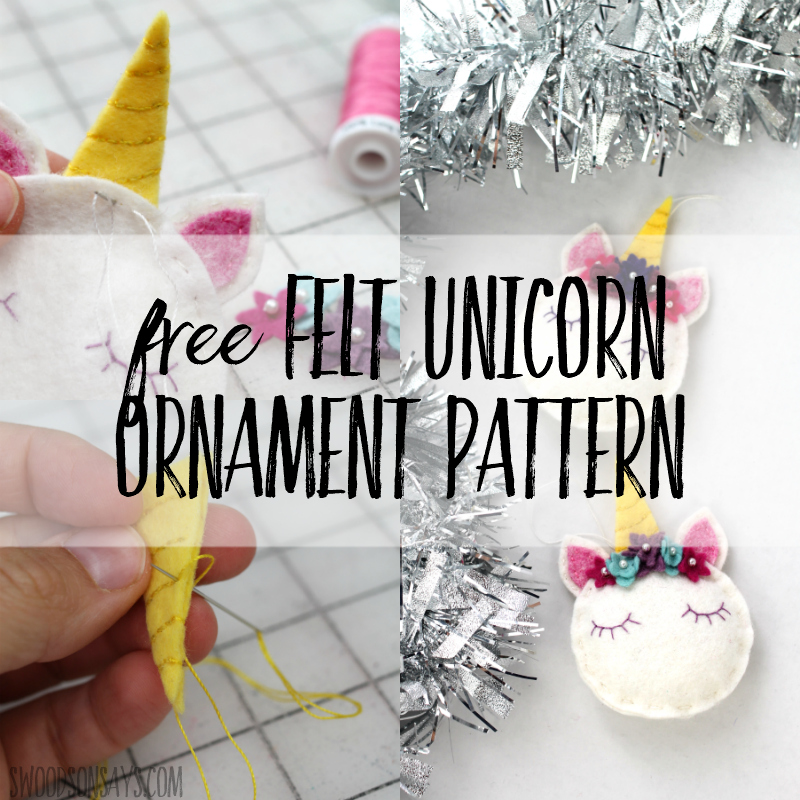
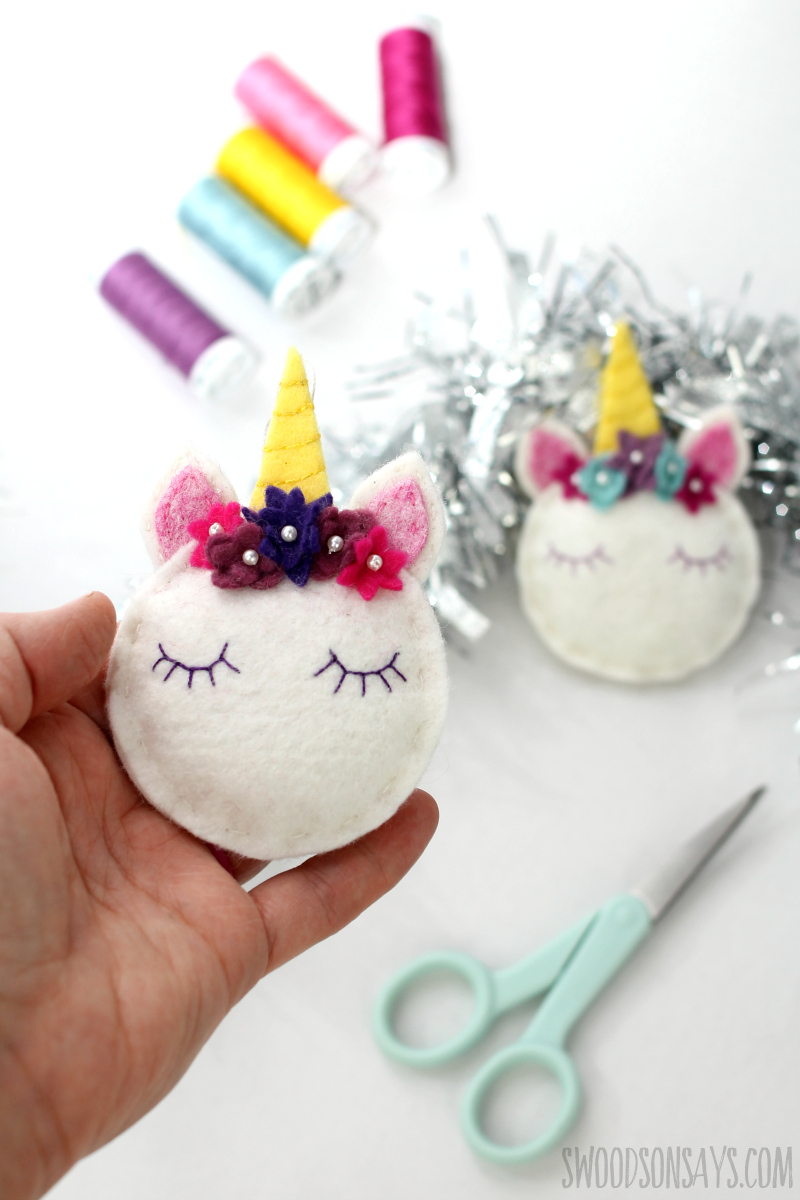
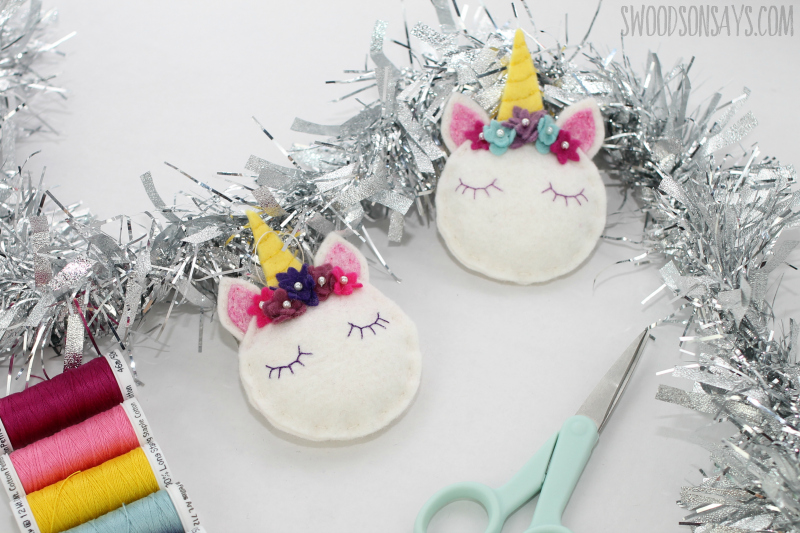
If you’re wondering how to make unicorn ornaments this Christmas, I have a free pattern to share today! This adorable, flowered forelock face has been everywhere the past year and my daughter spotted it while I was browsing Pinterest recently. I wanted to work from my stash instead of buying clay and plastic ornaments, so I decided to design a felt version instead. Cutting the tiny flowers can be finicky but I love the final result, and it wasn’t hard to make both of these in one night! She cannot wait to get her hands on this felt unicorn ornament, Christmas needs to hurry up.
I already have a third one in the works, they are fun to make. Who on your gift list would be happy with a magical beast in their stocking this year?
If you’re looking for more project inspiration, you should check out:
- The cutest felt animal ornaments to sew
- Master list of Christmas ornament tutorials – so many fun options!
- Clever unicorn sewing & craft projects
Pin this tutorial for how to make unicorn ornaments with this link or photo:
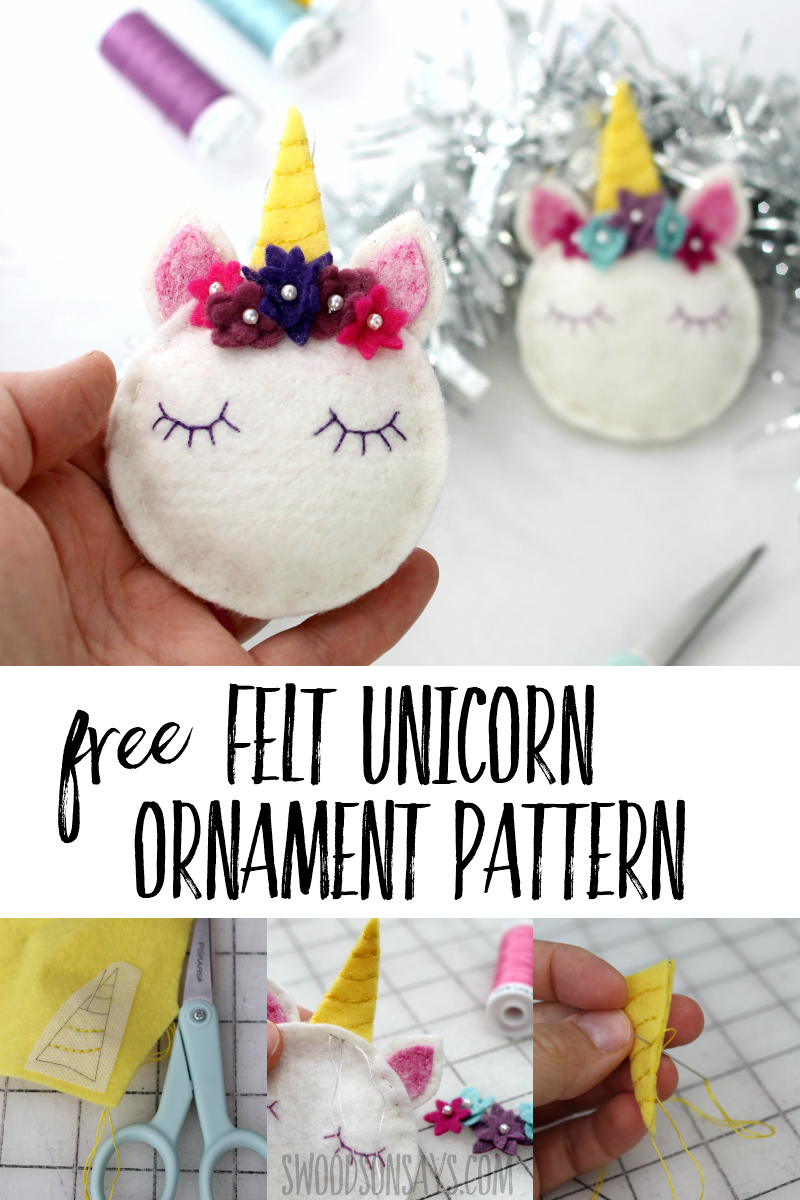
How to make unicorn ornaments
If you’re new to embroidery, check out the basic embroidery stitches this pattern uses here!
Supplies
- Sulky Fabri-Solvy or another pattern transfer method
- White wool blend felt & assorted other colors
- Pearl seeds
- Embroidery needle
- Coordinating embroidery floss; I used Sulky cotton petites here (you can buy on Amazon or on Sulky’s website)
- Scissors with a micro tip
-
Embroidery pattern-sign up for my newsletter and get the free download once you confirm your subscription! If you’re already a subscriber, you can access the pattern with the password in each newsletter, in the resource library.
Steps

Step 1- Stick the face on with a simple back stitch! You can use your favorite pattern transfer method; I am using Fabri-Solvy aka Stick and Stitch. Print, peel off the backing, stick on, stitch. Cut cleanly around the pattern line.
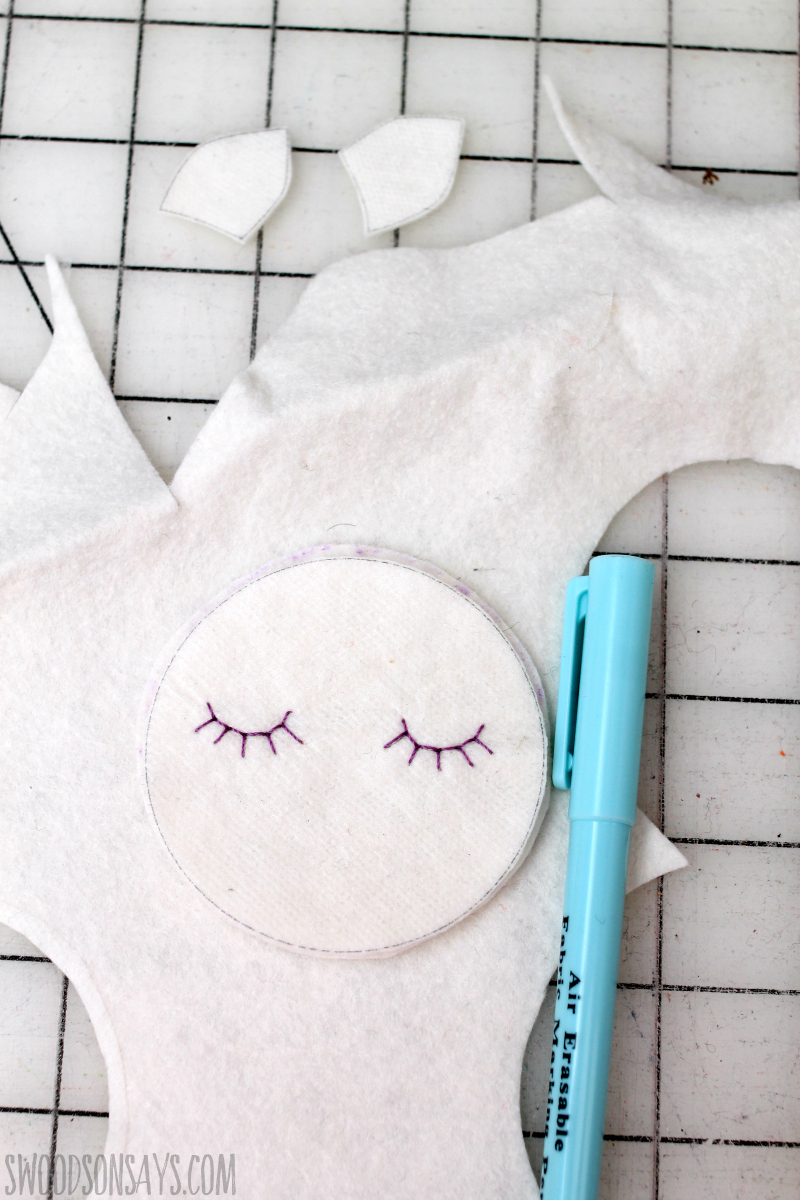
Step 2- Use the face circle as a template and cut out an identical backing circle.
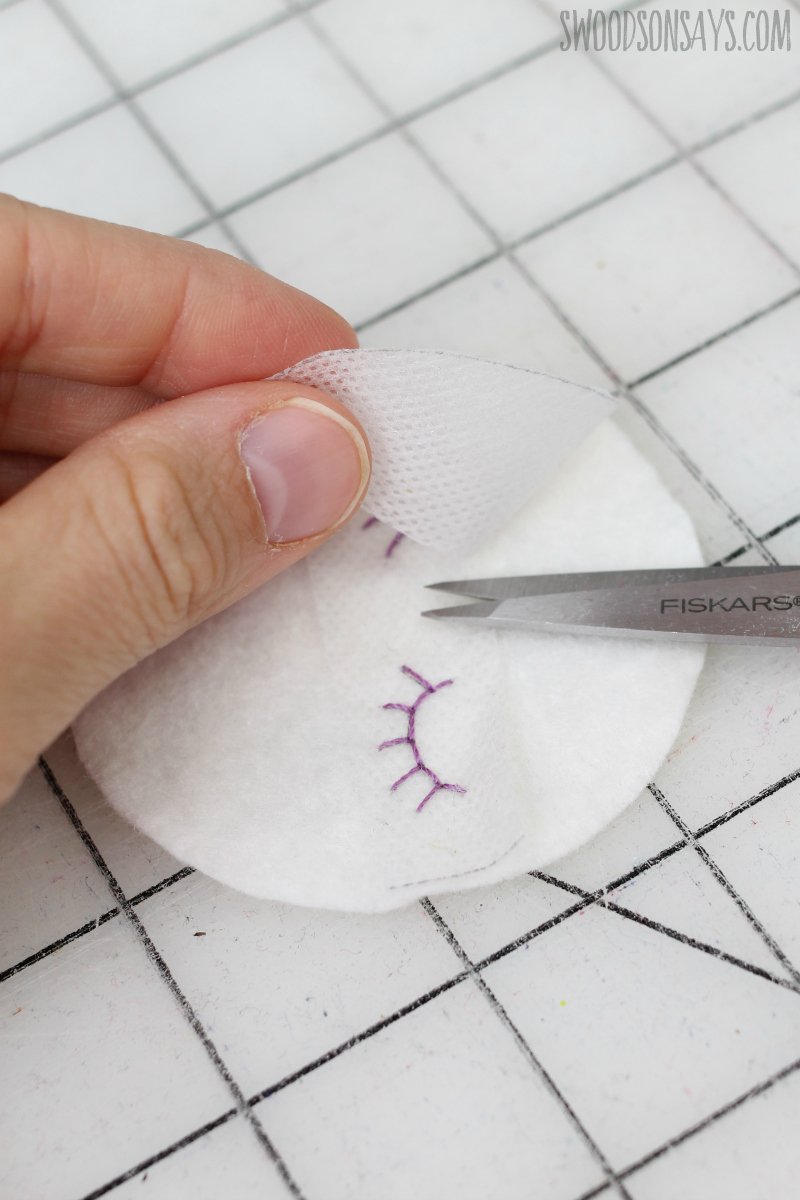
Step 3- Cut away the excess fabri-solvy, and then wash it gently in warm water. Lay flat to dry (if you want more pictures of this process, check this post out!)

Step 4- Stitch the unicorn horn with a simple backstitch again, cut along the line (carefully! don’t go through your stitches), and use it as a template to cut a matching back. Wash away the Fabri Solvy, let dry, and sew the two side together, stitches facing out. You can do a running stitch along the sides or carefully placed edge stitches, lining up with the horn stitching, as shown here. I’m sure my kids will appreciate this detail (not!).
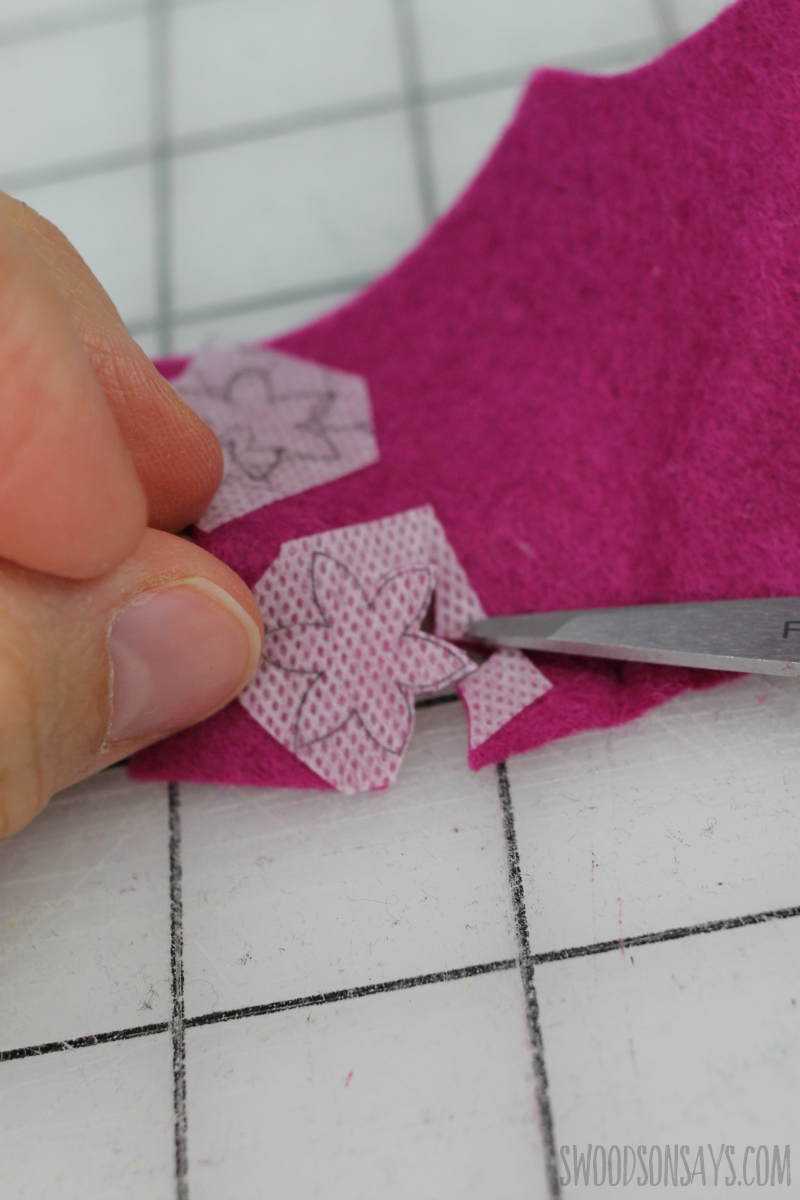
Step 5- I use the Fabri Solvy to cut out the rest of the pattern pieces as marked on the pattern; freezer paper would work as well.
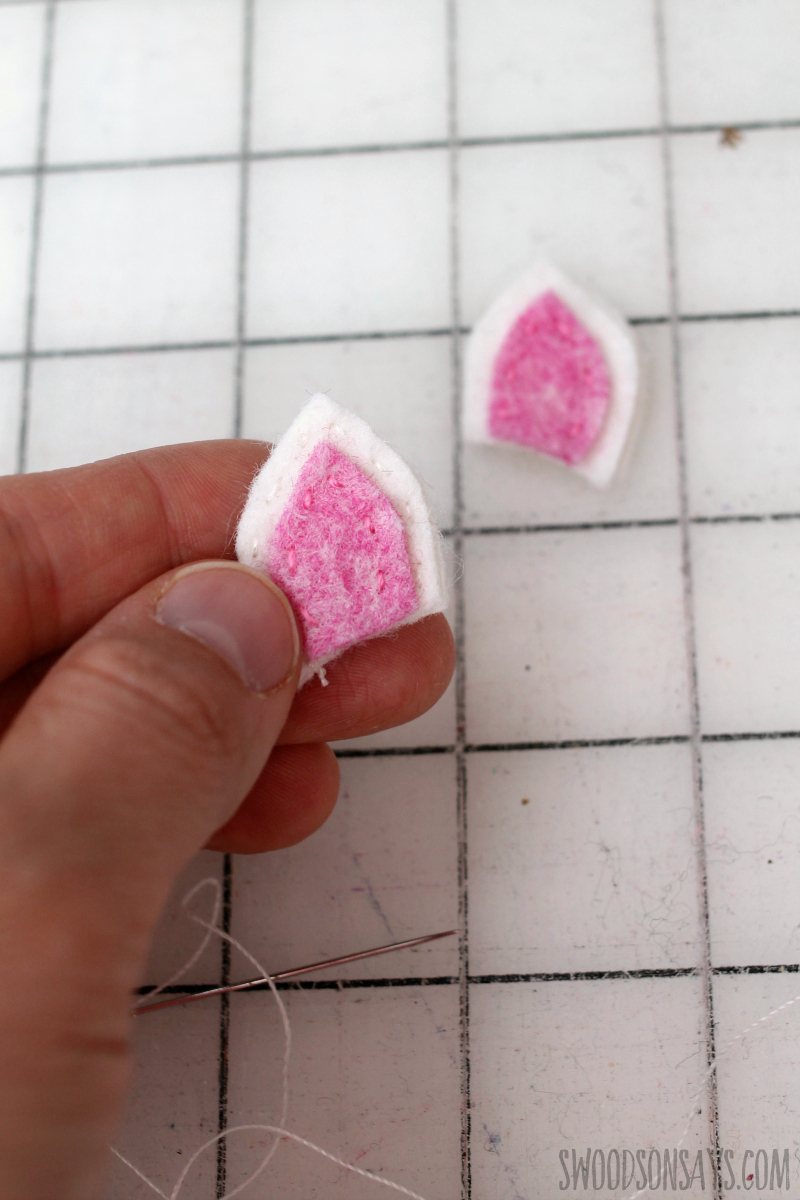
Step 6- Stitch an ear front to an ear, then stitch that ear to a plain backing. Repeat for the right ear, making sure that it is facing the right way for a mirrored image.

Step 7- Layer a smaller flower on top of a base one, and then secure with pearl seed bead. Repeat for the 3 remaining flowers, and then stitch a seed bead on top of a single base for the outer two flowers (or style however you wish!).
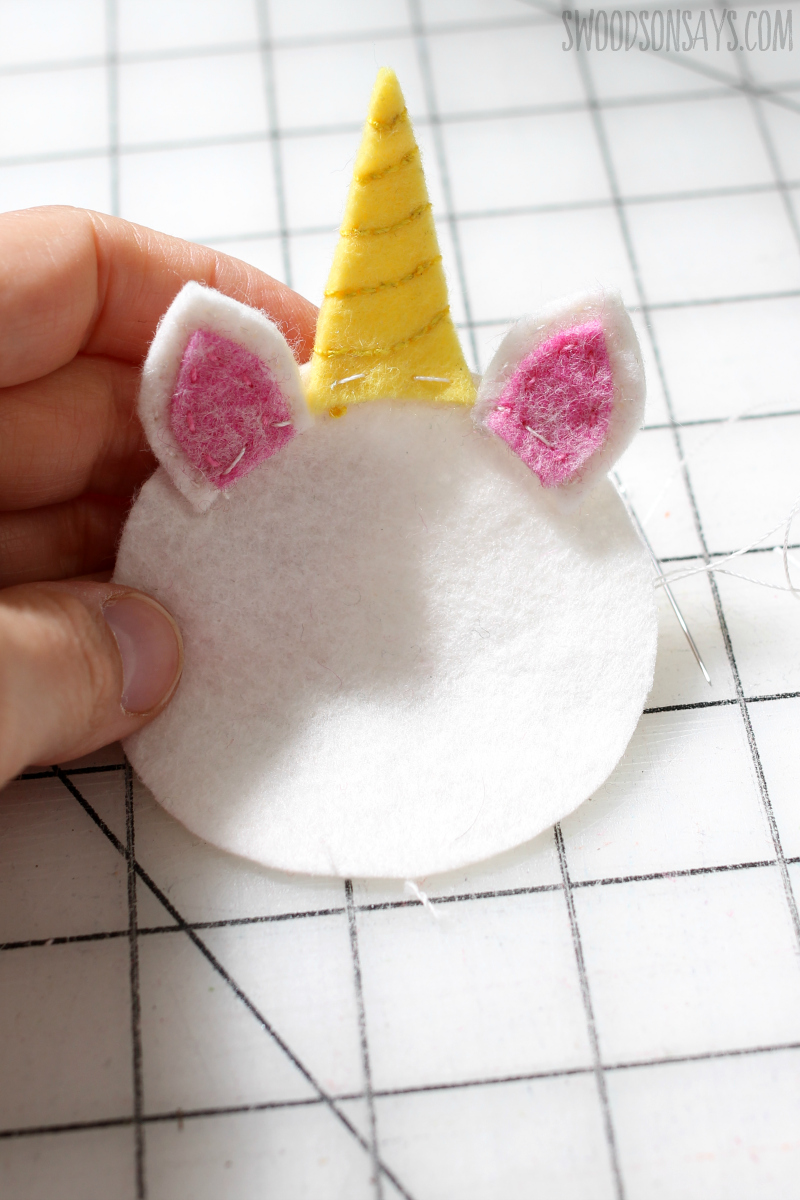
Step 8- Time to loosely stitch the ears and horn on so they don’t slip! This can be sloppy, since you can rip it out after the top and back are sewn together.
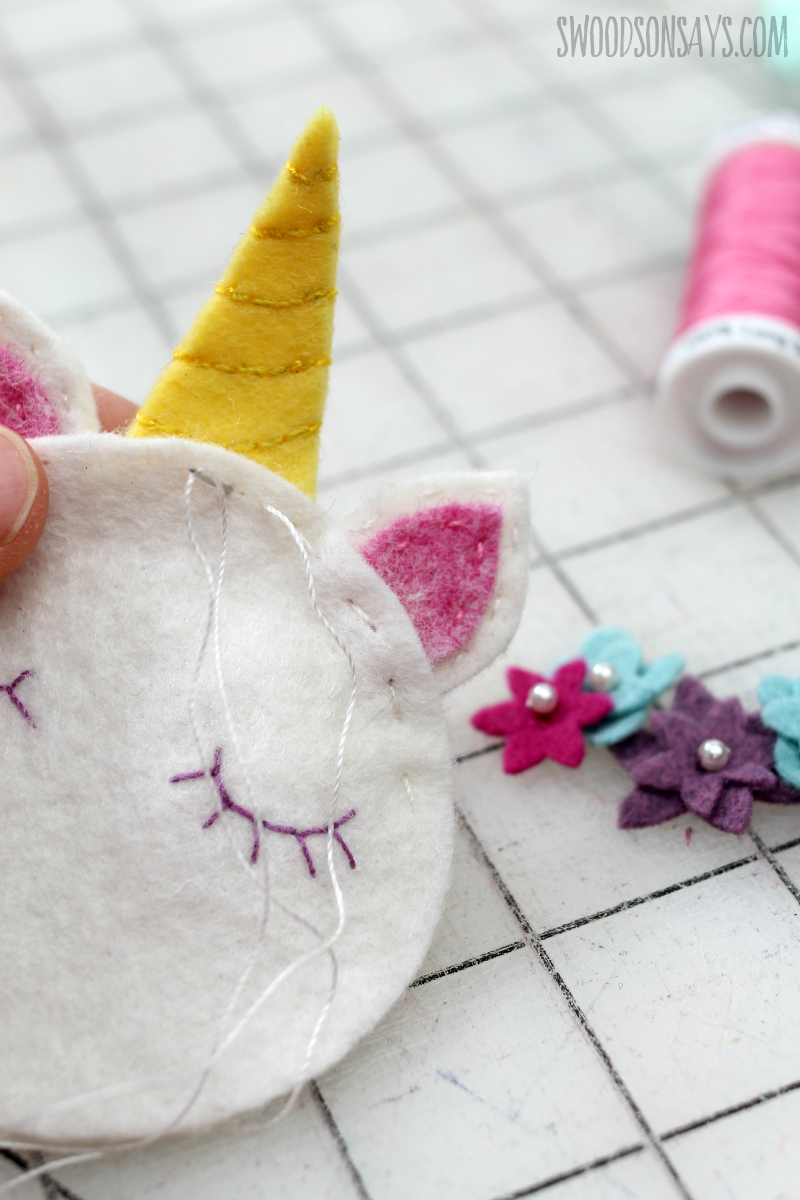
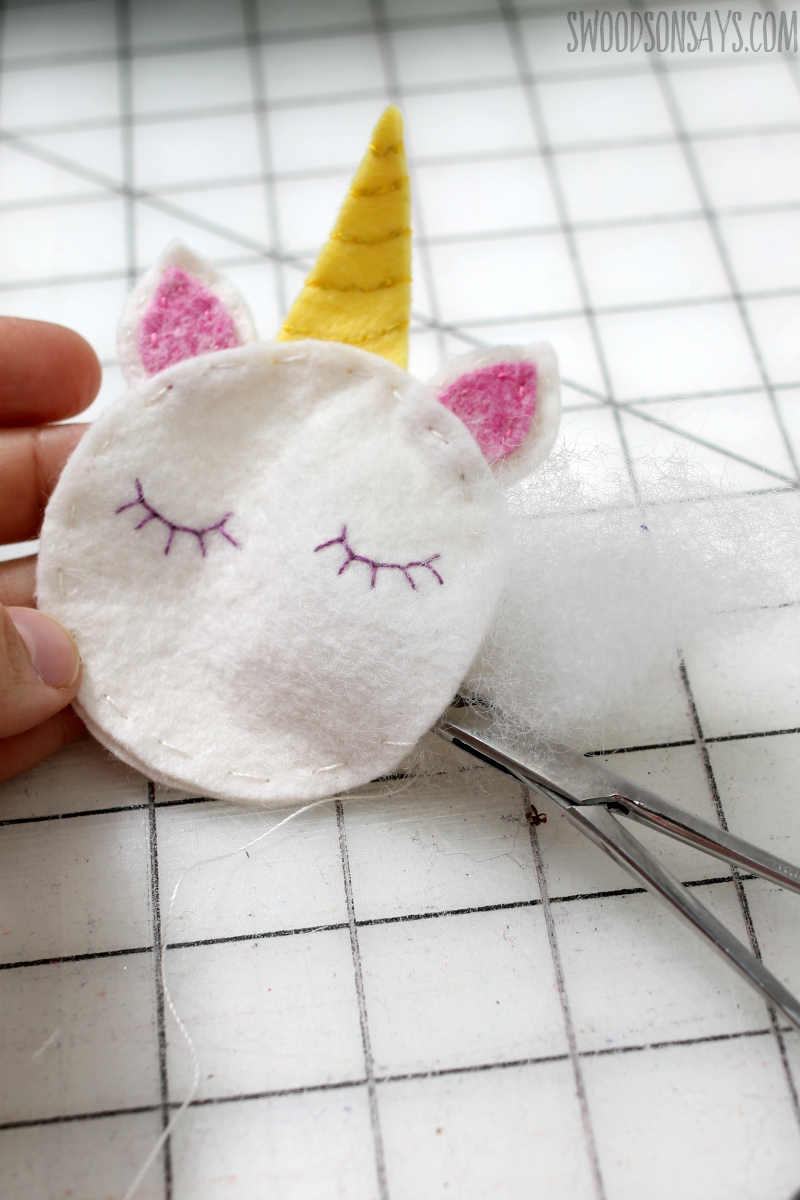
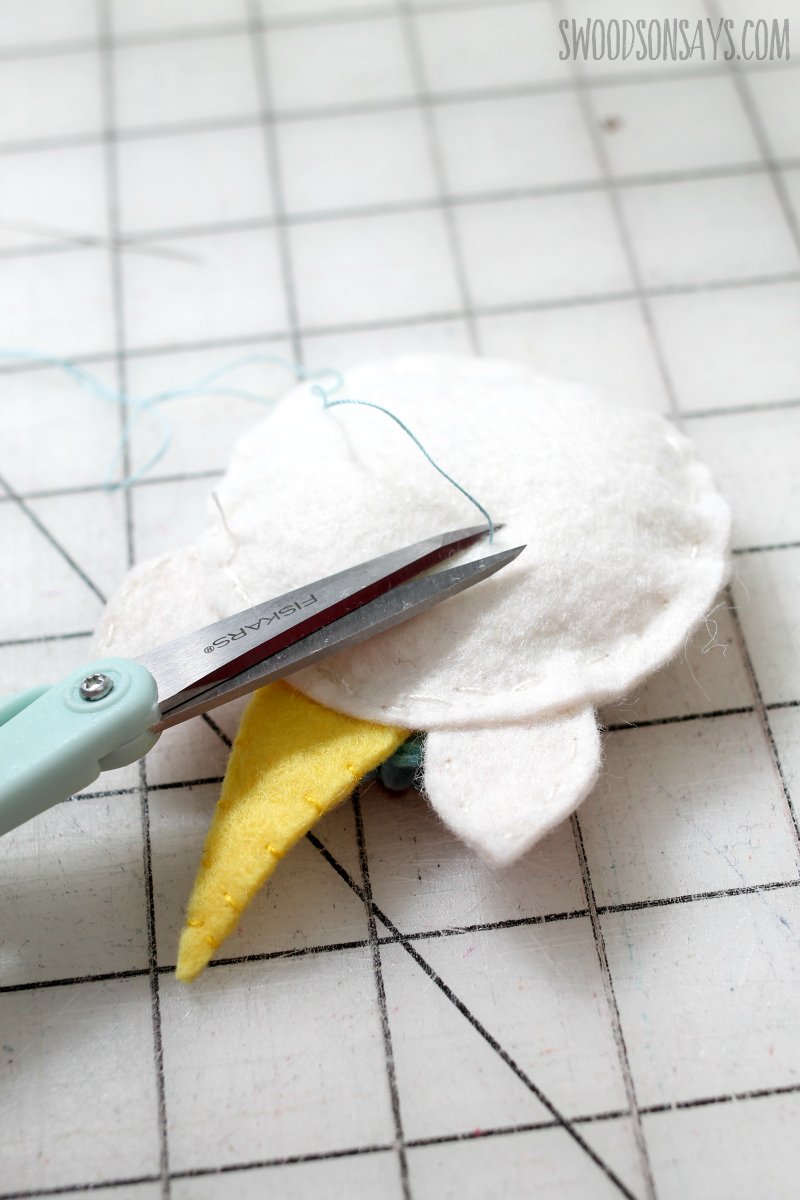
Step 9- With the pretty stitching facing out, line up the face front and back and use a running stitch to secure them, leaving a small gap to stuff before finishing it closed (read to the end to see how I “hide” the end of a stitch). I use forceps to slide stuffing in! 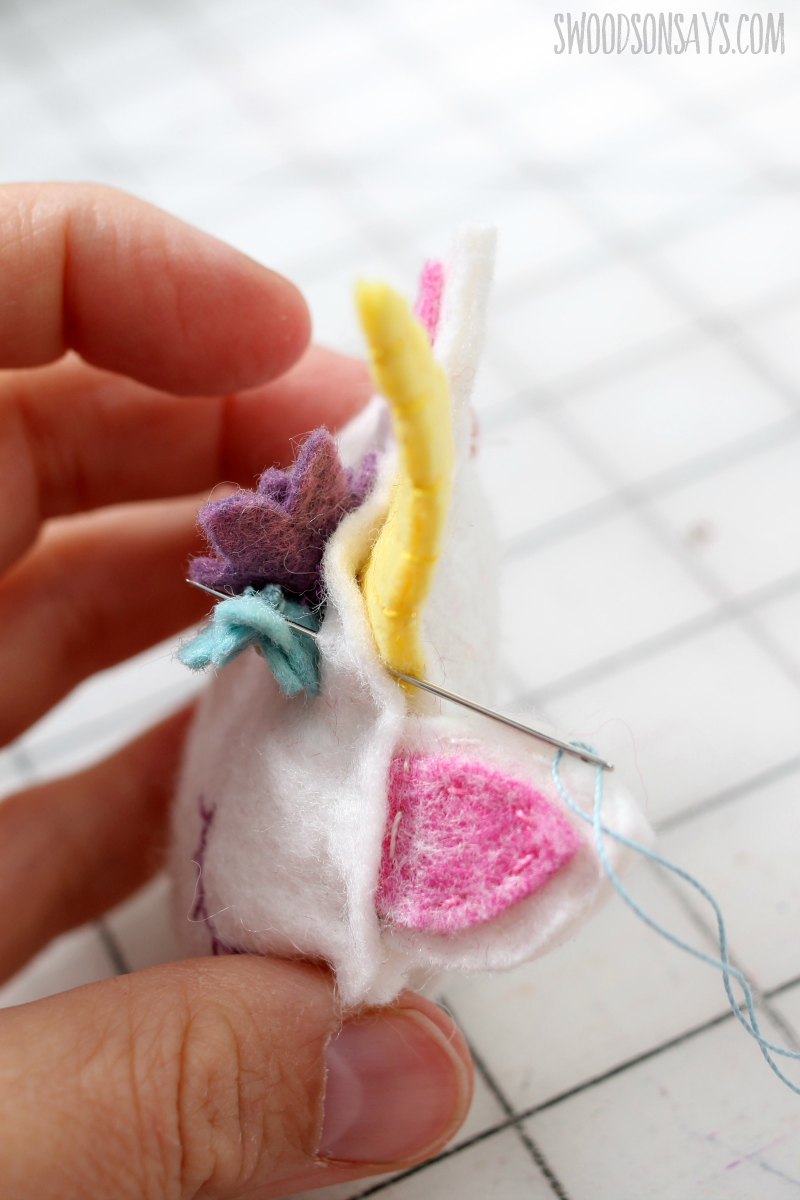
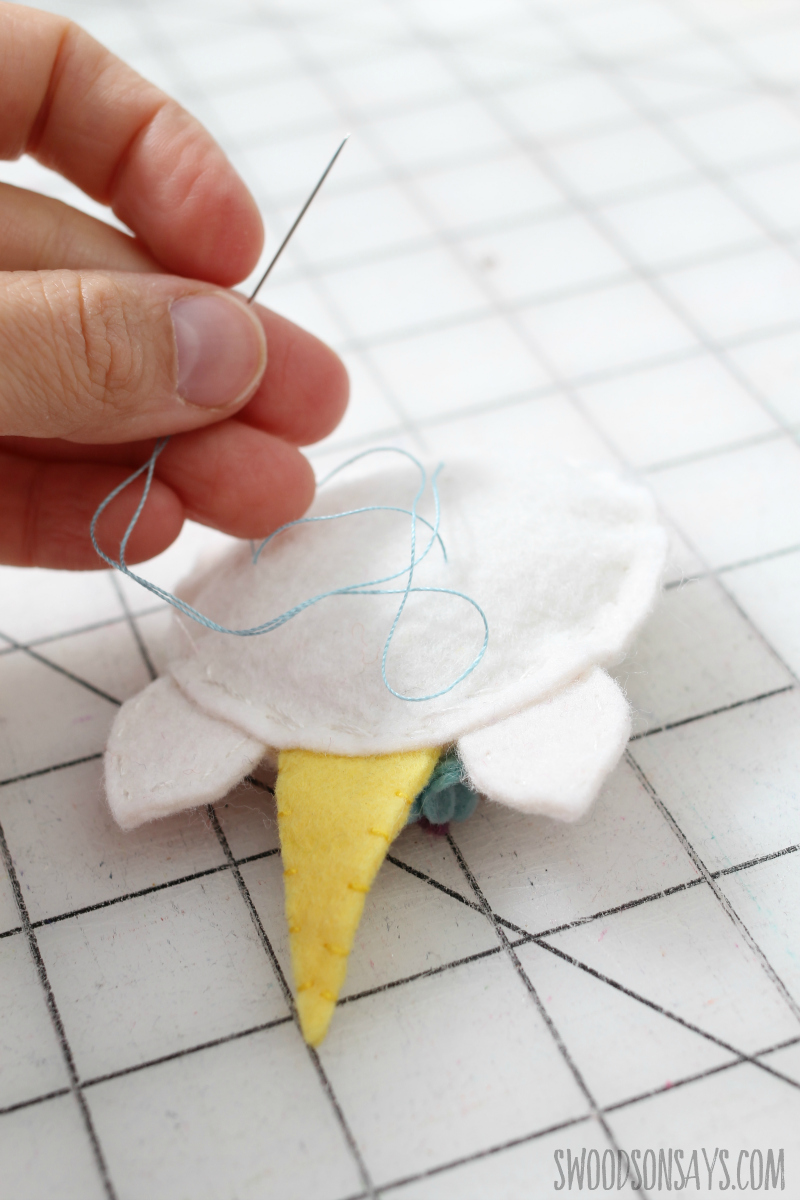
Step 10- Time to stitch the flowers on! Slide your needle in between the front and back to hide the knot/tail, repeat until they’re all positioned and secured. Knot to secure, and then push the needle out through the back and trim closely, to hide the tail.
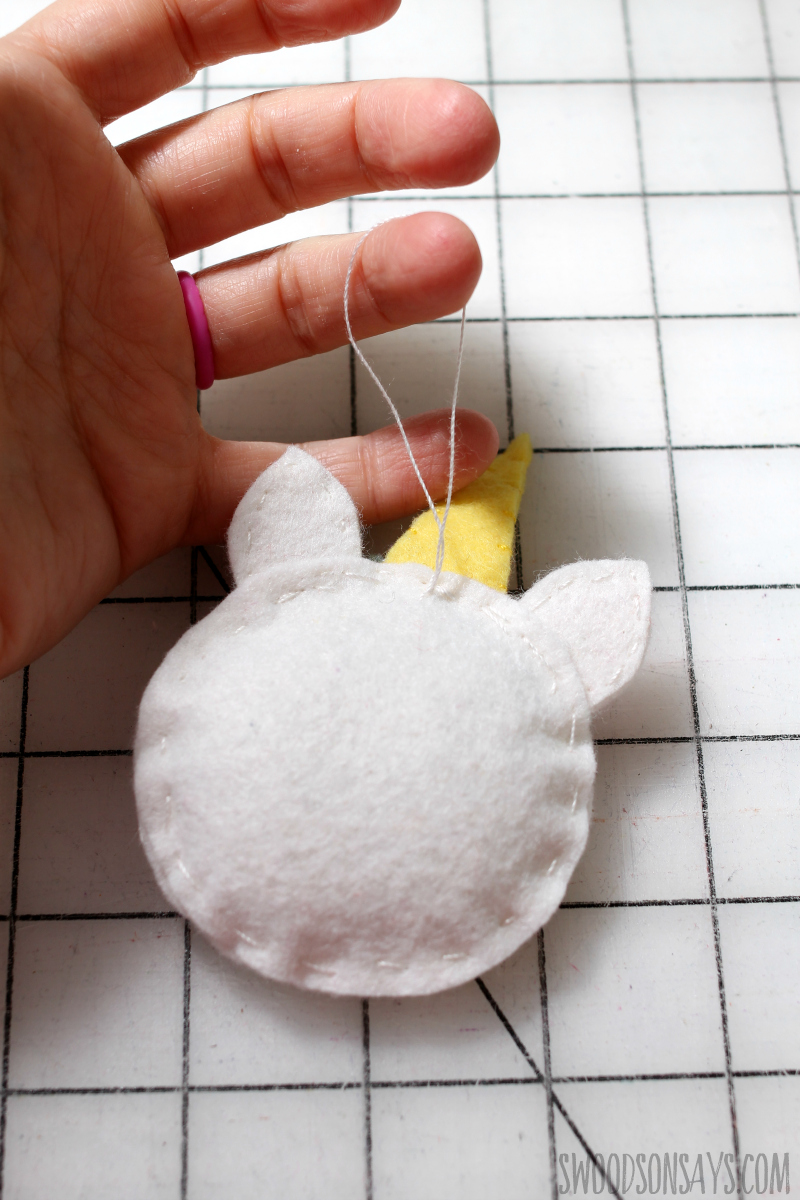
Step 11- Tie on another loop of floss for a hanger, cut out the basting stitches from before if you want, and you’re done!
Scarlet
Tuesday 1st of December 2020
These DIY unicorn ornaments are so pretty! They would make great DIY gifts and I love that my kids can practice their sewing skills without it being too complex.
Julie
Saturday 17th of November 2018
These are really sweet. I made some similar ones last year but I didn't make the horn separately, I like how you did that. I used flowers from my papercraft stash from years ago, a right old mix of tiny silk flowers, flower buttons etc that worked pretty well and did speed things up a bit!
Danielle Snow
Tuesday 13th of November 2018
What is the blue needle holder you have in step 1? I’m intrigued :)!!!
Thanks
Stephanie - Swoodson Says
Wednesday 14th of November 2018
That is the container the needles come in, I love them! It makes it so much easier to find them. They're linked here if you want to check them out - https://swoodsonsays.com/favorite-hand-embroidery-tools/
Kelly P.
Tuesday 13th of November 2018
Your unicorn ornament is very cute! When my daughter was little, she would have flipped over this! I may have to make some for some little girls at my church who love fantasy characters. I love that is is simple, fast, and adorable -- what a great combination! Yay! Thanks for sharing! :)
Stephanie - Swoodson Says
Wednesday 14th of November 2018
Thanks so much Kelly!! They really are fun to make, I'd love to see them if you try the pattern :)