
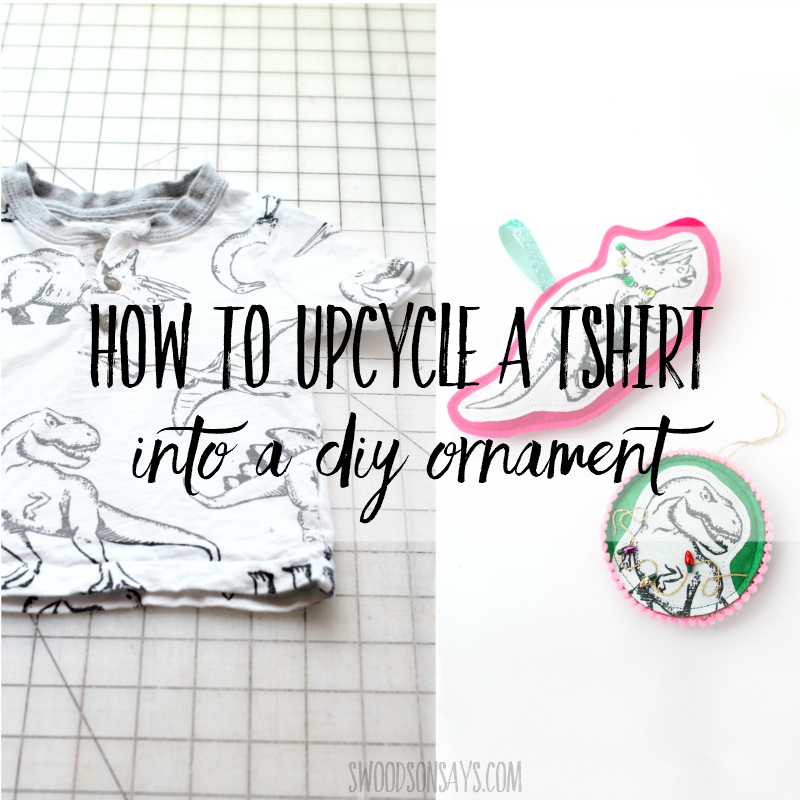
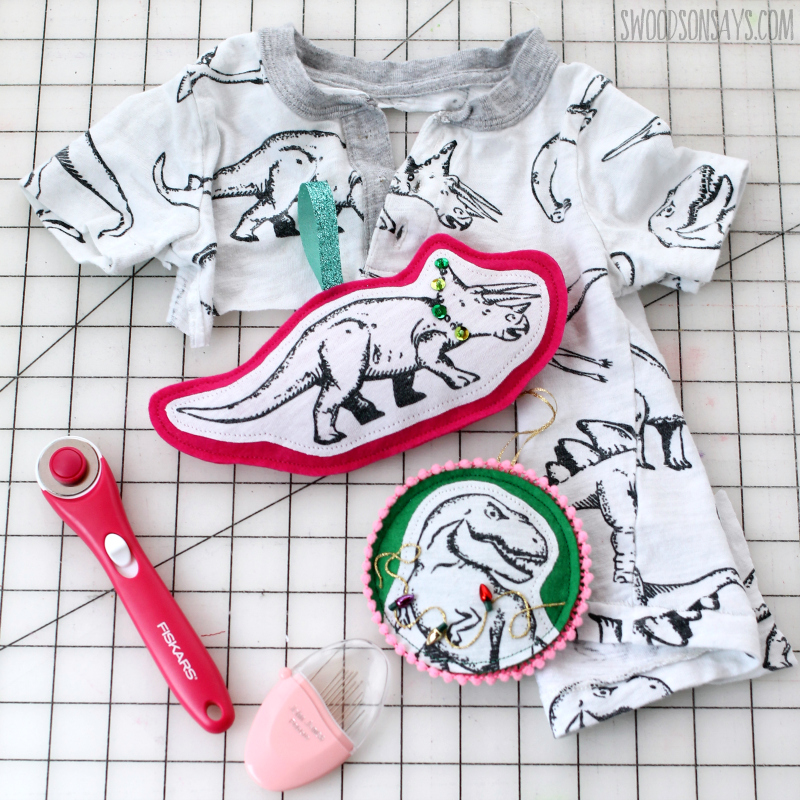
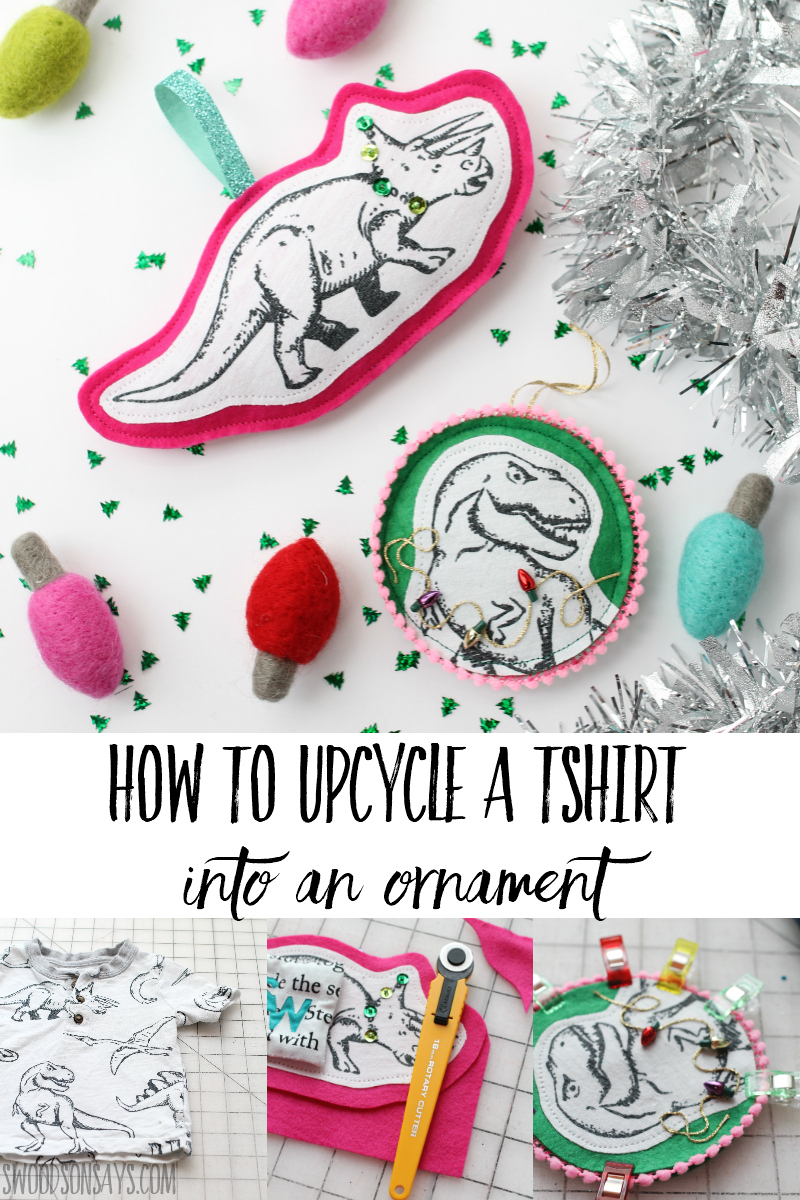
 I had so much fun making these ornaments. I love get allll my material options out and play with them, placing and swapping, snapping pictures to see how it looks later until it finally feels “right”! I sewed two DIY dinosaur ornaments from a worn out baby shirt and now I’m sharing a tutorial for how to upcycle a tshirt into a DIY Christmas ornament so you can try too!
You should check out these posts while you’re here!
- 25+ upcycled sewing tutorials that would make great gifts
- 20+ free felt ornament patterns
- How to make upcycled furoshiki to wrap gifts
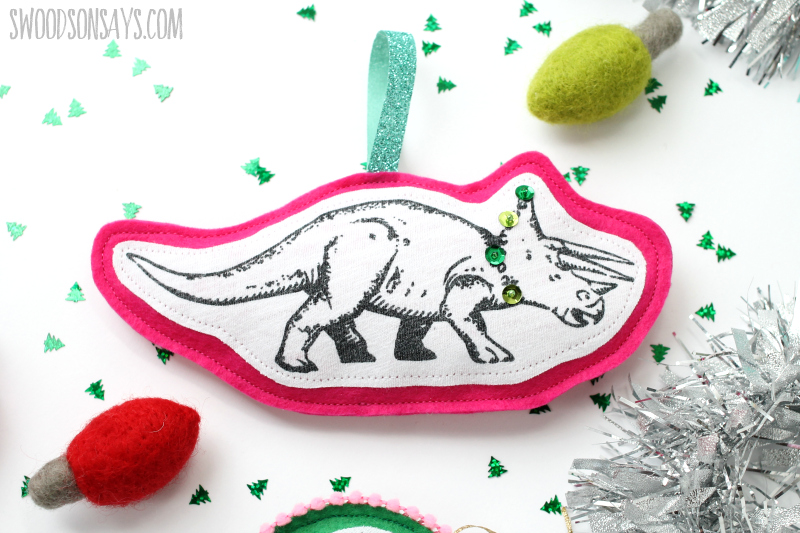
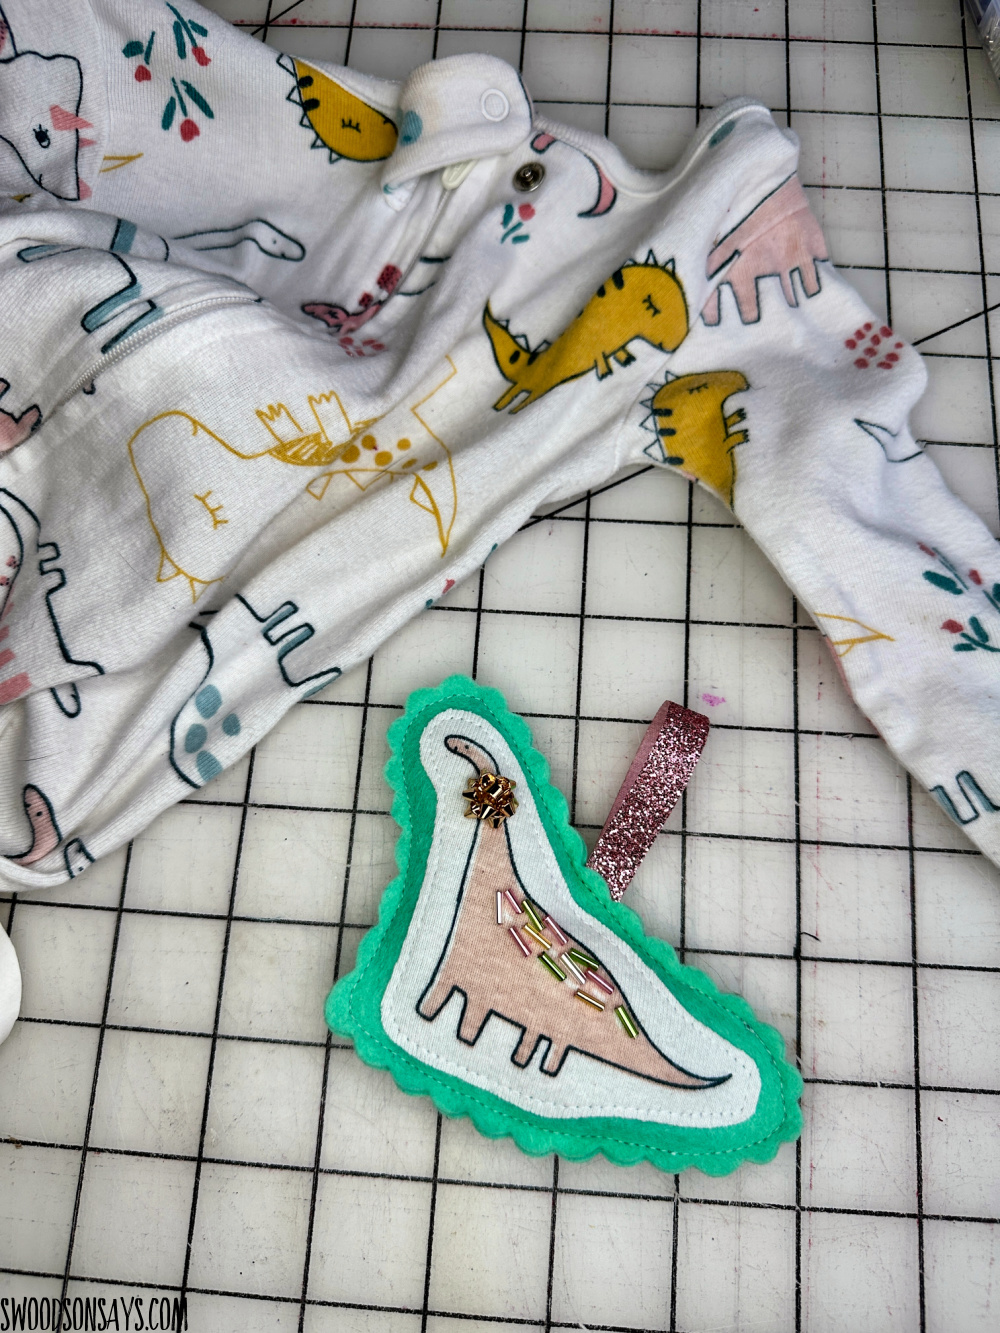
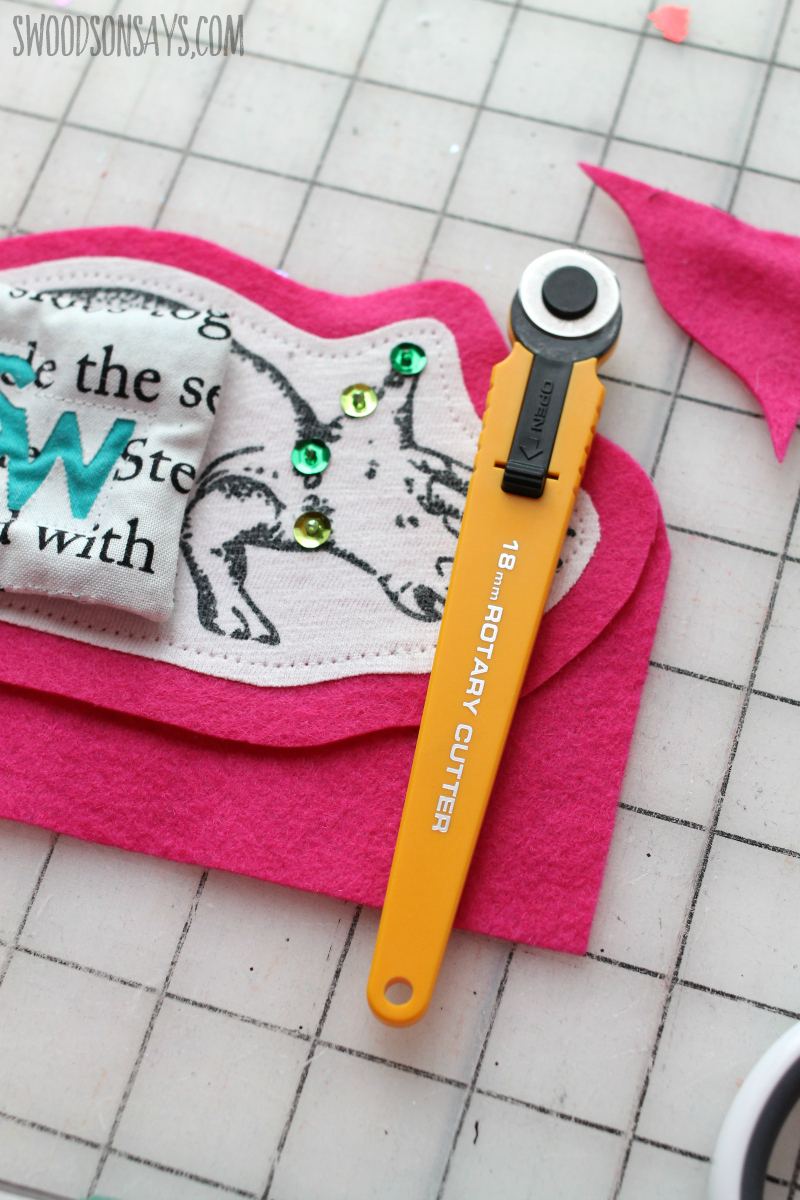
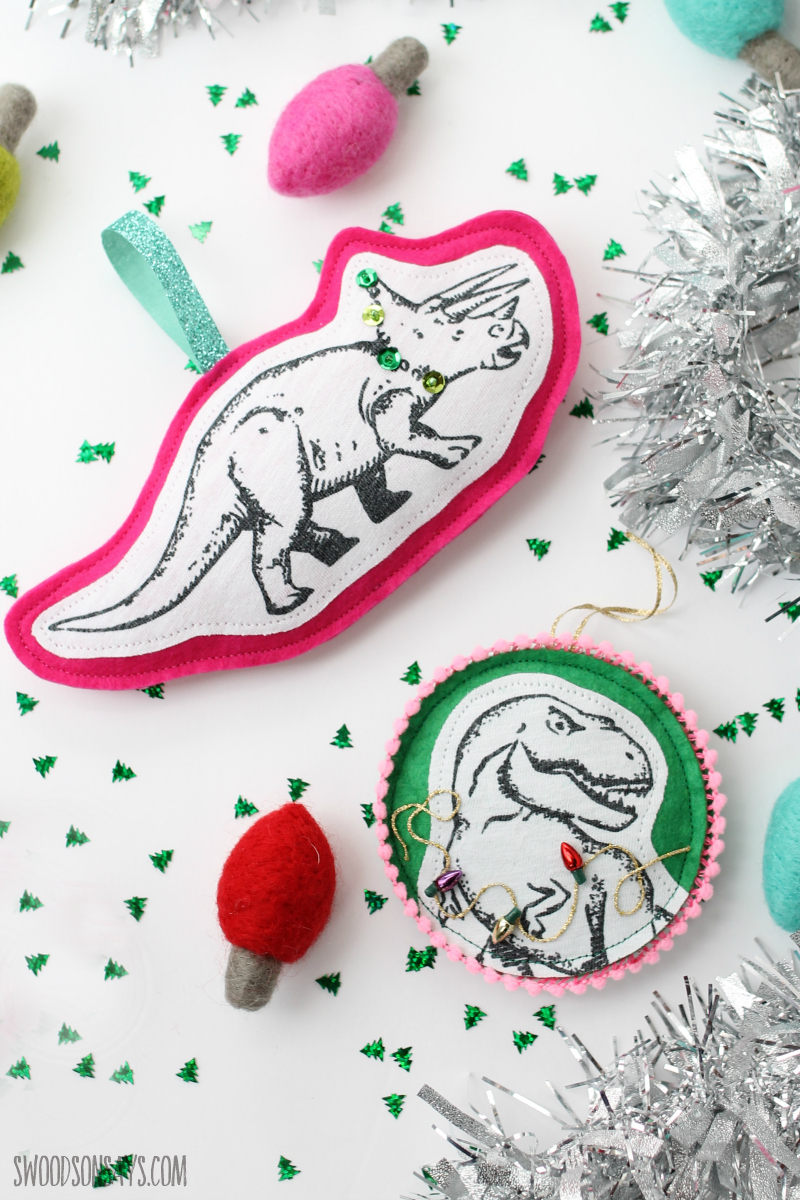
Here is a closeup of 1 method, with a sequined triceratops. You can add hand embroidery, beads, sequins, applique, stamping, confetti, etc. Get creative and dig up all your craft stash to play around and get crafty embellishing!
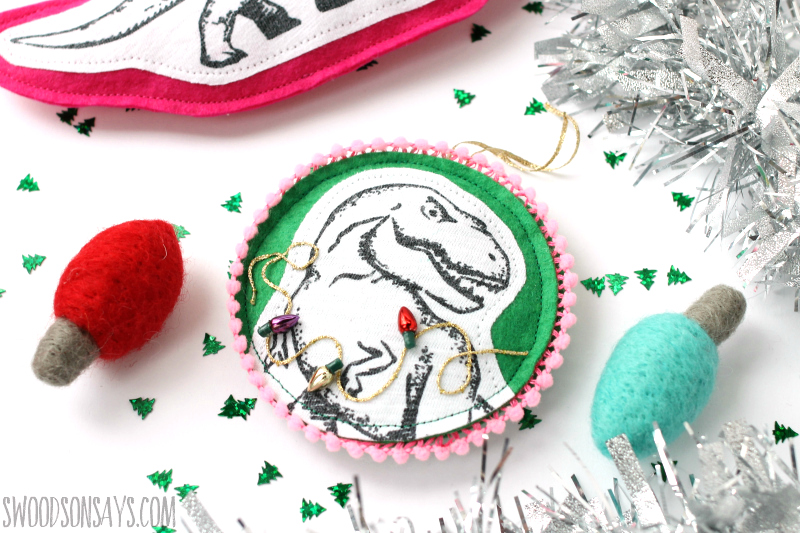
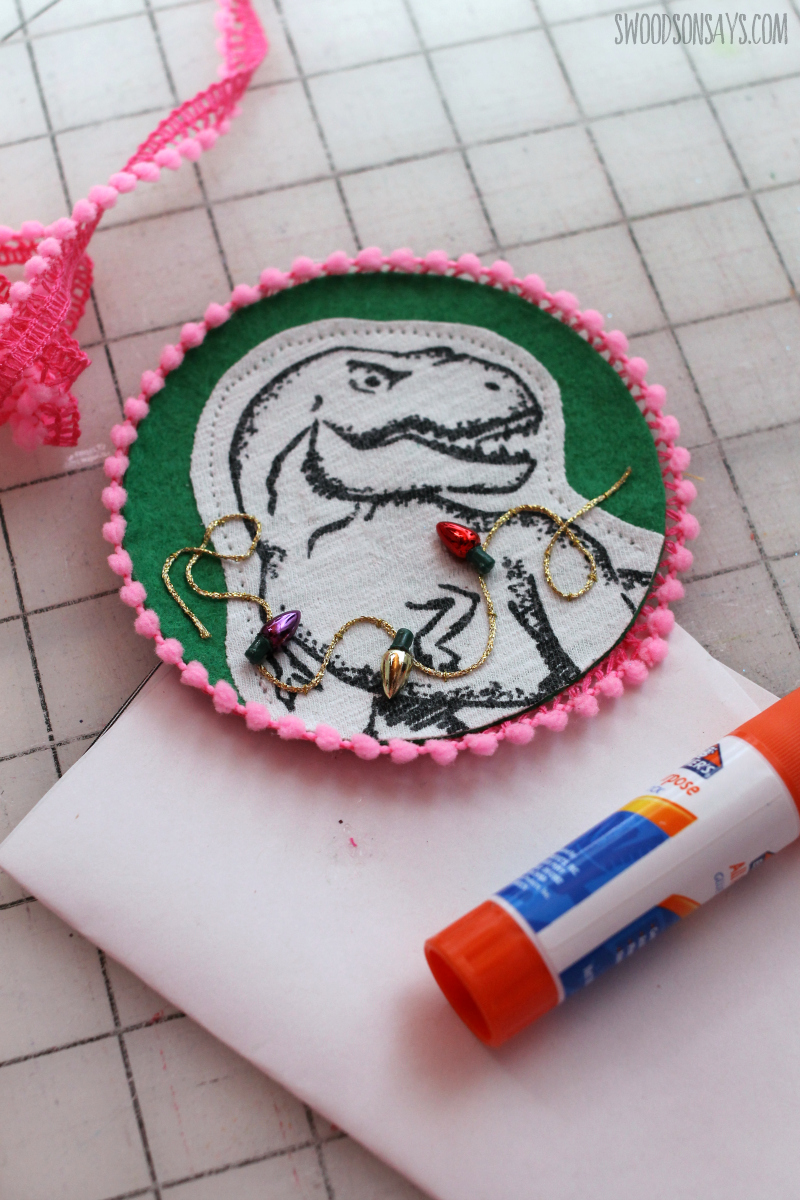
Here’s a closeup of the T-Rex version! There wasn’t a full dinosaur so I instead cut it off at the waist and put it on to a felt circle instead. I originally had the lights on their original garland and wrapped around its neck but decided it was funnier for it to look like the T-Rex was trying to put up lights!
Here’s another version I stitched up recently!
A onesie into a sentimental keepsake! I used 10mm scalloped scissors around the edge here.
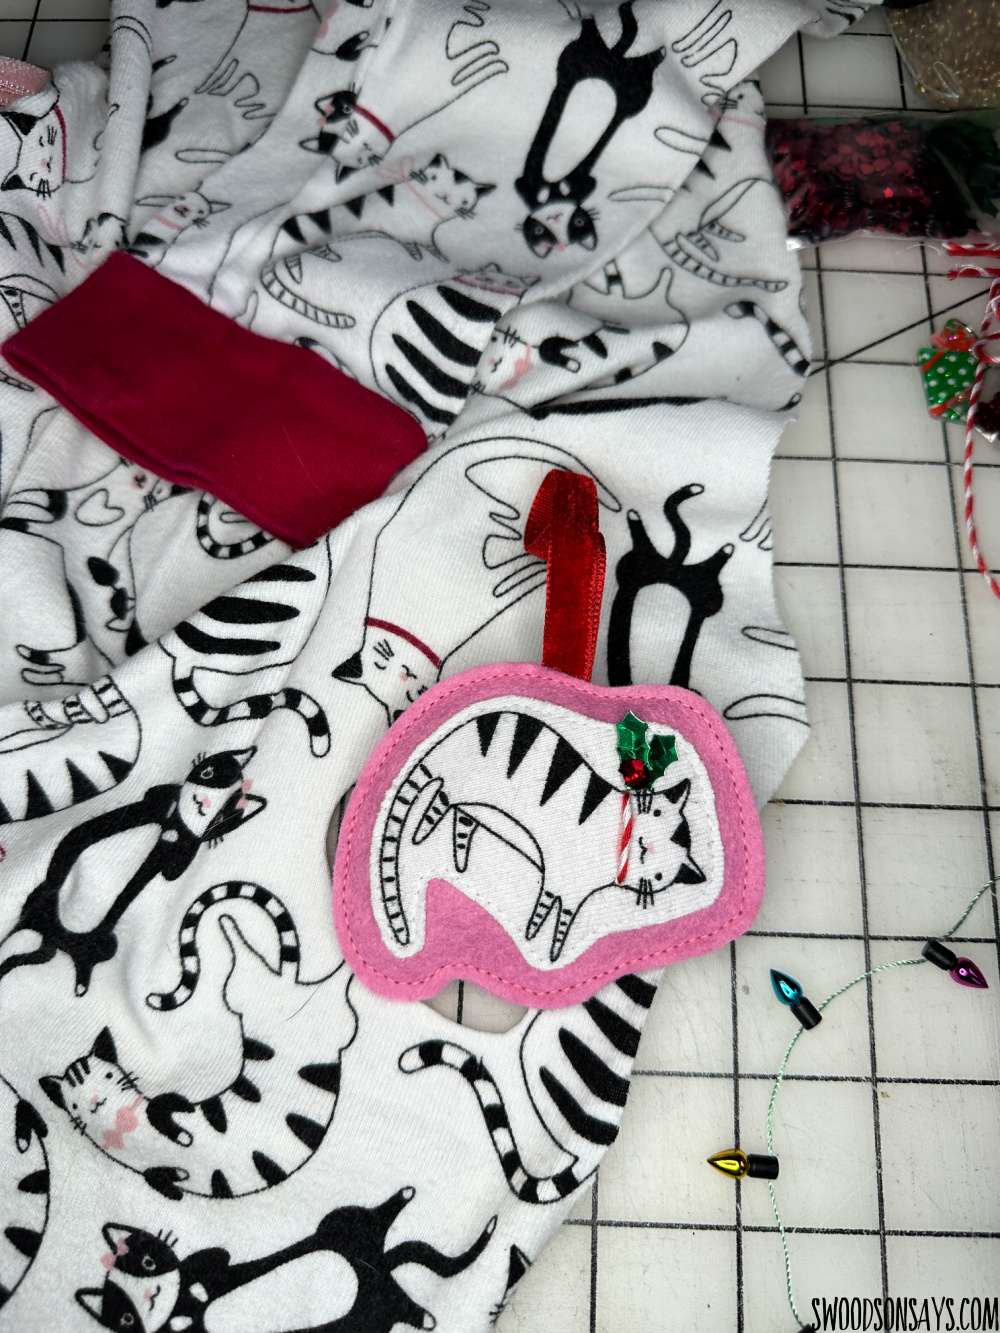
Here is another fun one – kitty pants upcycled into a holiday cat ornament!
I already have a few other ideas in my head to use this method and upcycle some old tshirts! This would also be a really sweet sentimental gift if you made it from your baby’s clothes once they’re grown up but I purge clothes way too quickly for that and had to buy this cute little tshirt from the thrift store instead.
I’ve had a few emails about *where* to buy fussy little things to add as accents, so here are some ideas!
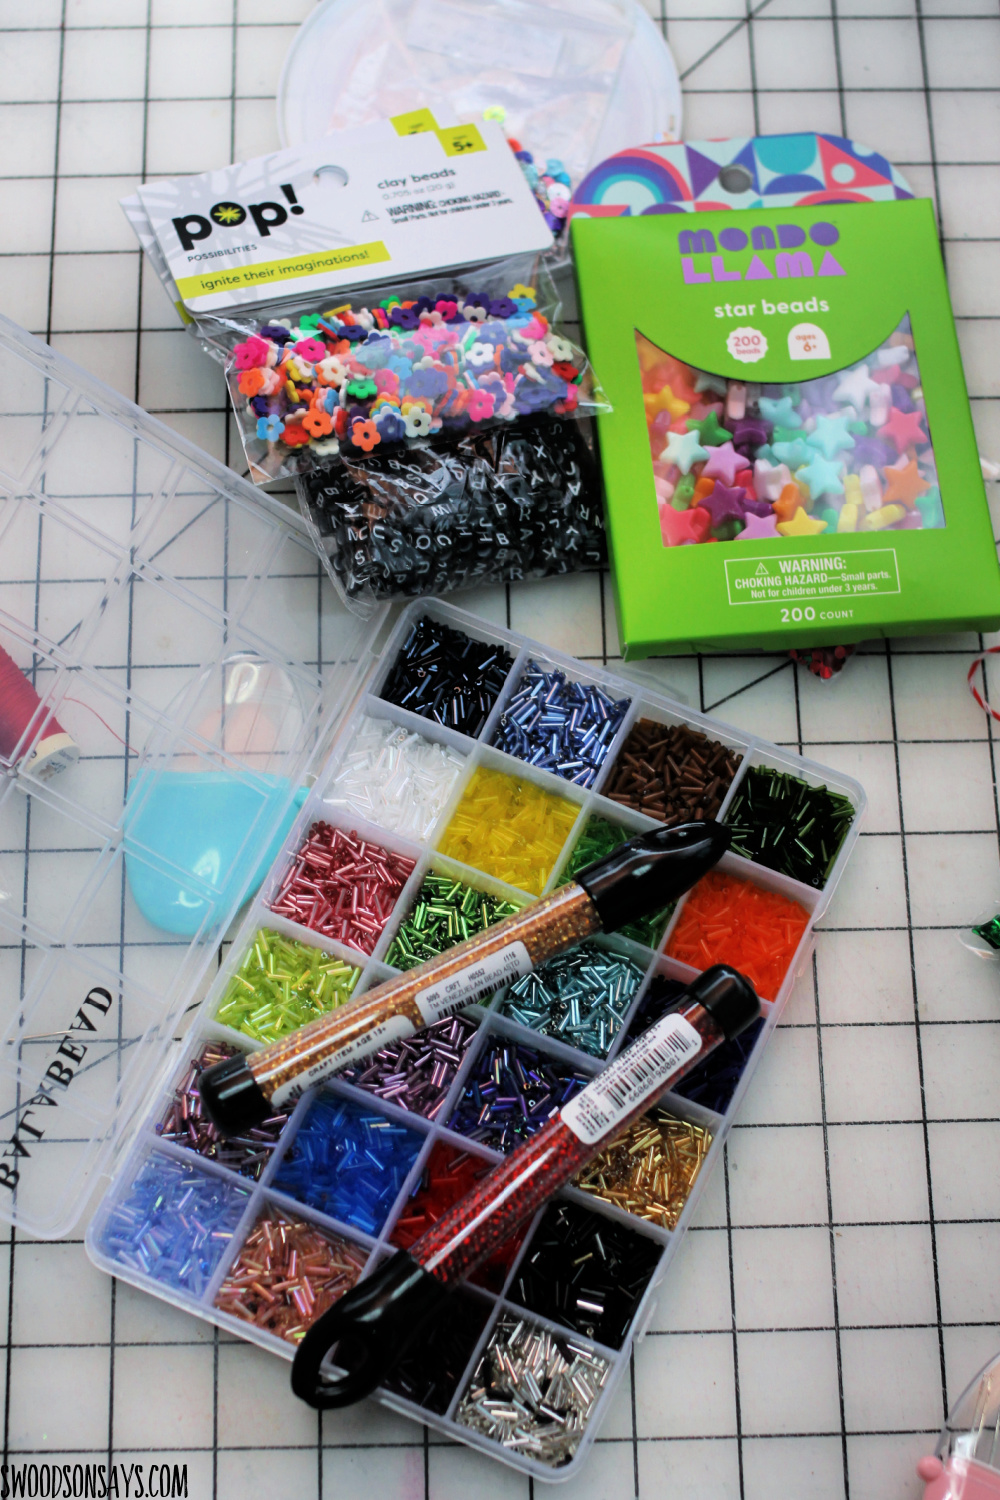
Beads! Beads can be used by themselves or on top of sequins to keep them in place.
Shop:
- The bugle bead container shown here has lots of different colors
- Amazon is an affordable place for seed beads + letter beads
- Target always has some chunky colorful beads
- JOANN & Michaels both have bead options as well
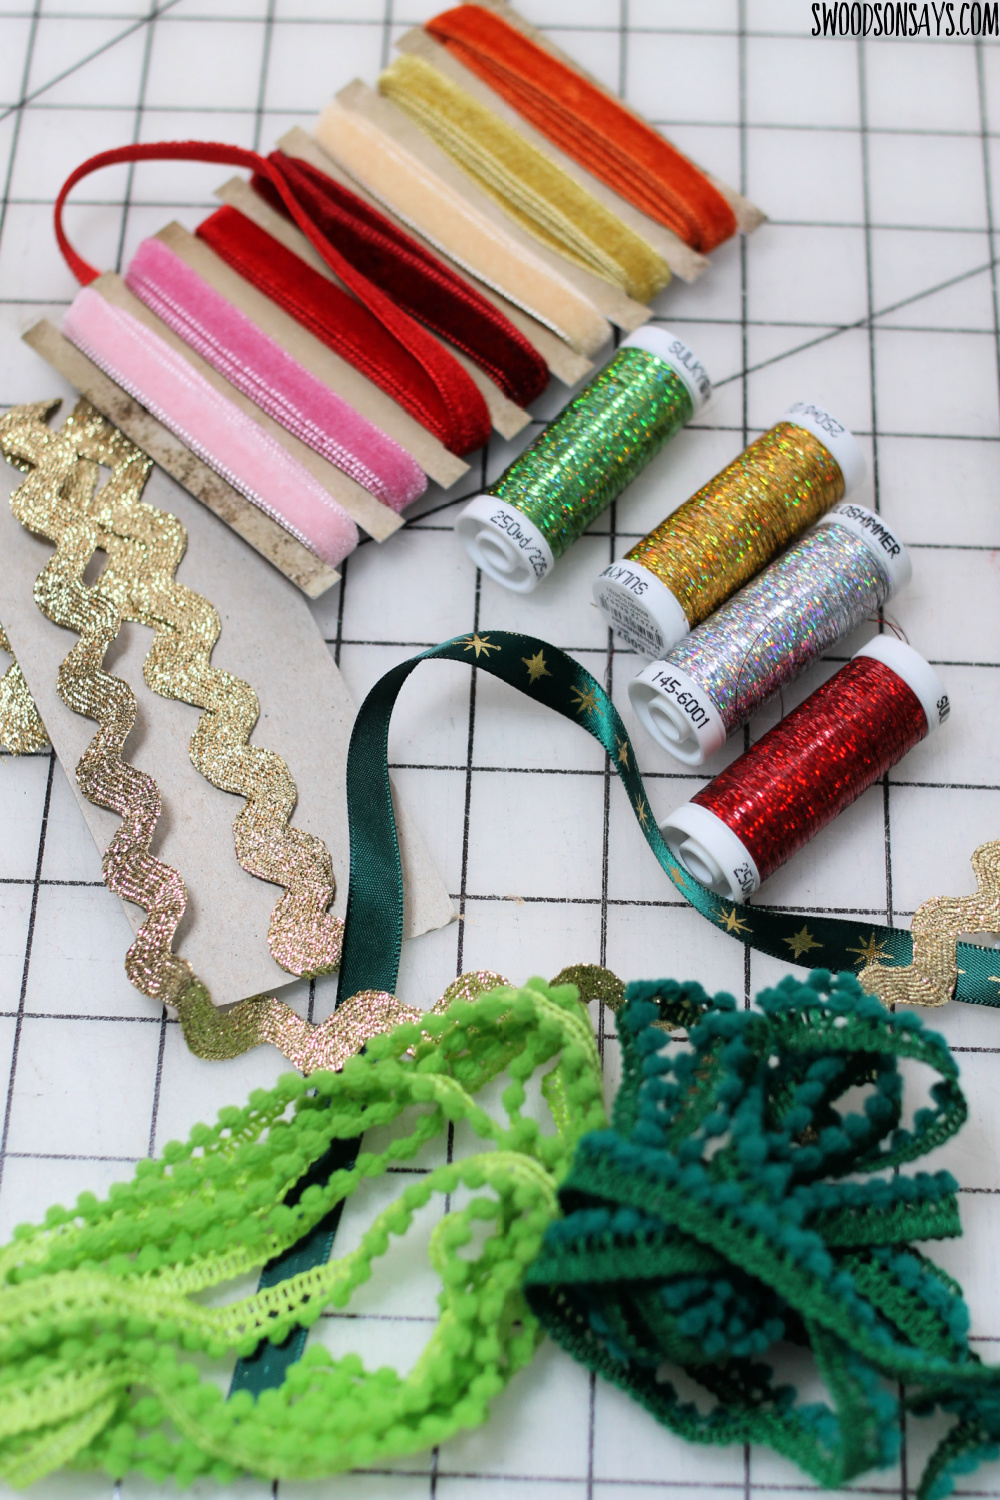
Trim & stitching supplies! You can think about fancy ribbon or ric rac for the hanging tie, mini pom-pom trim around the edges, hand stitching details with fancy embroidery thread.
Shop:
- my favorite shop for miniature pom pom trim & velvet ribbon
- Michaels & JOANN both have fun glitter ribbon and printed holiday ribbon, ricrac, etc.
- Sulky has the holoshimmer plastic floss shown here, for stitching details
- DMC has light effects metallic floss, for stitching details

Fancy little trim can be used around the edges or on top.
Shop:
- Amazon has “flat back buttons” which are basically little decals that can be tacky glued on to ornaments
- Miniature Christmas lights and snowflake trim is easy to find on Etsy
- The miniature tinsel came from Dollar Tree
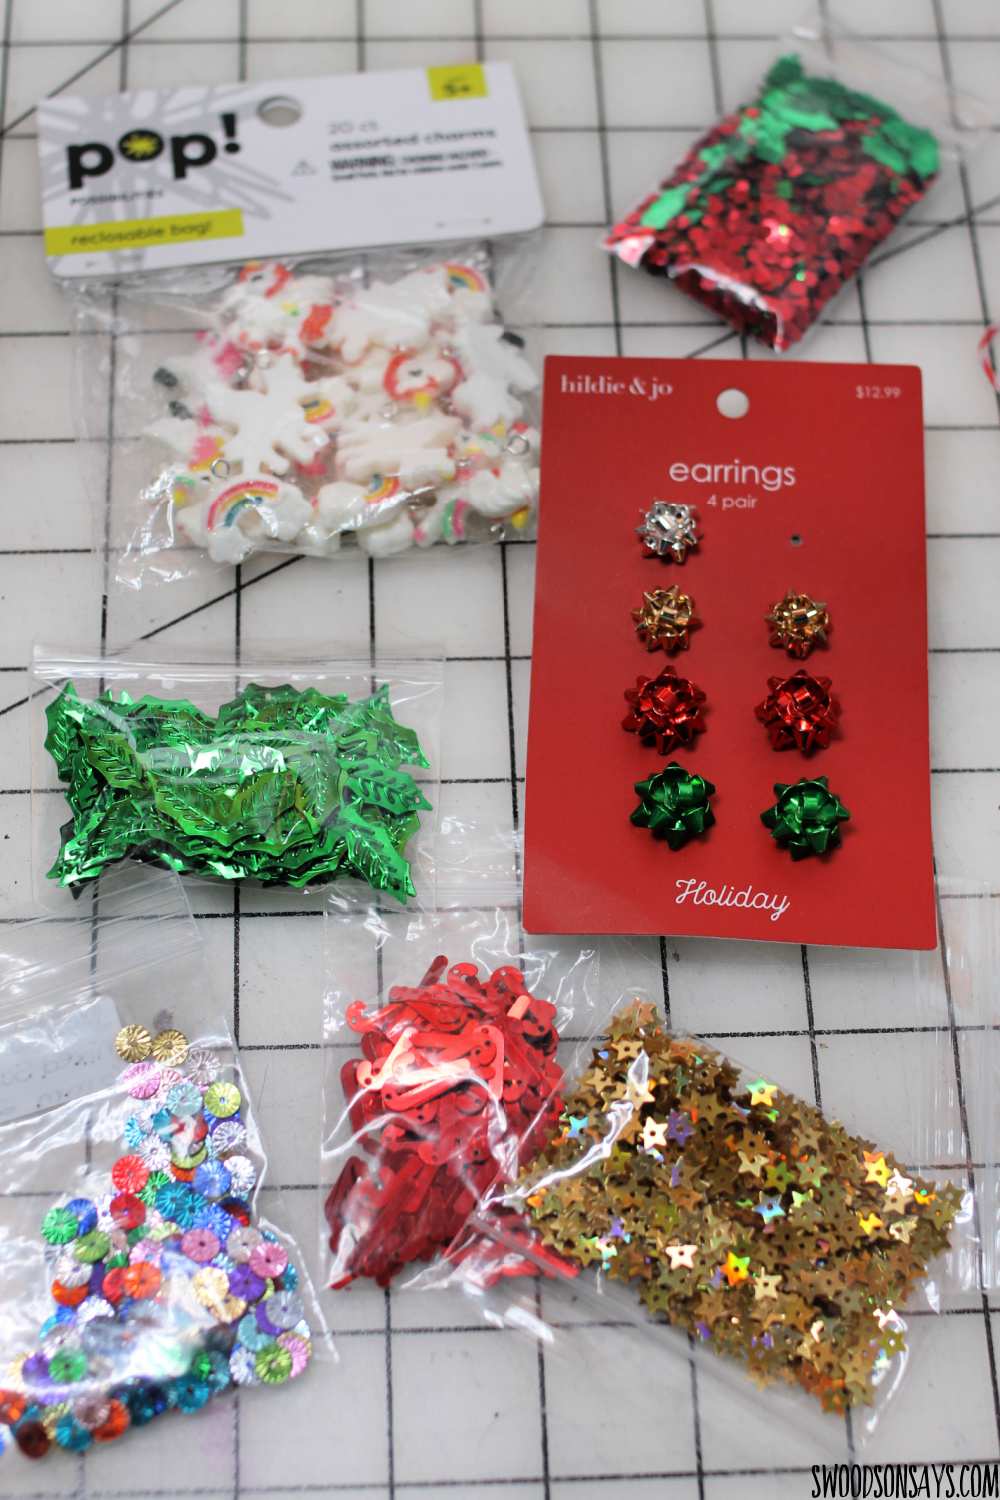
Lastly, sequins & charms! These are so much fun and I have way more options than are pictured here.
Shop:
- Consider holiday charms you can stitch on- metal, resin, even gemstone charms
- Holiday buttons can be sewed on as well
- Colorful sequins are easy to buy in bulk!
- Sunburst sequins are some of my favorite – you can also do star sequins, Christmas sequins, holly sequins, candy cane sequins, snowflake sequins
- I used Christmas earrings and just clipped off the post and glued on the topper
- Any Christmas confetti can be turned into sequins if you poke a hole through with a needle!
Pin this tutorial for how to upcycle a tshirt into a DIY Christmas ornament with this link or collage image:
Ready to make your own?
How to upcycle a tshirt into a DIY Christmas ornament
Supplie
- Heat n bond lite, sewable
- Wool felt – this is my favorite shop and where my felt is from
- Mini pom pom trim
- Glitter ribbon
- Aleene’s fabric fusion glue
- Poly-fill
- Forceps make it easier to stuff but aren’t necessary.
- Sharp scissors – with a sharp micro tip & rotary cutter, preferably a small one
- Embroidery floss
- Sequins & seed beads
- Hand sewing needles – the smallest one from this set fits through the seed beads
- If you want to try the miniature Christmas lights
- An old tshirt
- Quilt clips
- Iron
- Press cloth (plain piece of white cotton)
Steps
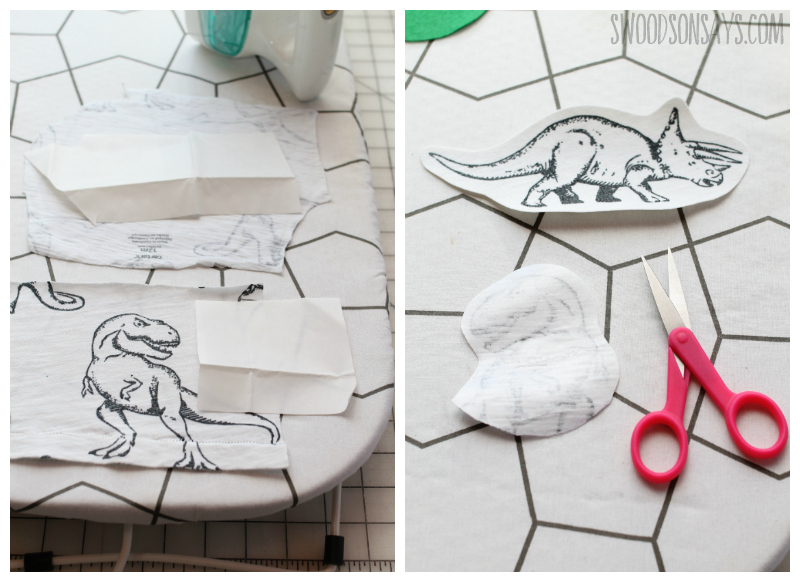
Step 1- Cut out a piece of heat n bond slightly larger than the image you want to cut out. Apply it to the wrong side, adhere with the iron and cool. Cut around the image and peel the paper backing off. If you are planning on doing the circle be sure to trace that curve or leave overlap and trim it once it is adhered.
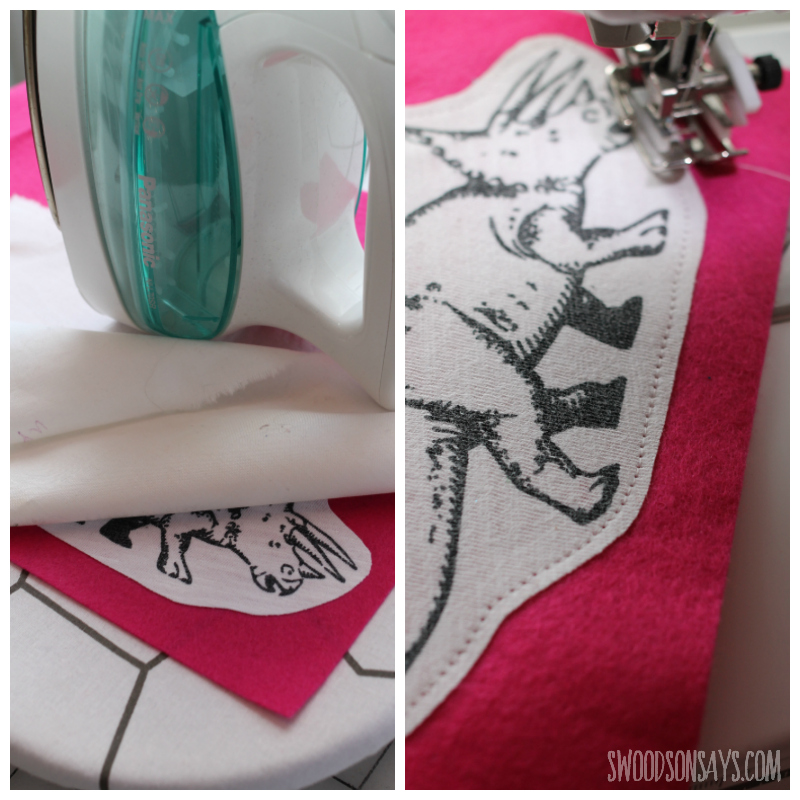
Step 2- Press the design wrong side down to the wool felt, cover with the presser cloth (which protects your iron from any ink or decals coming off the tshirt) and press to adhere. Let cool and then stitch around the edges.
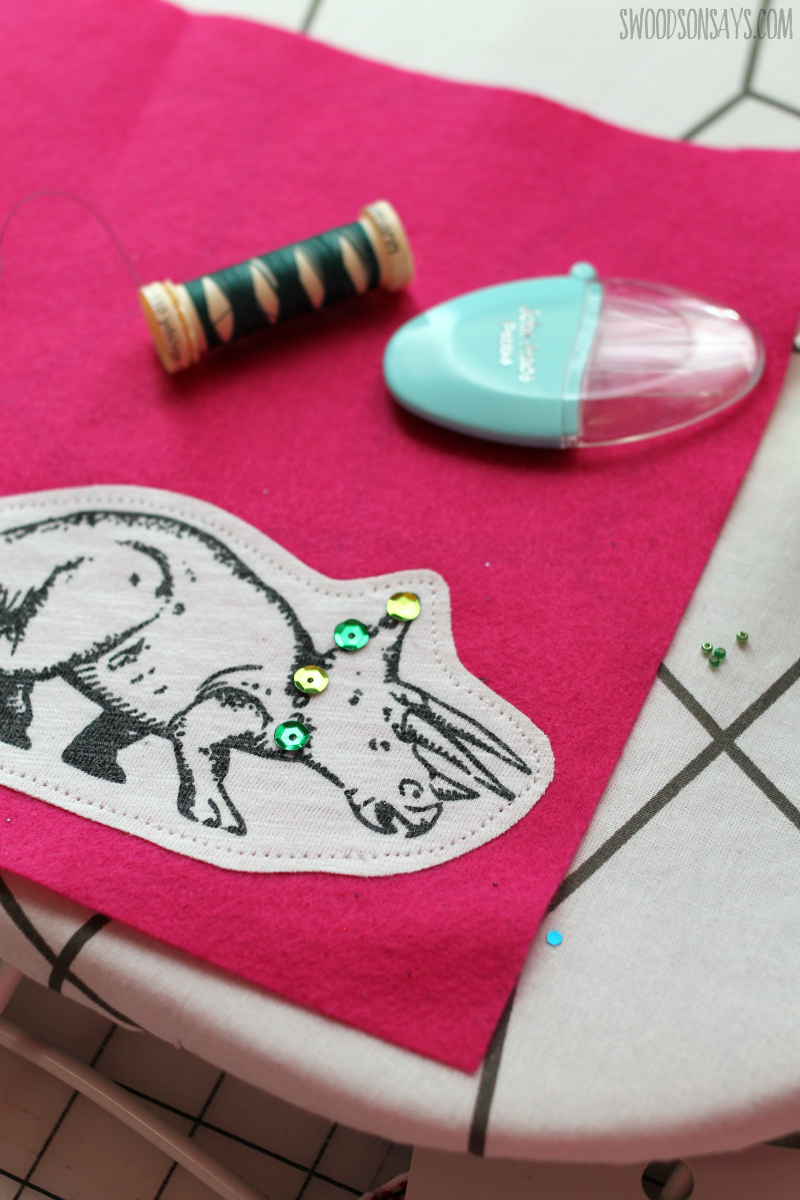
Step 3- Time to add embellishments! Sequins with tiny seed beads on top, ribbon, whatever suits your fancy.
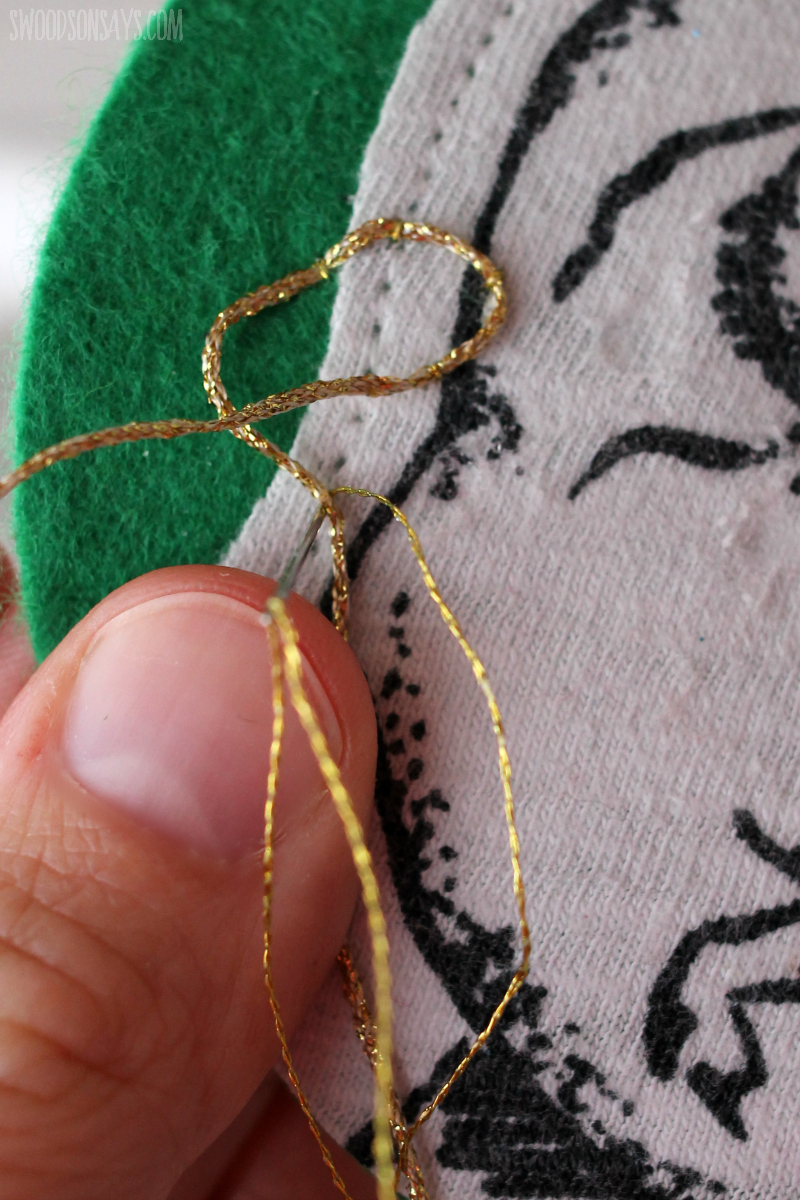
I used a couching stitch for the t-rex Christmas light strand, see below for an example, you come up on one side and go down on the other side of the line, making little tiny loops to secure the curve.
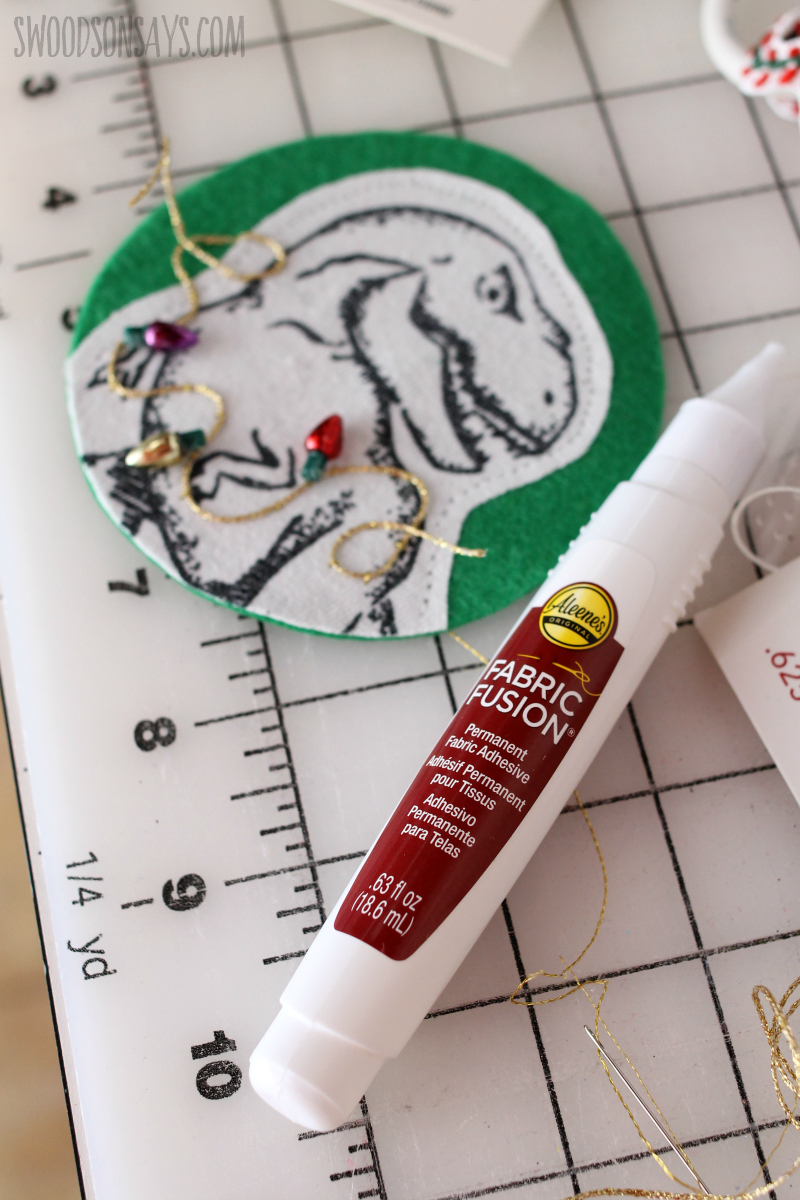
Step 4- After stitching is done, add any glueing! Let dry completely before moving on, because its apt to get bumped.
Step 5- Layer your ornament top on the backing felt and trace, cutting out a mirrored image for the back.
Step 6- If you’re adding any trim around the edges, now is the time! I used a glue stick lightly to get it situated and then let it dry before sewing.
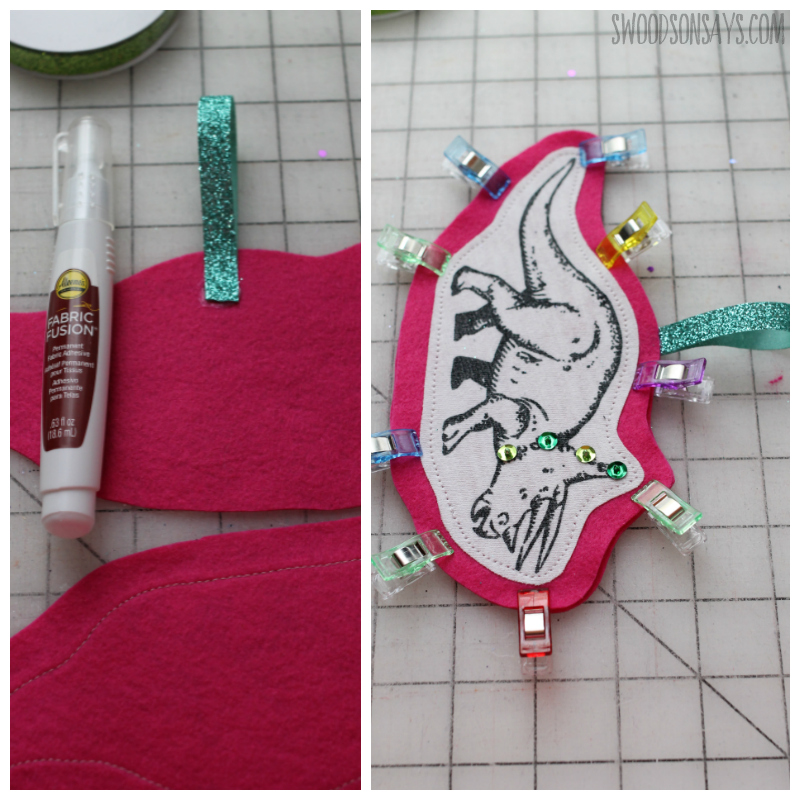
Step 7- Glue your ribbon loop for hanging at the top, then pin all the way around, leaving a small gap.
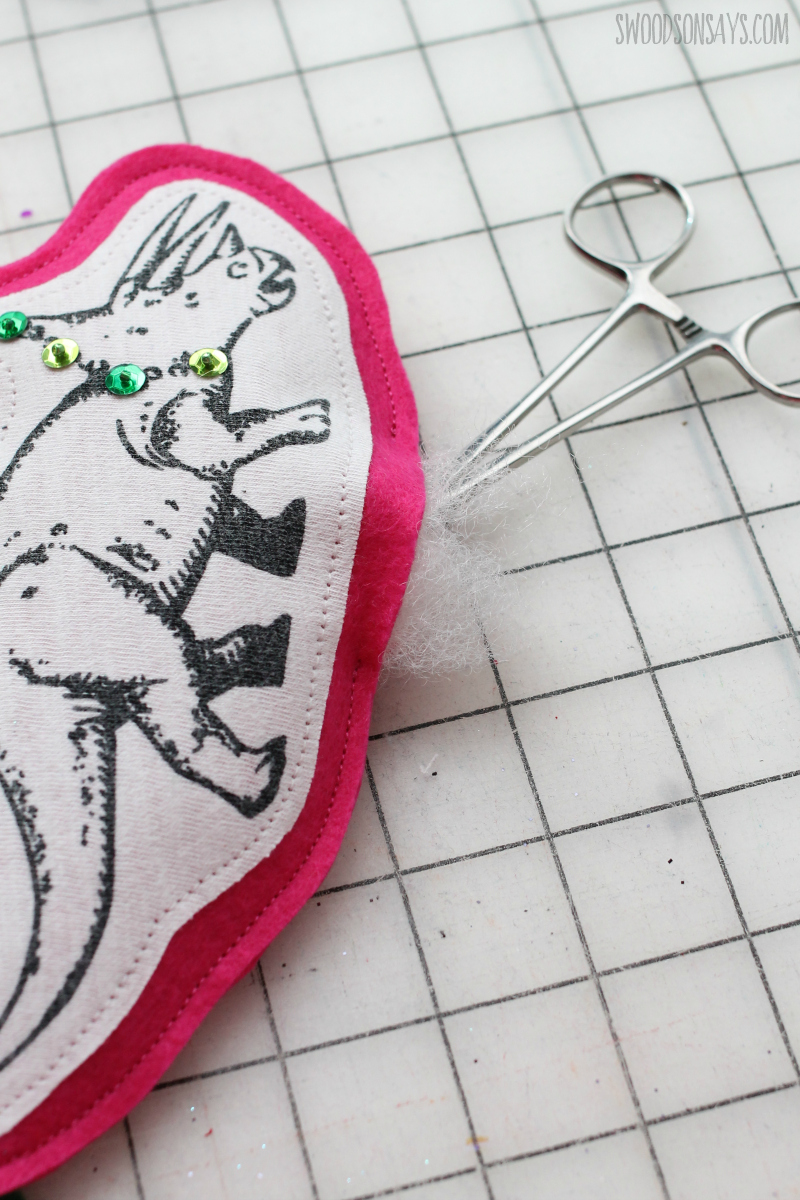
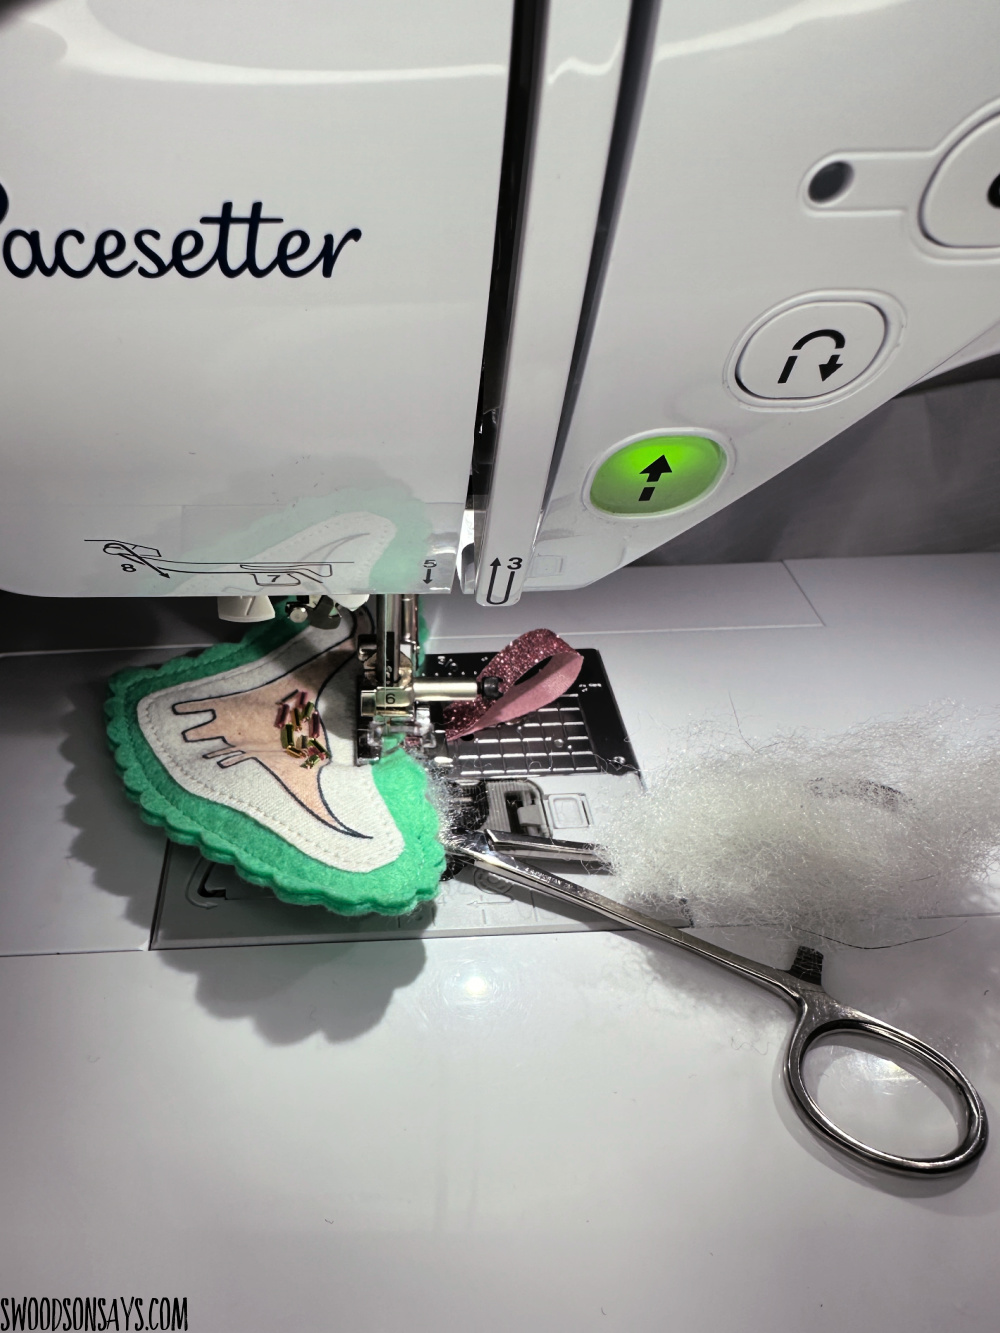
Step 9- Sew around the edges and either pause to shove some stuffing in while sewing, or leave a gap, add some stuffing and then sew it shut! Trim any weird overlaps around the edges and hang that pretty ornament up on the tree!
Laura
Monday 4th of December 2023
I have some dino fabric that is really cute so thanks for this idea to make ornaments for children. And, T-rex dealing with putting up Christmas lights - with the super-short arms - is truly funny.
Claire
Wednesday 11th of December 2019
This is such a clever idea, and the ornaments are so cute and colourful. I love them!