
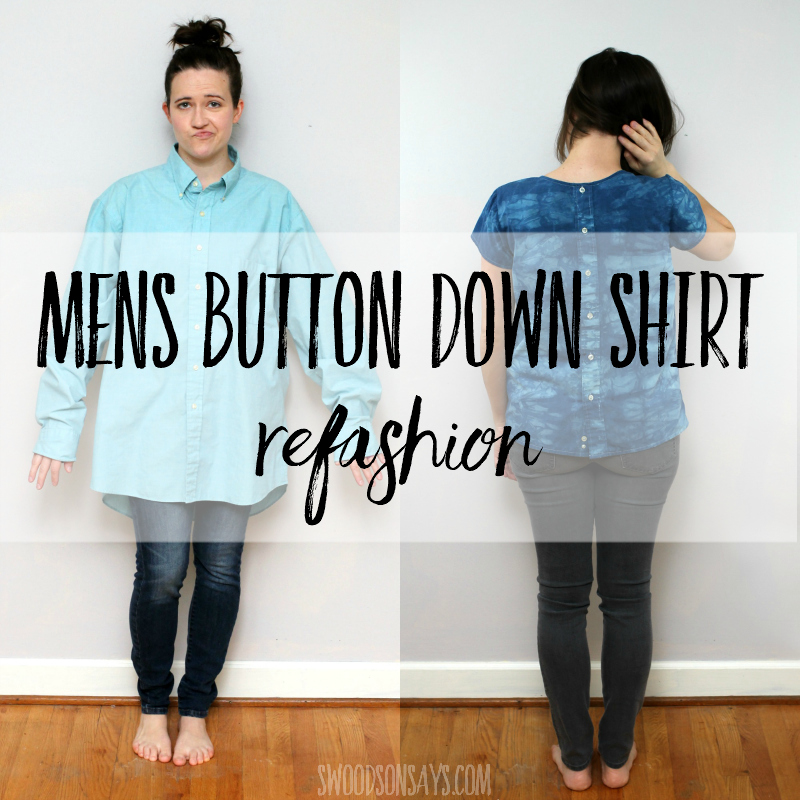
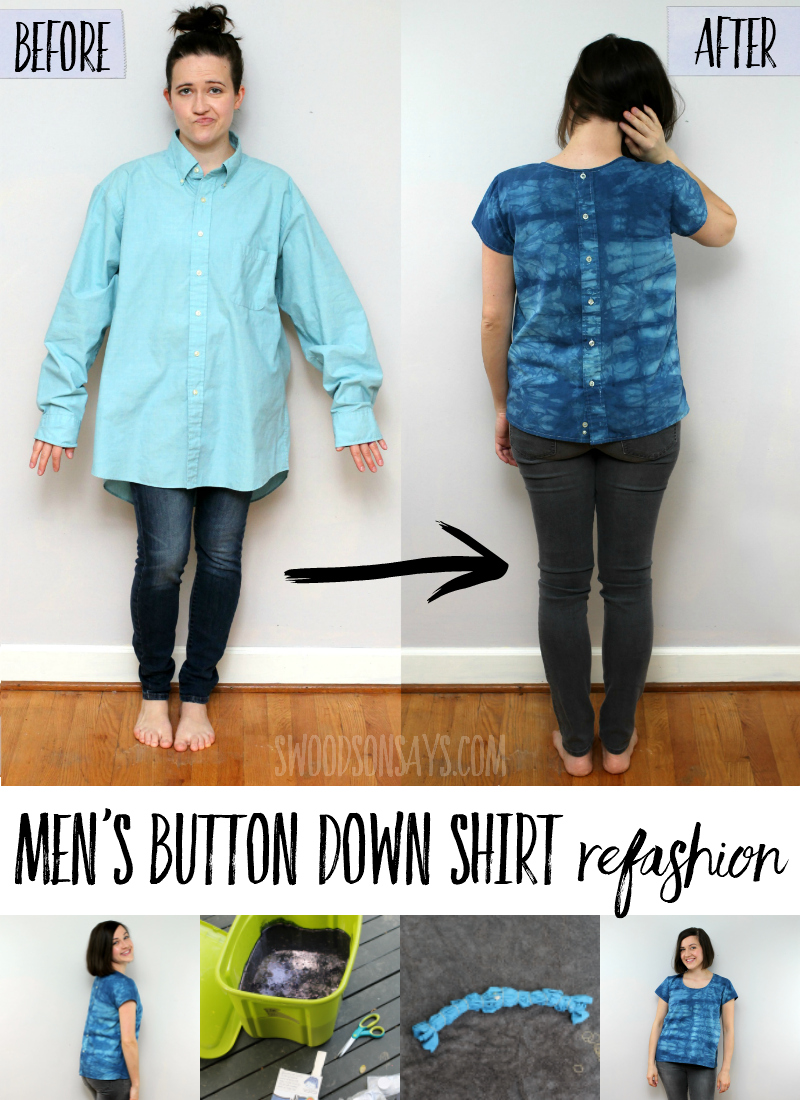
My husband works from home now but when he was in an office, we frequently donated dress shirts that had worn out. I decided to try and make one over into something I’d actually wear, and this is the mens dress shirt refashion idea that I came up with! I think it would be cute with a few of the buttons in back undone, too, but the weather wasn’t quite warm enough to try it out. If you don’t have any shirts to work from, check out my tips for shopping to refashion & upcycle here! If you already have a shirt, read my tips for actually sewing refashions here!
Men’s dress shirt refashion tutorial

As you can see, the ‘before’ wasn’t particularly flattering. I did look for a 100% cotton shirt because I knew I wanted to dye it, and it was a little less stiff than some of the poly-cotton blends.

Then I flipped the back to the front! I originally tried this exact same style of mens button down shirt refashion a few years ago with a silk version that you can see here.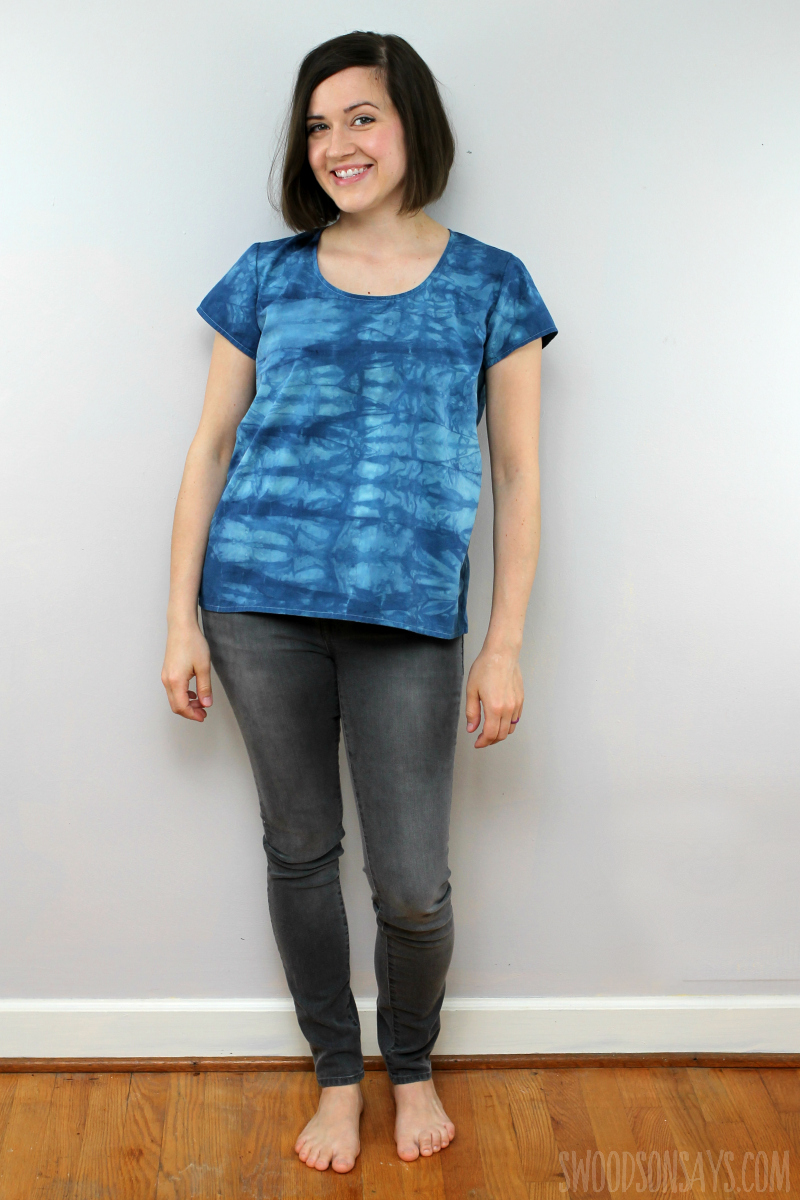
The back became the front. Now that I’m typing up the post, I wish I’d played with putting that pocket on the front, do you think it would look good?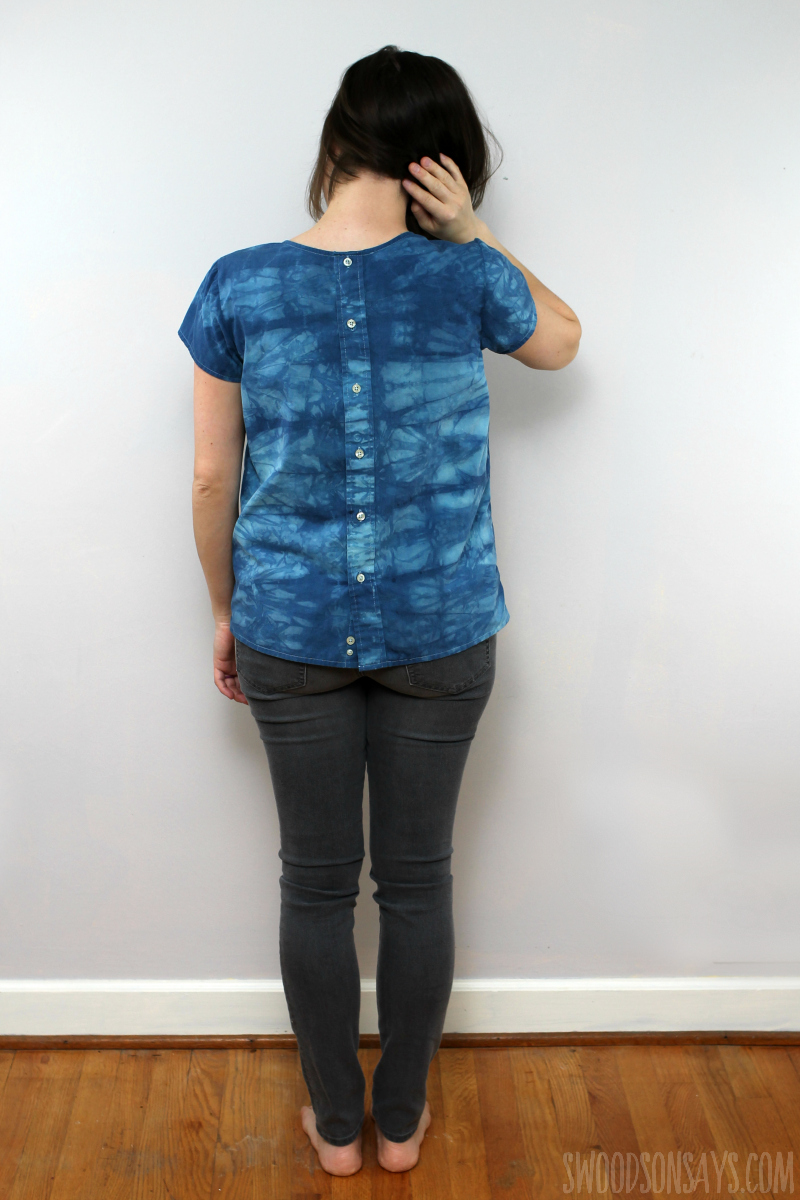 One of the biggest advantages to refashioning a man’s shirt this way is that you get buttons without having to measure or space them out!
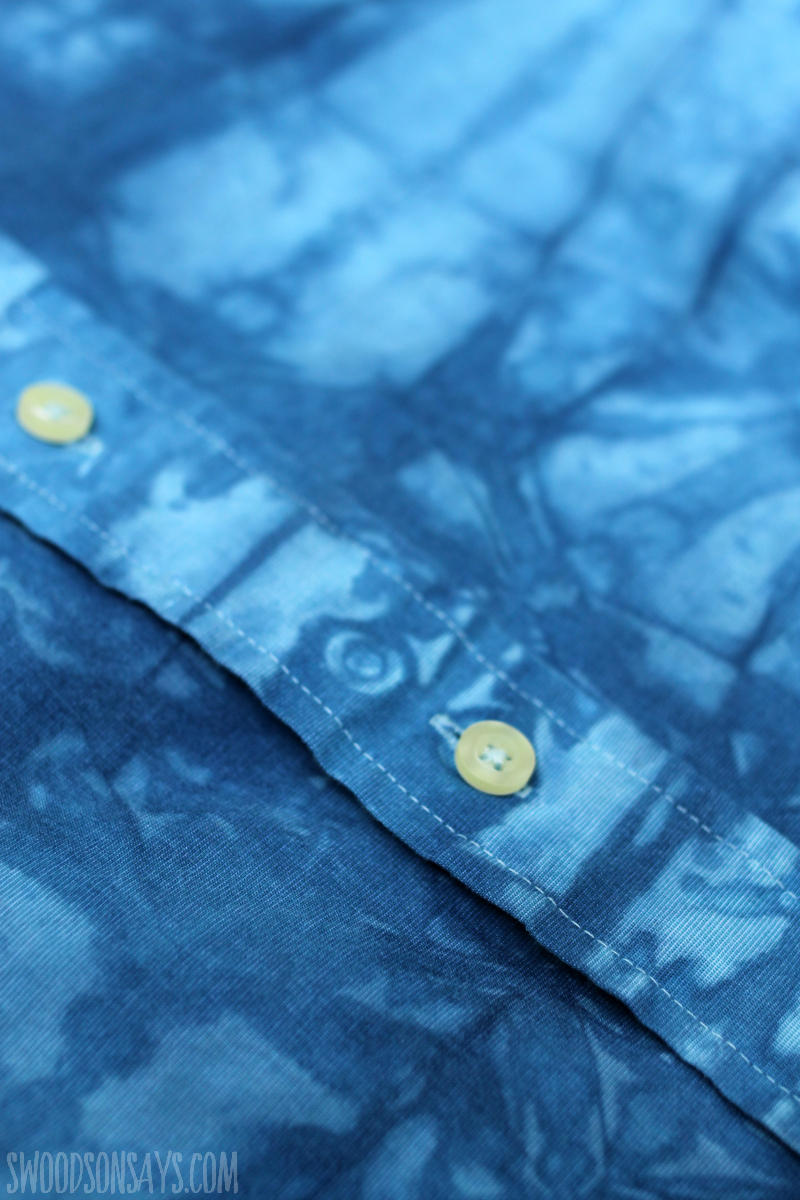
I think this was the first time I’ve dyed something that was already sewn, as opposed to dyeing fabric, and I noticed it left some fun little imprints where the buttons were. I was going for an organic, unfussy dye design and I really love how it turned out. If you want more indigo dye inspiration, check out this round-up of indigo shibori projects!
Please pin this mens button down shirt refashion post for later, here:
Check out a quick video of the process:
Want to make your own? Here is how!
DIY Mens dress shirt refashion
Supplies
- Indigo dye kit* – this is the one I use all the time!
- Sewing pattern for a woven t-shirt – I used the Scout Tee pattern from Grainline Studio*
- Sewing machine (I recommend this sewing machine* for beginners!)
- Coordinating thread
- Scissors
- Iron
- Pins or clips
Steps
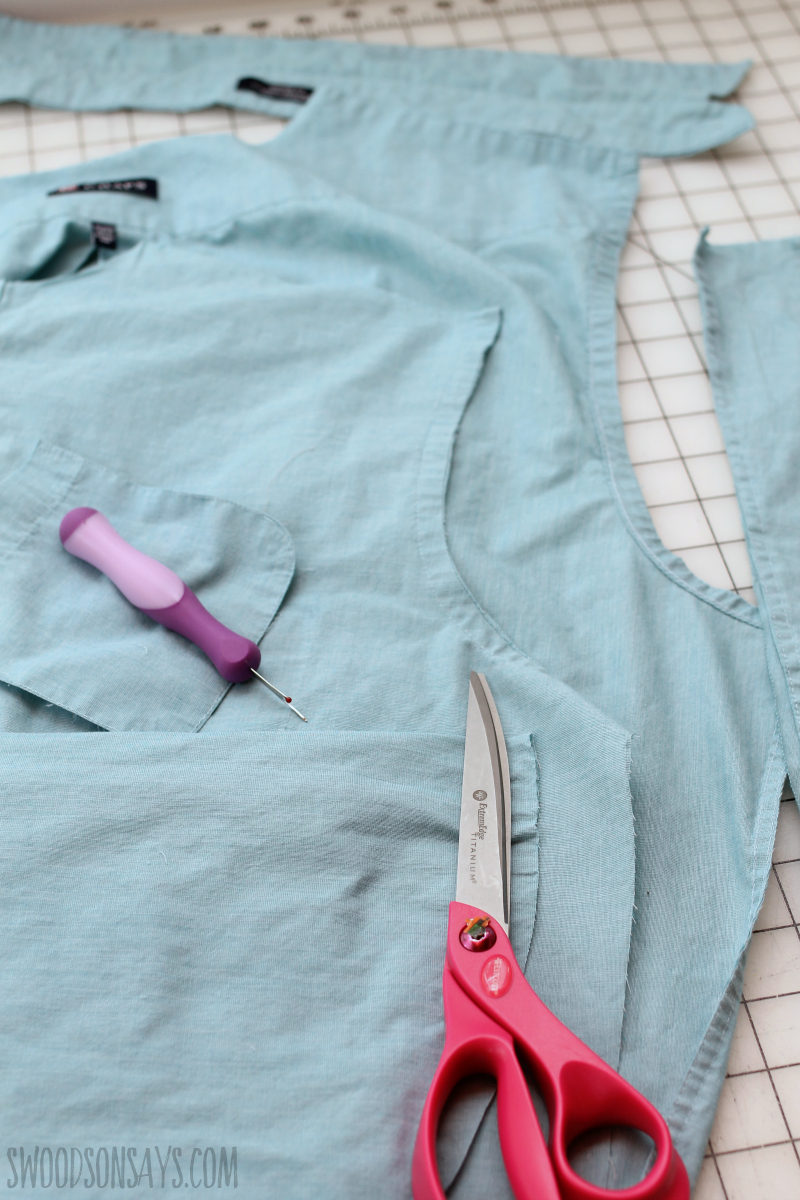
Step 1– Cut up all the parts! If you’re worried about having enough fabric, you can seam rip instead but I just cut along the seams because I knew I had room to spare. I chopped off the sleeves, collar, and seam ripped the pocket off.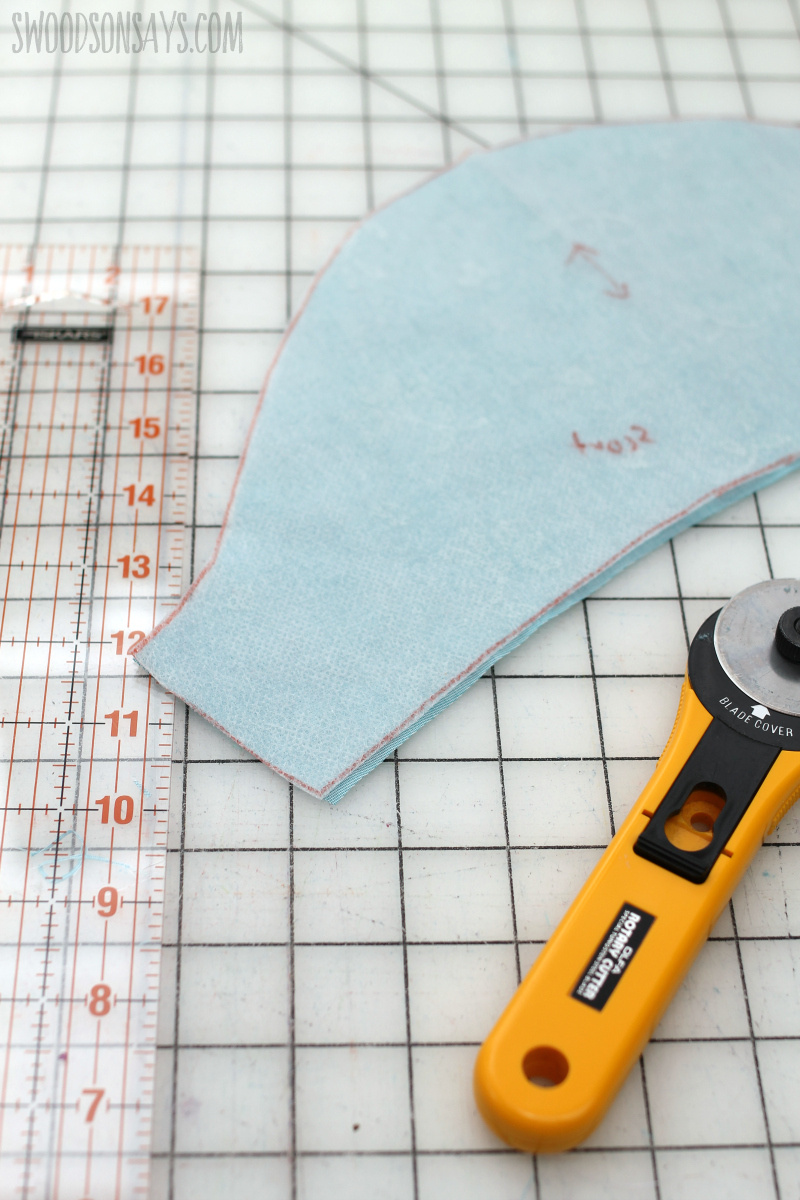
Step 2- Lay your pattern pieces out and cut new sleeves. 
Step 3- Lay your front & back bodice pieces out and cut them. It would probably be best to trace the pattern piece so you have a full front but I risked using the “on the fold” version, just centering it over the buttons, cutting one half and then… 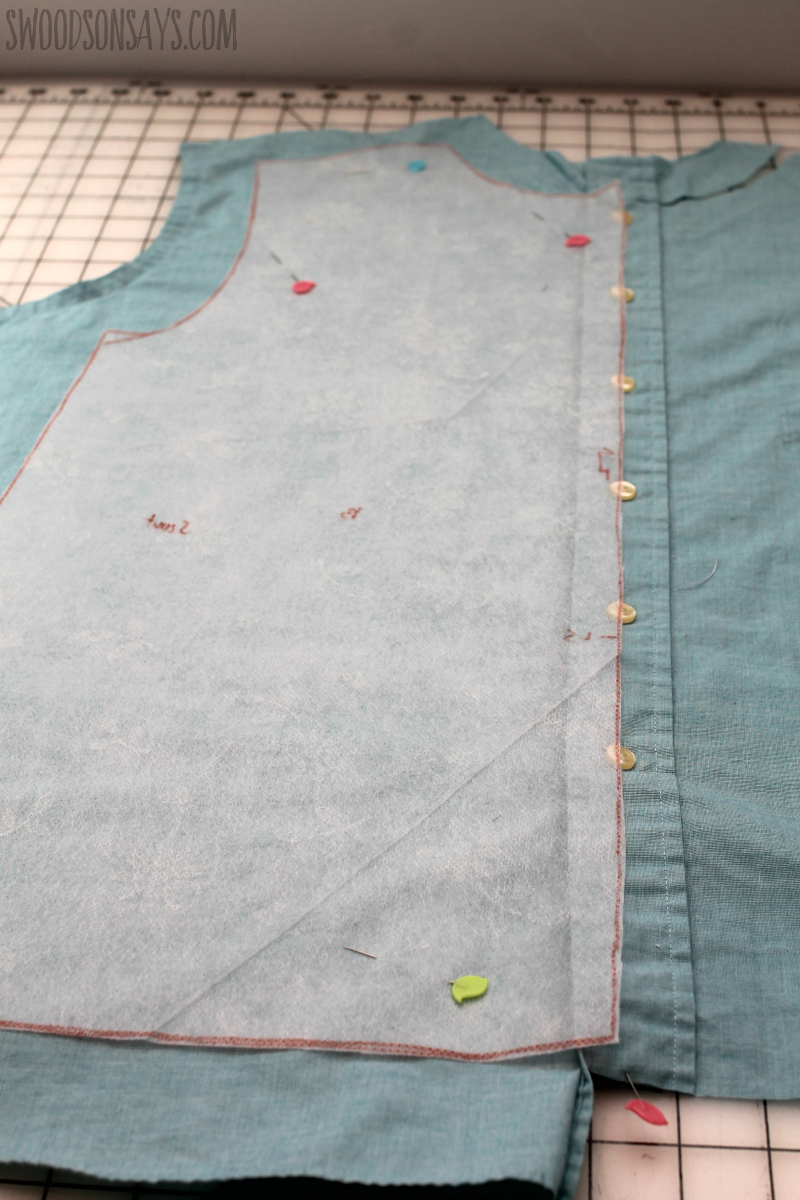
Step 4- Flipping the piece over, centering it again, and cutting it out on the other side. 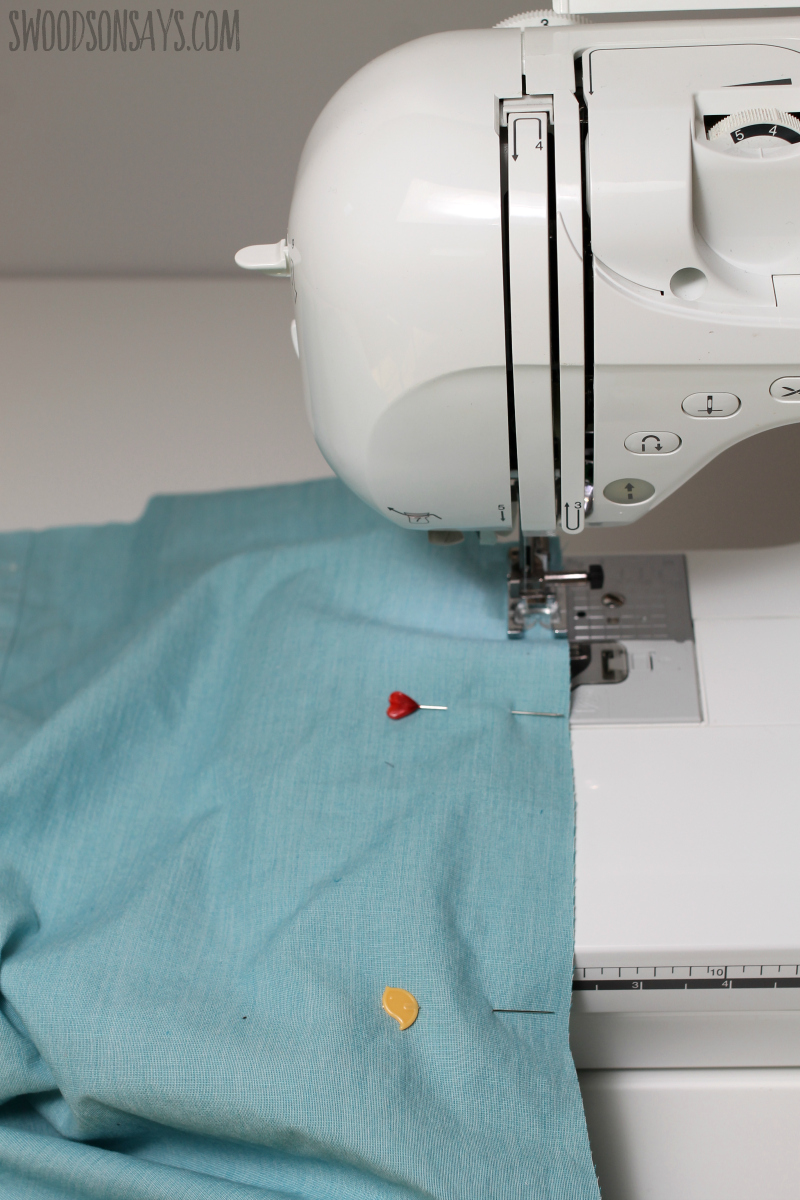
Step 5- Finish sewing the shirt together as the pattern instructs. If you’re planning on dyeing, remember that the thread may not take the color and the safest route, if you don’t want the contrast, is to use a color matching the dye. 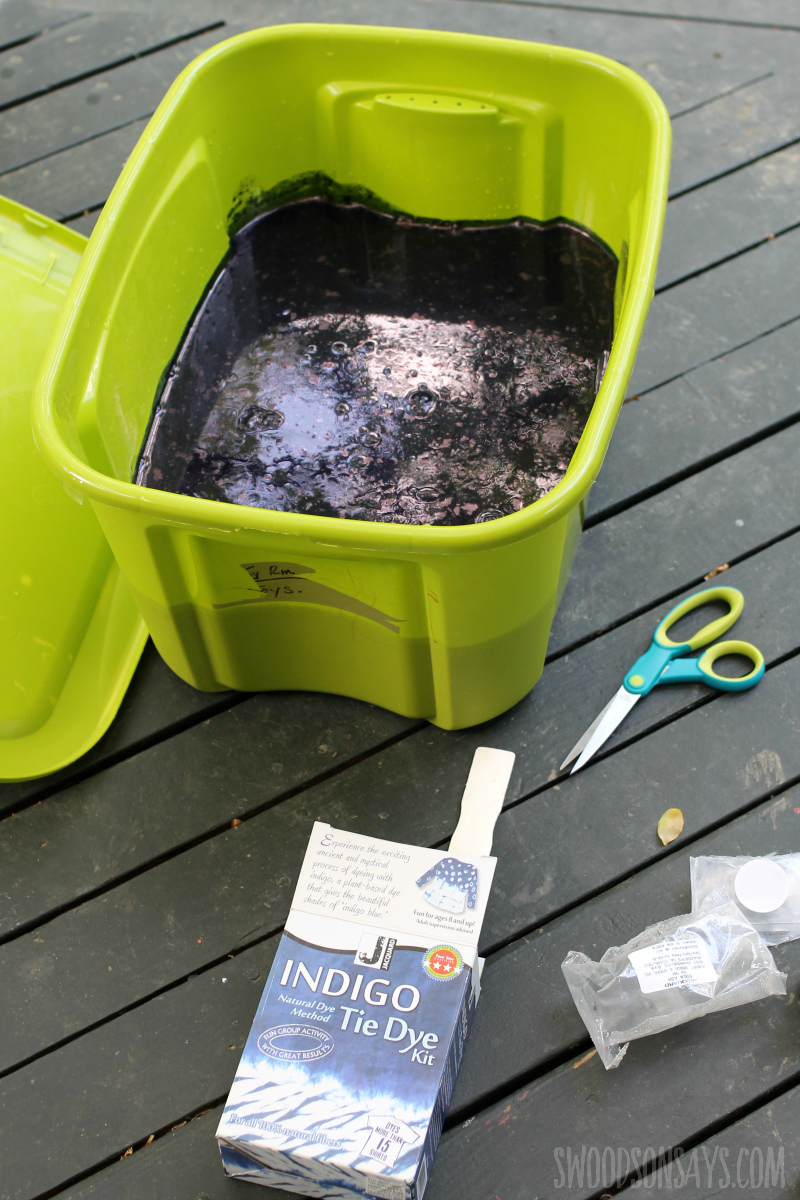
Step 6- Get ready to dye! I used an indigo tie dye kit that I love, you can see more details about what is included in this review post. 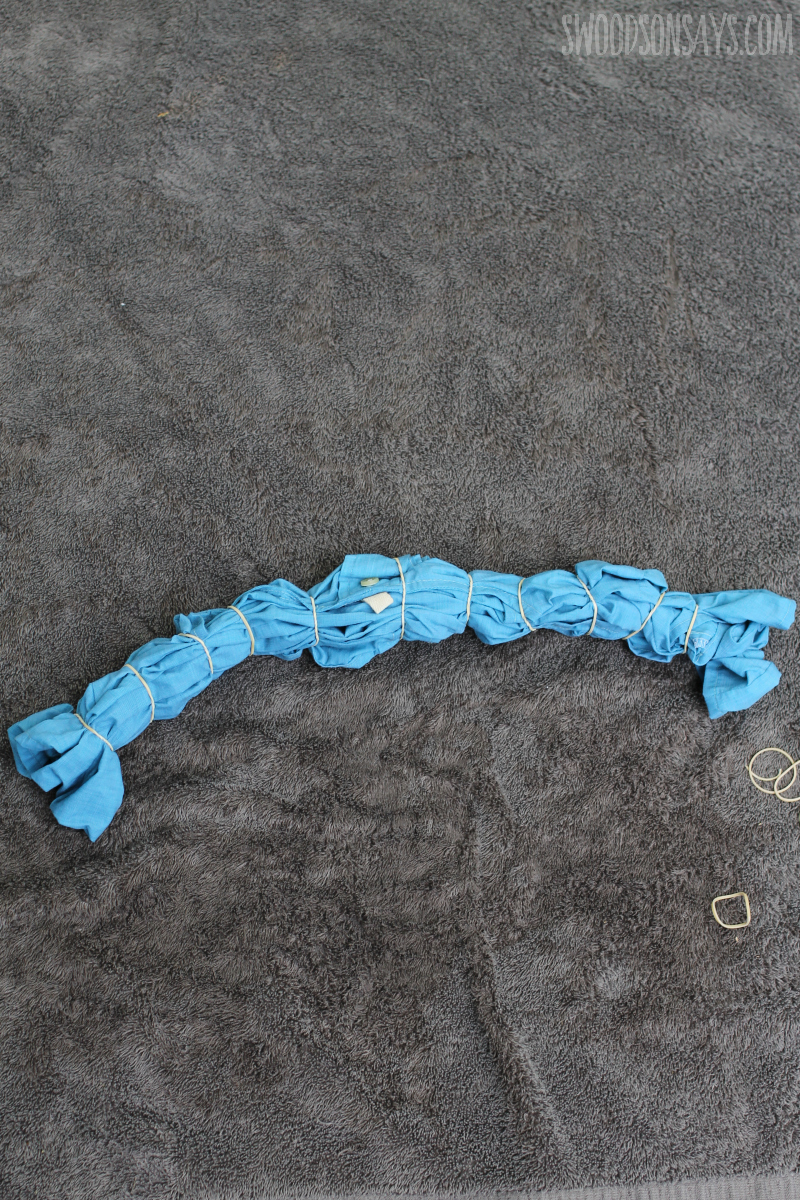
Step 7- This was hard to take pictures of, but I literally just scrunched it up from the bottom like a messy accordian, and loosely looped rubber bands over the tube I’d created.
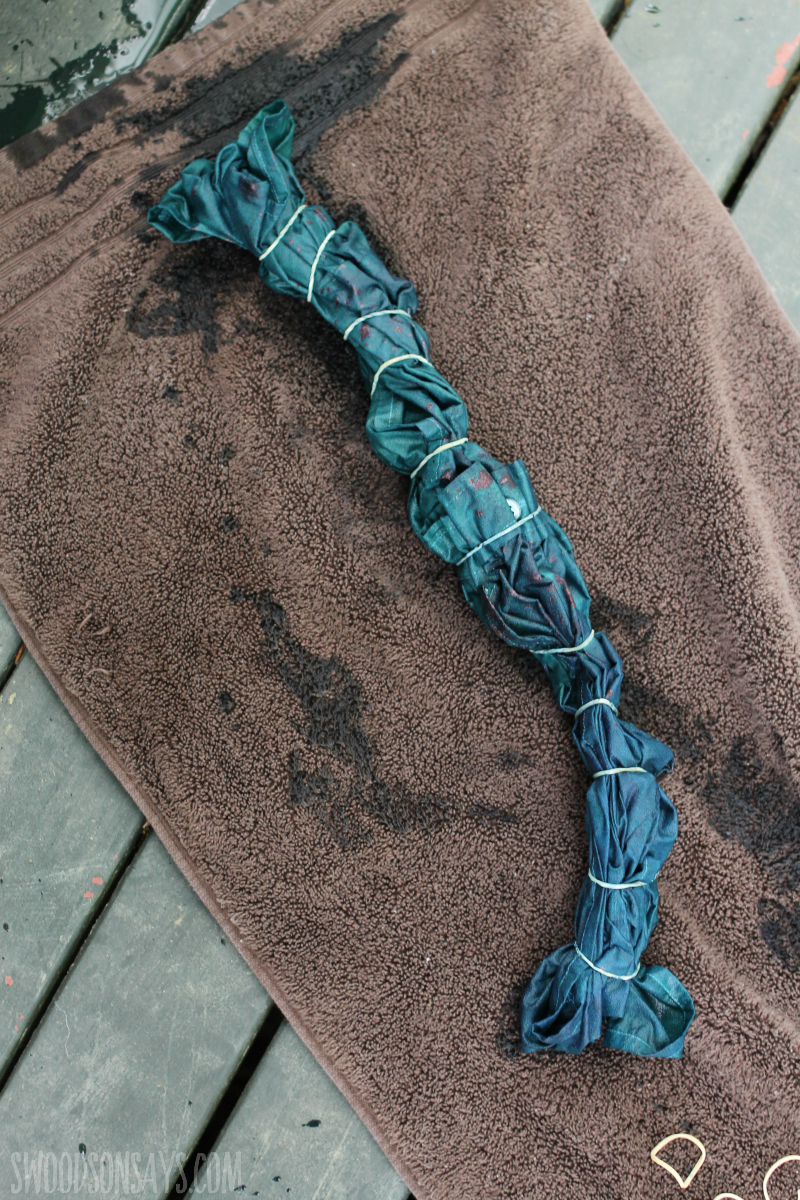
Step 8- Dye it per the kit’s instructions and enjoy! 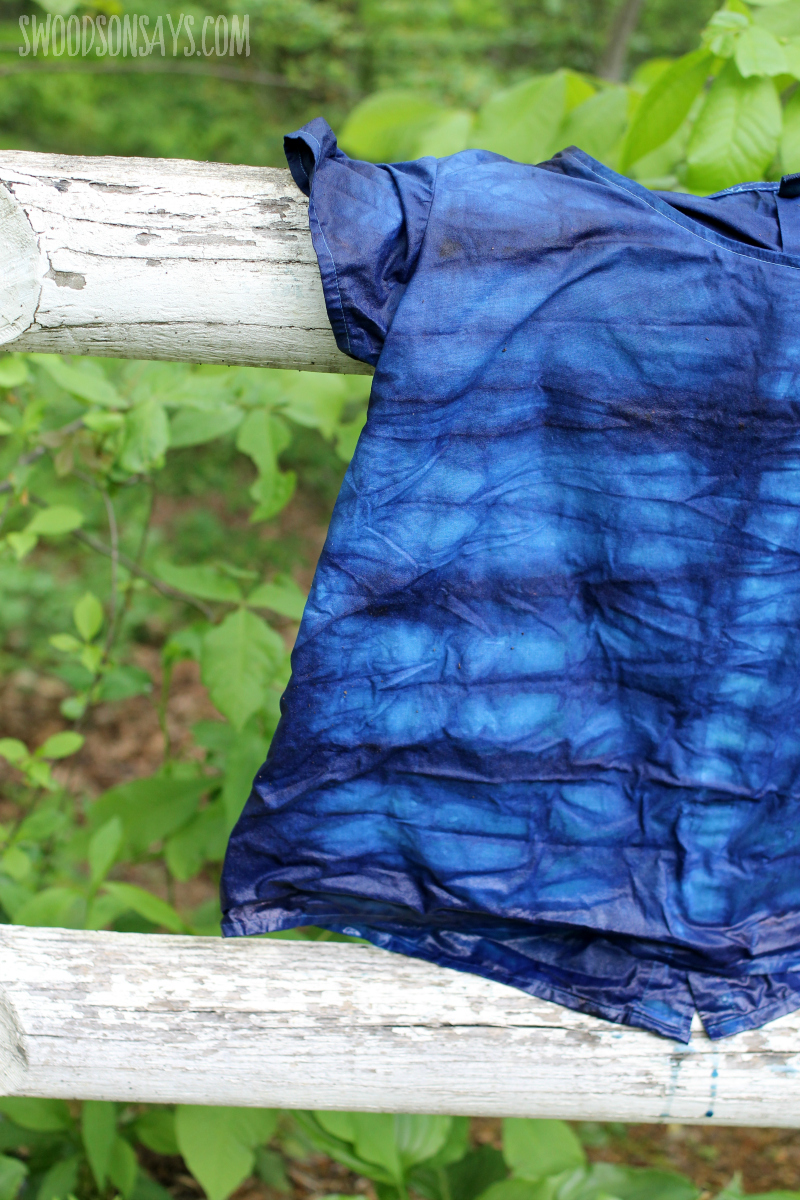
I can’t get enough of the rich indigo hues when it’s drying. How would you indigo dye a shirt?
If you want more men’s button down shirt refashion ideas, check this post out!
Teri
Wednesday 28th of May 2025
So silly question how do you button the shirt up? The bottons are real or is it slip on?
Stephanie - Swoodson Says
Friday 6th of June 2025
The buttons function just as normal :)
Jennifer
Saturday 28th of November 2020
Thank you so much for the great inspiration! Your instructions are easy and clear. I love the look of back buttons. I love buttons! Anyway, I will be definitely making a few new tops. I have lots of pro fabric dye...so I can’t wait! Thanks again 👏🏼 Jennifer
Scarlet
Tuesday 4th of August 2020
You are so crafty! What a gift. I love the way the refashioned button down turned out. In fact I have a shirt that I bought brand new very similar and I paid a pretty penny for it!
Stephanie - Swoodson Says
Saturday 7th of November 2020
thank you!!
Mallory
Thursday 27th of September 2018
Ah I'm glad I could make your day nicer! Your tutorial made me feel accomplished and expanded my abysmal wardrobe! So endless thank you's!
I posted a photo on your facebook page! I'm too computer illiterate to be able to post it in this comment!
Have a most lovely and creative day!
Mal
Thursday 27th of September 2018
I used your tutorial and made a really cool upcycled shirt! I also got introduced to a cool indie brand because of you! Your instructions are easy to follow and the photos are lovely! Thank you for inspiring and teaching me!
Stephanie - Swoodson Says
Thursday 27th of September 2018
Mal, your comment 100% made my day. I'd love to see it if you want to share :)