

Sewing tips for beginners! Yes, you can teach yourself to sew with some patience and practice. I read sewing blogs and browsed Pinterest for sewing tutorials for at least a year before I ever actually tried to sew; I bumbled along, teaching myself online with various tutorials and videos, and I cringe looking back now at how much harder I made things for myself. I thought I’d write up my best tips about sewing for beginners, where to start when you don’t know what you don’t know yet!
Biased as I may be, I think blog tutorials are the best way to learn for someone trying to teach themselves. Having clear photos for each step makes a world of difference instead of trying to stop and start a video or read text directions in a book. I’m sure hands-on classes are fantastic but I also know it’s hard to carve out time to get away, and they can get expensive! These are tips that apply to any tutorial and any project, just general basic sewing knowledge to store away. I promise, eventually you will know enough to troubleshoot your problems and help teach someone else, you just have to dive in and start making mistakes!
I also have a separate post explaining what I consider to be the ‘must have’ beginner sewing supplies list, so check that out once you’ve read these tips!
If you like this post, check out these other posts while you’re here!
- 20+ Easy beginner sewing projects
- The best tips for teaching kids to sew
- 10 refashioning tips for successful sewing
- How to save money while sewing
If there is a tip you wish you’d known or want to share, leave it in a comment!
Pin this guide for sewing for beginners where to start with this collage image or link:
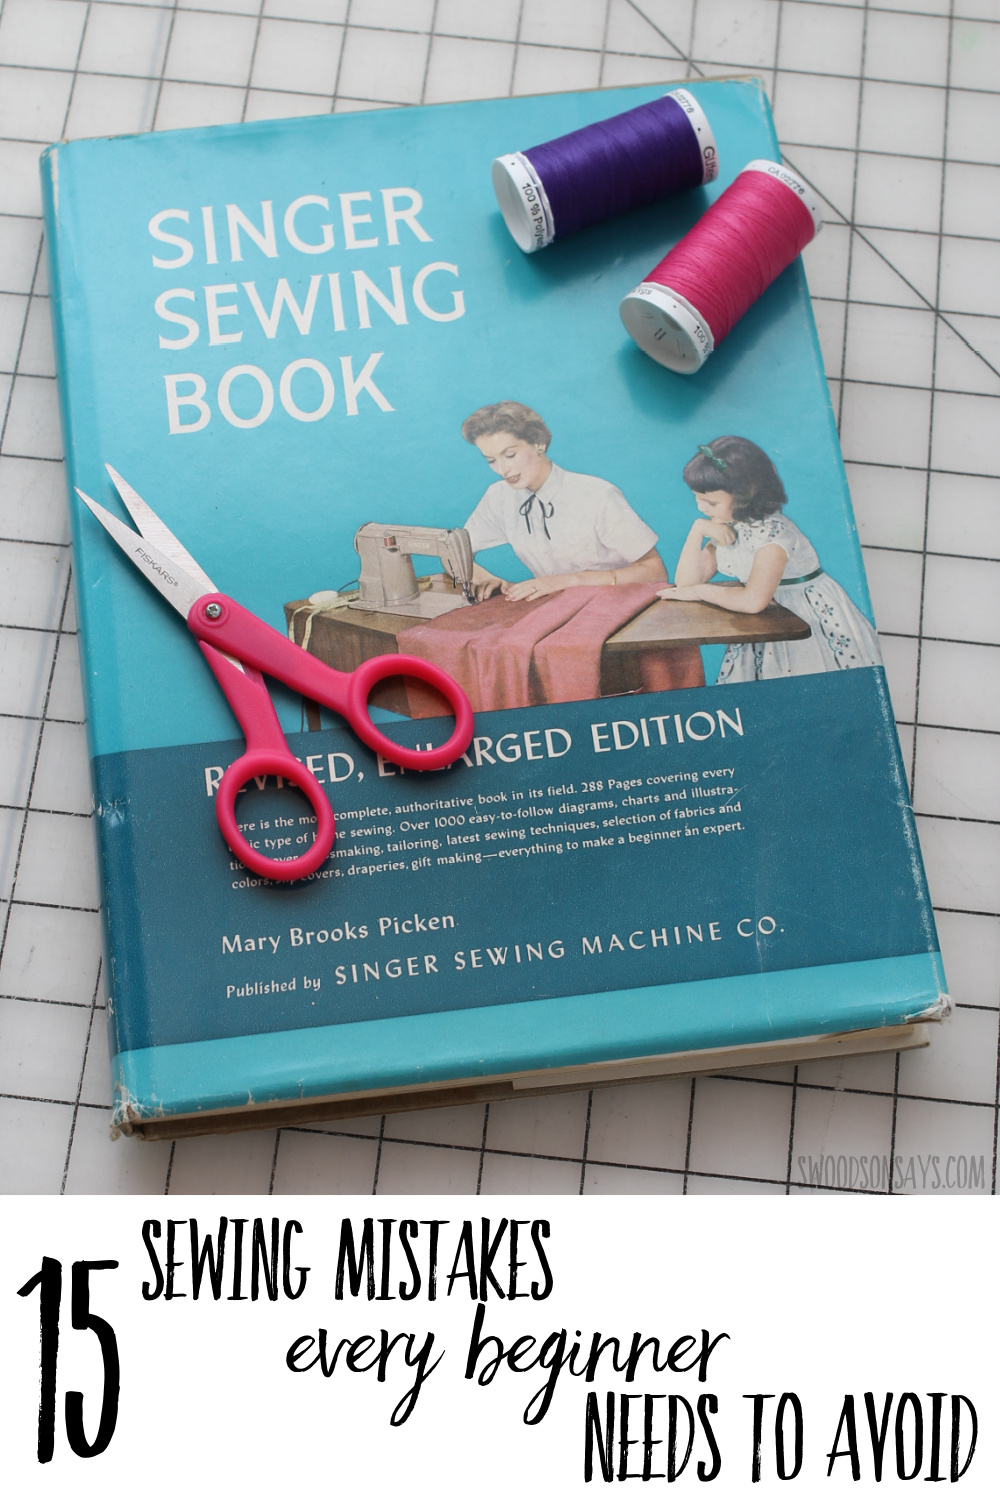
Top 15 mistakes beginner sewing students need to be aware of!
Spending more time buying supplies and building a “fabric stash” than actually sewing (and related, buying fabric online without researching first!):
So you want to start sewing! Some blogs and sites are going to try and convince you you need to buy lots of things! Many will regularly share memes and jokes that you should always buy the fabric, hide it, lie to your spouse, it’s all in good fun. Maybe some of those writers genuinely do believe you need 50 different notions to be a success and maybe I am a spoilsport but let me tell you that I have personal experience in buying way more gadgets than I actually needed and feeling overwhelmed by my fabric stash that was full of wasted money.
Shopping for this stuff feels creative but you’re actually consuming instead of creating! Absolutely enjoy the preparing stage but don’t forget that you can’t learn how to sew until you just start sewing. It makes sense to have a small stash of stuff so you don’t have to run to the store each time but it’s easiest to learn more about your sewing style, types of fabric, and shop project to project than to buy up a bunch of stuff because it is cheap or because you like it and then later realize you can’t put most of it to good use.
Related to that, it can be hard to shop for fabric online! The two things that make it difficult are weight and drape. Some shops don’t share that information but even those that do, it can be tricky to get a feel for digitally. Something can be 100% wool and be thick and inflexible, heavy like a winter coat or thin, stretchy, and drape-y like a wool baselayer. A jersey knit can be thick and soft like a pair of jogger pants or it can be see-through and show every lump and bone underneath like a super thing t-shirt. Consider ordering small swatches or contact the fabric shop for personal help when ordering if you’re new, then make notes about what weight and fiber content something was, if you love or hate it.
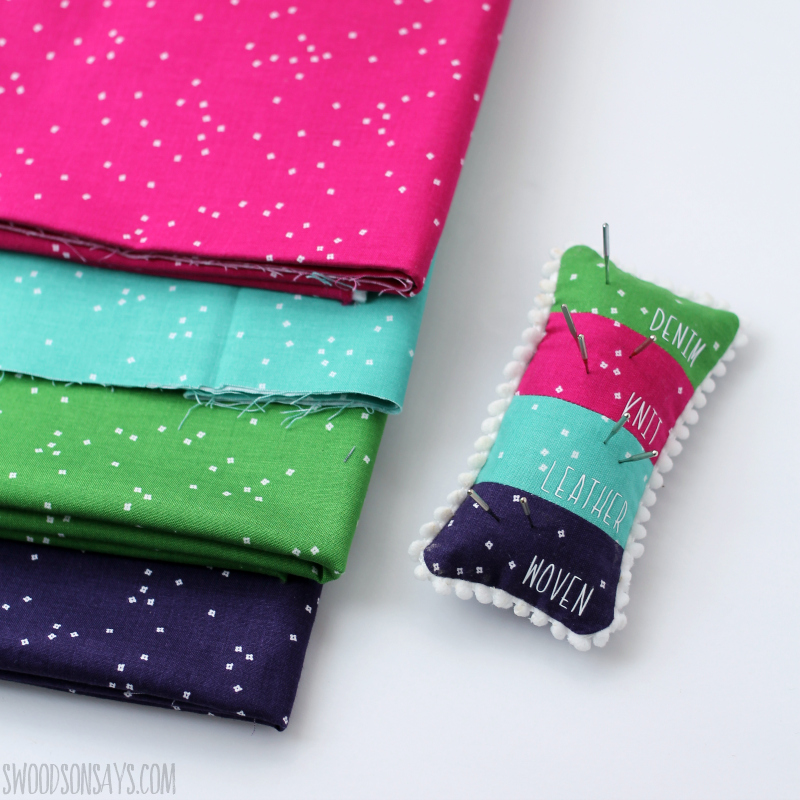
Ignoring the type of fabric a pattern/tutorial calls for (like is it knit/stretchy, is it thick/canvas, is it woven/quilting cotton):
There are lots and lots of different types of fabric and if you dive in deep, it can be overwhelming. The most important thing is simply to keep in mind that you can’t use every fabric for every project. A tutorial or pattern should give fabric recommendations and at least the first time you make it, you should use that type of fabric. After you have tried it once, you can experiment more and feel confident bending the rules. One of the first projects I tried to sew was a fold-up grocery bag that was intended to be sewn with thin, rip-stop nylon. Well I had bought a ton of fabric from thrift shops and decided to use some bulky, thick knit instead. Of course, the finished project was lumpy and heavy, and did not roll-up. I also tried to make a tshirt with knit fabric that wasn’t actually stretchy enough, which of course was another huge failure.
Not matching your needle to the project:
Sewing machine needles come in different widths and also have different tips! A ball-point needle is intended for stretchy, knit fabrics but if you use it on a woven fabric, it will leave bigger holes than is necessary. If you use a woven quilting needle on thick denim, it is liable to break or skip stitches. There are needles for quilting, ball-point needles for knit, thicker needles for denim, stretch needles for swim or athletic wear fabric, and leather needles for leather. Using the wrong needle may result in messy stitching, broken needles, or cause your project to fall apart in a few months if the needle punches too big holes and the fabric slowly rips in those places.
Skipping the ironing steps:
In my experience as a self-taught sewist, it is hit or miss if online tutorials/classes or sewing books mention the pressing and ironing step. I hardly ever iron my clothes but not ironing/pressing your sewing projects can mean your finished project looks much messier. You’ll want to consider the right settings (check your iron manual!); fabric with synthetic fibers will require a much lower heat, but ironing the fabric flat, like you would clothes, before you cut pattern pieces will make sure they’re precise. Pressing is the act of gently pressing down with firm pressure (but not moving back and forth) on a seam or a dart. Pressing your seams will both help shape the garment and also help make it look more professional and smooth.
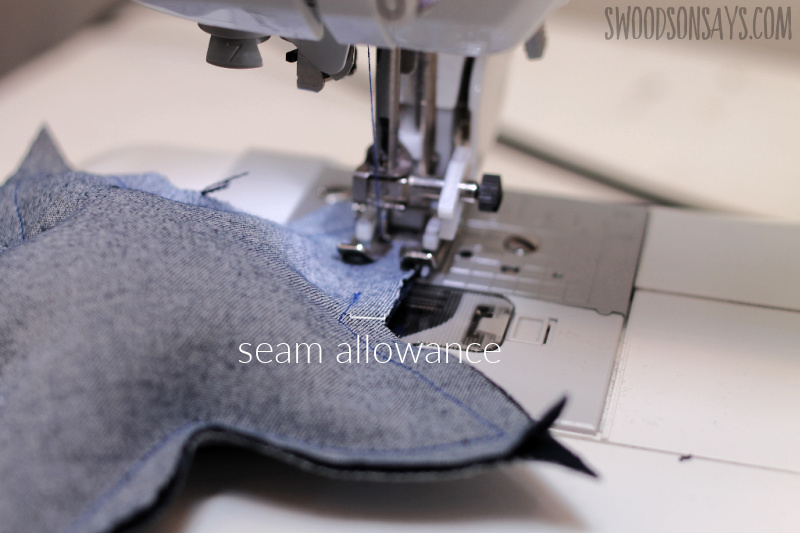
Ignoring seam allowances/not keeping them consistent:
A seam allowance is the fabric that is left to the outside of your seam, and often has a ‘measurement’ that says how wide it is. In some projects, the seam allowance doesn’t really matter as long as you keep it the same; say you’re sewing a rice-warming hot pad, it isn’t going to make a big difference if you use 1/4″ seam allowance or 1/2″, it will just be a tiny bit larger or smaller. But when you’re sewing something to fit something specific or a pattern with multiple pieces, using the correct seam allowance will make sure everything is meeting up right. If a pattern or tutorial doesn’t have a seam allowance, I usually assume it is 1/4″ but it also can be an indicator that the pattern isn’t written very thoroughly.
Not prewashing fabric:
This depends a little on what you’re making – some folks who quilt do not prewash because washing a finished quilt gives it a “crinkle” at the end. Some people say they don’t prewash things that won’t shrink like fleece or athleticwear fabric but I do, mostly to get rid of treatment chemicals that they put on to prevent bugs. But if you’re using a woven cotton or knit fabric, it’s very important to wash and dry it however you plan to wash and dry the finished project, otherwise it will shrink and warp once you’re done!
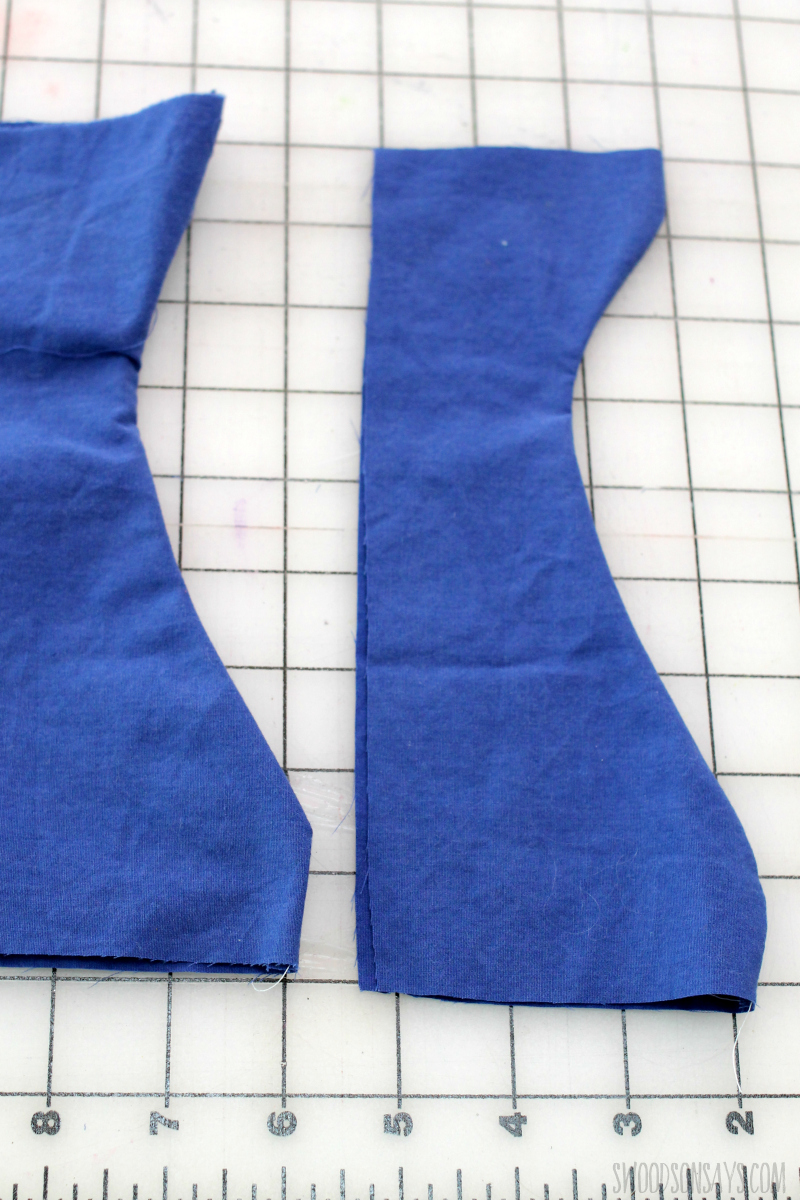
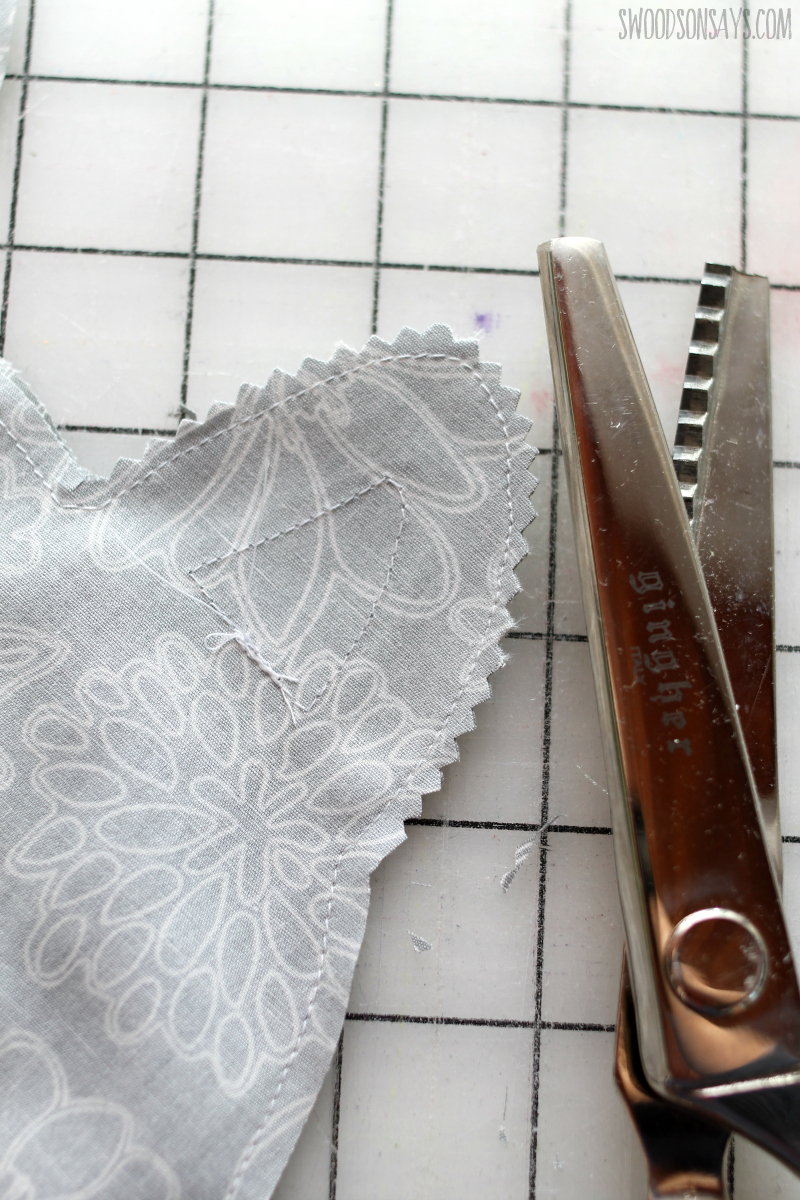
Not clipping curves/corners:
Above is a visual of why this matters; the left is the same pattern piece without any clipped curves, the right has both and look so much smoother and polished! Pressing the seam on the right would make it even crisper, and I would do that before continuing to sew the rest of the pattern.
Be sure to cut small triangles out of curves that curve out and cut small slits in curves that curve in, this helps the fabric to lie flat and look pretty.
Clipping the corners will get rid of the extra fabric and make the corner nice and pointy when you turn it right side out!
Comparing your finished project to others online:
If you’re following a blog tutorial or making something after seeing it on social media, keep in mind that 1. you have no idea how experienced the original maker is and 2. things are absolutely photoshopped and photographed strategically. While I would never intentionally deceive in my tutorials, everything looks better photographed with a well lit DSLR. I have also seen examples where bloggers edited their hems straighter, etc. Take pictures so you can compare you to yourself in a few months of sewing, because your progress is all that counts!
Using the wrong scissors:
There are lots of jokes about only using fabric scissors on fabric but it’s true; your junk drawer paper and tape scissors are not going to cut fabric well or easily. This is one thing that I do recommend you buy special for sewing and then keep them tucked away for fabric only!
Not making a “muslin”:
This term is traditionally used for using cheap, thin muslin to make adjustments when sewing clothing before using the nice fabric but I like to apply this concept to anything. Make a practice version with junk fabric (think upcycled sheets, old tshirts, etc.) to make sure you understand the process and don’t want to change anything before you use your expensive, nice fabric. Just make sure the practice fabric is somewhat similar to your final fabric in weight and stretch.
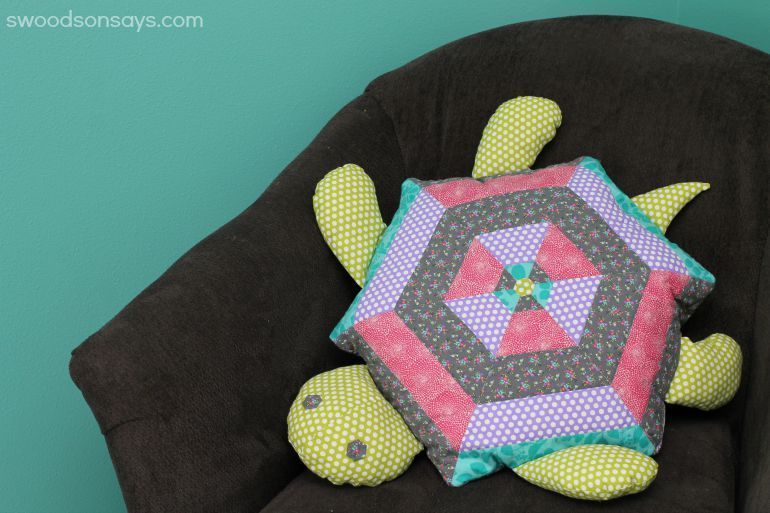
Starting with advanced projects:
I’m sure there are some exceptions but generally speaking, trying to sew a fitted dress or jeans (or a quilted stuffie, as shown above) for one of your first projects will probably end in heartache. Picking something that you can complete in a day or two will be a great confidence boost! Your first projects should be skill builders as you learn your machine and get comfortable with the process, then you can tackle more complicated things.
Giving up or blaming yourself:
I’ve gotten a few emails from folks who are ready to give up, wondering what’s going wrong and what they’re messing up. First, it’s not always you! Often the problem is with the machine or your materials, so you can waste hours fiddling with tension and thinking you’re missing something when all you really need to do is change for a new needle and rethread. Alternately, giving up with the first setback is a mistake! There is a learning curve with sewing just like everything else. Keep in mind that if you keep going, eventually you won’t feel like you have to look up every term or reread each step 5 times.
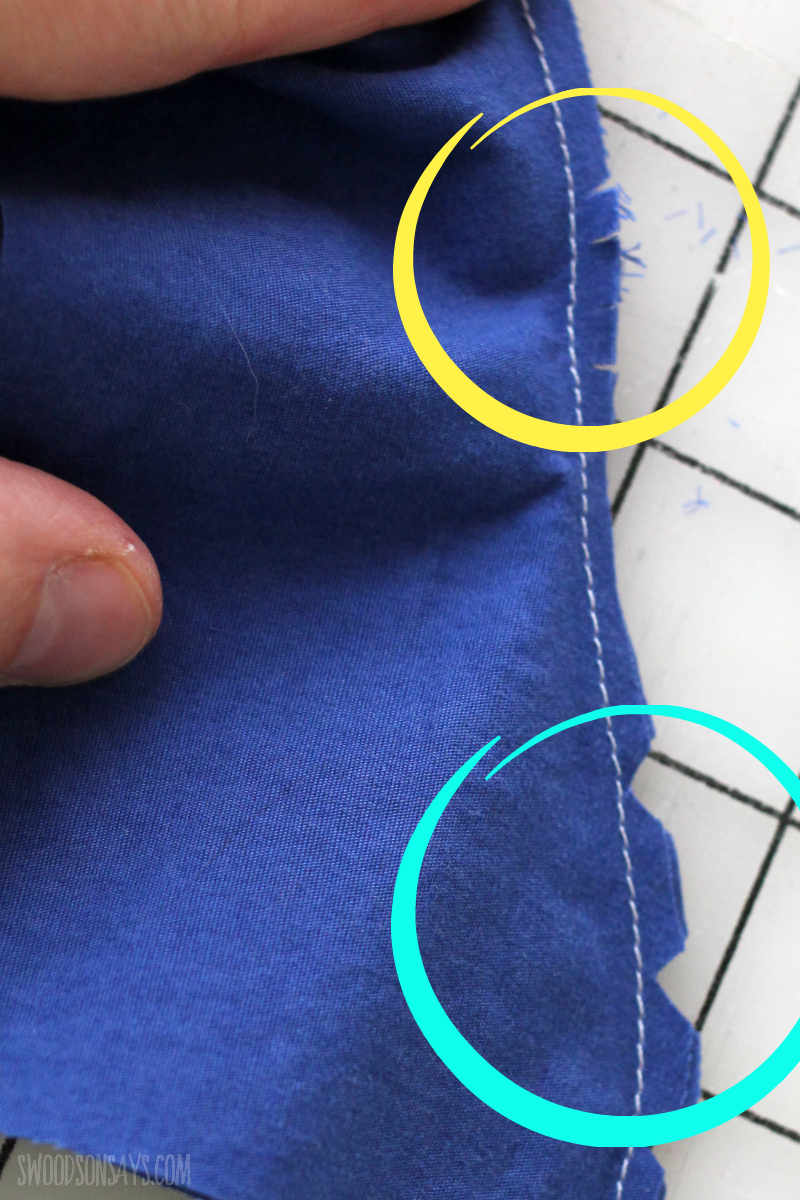
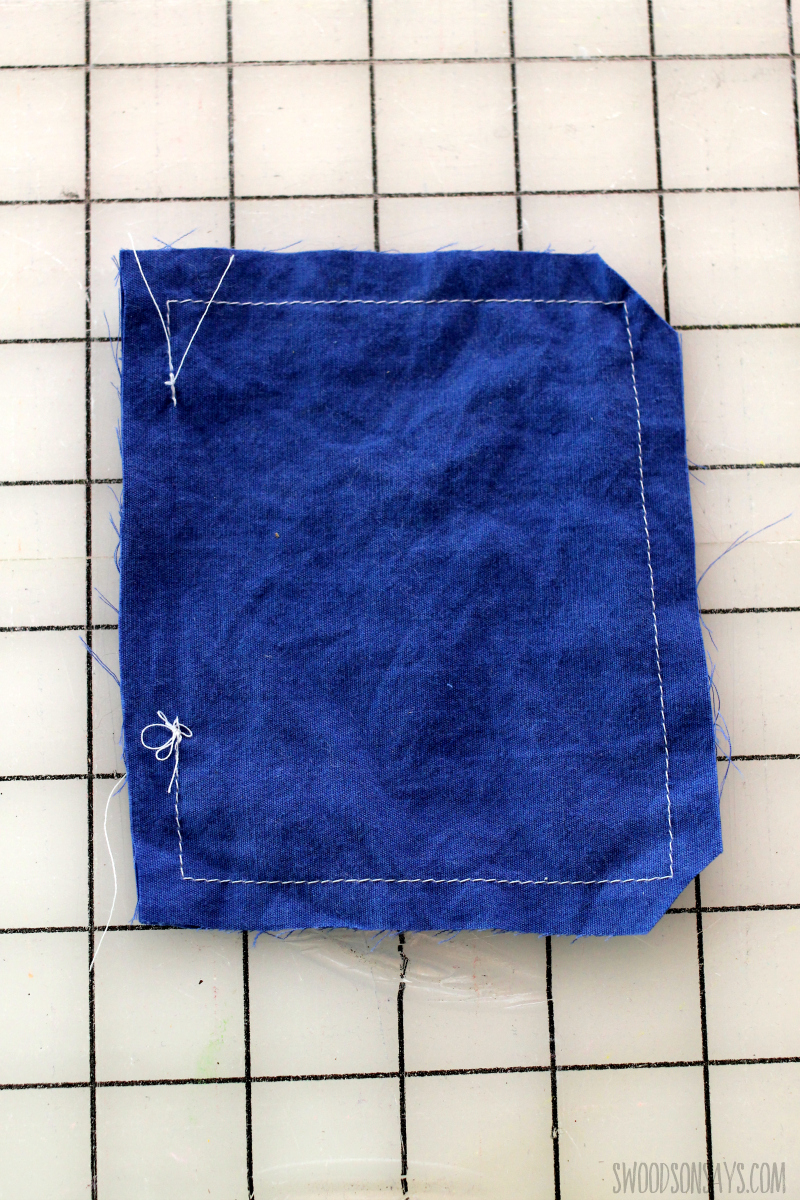
Not finishing seams and taking a few anchor stitches at the beginning & end of seams:
Unless you have a fancier machine that does this automatically, you need to take a few, short stitches back and forth at the beginning and end of whatever you’re sewing. This ‘anchors’ the rest of the stitches, otherwise they can slowly pull apart over time, while you’re assembling the pattern, or in the washing machine.
Finishing seams is also often not mentioned in tutorials, but it is where you stitch or cut the seam allowance once the seam is sewn. It’s not necessary with fabrics that don’t fray (like fleece, felt, or knit stretchy fabric) but becomes very important with woven fabrics that fray. If you don’t finish your seams, your whole project can fall apart in the wash. My friend Heather has a blog post sharing methods for finishing seams!
Letting friends guilt you into doing their mending/hemming/sewing them curtains:
If you mention sewing to people you know, mentally prepare yourself for them to start asking favors. Let me be the first to tell you that sewing other people’s favors is not fun and it takes forever. Start as you mean to go on; politely say you don’t feel like you’re up to that (whether you are or you aren’t) and refer them to a local tailor. People who don’t sew think that “whipping up some curtains” or hemming their pants will take you 10 minutes, because they don’t sew!
Getting discouraged by how long something takes or making mistakes:
I’ve been sewing regularly for 9 years now and I am still forever under-estimating how long most things will take. Assume it will take more than a day and that you’ll have to use your seam ripper at least once and be pleasantly surprised if you’re wrong.
Buying too much or too little machine: This one is from Rebecca Grace Quilting – she is so kind and has a great point! If you go to a sewing machine dealer they often will try to upsell you into all the bells and whistles. Sometimes more options can feel more confusing! Alternately, buying a $50 Singer from Walmart will almost surely leave you frustrated even if you do everything right, they are notorious for being short lived.
A common refrain here is to buy a quality used machine, which I fully support if you can find a dealer selling them with a guarantee or know someone personally who you trust. I think a beginner can’t easily evaluate a used machine and can easily be swindled. You can read more of my thoughts on vintage/used vs. new in this post, but know that the machine I recommend for beginners buying new online is the Brother cs6000i or in person, any mid-level dealer Brother or Janome model.
Get started tips and commonly asked questions:
Ok, now that you’ve read all the things I hope you AVOID, here are a few things to keep in mind or be sure to do! Also including a few answers to questions I see pop up in online groups often.
- First line of defense when your machine is sewing wonky:
- Change to a new needle, clean out lint by the bobbin, and re-thread top and bottom thread. This cures 75% of my issues.
- There is a huge online community eager to help:
- If you’re using a blogger’s tutorial and are confused, contact them! I can’t make promises for other people but I always try to respond to those type of emails within half a day.
- There are sewing communities on Facebook, on reddit, maybe local to you on Meetup.com. Make some virtual sewing friends and ask questions. Most sewing people are excited to get other people into sewing.
- Practice on junk fabric:
- Upcycled stuff is PERFECT for practice. I touched on this a little above but ask friends and family for old sheets and old tshirts to practice a tutorial or pattern before you keep going. I also use scrap fabric to test my machine when I’ve changed the needle or switched to a new stitch, making sure it’s sewing nicely before I put my actual project in.
- Store your fabric, thread, machines, etc. in a way that protects them, not just looks pretty:
- Dust and sunshine are bad for everything in your sewing room! Thread racks on the wall might look great but if you have pets, open your windows, etc. that thread is going to get dusty. Store things under covers and in boxes to keep it clean and safe.
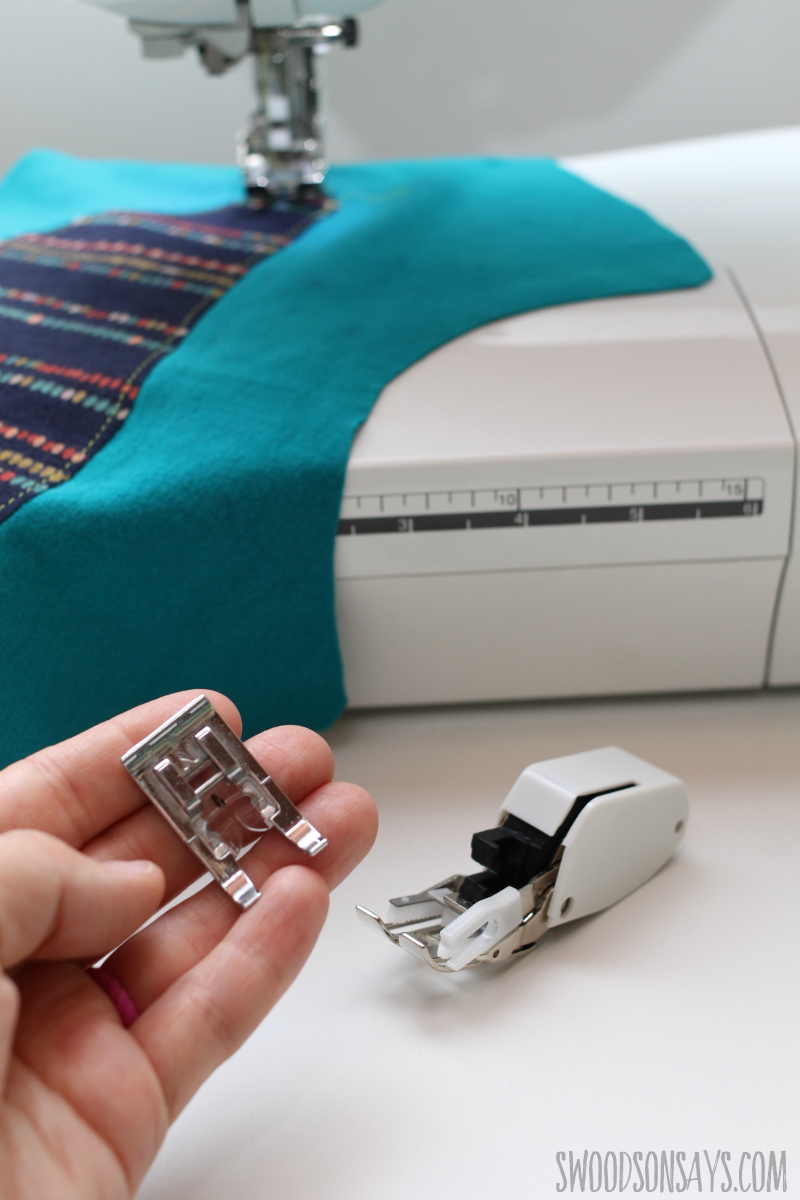
- Know what a sewing machine “foot” is:
- Sewing machine feet clip or screw on behind the needle, and different types have different functions. Read your machine manual for tips on which came with your machine; I don’t change mine a ton but sometimes it helps with certain projects!
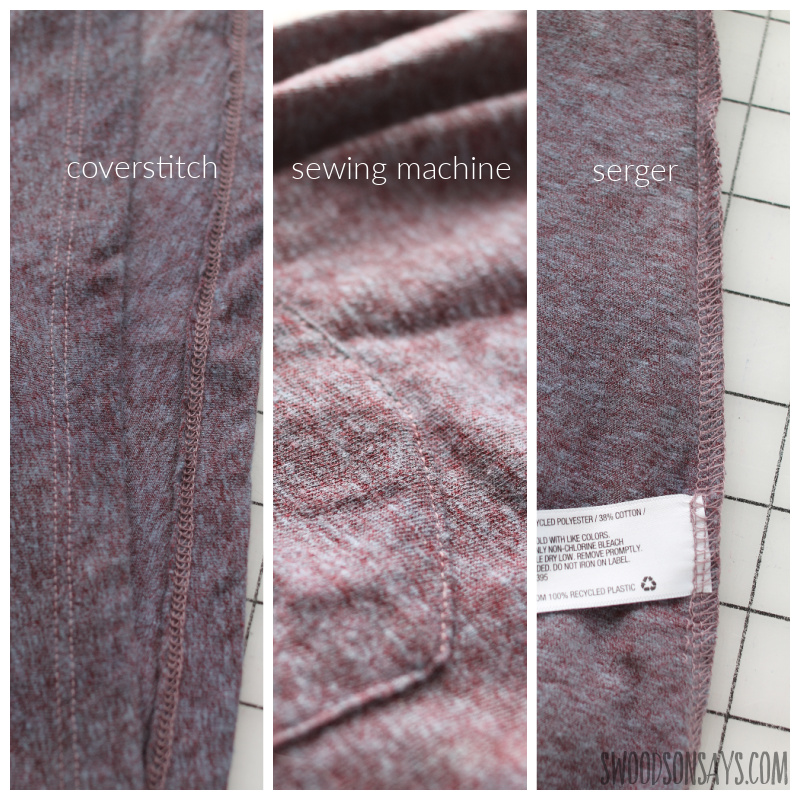
- Know what the difference is between a serger (or overlocker) vs. cover stitch vs. sewing machine:
- Look at a tshirt. The hem? That’s a coverstitch. The side seam? That’s a serger. The pocket? That’s a sewing machine. You don’t need a serger to sew with knit but it does make life easier; I also use mine to finish seams of woven projects sometimes too. A coverstitch is used primarily for knit fabric hems.
Alright, let me know what you wish you’d known when you started sewing if I missed it, in the comments!
Jennifer
Wednesday 1st of October 2025
Thank you for this. I had discouraged myself a few years ago and reading some of these very things I did made me realize that others do it too and maybe I’m not as hopeless as I thought!
Stephanie - Swoodson Says
Wednesday 1st of October 2025
Oh my gosh no. You cannot be hopeless, I promise!! Let me know if I can help you get re-started somehow - shoot me an email and we can chat!
Emily
Tuesday 2nd of March 2021
Do you have any tutorials on sewing with knit fabrics?
Stephanie - Swoodson Says
Tuesday 4th of July 2023
Emily, I have had one in the drafts forever... I'll keep working on it, I just forget about it :)
Rozy
Tuesday 2nd of March 2021
All very good advice! My mother was a good seamstress (the term I still use) but she didn't have the patience to teach me and had me take a summer school course in between seventh and eighth grades. After that she would help me with any new or unfamiliar skill needed as I sewed. Mom learned from her father who was a tailor trained in Norway. It really is a shame that Home Ec is no longer taught in schools because everyone eats and everyone wears clothes, so no matter what job or career you choose to pursue outside your home, you still eat and dress each day. I suggest a brand new seamstress ask around at church among the older ladies (mid sixties and older) to see if there is someone who knows how to sew and is willing to help you learn. I suspect many are like me who would be willing to share knowledge and expertise (and even their stash) with a beginner.