
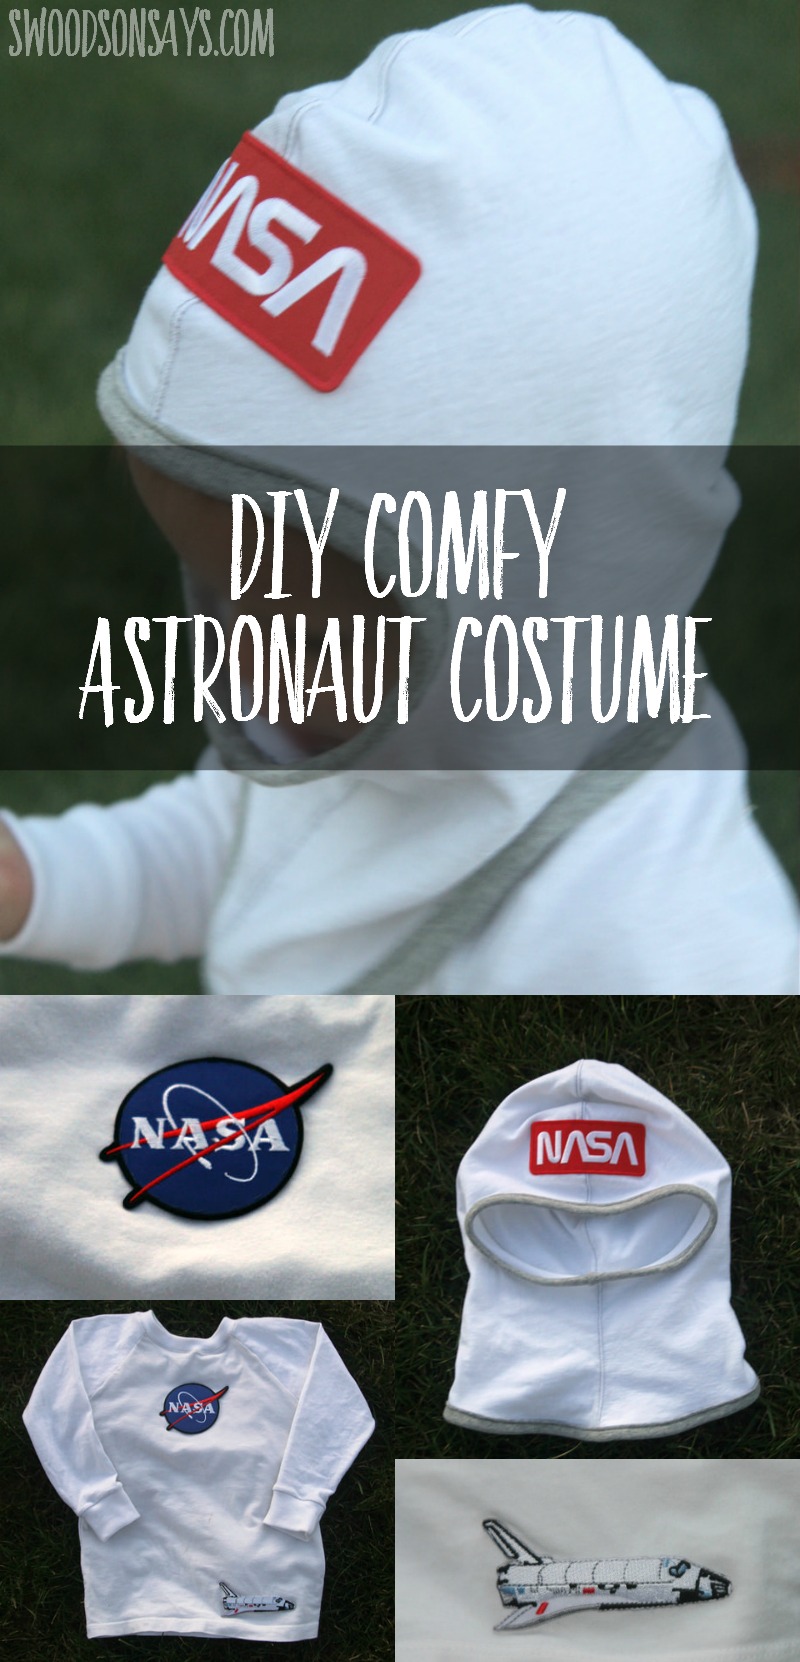
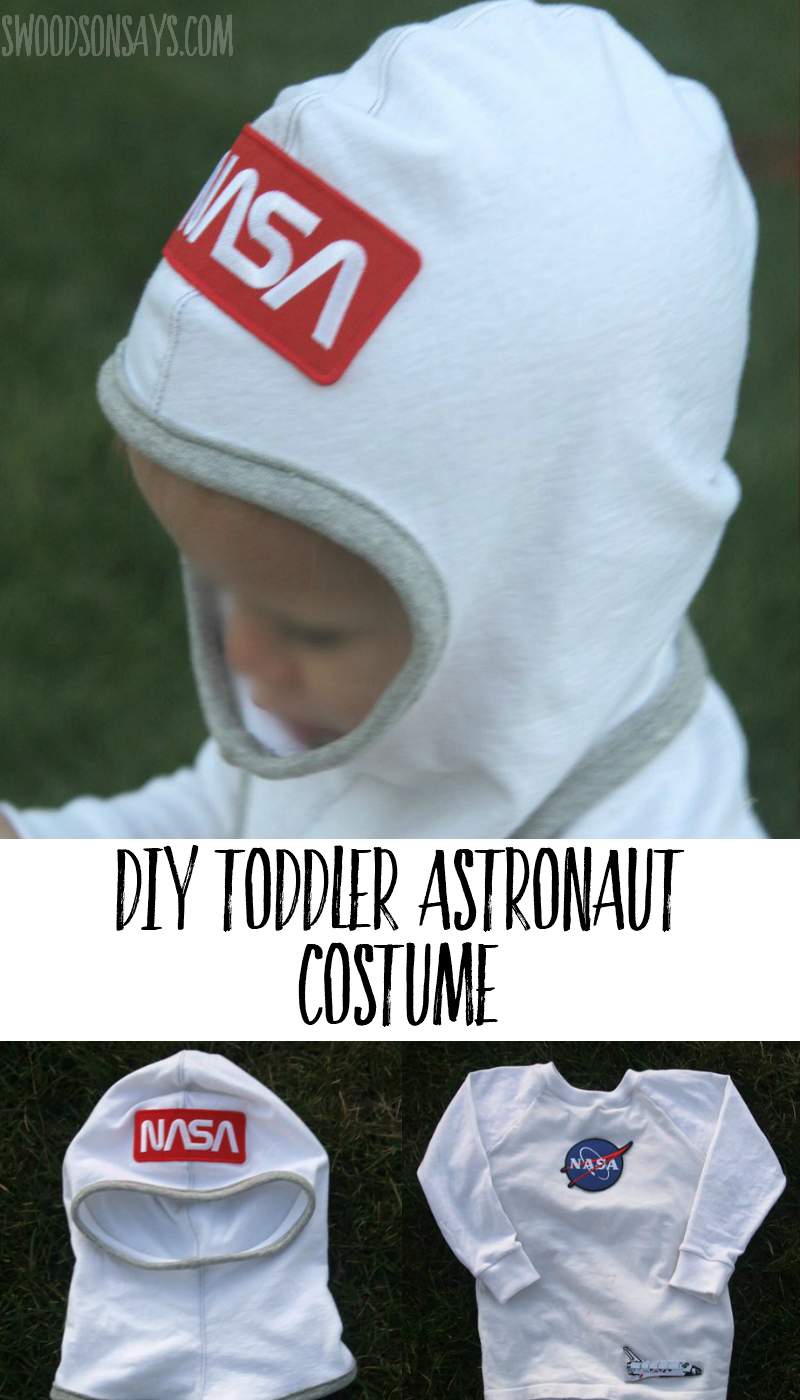
My little one wanted to wear a space suit but wouldn’t tolerate anything boxy or uncomfortable. I came up with a plan for how to sew a diy toddler astronaut costume and now I’m sharing the tutorial in case you want to make one too! One of my favorite things about this easy costume is that I can take the patches off and reuse them once he has outgrown this.

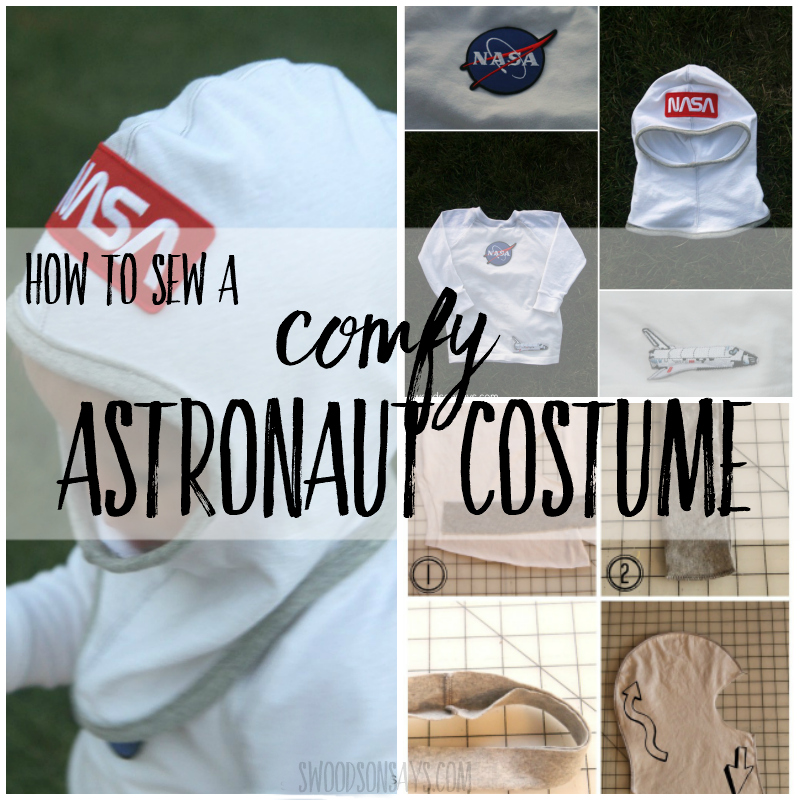
I already used the Greenstyle Balaclava pattern to make a DIY ewok hood and it was my first choice for a quick costume hack. The NASA patches are a trio from Amazon* and the shirt is the Recess Raglan from See Kate Sew. I used a mash of jersey sheet & upcyled shirts for the white pieces and then grey ribbing for the binding, white ribbing for the shirt’s cuffs/binding.
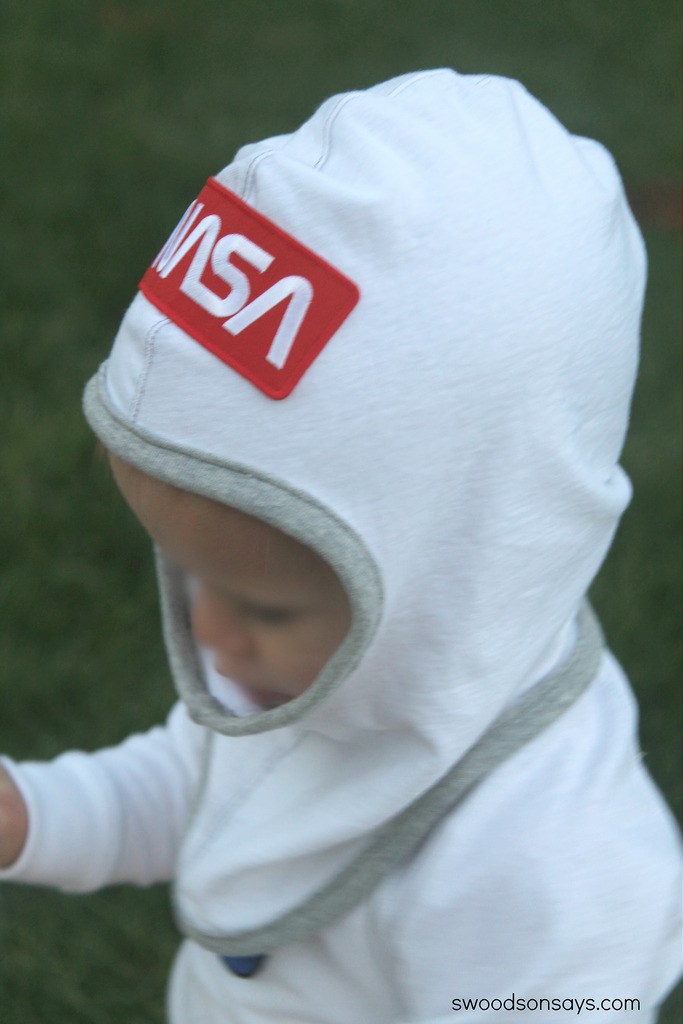
This is the size medium/small hood (3t shirt) cut at the shortest length. I probably could’ve cut it even shorter, once I added the binding it stiffened up a little which I didn’t anticipate.
I am happy with how it came out! Since he doesn’t “get” Halloween yet I’m not particularly inclined to put a ton of time into something he will only wear once so I love that the shirt is totally wearable and the hood can be a dress-up accessory.
I’m thinking if I have time I will make a cape with a jetpack applique – I know he wouldn’t keep a “real” jetpack backpack on!
If you’re interested in more halloween costume ideas that you can sew from regular clothing patterns, check out this post of “halloween hacks”!
Pin this sewing tutorial for a diy toddler astronaut costume with this link or this photo:
Diy toddler astronaut costume
Supplies
- Greenstyle Balaclava pattern*
- 2 pieces of grey ribbing with the stretch going horizontally: 2.25″ tall X 17 inches long & 2.25″ tall X 20 inches long
- 4 matching pairs of the balaclava cut out from white knit
- NASA patch*
- Iron
Steps
I used a 3/8 seam allowance throughout.
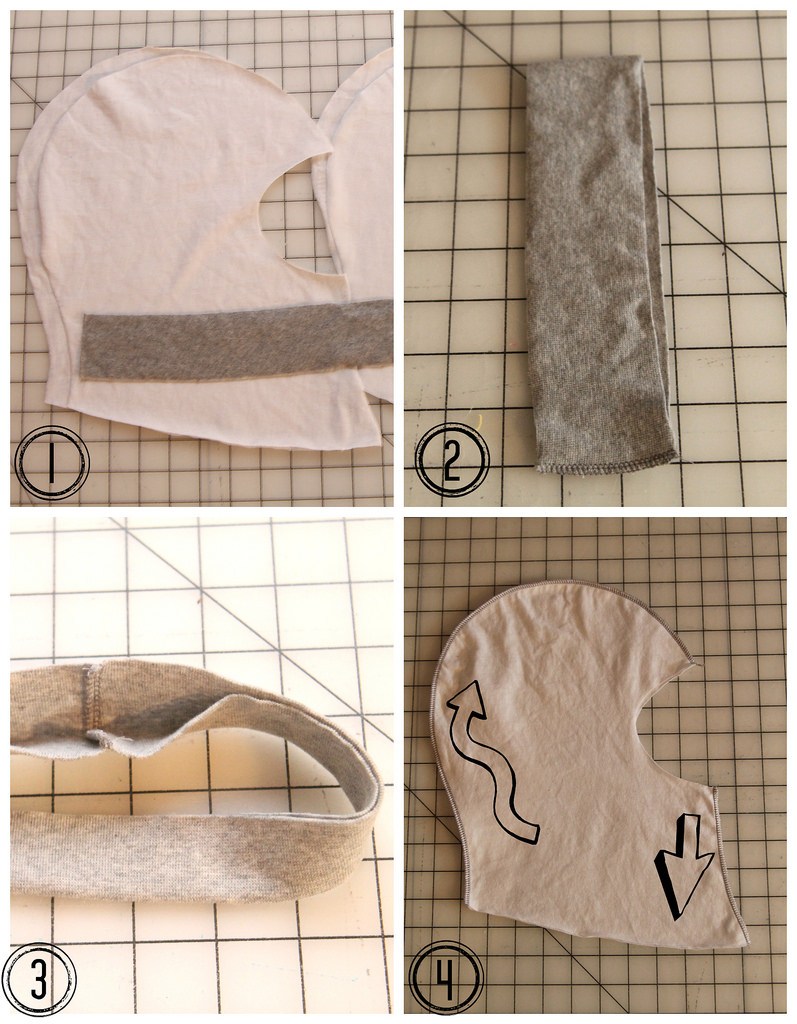
1. Cut all materials
2. Press both bindings in half, lengthwise (like a hot-dog), and then flatten out and place right sides together (RST), sew short ends together.
3. Fold back and press again, wrong sides together (WST).
4. For both pairs, put RST and sew along the long curved edge and the short throat edge leaving the eye/face gap raw.
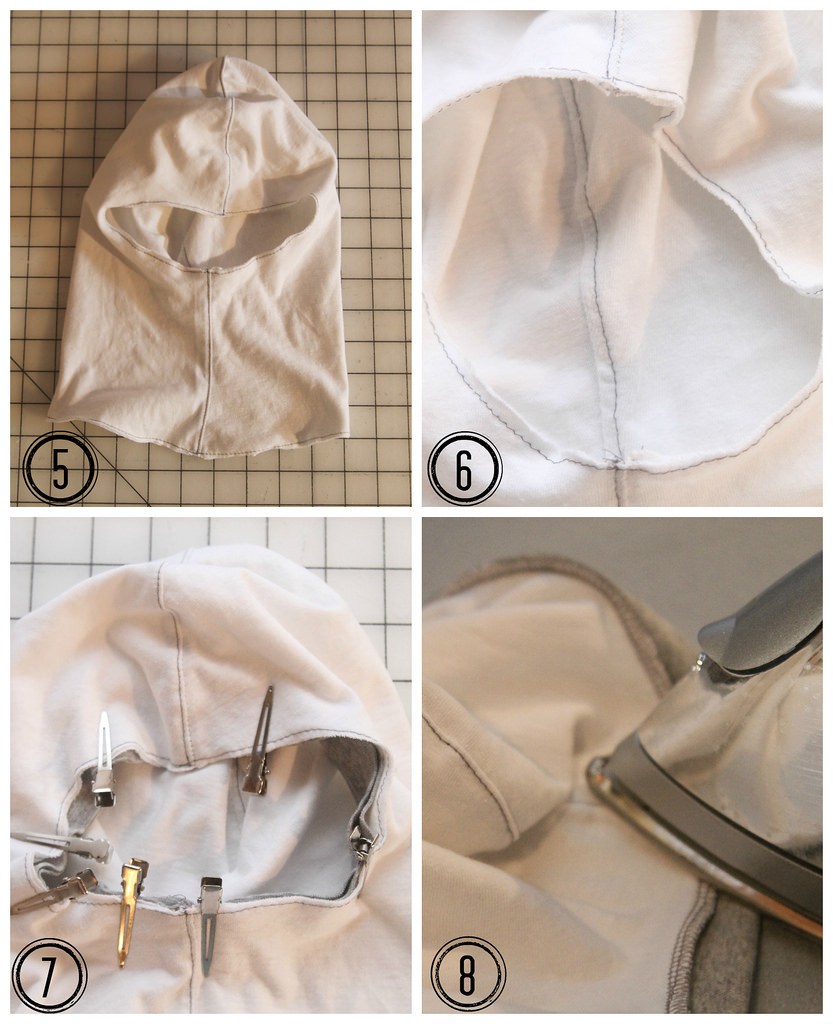
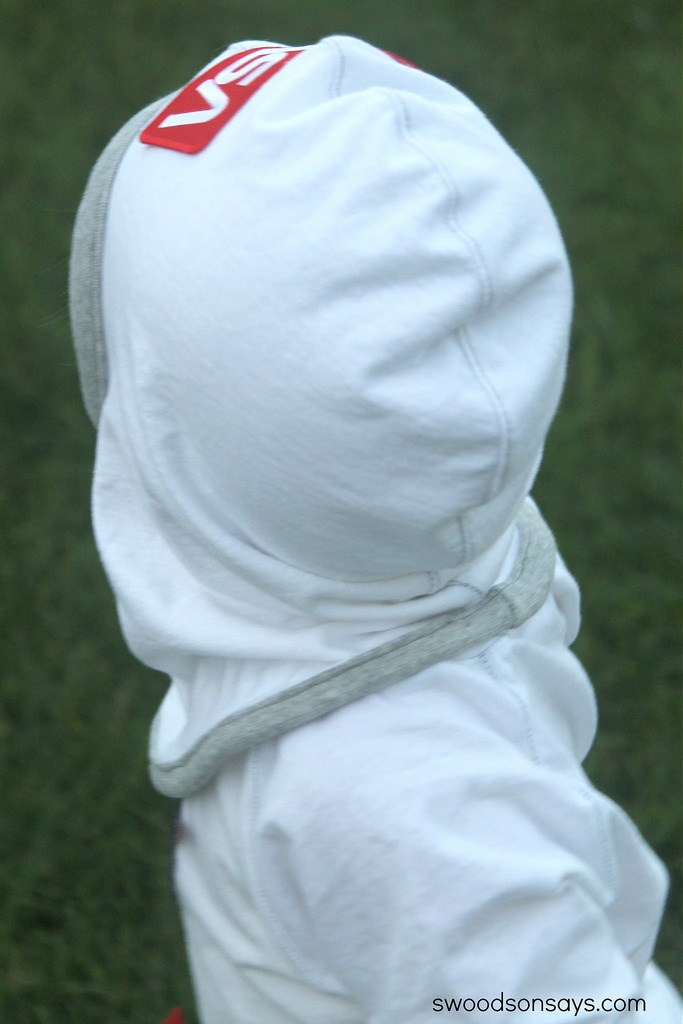
5. Turn one hood right side out and slip it over the other hood, aligning all the edges and seams. This place all the sewn seams on the inside, facing each other. I topstitched along the seams once the two pieces were aligned but that’s optional.
6. Baste around the face edge, catching both layers.
7. Stretch the smaller binding and pin or clip around, with the raw edges facing OUT so you can see them when the hood is right side out.
8. Press the seam allowance outwards.
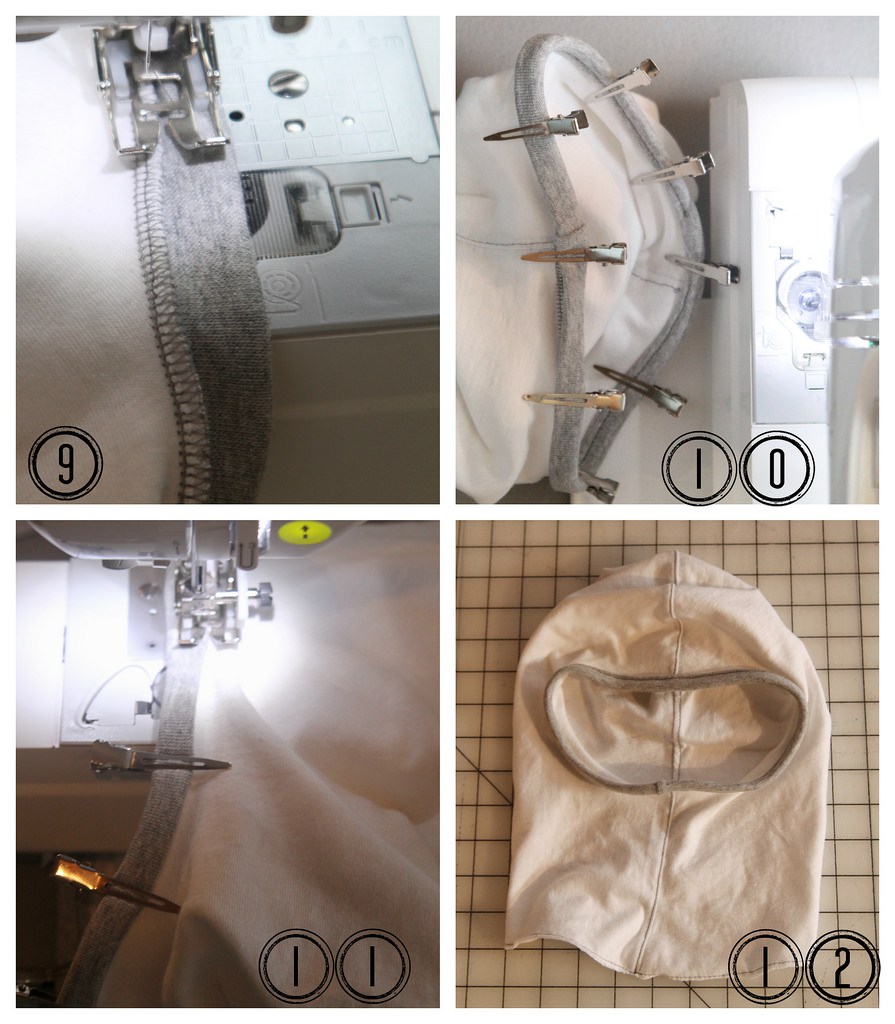 9. Baste the seam allowance down.
10. Fold the binding piece inwards, stretching it to cover the seam allowance. Pin around and press if desired.
11. Sew the binding down.
12. Admire your handiwork and then repeat steps 6-12 with the longer piece of binding and the neckline opening.
You’re done! Admire your soft, enclosed seam NASA hood after hand-stitching the patch on to the forehead.
doris
Monday 19th of October 2020
simplemente genial felicitaciones y gracias , compartir hace bien
Michelle White
Sunday 4th of October 2015
This is so brilliant! I love that it can be worn any time! Thanks for linking to my party!
Stephanie - Swoodson Says
Sunday 4th of October 2015
Thanks for hosting one, I haven't seen some of the fun ones that are linked up!
Pam @Threading My Way
Saturday 20th of December 2014
I'm sure this little hood will get lots of use in the dress up box... taking him to many far away places.
Stephanie - Swoodson Says
Thursday 25th of December 2014
I'm slowly building up the dress up wardrobe! So much fun.
Melissa
Thursday 9th of October 2014
This is so cool! Thanks for the tutorial. Now I wish I had a little astronaut in the house
Stephanie - Swoodson Says
Thursday 9th of October 2014
Thanks Melissa!
Starly
Thursday 9th of October 2014
Love this! Being in Texas I did not think I had any use for the Balaclava pattern. We do a ton of dress up outfits though. I'm going to have to get it now!