
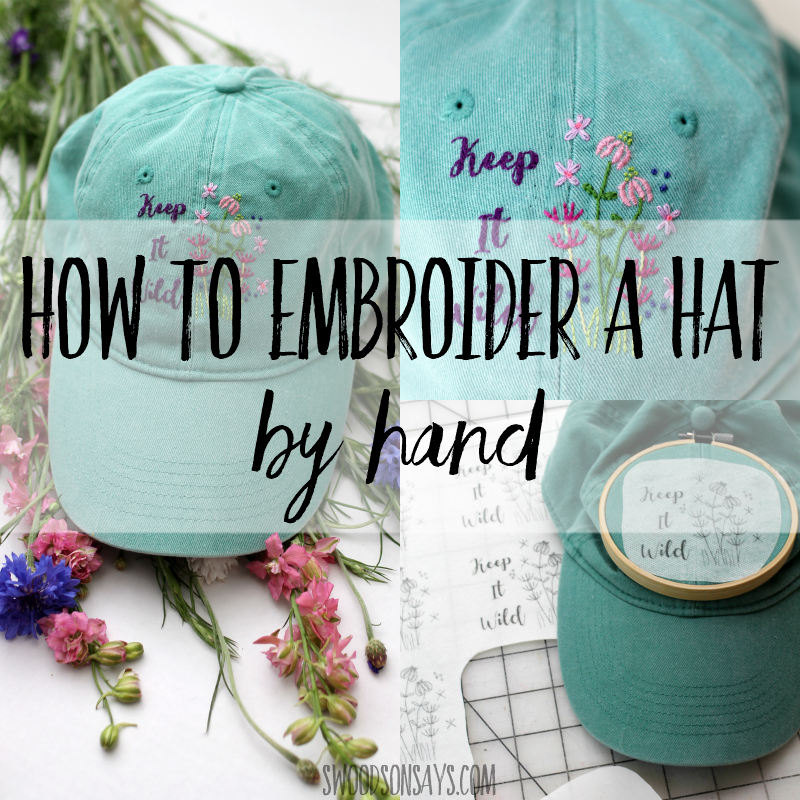
 Hand embroidery is my favorite summer project because you can take it on the go! I always have a hand sewing project for summer road trips and what better way to get ready for our Yellowstone National park trip than this fun handmade wildflower baseball cap! Anyone can do this, and I’m excited to show you how to embroider a hat by hand along with this free floral hand embroidery pattern.
This post was sponsored by JOANN, which means they supplied materials and compensated me for my time, but all opinions are my own.
Don’t be intimidated by the fact that it is on a hat! This is truly a beginner project. I have the pattern designed so several of them print on one page, so if you’re not loving the stitches you made, just seam rip them out, peel off the pattern, and start fresh!
If you like hand embroidery, you’ll like these other posts too!
- 15+ Free hand embroidery patterns
- How to embroider on a tshirt – with a cat pattern
- How to hand embroider shoes
- Online embroidery classes for beginners
- Modern embroidery kits for beginners
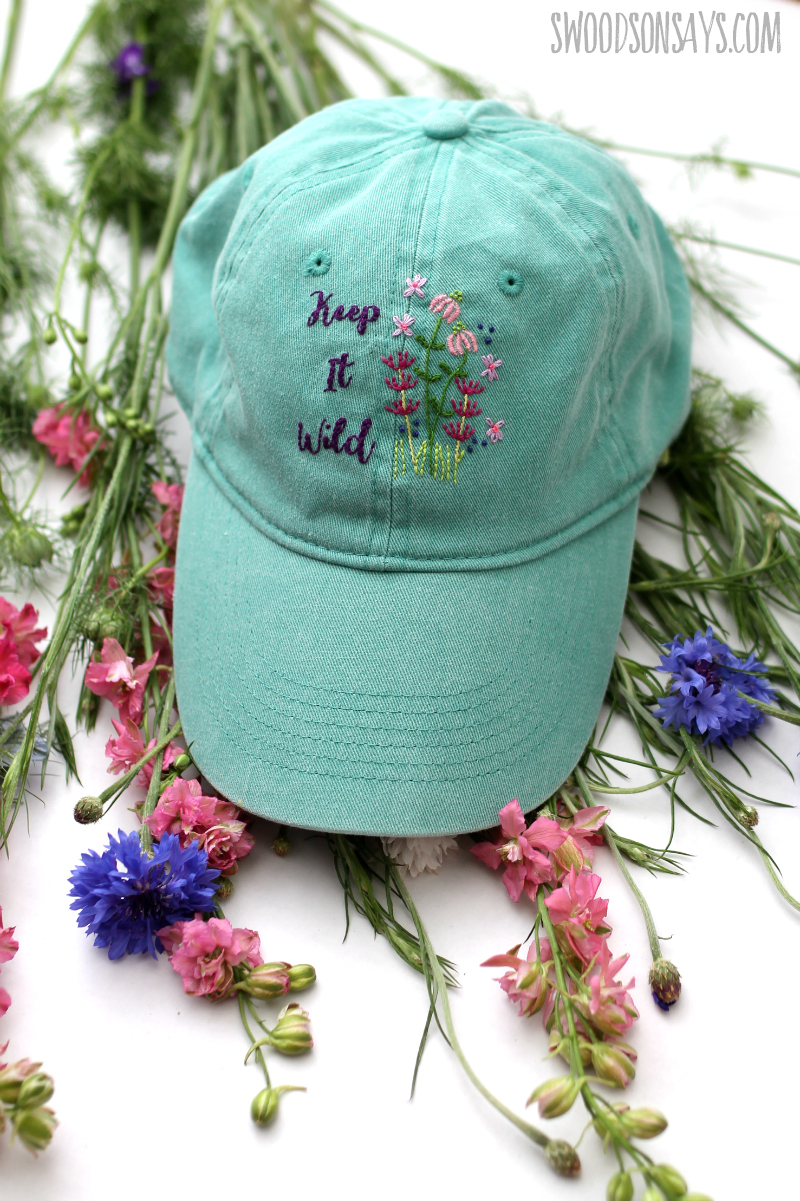
I am loving the hand embroidery trend on clothes lately, but can’t swallow all the designer prices. This is an easy way to stitch on hats, jeans, bags, tshirts, anything! This little pattern would look adorable stitched in a hoop as an ornament or a patch on a backpack, too.
When I’m not making something, I’m usually outside with my kids. I had so much fun matching those two hobbies together with this project, and I hope you love it too!

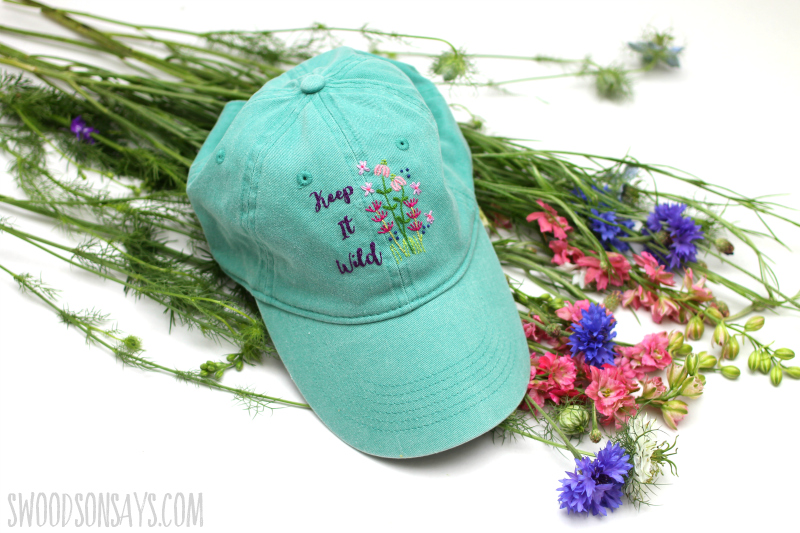
Pin this tutorial for how to embroider a hat by hand for later with this link or collage image:

How to embroider a hat by hand:
Supplies
- Comfort colors Hat – this is the same one I used, I think it looks much bluer in real life
- Sulky Fabri Solvy
- Sharp, micro tip scissors
- Hand embroidery needles
- 4″ embroidery hoop
- DMC embroidery floss
- Free PDF pattern- sign up for my newsletter and get the free download once you confirm your subscription! If you’re already a subscriber, you can access the pattern with the password in each newsletter, in the resource library.
DMC Colors:
- Dark blueish purple: 791
- Lime green: 907
- Citrine green: 472
- Grass green: 905
- Light purple: 554
- Dark purple: 550
- Fuchsia: 718
- Light Pink: 957
- Coral: 956
Steps:
Step 1:
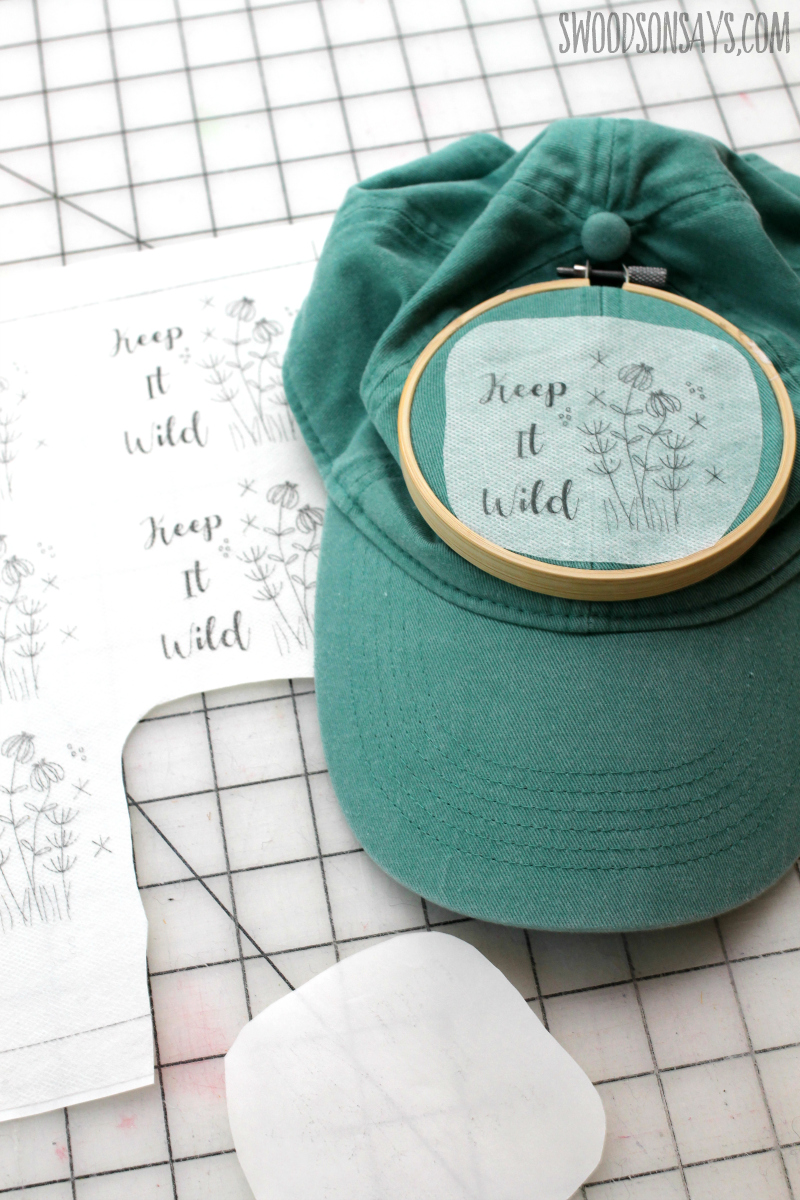
Prewash your hat! If you ever have any intention of machine washing it, you need to wash it the same way first to eliminate any shrinkage. Print the PDF pattern on to Fabri-Solvy, trim roughly around, hoop the hat and peel off the back/press to adhere it.

Step 2:
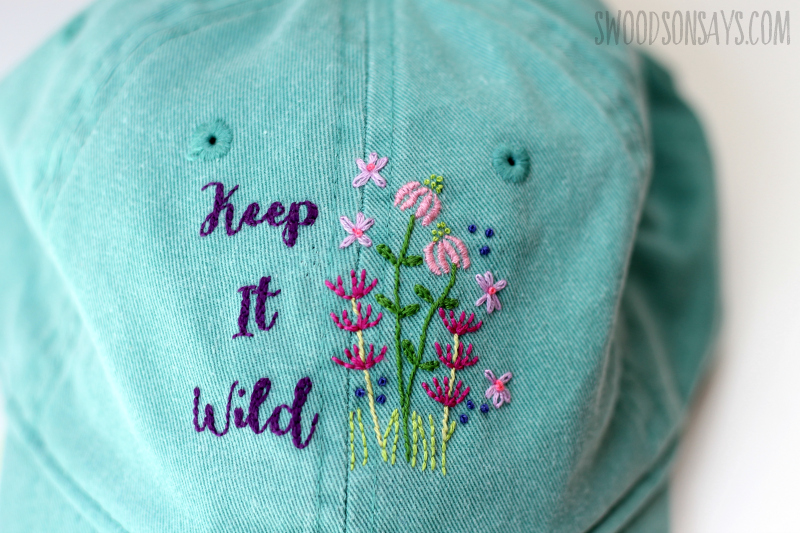
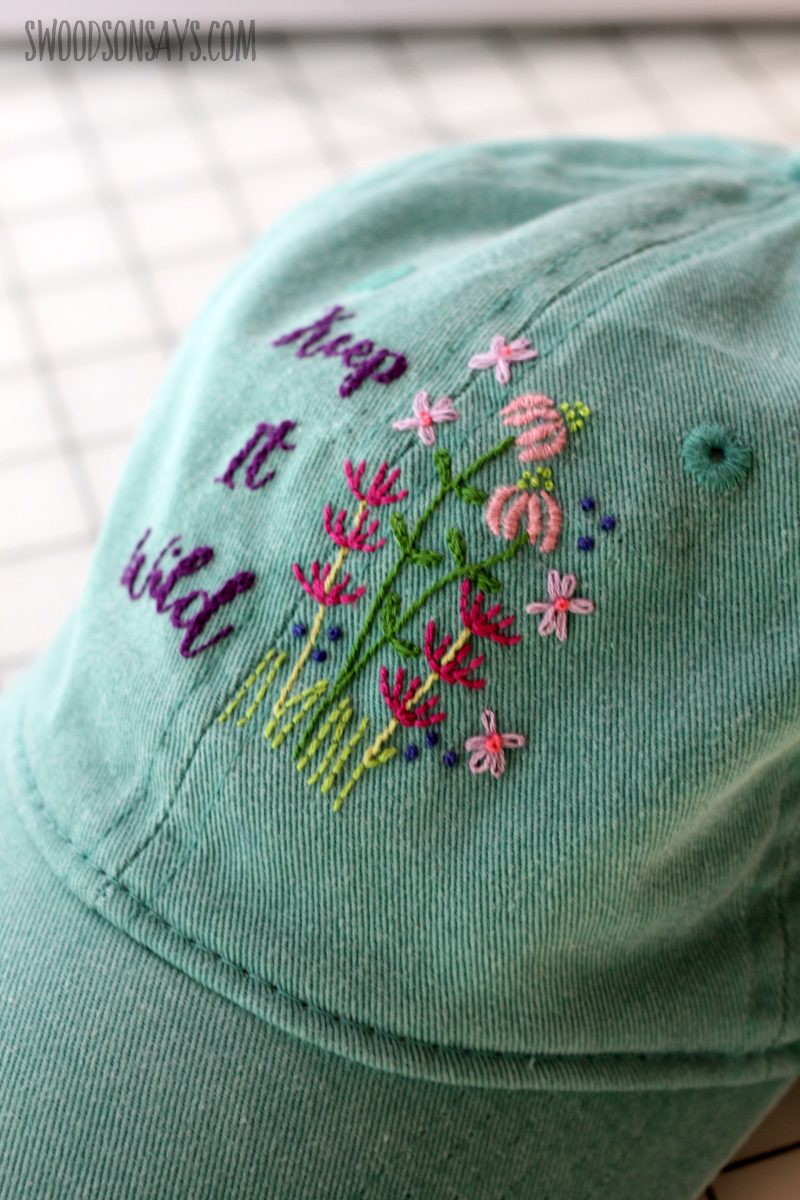
Start stitching! All stitches were done with 2 strands unless otherwise noted below:
Text: Filled backstitch
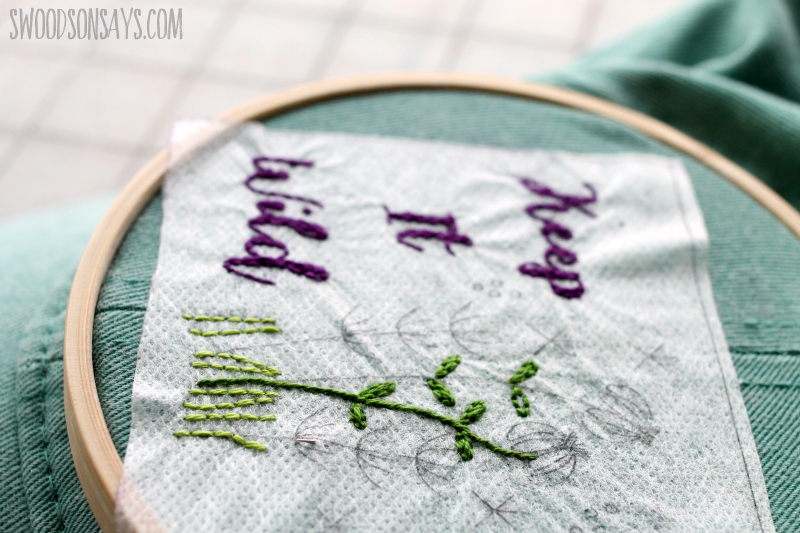
Green stems: stem stitch
Green leaves: filled backstitch
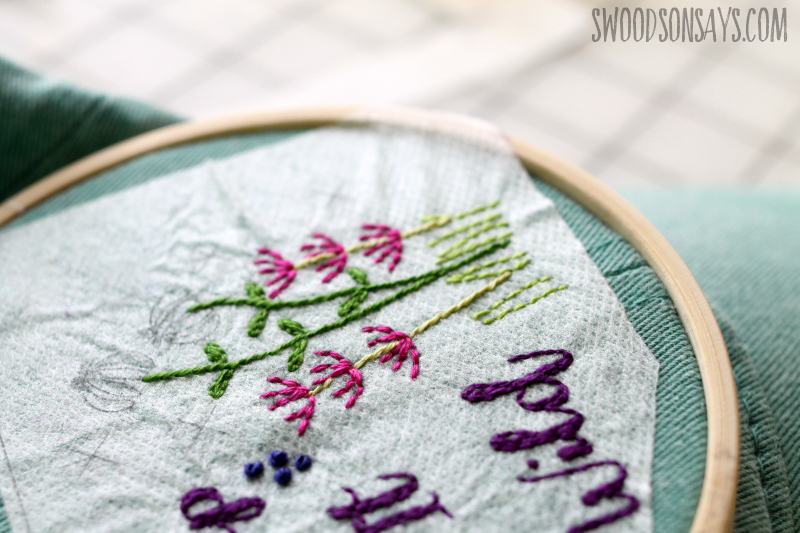
Fuchsia flowers: 3 strands
Light pink flowers: satin stitch (as shown in the picture, I prefer to do a backstitch around the outline and then satin stitch over it!), 1 strand
Light purple flowers: lazy daisy stitch
Step 3:
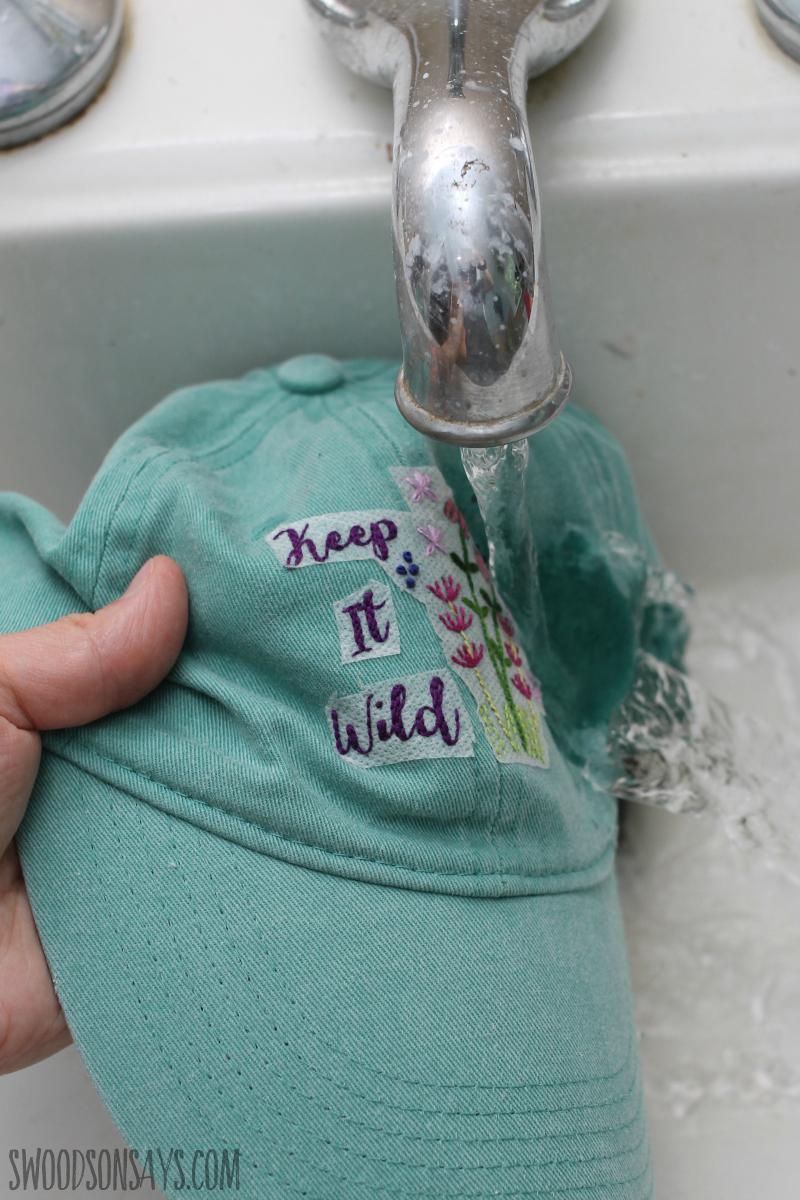
Once you’re done, take the hoop off and turn it upside to soak in warm water for a while, then use running water to finish rinsing away the Fabri-Solvy.
Step 4:
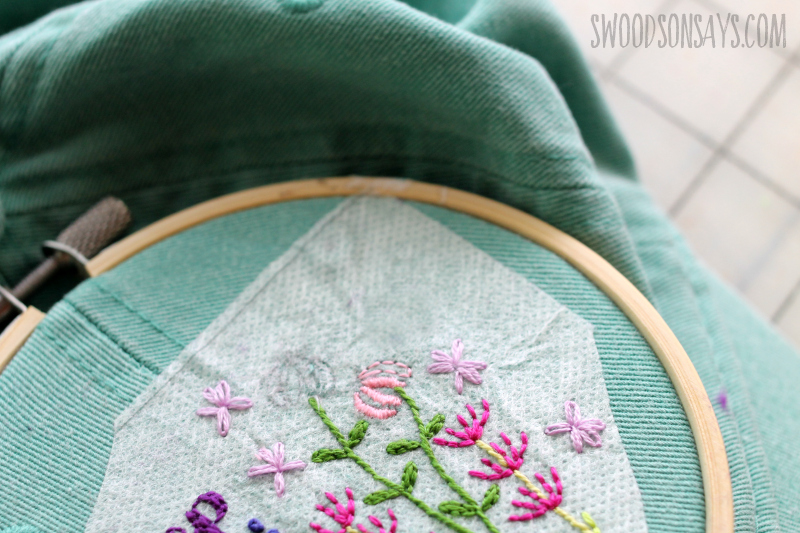
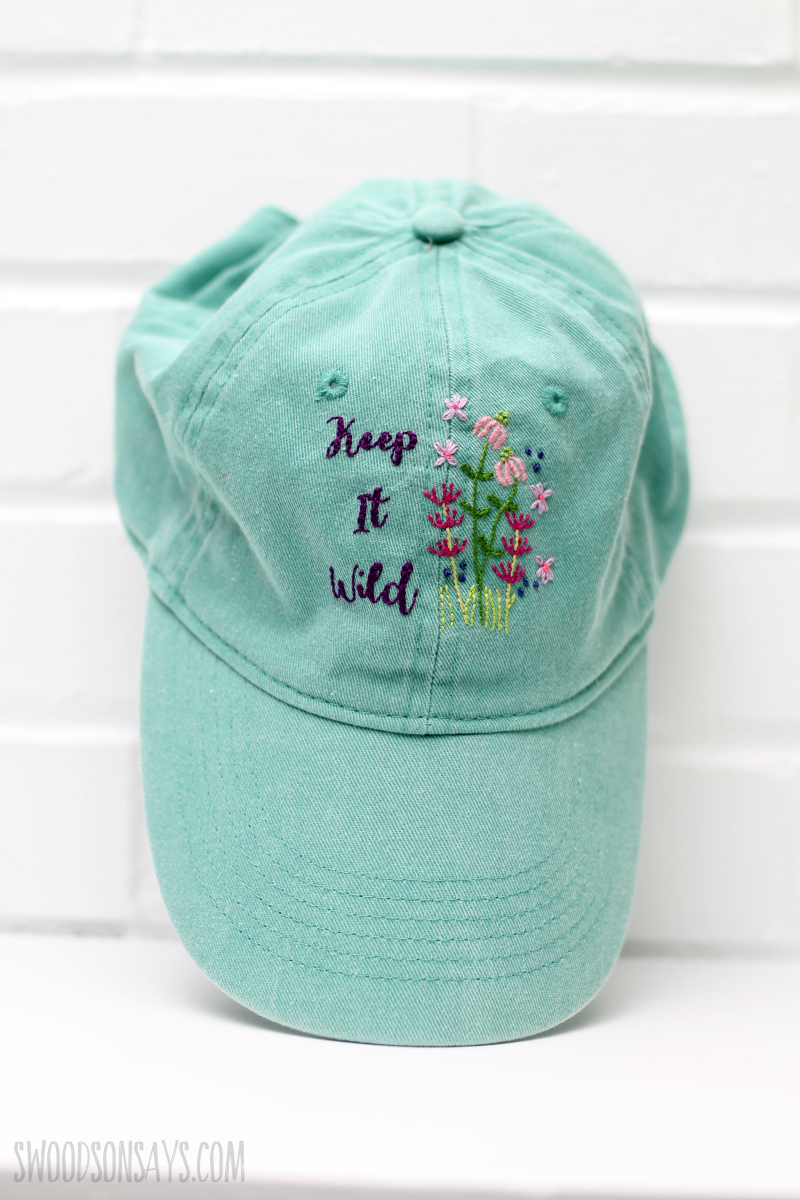
Add any freehand stitches for extra buds or flower centers, like I did, let it dry in the sun (I recommend balling up a towel underneath to help shape it) and you’re ready to wear it!
Anne Grasmick
Friday 23rd of May 2025
No one ever mentions hand embroidery over the xe yet seam!! Or any seam. This was so difficult. Any tips? Thanks
Stephanie - Swoodson Says
Friday 6th of June 2025
I'm sure the difficulty level depends on how thick the hat is - forceps maybe would help pulling it through for you?
Alyssa
Tuesday 23rd of April 2024
Thank you for this great tutorial! Did you back your embroidery on the inside of the cap after finishing? If someone wanted to, is there a material you recommend? Thanks!
Stephanie - Swoodson Says
Tuesday 4th of June 2024
I'm sorry I missed this comment initially - I did not back it and I've machine washed/dryed it several times over the years without issue BUT if you wanted to, I would try tender touch stuff -- https://amzn.to/3KuppP1
Malia Bishop
Wednesday 28th of June 2023
I love this! What size embroidery needle should I get? Thanks!
Stephanie - Swoodson Says
Wednesday 28th of June 2023
I'd love to see it if you try it! I linked the ones I used under 'supplies' - but it honestly matters more depending on what floss/thread you're using, just want to make sure it fits through the eye :)
aimee
Thursday 2nd of March 2023
Hi can you embroider on straw hats? is there another way to peel away the paper without running water?
Stephanie - Swoodson Says
Thursday 2nd of March 2023
I have never tried! No, it only removes with running water.
JoAn
Thursday 20th of January 2022
Can you print right on the sulky fabri solvy or do you have to trace the pattern onto it?
JoAn
Thursday 20th of January 2022
@Stephanie - Swoodson Says, Thank you very much
Stephanie - Swoodson Says
Thursday 20th of January 2022
Hi! You can print right on it, with laser or inkjet. I have a fuller walkthrough of the product here if you're interested: https://swoodsonsays.com/fabri-solvy-an-embroidery-game-changer/