
See how to make a pin cushion from an upcycled planter with this thrift craft project!
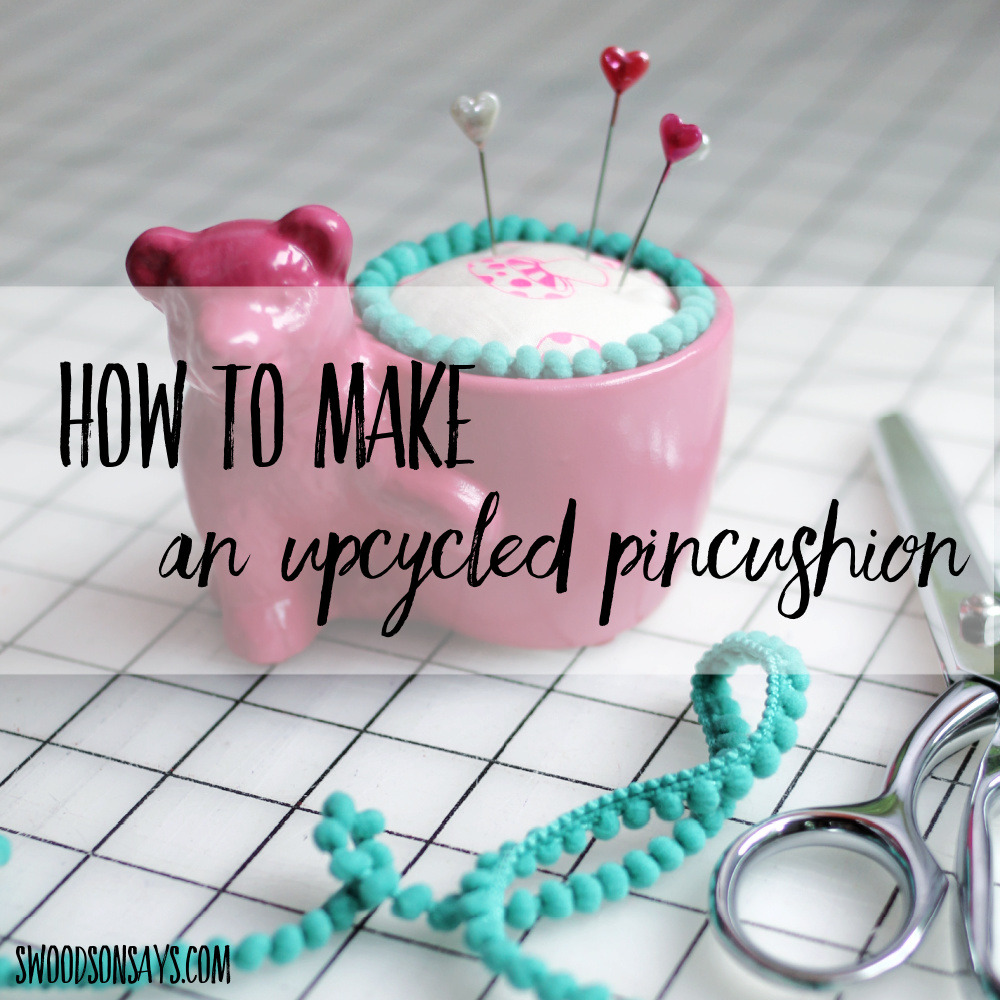
I’ve been lurking in the knick knack aisles at the thrift shop lately, trying to think of creative ways to use up the little trinkets that no one seems to want. I decided to keep an eye out for pincushion potential and here is my first project to share, didn’t it turn out cute! Keep reading for how to make a pin cushion from an upcycled planter – this tutorial would work for any planter or object with a hole (I have a holiday wax warmer on my shelf to try next!).
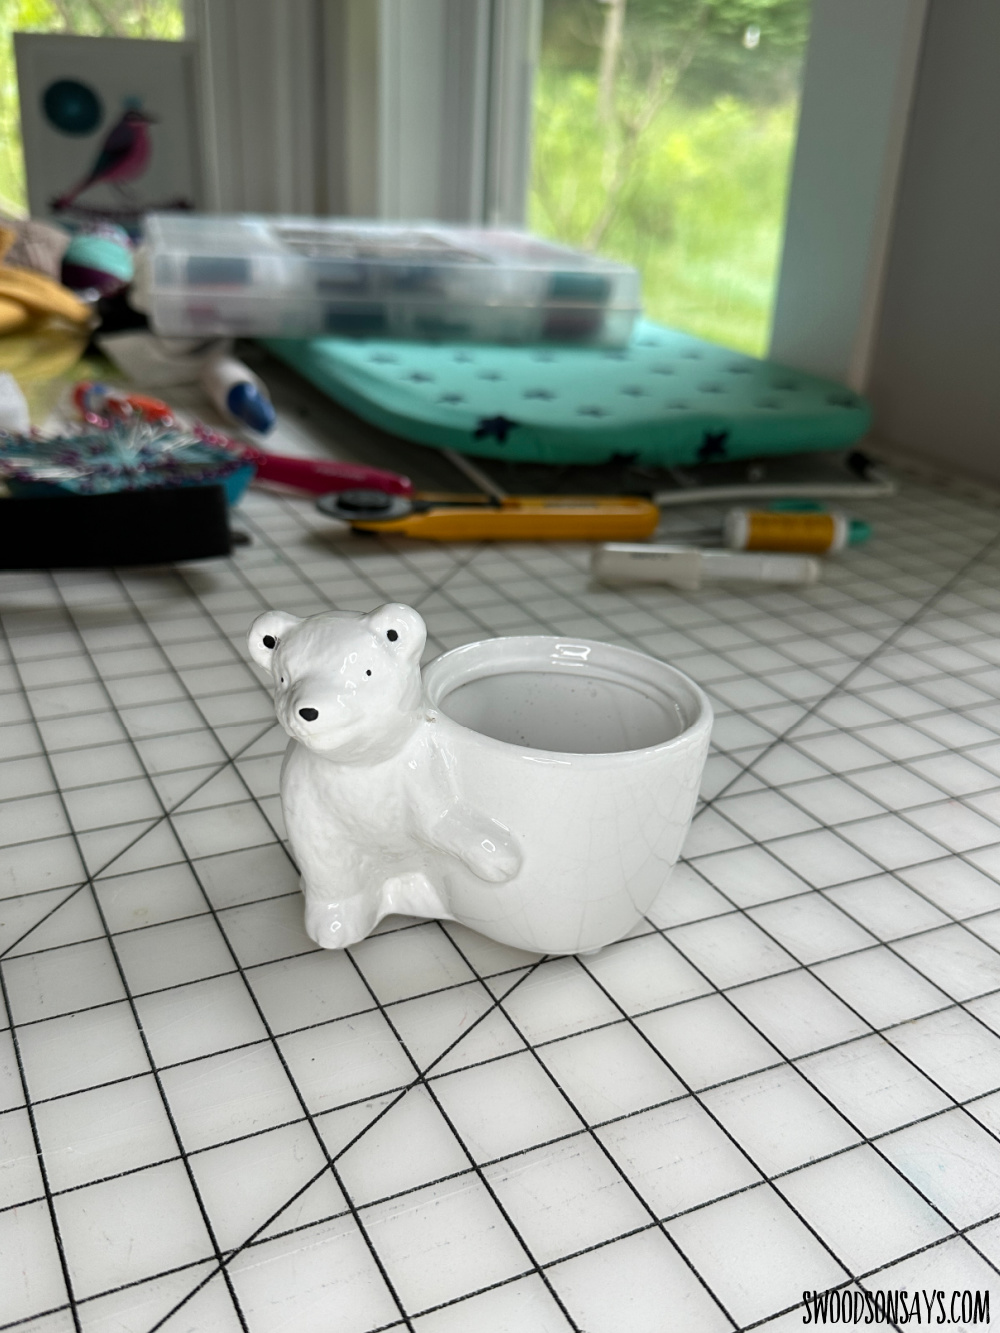
Here is the before! Just a cheapie little bear planter, with cheesy painting and dirt still inside. I washed and dried it before spray painting it of course!
If you like this project, you should check these out while you’re here!
- 25+ Free Pincushion Sewing Tutorials
- 18+ pairs of adorable embroidery scissors
- 30+ of the best fabric scrap projects
- 20+ upcycled thread spool crafts
If you don’t want to use pink spray paint I’ve also had good luck with this acrylic paint on ceramics in the past.
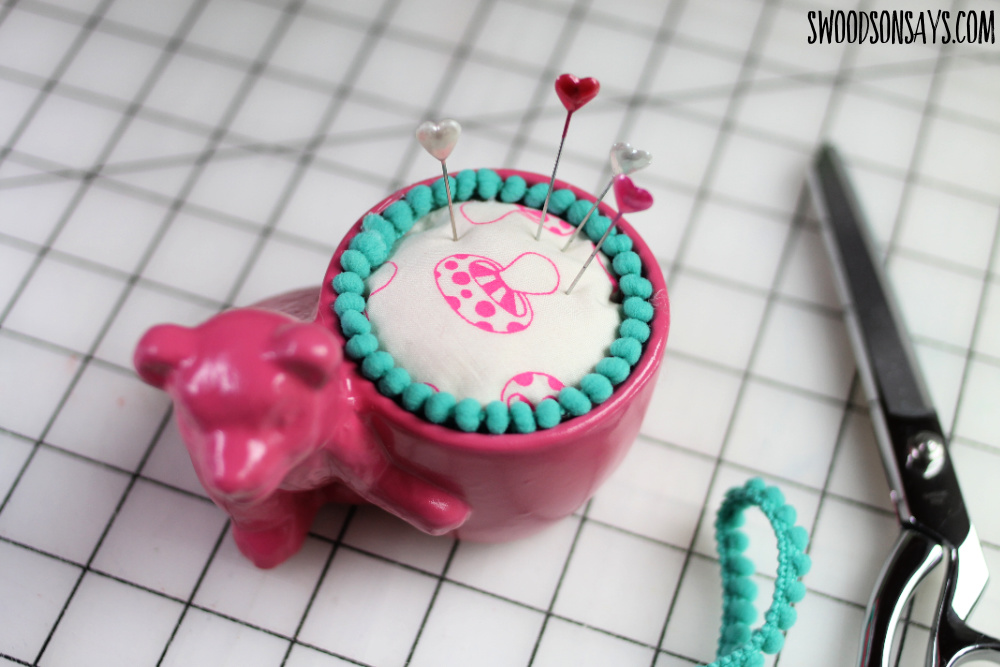
I had trouble choosing a print to use but when in doubt, mushrooms are the best! I got a few comments on social media that they’d pass on the pom-pom trim which is fine because it’s totally optional.
Pin this tutorial for how to make a pin cushion from an upcycled planter with this link or collage image:
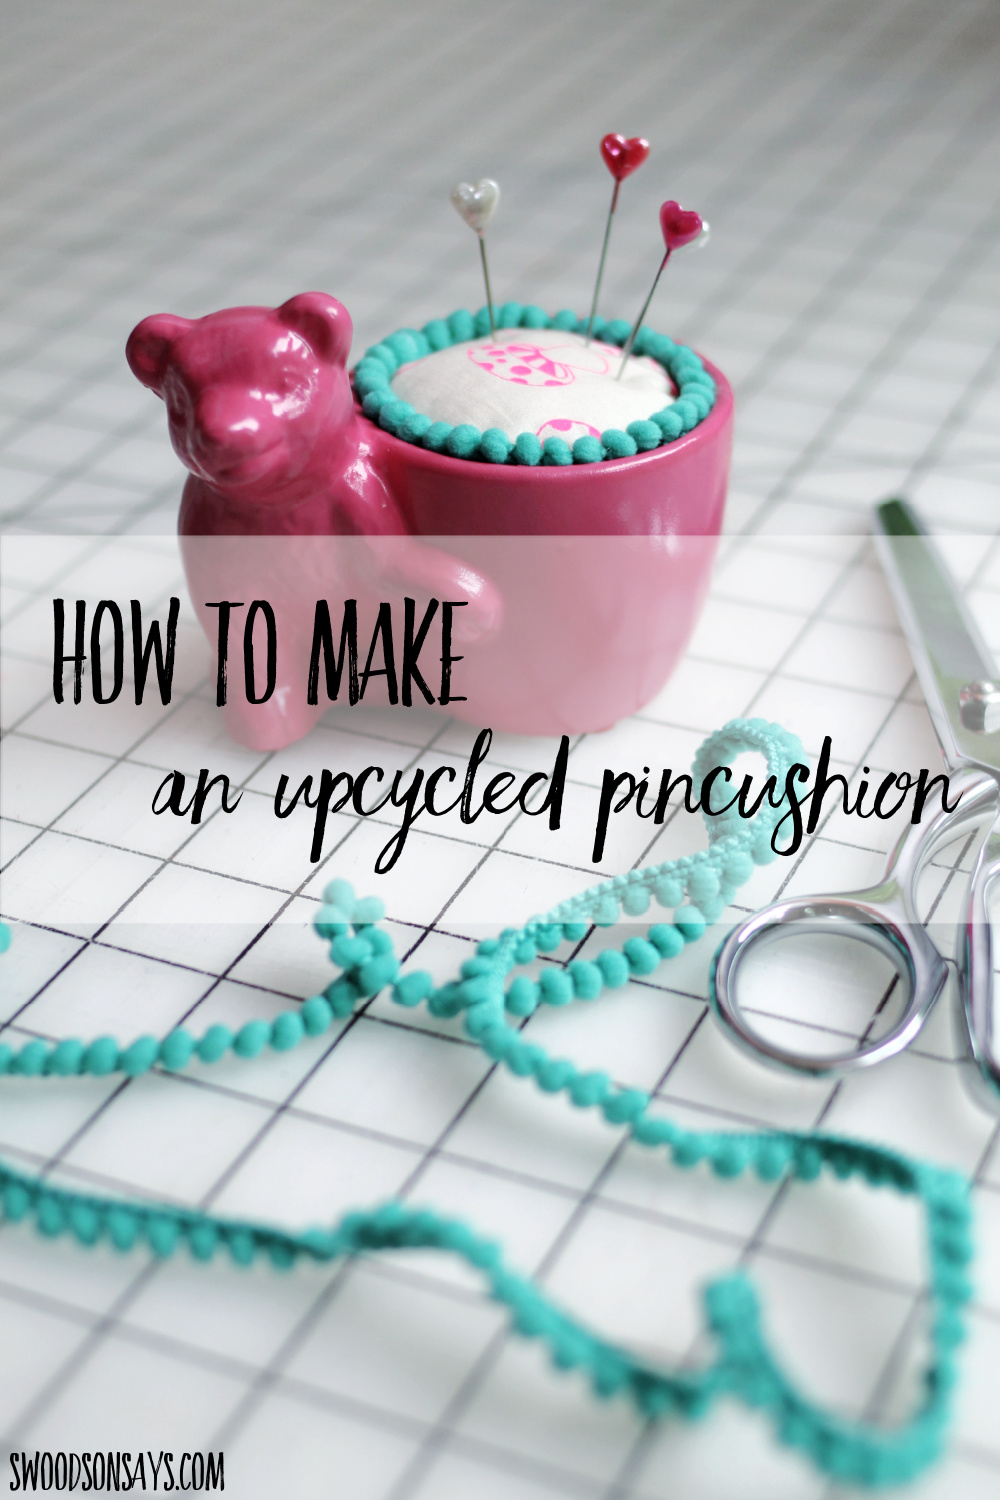
How to make a pin cushion from an upcycled planter
Supplies
- Scrap of felt
- Stainless steel wool or scrubbie
- Hand sewing needle & thread
- Poly-fil (mine is from an old pillow I cut open to reuse!)
- Hot glue gun
- Woven cotton scrap – this is the mushroom print I’m using!
- Mini pom pom trim
- Spray paint
Steps
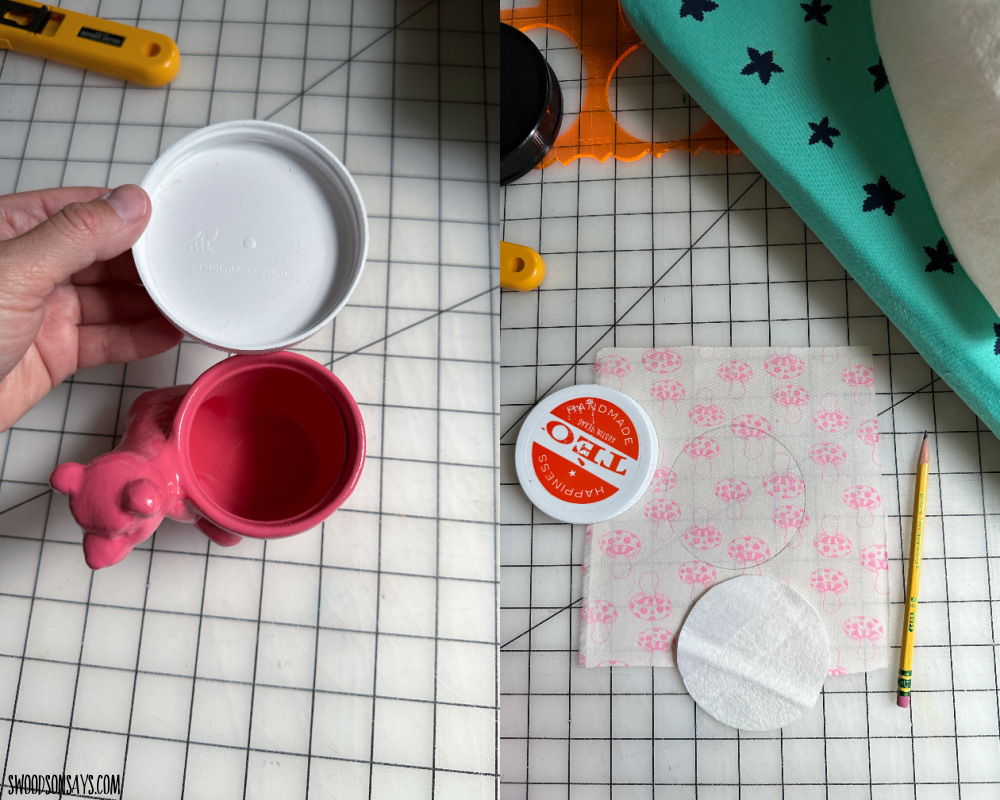
Step 1- Spray paint your planter, let dry. Find something to trace that is circular and about 1.5x bigger than the planter opening. Trace the circle on the wrong side of your pincushion fabric spray and then cut another wool felt circle to match (or smaller).
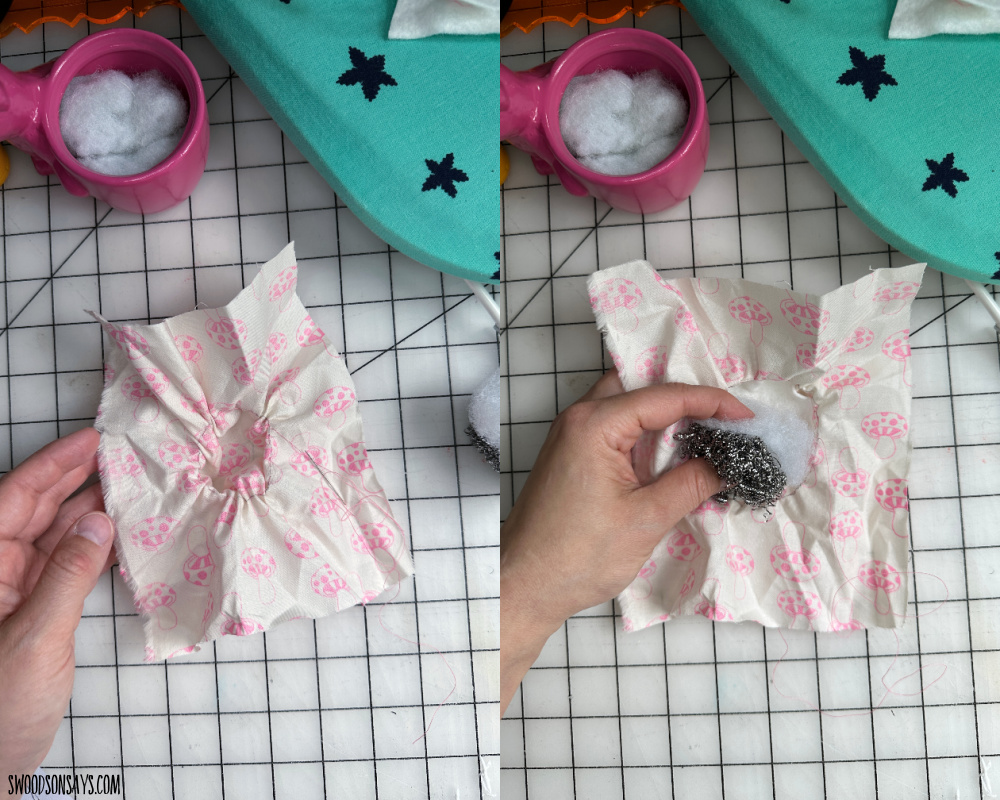
Step 2- Hand sew a running stitch around the circle you just traced. Gently cinch it up and stuff – first a layer of wool felt, then the steel, and then polyfill to fill out the edges. Pull the stitching taut softly and make sure the gathers are all even the entire way around.
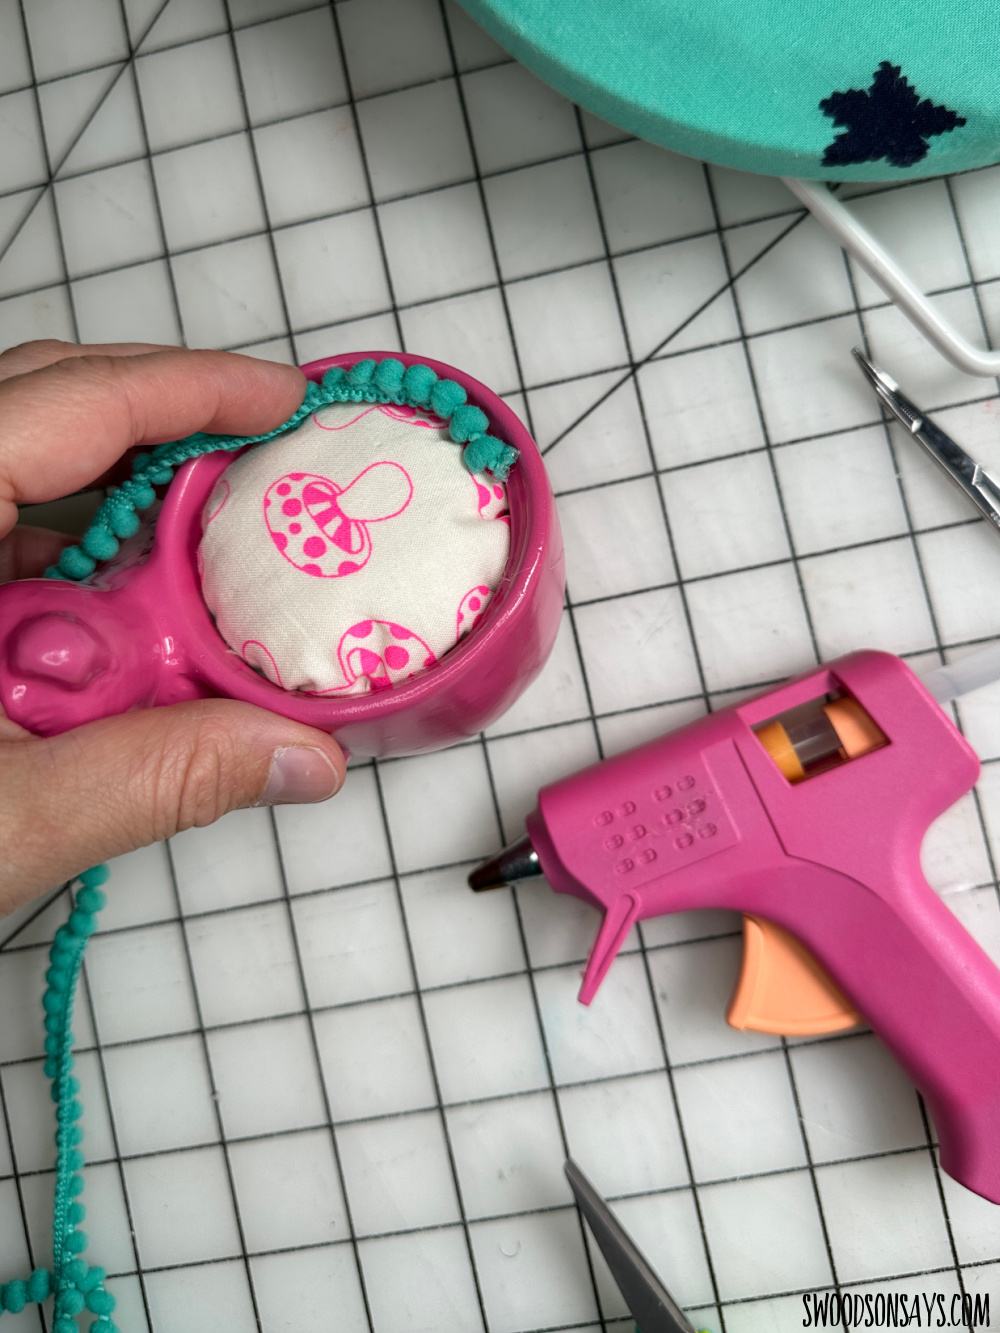
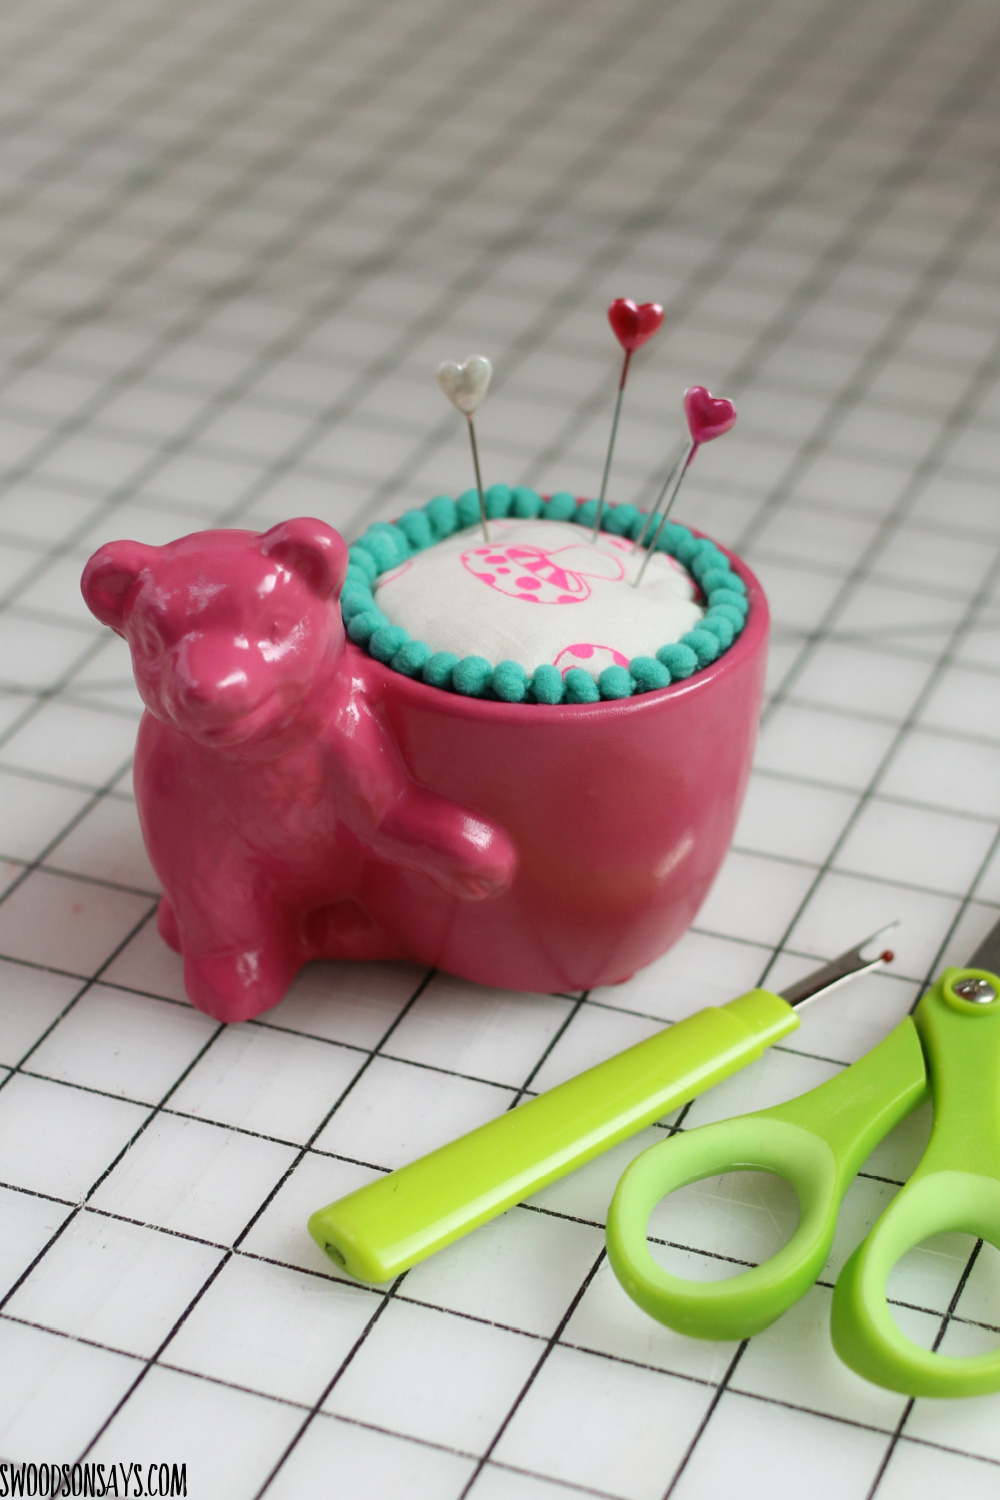
Step 3- Stuff some poly-fil or glass beads into the bottom of the planter for weight. Then shove the pincushion down into the opening and hot glue around the edges. Hot glue pom-pom trim around the edges if desired!
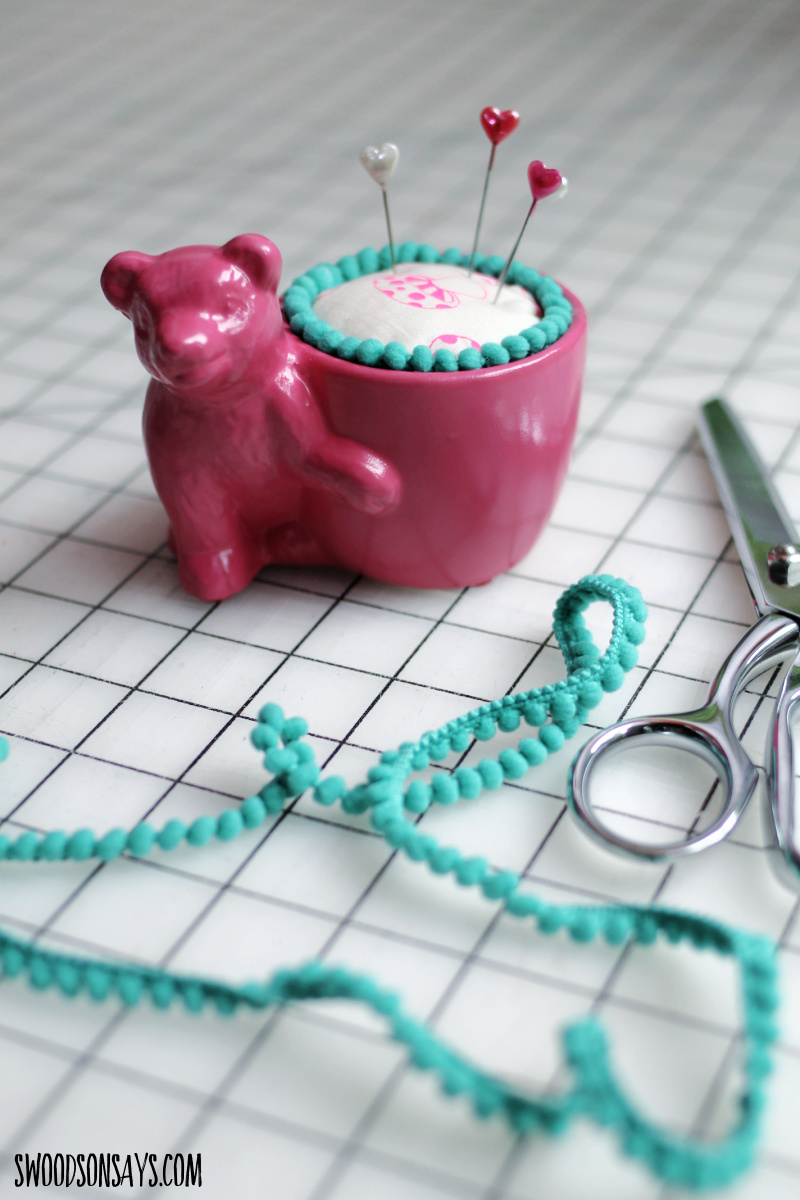
You’re done! Isn’t this a cute project!
Vox
Friday 2nd of June 2023
This is a really cute project. We are on the verge of our resale shopping season, so I will be looking to try this project. 💥
Thanks for constantly keeping me looking for ways to upgrade my crafting space and take advantage of upcycling. 🙌🏾
Stephanie - Swoodson Says
Monday 3rd of July 2023
love to hear that, thanks for reading and commenting!
Donna
Friday 2nd of June 2023
Love this idea. I have a small planter from when I was born, 65 years ago. I finally know what to do with it. Thank you!
Stephanie - Swoodson Says
Monday 3rd of July 2023
yay!! happy to read it. i'd love to see it if you try :)
Brenda
Friday 2nd of June 2023
I love the pom pom trim! Your pin cushion is adorable! I love the colors you chose. I bought a couple of little plants to do the same thing with.
Stephanie - Swoodson Says
Tuesday 4th of July 2023
yay! I'd love to see them if you try it!
Judy
Friday 2nd of June 2023
Just love this idea and have two small planters at home ready to become pincushions. Thanks for sharing.
Stephanie - Swoodson Says
Monday 3rd of July 2023
yay!! happy to hear it, I'd love to see it if you try it :)