

Ticking off another refashion from my stash, and sharing how to make jeans skinnier! I refashioned these overalls to fit a little better and attempted to cover up the stains with indigo dye. There was a hole I decided to try a big, hand embroidered patch over, keep reading to see what I’m not so sure about or to follow along for a tutorial to try it on your own!
Here is a before & after showing the difference in dye color. I’d honestly hoped to go even darker, but I ran out of sunshine and patience so only dipped the jeans twice.

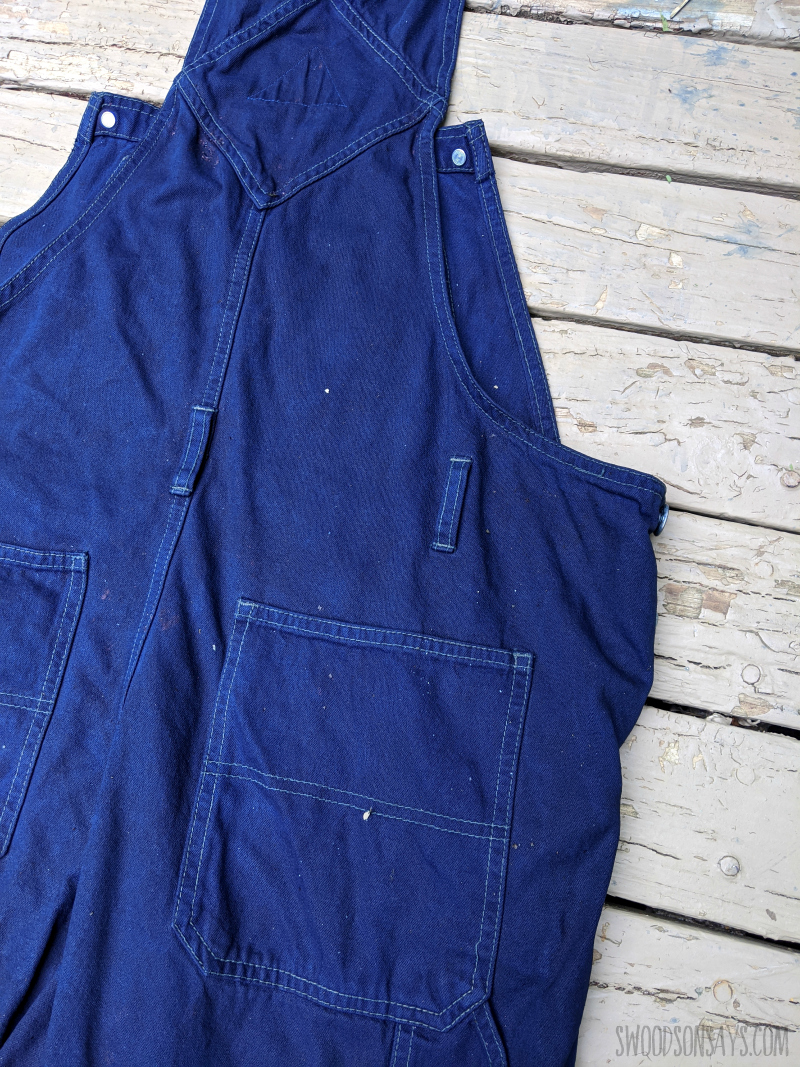
Here’s a better view of the ‘before’! Huge, 90’s style overalls with lots of dirt & grass stains, a hole, etc. I rescued these from the Goodwill Outlet bins, my favorite place.
If you love refashioning, check out these other posts too!
- ive Tips for Thrift Shopping to Upcycle & Refashion
- 10 refashioning tips for successful sewing
- 13+ ways to refashion a plain t-shirt
- 12+ dress refashion tutorials
- Modern books on refashioning
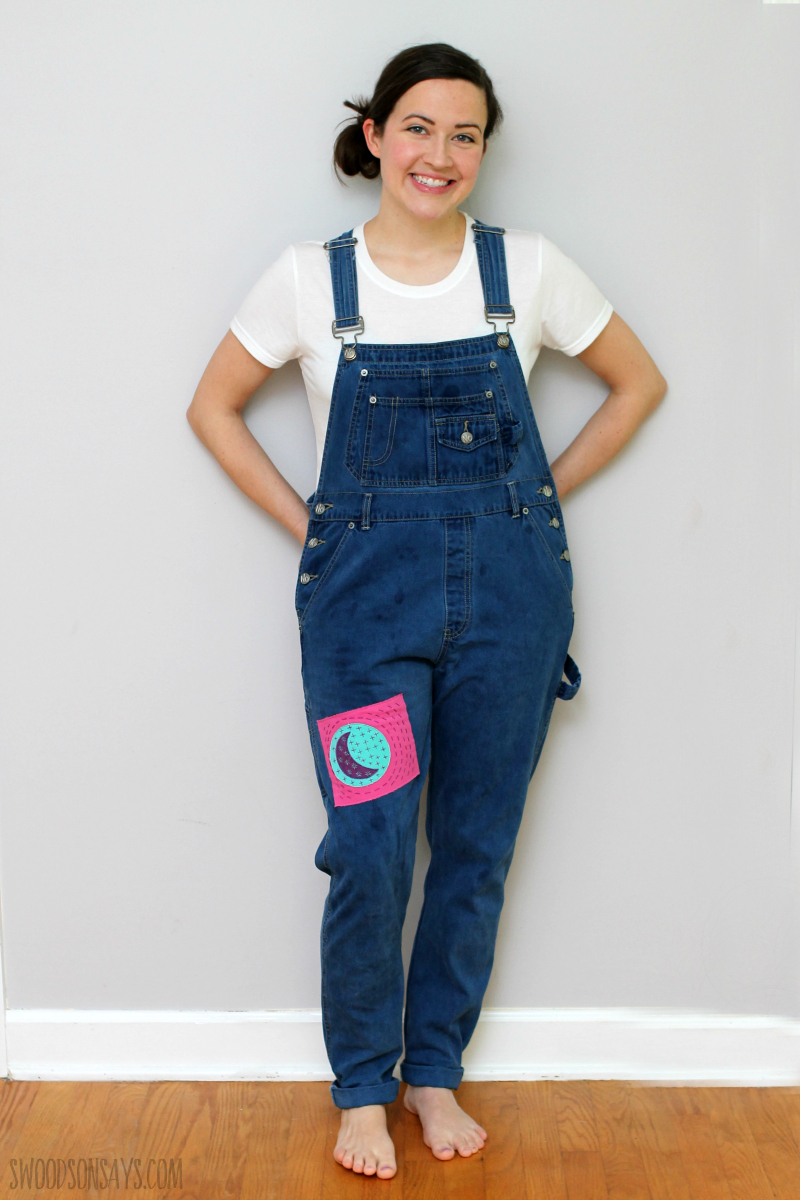
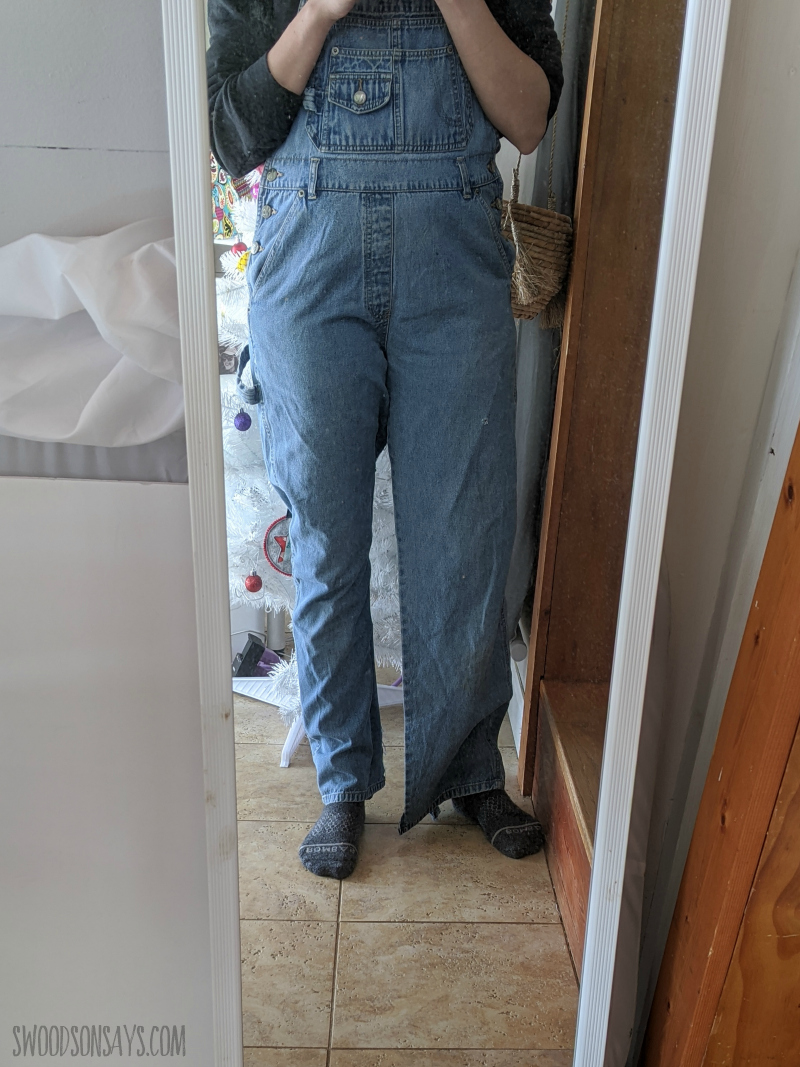
And a clearer shot of the ‘after! I slimmed the legs along the inseam, rolled the hem, added the patch, and added the dye. I’m contemplating a few more changes, one of which is to unroll the hem and change it to a raw edge instead! Not loving the cuffs as much as I thought I would.
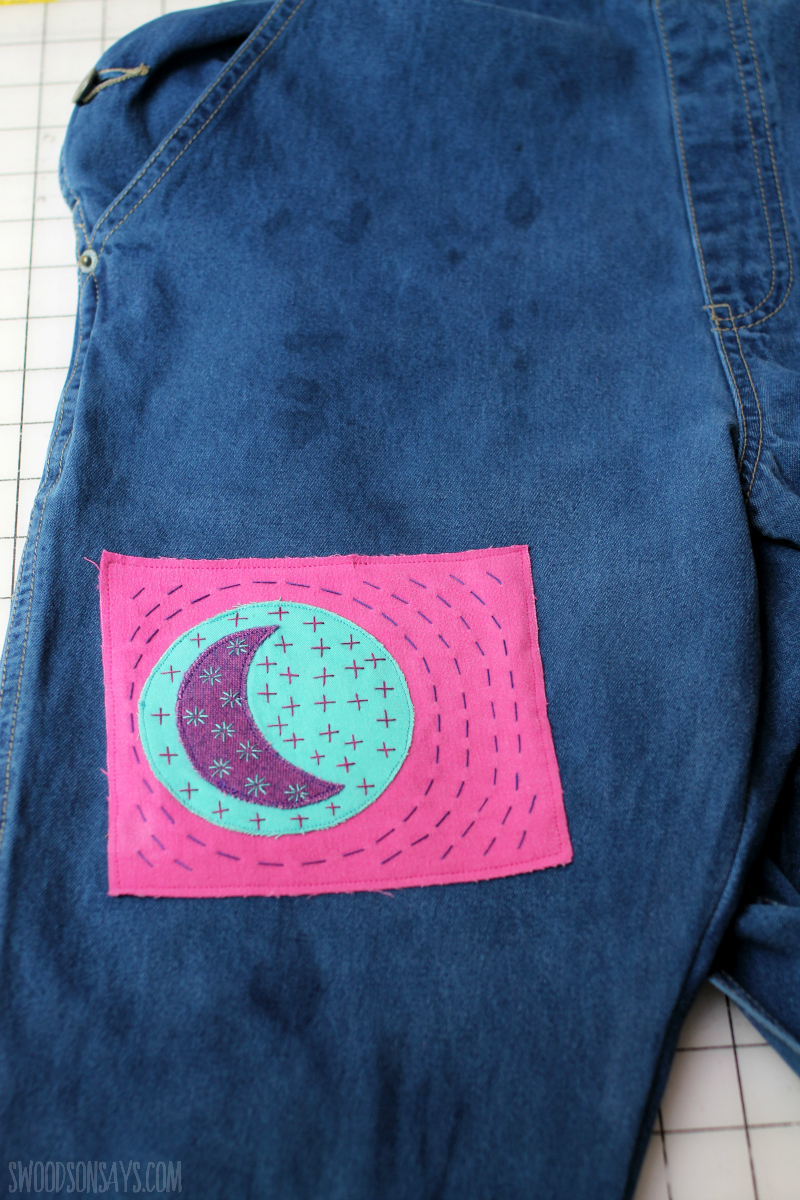
Another problem? Indigo covered up all the grass and dirt stains well but it also revealed some grease stains that weren’t as visible with the lighter denim! I’m not sure how to handle these. The patch is so big, I think more patches would be overkill. Maybe just some abstract stitching? I have more brainstorming to do on that! I don’t have the pattern for the patch done yet, I’m not 100% sure if I’ll be sharing it for free or not, but stay tuned (also, that pink moon is a scrap from this dye & denim refashion!).
Pin this refashion tutorial for how to make jeans skinnier with this link or collage image:

how to make jeans skinnier
Ready to try it yourself? You can apply this tutorial to regular jeans as well easily!
Supplies
- Indigo dye kit – I have used this first one a zillion times, Amazon – Etsy
- Rotary cutter – Amazon – Etsy
- Pattern tracing paper – Amazon
- Seam ripper – Amazon – Etsy
- Pins
- Denim scraps
- Cotton sulky petite floss for embroidery – Amazon – Etsy – Sulky.com
Steps
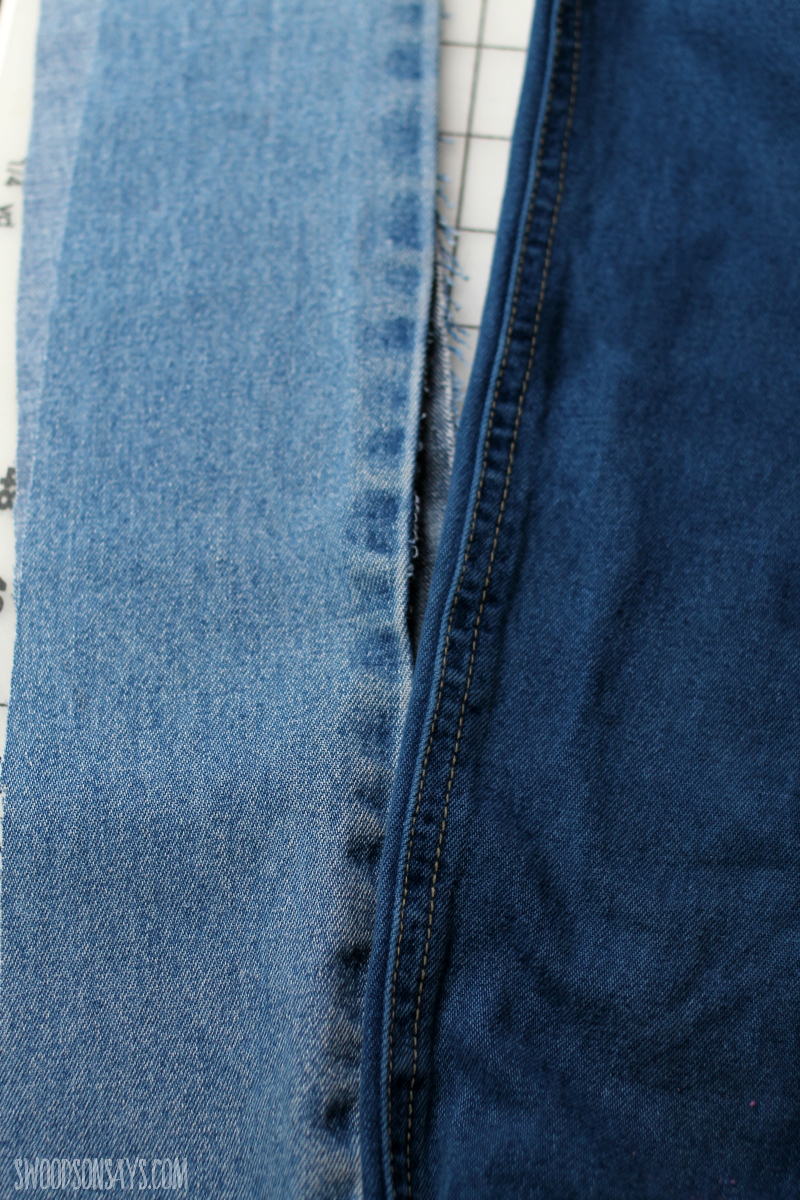
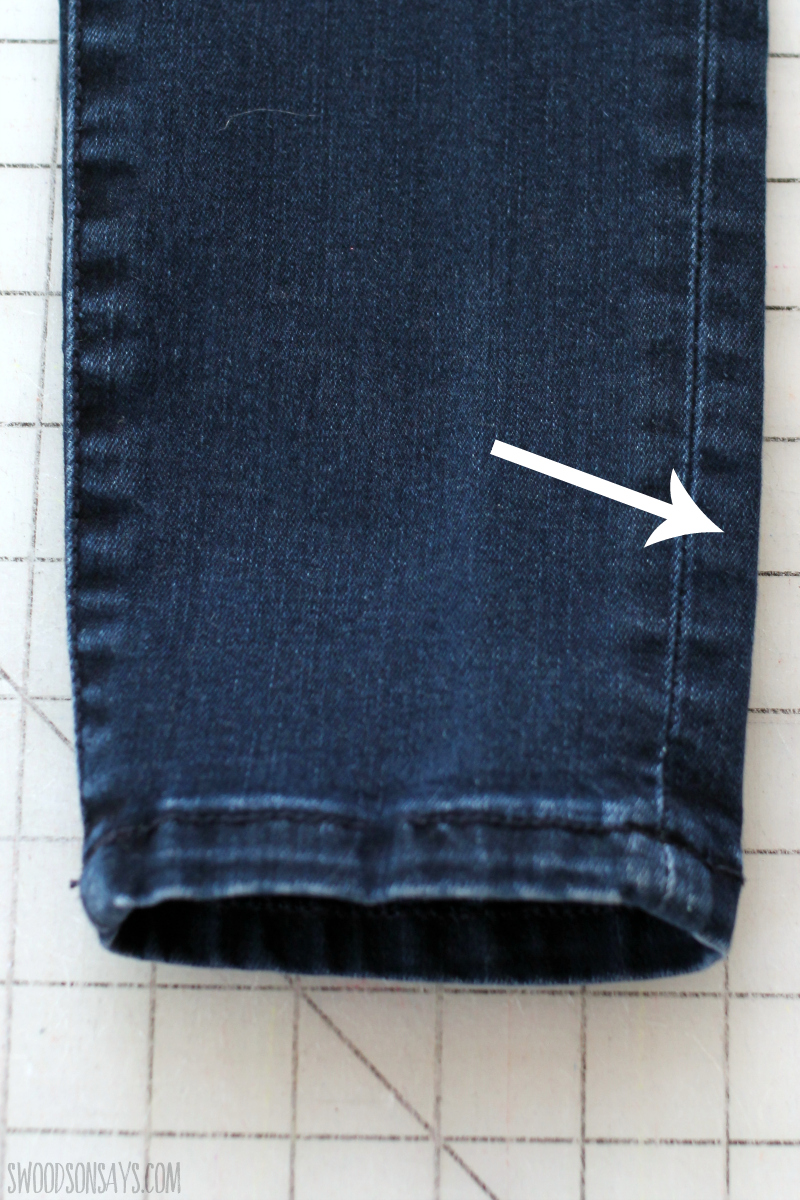
Step 1– Seam rip up whichever seam doesn’t have the thick topstitching! If you’re going from a really large size to a really small size, it’s a good idea to rip both seams so the grain of your fabric doesn’t end up pulling, but since I was only altering a touch I felt okay going the easy route here.
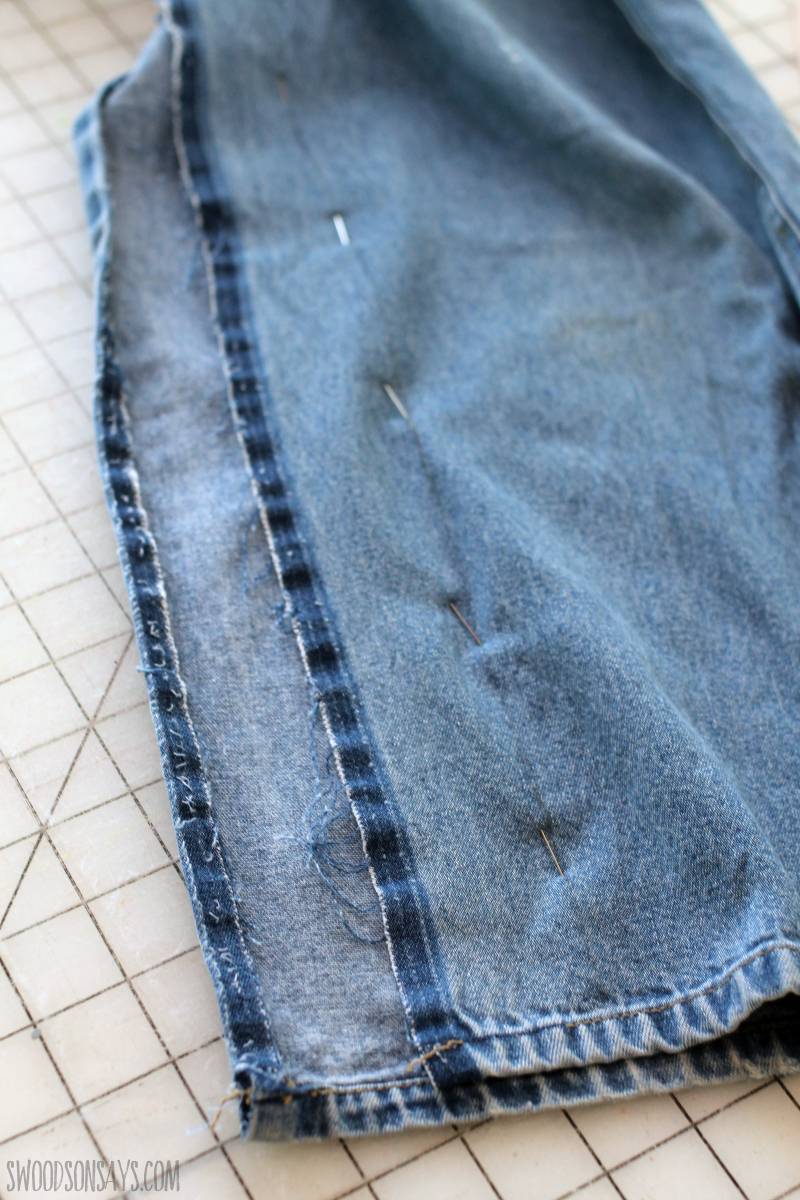
Step 2– Next, make a pattern piece from a pair of jeans that fit! You’ll need to make one for the front and the back; as you can see in the photo above, the back leg of jeans is always larger than the front, so if you just take an even slice off the side and the fabric isn’t folded right, you’re going to end up with weird fitting pants.
Step 3– I apparently forgot to take a picture of the pattern on top of the jeans, but I laid it out, traced with pencil, and then pinned both pencil lines together. Baste them and try them on before you cut anything off! Adjust as needed and make sure both legs look even.
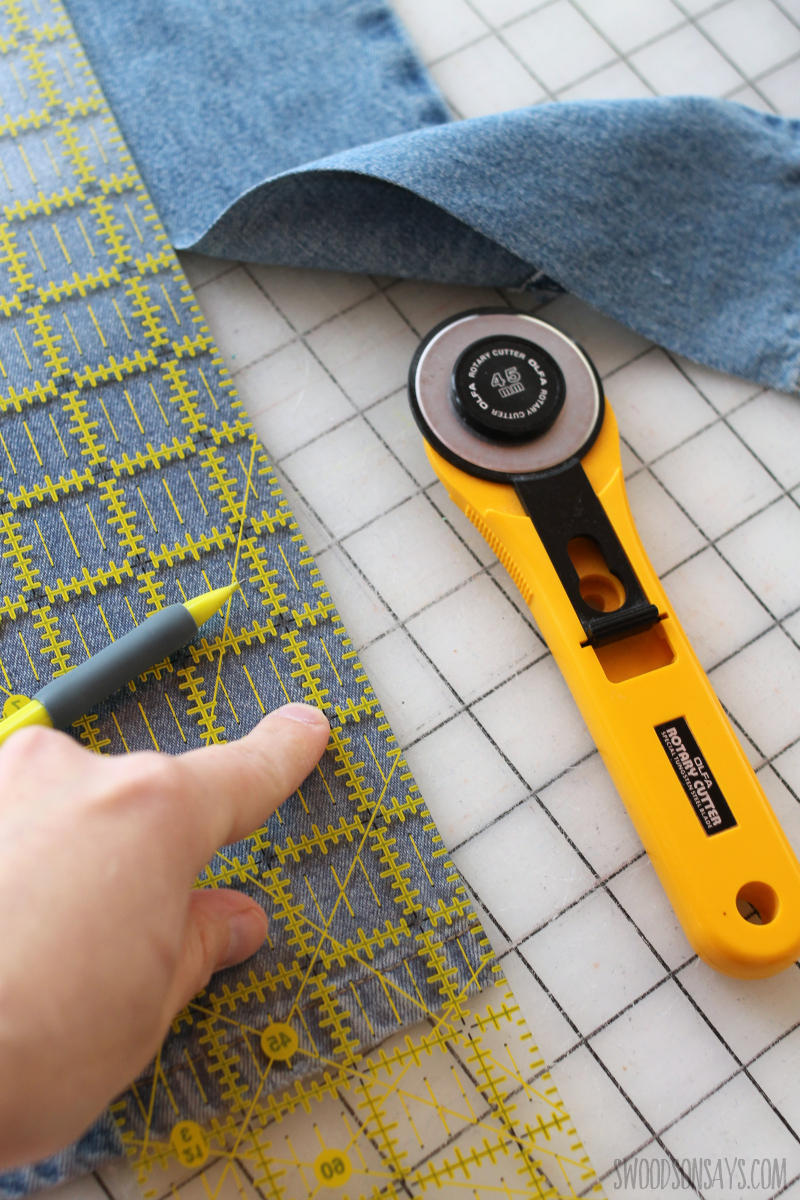
Step 4– I opted to add my seam allowance as I cut instead of on the pattern piece; you can see my finger pointing at the line I traced for pinning/sewing and then I used my ruler to add an extra half an inch for the seam allowance.
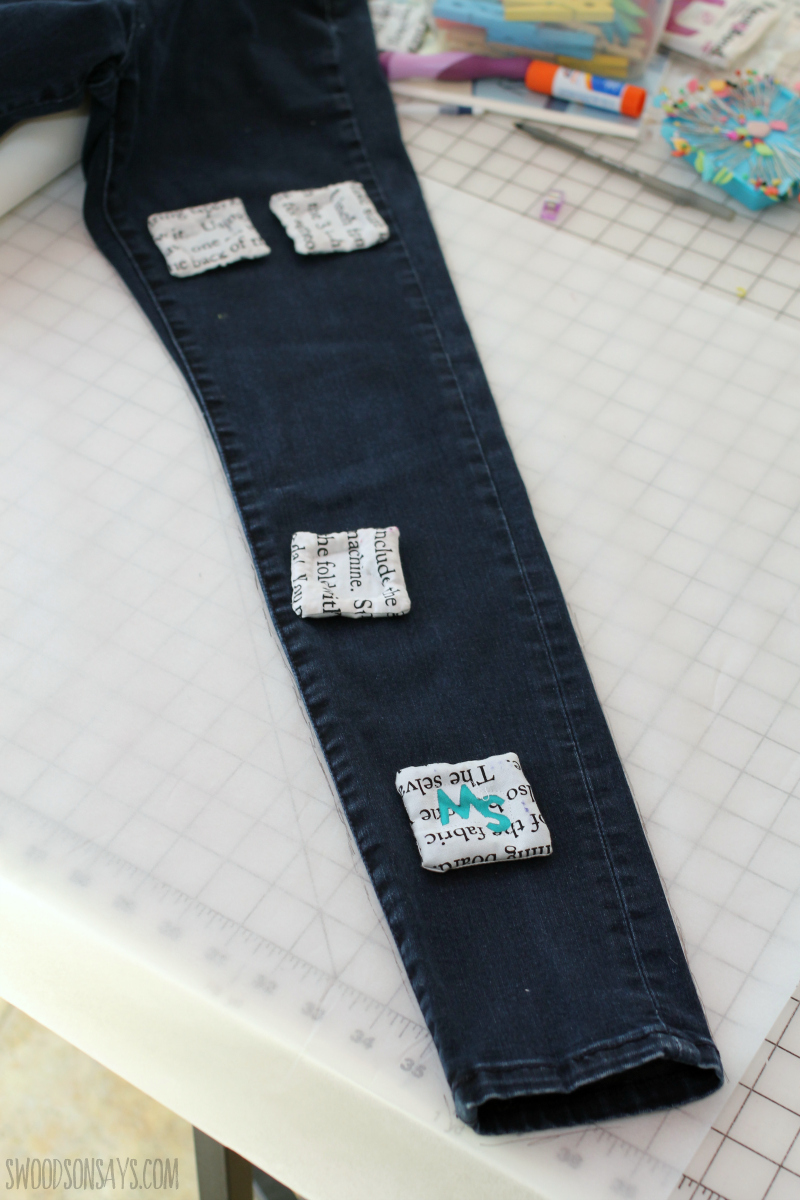
If you’re adding any embroidery or patches but NOT dye, now would be a great time to add it!
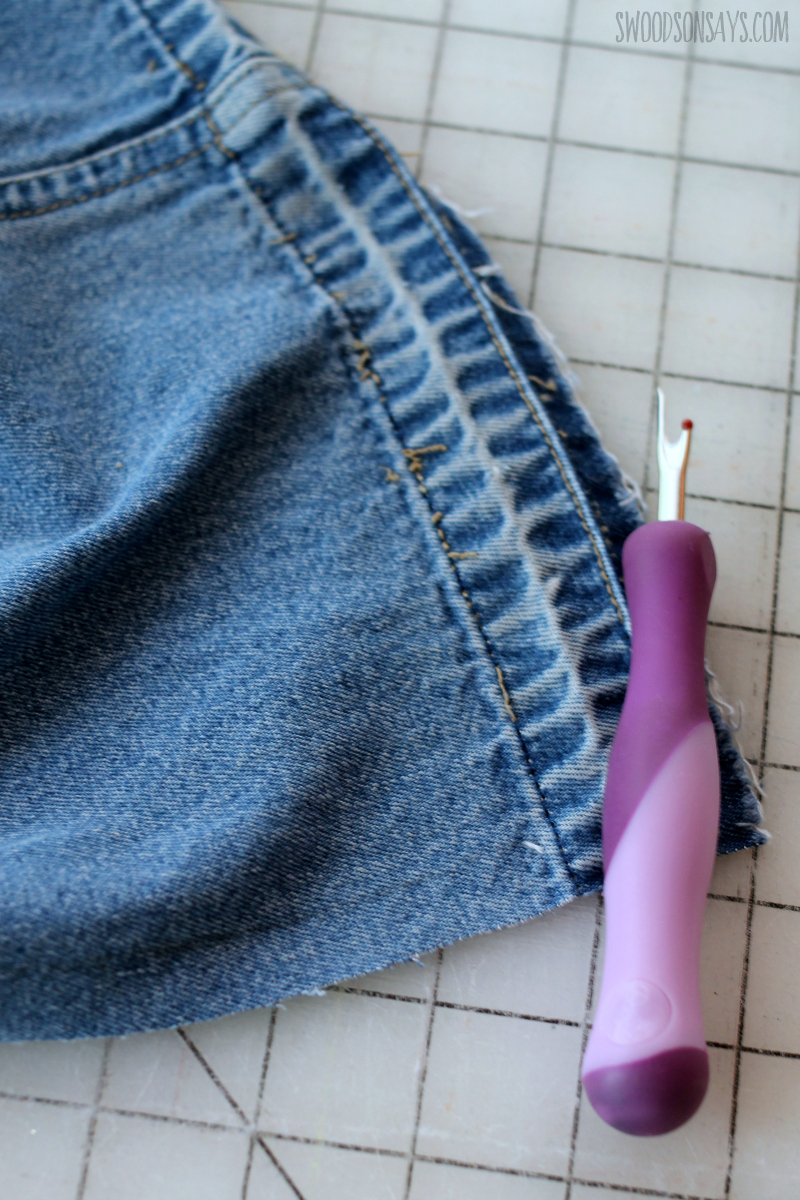
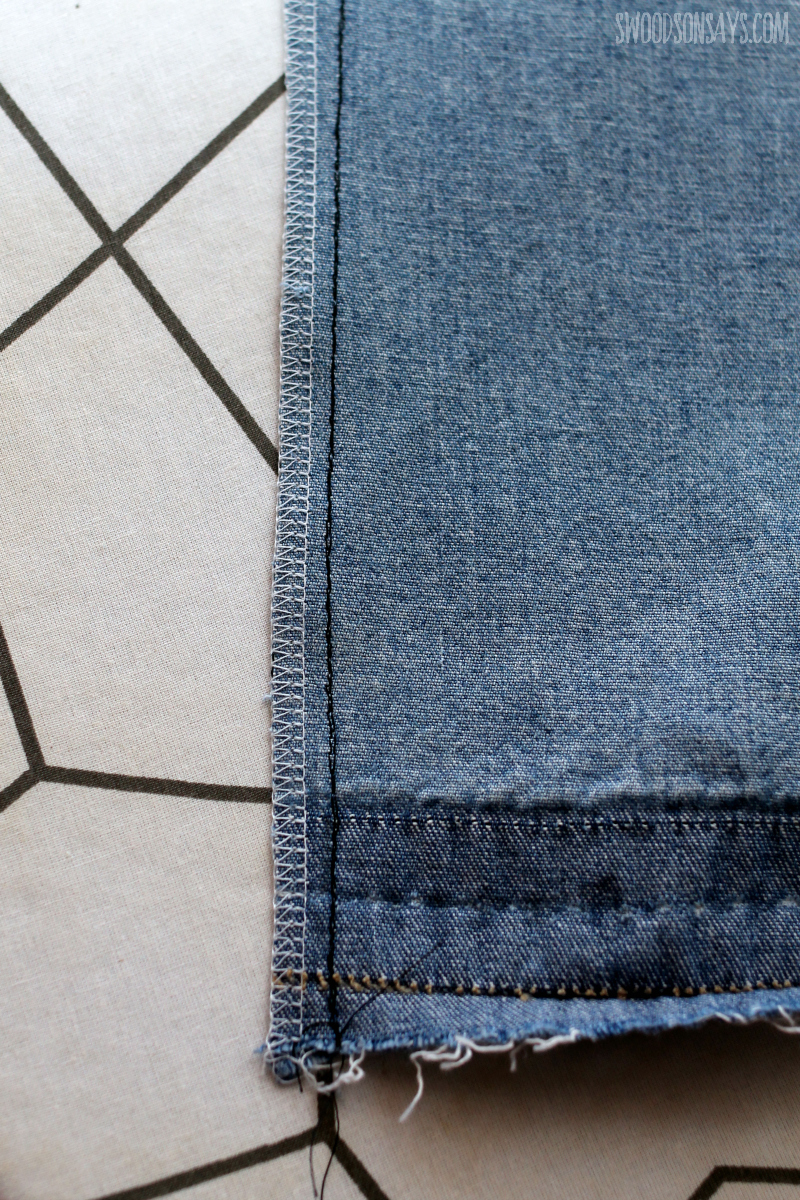
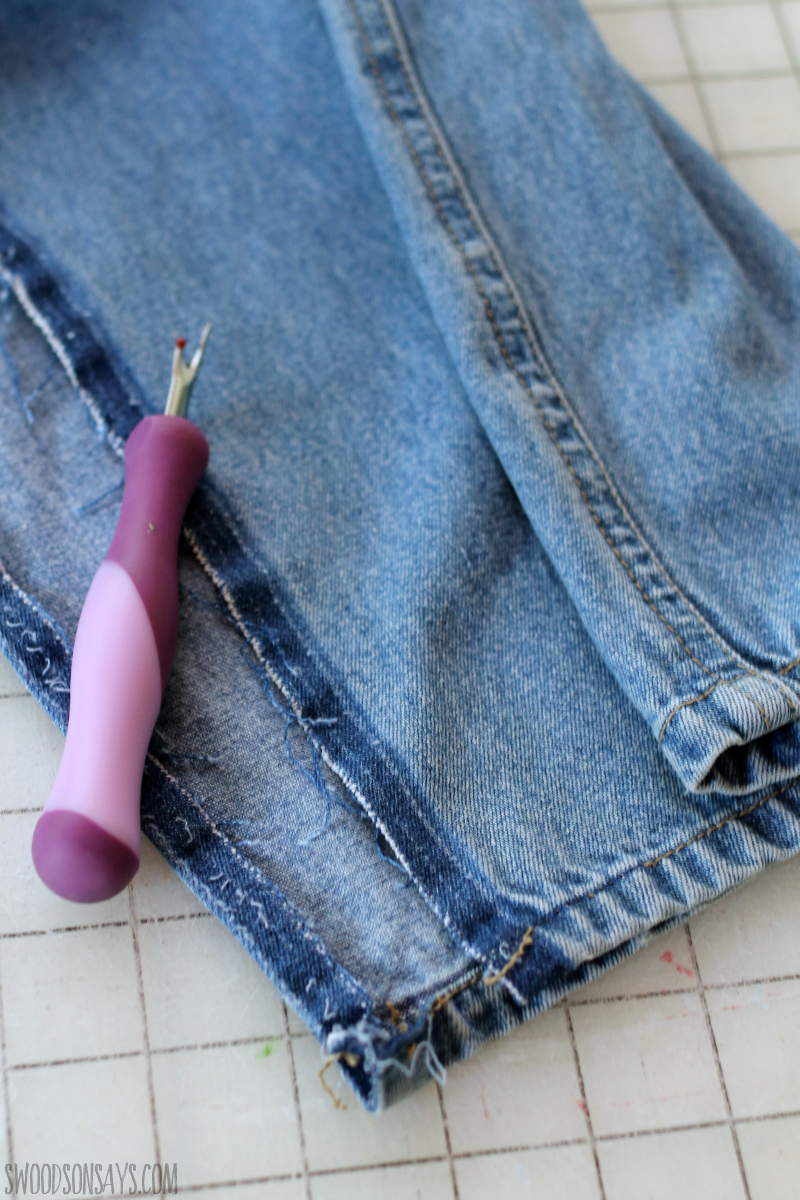
Step 5– Rip the hem out so it’s nice and flat, and sew! I sewed a straight stitch and then serged the seam allowance, cutting off part which is why it looks smaller here. You’re done!
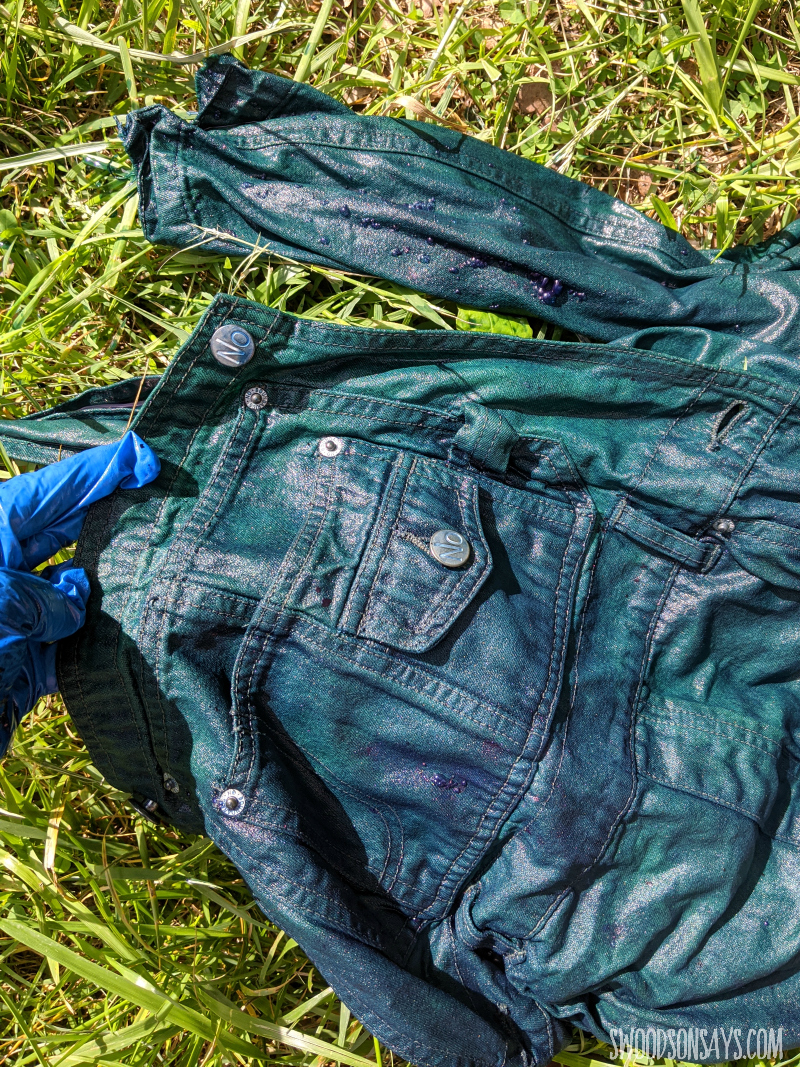
Step 6– Time to dye! If you’re not familiar with indigo dye I have more photos and projects here; it’s a natural dye that is fun to watch. They come out lime green-y and oxidize in the sun. Below you can see the pants when wet, so it can be deceiving! It washes and dries lighter for sure.
Then I stitched my patch on! It would’ve been easier to add when the legs were open, but I didn’t want to dye the patch but also felt like my edges would fray and curl if I washed them after dyeing without stitching them back up.
Let me know if that makes sense to you or if you’ve tried anything like this before!
Ange
Friday 2nd of June 2023
Let me share the greatest stuff on earth for grease removal. I’ve not found it an issue on fabrics or anything else.
This revelation is entirely the thanks to AndyTube who *freely* shares his knowledge and labor on YouTube in repairing and restoring vintage Singer machines. If you haven’t checked it out, he’s amazing how much he’d created for the world FOR FREE! The epitome of what the internet could have been. It’s better than a dozen other degreasers I’ve tried. It’s called Krud Kutter and it’s fantastic!! I can’t thank Andy enough for sowing me this stuff in action, and helping me restore my vintage Singer 500a!
Stephanie - Swoodson Says
Monday 3rd of July 2023
thanks for sharing!