
Tips for sewing ‘ransom note’ style from old tshirts, a fun way to upcycle old tshirts.

When I was a kid, I loved cutting up magazine letters and pictures to make collage cards and art; this is an extension of that same idea! In the United States, free/promotional tshirts are given out by the dozens and they clog up thrift stores – ransom-note style projects also uses those up in a fresh new way! I save the smaller pieces of tshirt to make DIY patches or layered appliques and the larger tshirt chunks to make tshirt quilts with. While this post is focused specifically on cutting up old tshirt letters and sewing them back on – I also have posts with lots of inspiration for general applique for beginners as well as cutting up tshirts in general to upcycle them in different applique methods!

I think these projects look best when you have a wide variety of different letter colors and styles, which may lead you to wonder where to find tshirts affordably. Here are a few suggestions for finding tshirts like this to chop up:
- Check your local thrift stores for “free” bins out front or sale days – or my favorite Goodwill Outlets where you pay by the pound
- Download the Buy Nothing app or search Facebook for a Buy Nothing group near you and post that you’re looking for some
- Ask friends & family if they have any next time they clean out their closet – people often just throw these types of shirts away

Here are a few projects that I’ve used letters on so far! Bags, shirts, and sweatshirts.

I store my letters in craft organizers, these are a dime a dozen at thrift stores so shop secondhand for storage while you’re at it too!
If you like this post, check out these other posts while you’re here!
- 40+ Ideas for what to do with knit fabric scraps
- 25+ ways to repurpose old t shirts
- How to make a tshirt quilt without interfacing
- How to upcycle a tshirt into diy patches

Pin this tutorial of tips for sewing ‘ransom note’ style from old tshirts with this link or photo:

Ready to make your own? I have a basic tutorial and then general tips to consider as you go! Leave questions in the comments and I’m happy to answer them.
Basic steps for sewing ‘ransom note’ style from old tshirts
Supplies I love when working on this:
- I use Heat N Bond Lite in a bolt but you can buy smaller packages of course. Similar products are Steam A Seam and FlexiFuse and Wonder Under but I personally have used all of them and prefer Heat n Bond. I use Heat n Bond Featherlite most often, it is great for layering in particular, but also use Lite on projects like this as well. There is a strong hold if you don’t want to sew at all – I have not tested this with washing & drying.
- Sharp scissors are best for trimming letters – I love these micro fine-tip scissors for finnicky edges or small pieces and these big ones for general cutting. I love rotary cutters for lots of things, but this isn’t one of them, it’s not common that the letters are truly straight and scissors give you more freedom to maximize letter cuts.
- Any iron will do – don’t use steam!
Steps if you’re using Heat n Bond:

Step 1– Lay the Heat N Bond over top of the letters you’re trying to cut out, leaving a margin around all sides, and cut the right size.

Step 2– Lay the Heat N Bond on the back side of the letters, shiny side down. Adhere with your iron, per the instructions on the packaging.

Step 3– After it is cool to the touch, trim around the letters with sharp scissors.

Step 4– Peel the paper backing off the letter you want to sew and place it shiny side down on to the base you’re sewing on.

Step 5– Adhere with an iron per the packaging instructions.

Step 6– Sew the letter on and you’re done!
Tips for sewing ‘ransom note’ style from old tshirts
Presented in no particular order!

1. Use a pressing cloth if the letters feel ‘sticky’ or you want to be careful with your iron! Some letters will melt off on to your iron and the pressing cloth avoids that happening – it is just a plain, white piece of cotton.
2. Experiment with test scraps! Use extra pieces of tshirt or common letters (e, a, o) to get a feel for stitching or experiment with what edge-stitch you want to use before your finished project.
3. Cut less first! You can always trim more but you can’t add it back on. When trimming letters, I go for the largest area around possible while preserving the other letters and trim closer when I actually use it on a project.

4. Different stitches to adhere the letters will wash/wear differently! The left is pre-washing and the right is post-washing and drying. The featherlite version of heat n bond is more likely to curl up vs. the lite. You can also see that I experimented with density of zig-zag stitch on the bottom – as long as you’re catching both the letter and the base shirt it is just an aesthetic choice. You can also do multiple straight-stitch layers for a messy look.

You can try decorative stitches as well, but beware of stitches like the top one that goes back and forth over the same spot multiple times. With knit fabric, this is likely to create “tunneling” which you can see under the stitches and also makes larger holes with the ballpoint needles.
5. If you don’t want to use a double-sided fusible interfacing like Heat N Bond, use a regular old glue stick to adhere the letters before you stitch them! You can avoid the edges and/or let it dry before sewing, but it works like a charm.

6. Consider prioritizing less common letters when you’re cutting if they are close together. I have lots of S and A so I cut here to highlight the T!
7. If you’re unsure about the letters you’ve chosen, I recommend taking a photo of the layout and coming back to it! After staring at them for a while, I find it’s easy to miss that you have two grey letters next to each other etc.

8. These are my two most used feet for this project! If you are sewing letters onto something somewhat bulky, like fleece or a backpack, a walking foot (left) has feed dogs on the top that help feed thicker fabric through easily. The foot on the right is an applique foot – it is clear so you can see where you’re going!.
9. Remember that you can play with stitch length! A smaller stitch length gives you more room to manuever around edges but also can sometimes get bunched up with knit fabric layers. This is another instance where it is great to experiment on scraps first.

10a. If you like pristine top-stitching, it’s pretty simple to do! I am not fussy about this so usually just take a few stitches back and forth, as seen circled on the top, but if you want yours to look like the bottom, keep reading!

10b. 1. make sure when you’re starting your stitching, you have long pieces pulled out – if you use auto-cutting on your machine, you may start and stop on a scrap like I did here and pull it out before cutting with actual scissors. 2. Start stitching and take a few stitches, stop with the needle down and gently use a pencil or seam ripper to tug the top stitch tail that is hanging off the front of the stitching, down to the back. 3. Stitch all the way around until you meet your first stitch and pull it away, manually cutting off the tails. 4. Again gently use a pencil or seam ripper to tug the top stitch tail that is hanging off the front of the stitching, down to the back, and then tie these 4 threads into a knot and trim!
11. Consider the weights of fabric! A super thin shirt that is more polyester than cotton is going to cut & sew much differently than 100% cotton tshirt. I would not recommend cutting thick, 100% cotton tshirt letters up and sewing them to a slinky rayon tank top – it will pucker and hang funny.

12. Here is a visual for different weight base fabrics as well as using Heat N Bond vs. not. The black base is 100% cotton with zero stretch and the blue base is 50/50 cotton/polyester with more drape. Both ‘M’s have heat n bond on them whereas the ‘a’ and ‘s’ do not. You can see that the base shirt doesn’t make a ton of difference using the Heat N Bond but without it, you can see definite rippling/wiggling of the base fabric with the blue 50/50 shirt.

13. If you use too much heat with a fusible interfacing, you can literally burn it off! Here is a visual for if you haven’t used enough heat (A) and you can still see the shiny fusible on the blue piece vs. where it has had too much heat (B) and the fusible no longer exists.

14. Never start your needle at ‘X’, it is very likely to get sucked in and make a big knot underneath. I would recommend always starting at ‘O’ where you have a full bite of both layers and can be successful stitching all the way around without getting hung up.
15. If you absolutely hate how stitching turned out or it gets all chewed up, you can always peel it off and replace with a different letter!

16. Always cut off neckbands and cut open seams before applying interfacing and starting to cut – the fabric may be slightly gathered or change taut-ness.
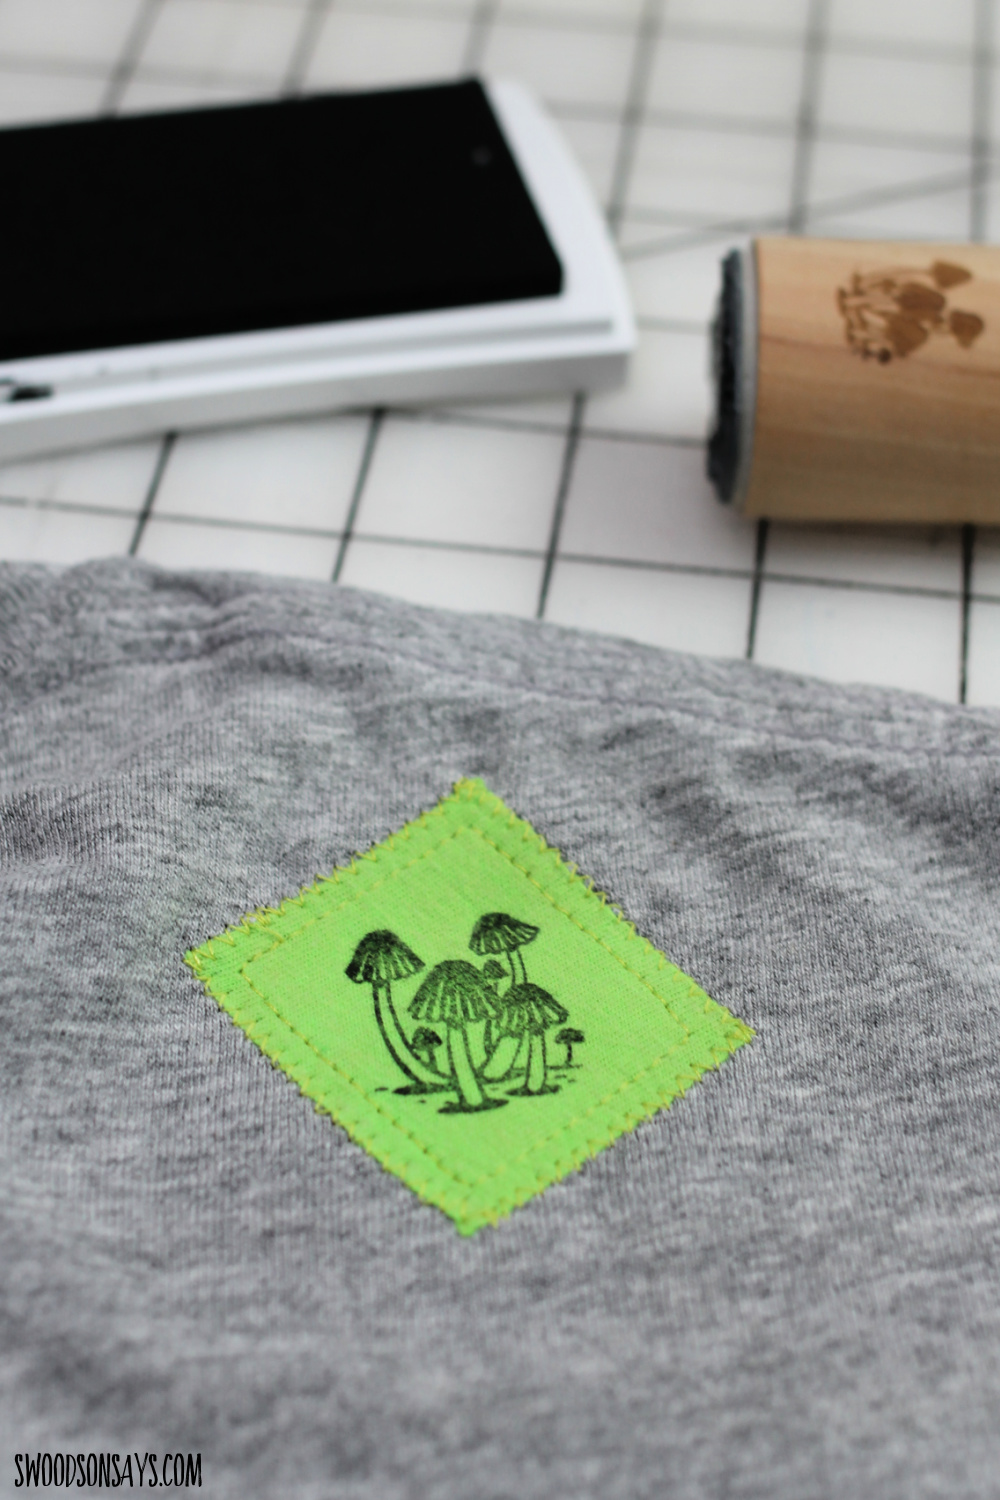
17. If you end up with chunks of fabric that is blank but has interfacing on the back, cut them out nicely and use them to make DIY stamps like above (tutorial here).
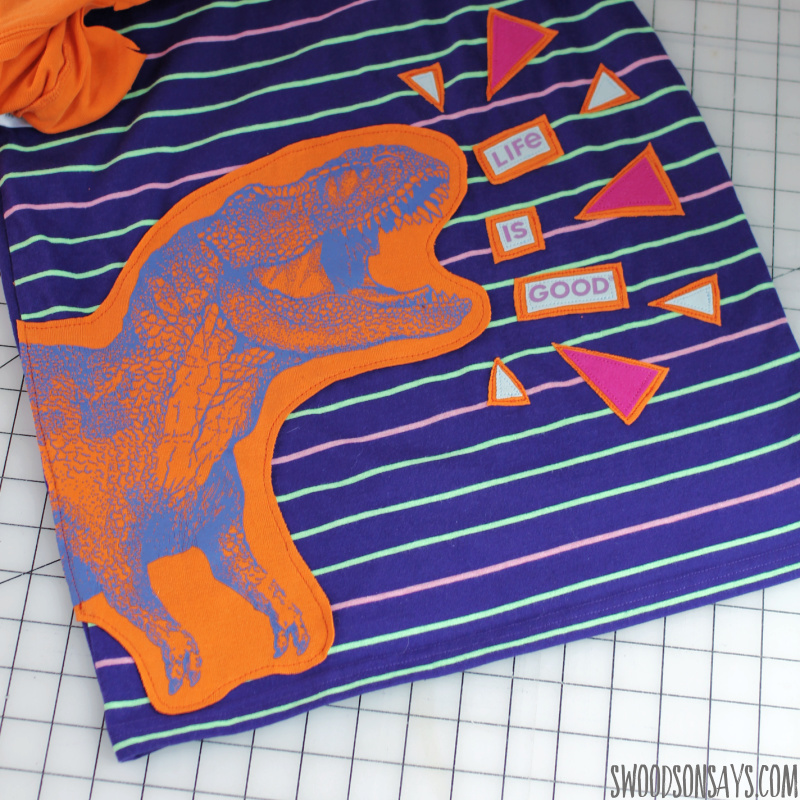
18. This visual uses whole words instead of individual letters, but same idea: remember you can add a different color as a base before sewing on to the final product!
Applique Silence of the Lambs T-shirt - Shiny Happy World
Monday 13th of April 2026
[…] that I was done with the front of the shirt, it was time for the back. I was inspired by a Swoodson Says post about ransom note letters from old t-shirts. I followed her instructions pretty much to the […]