

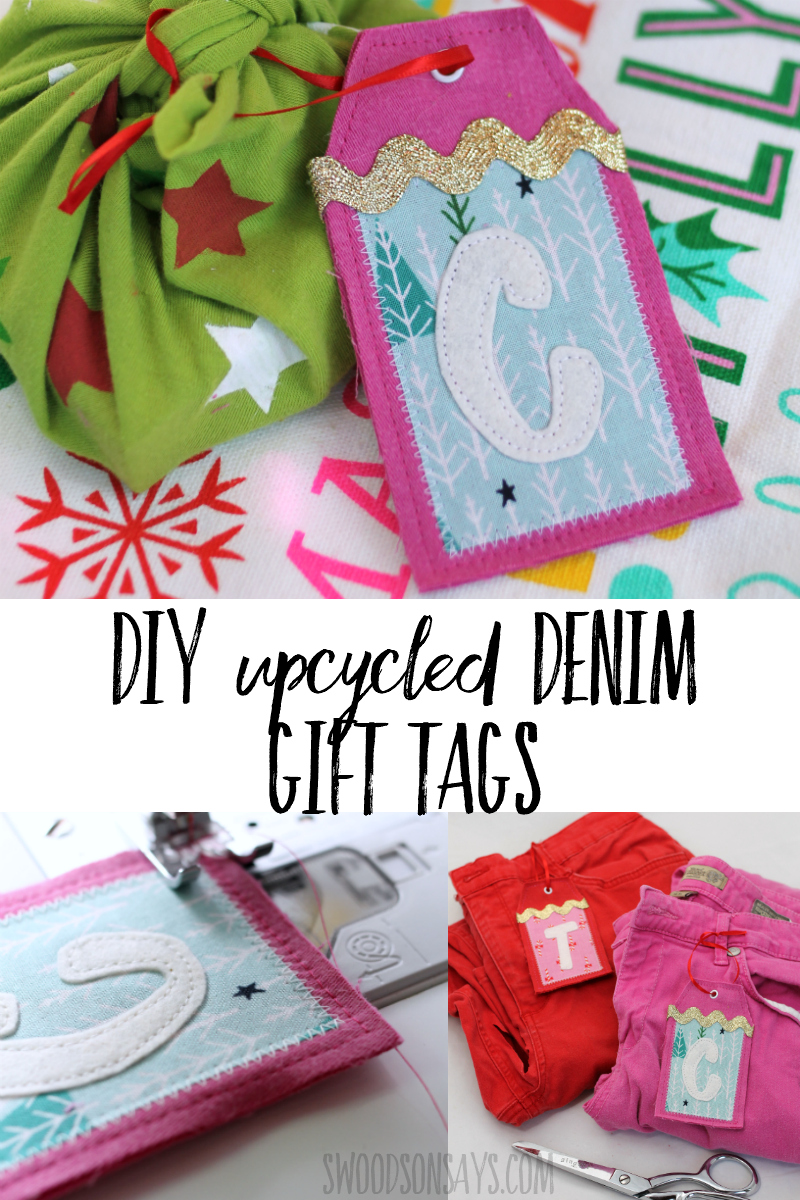
This is day 3 of 12 Days of (upcycled) Christmas tutorials! Today I have a free pattern & tutorial for how to make reusable fabric gift tags from old jeans. Skip the cheap little stickers that will end up in the trash and make some fun tags from your fabric scraps and old jeans instead! I sewed mine but these could easily be made no-sew with a tweak or two that I share in the instructions.
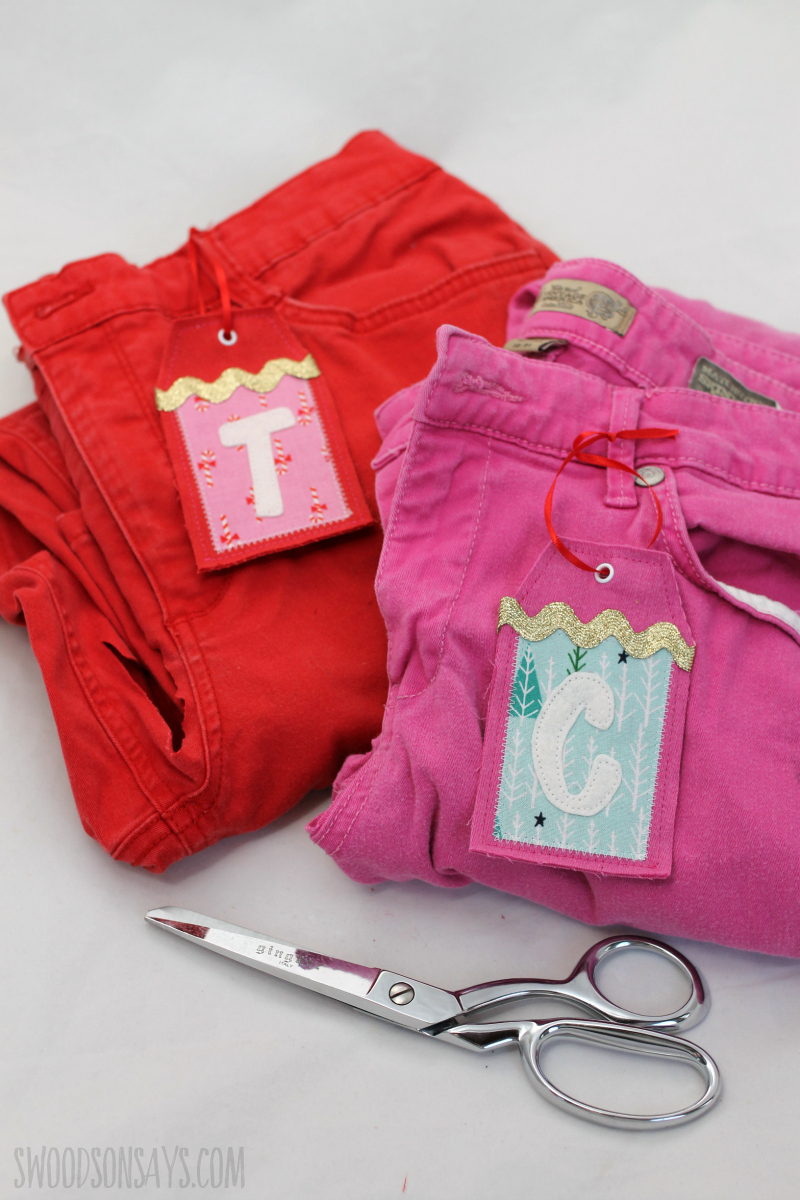
I cannot pass up colored denim in the Goodwill Outlet bins (it isn’t a regular goodwill!) and was happy to cut into these bright pairs that had busted zippers. I didn’t realize before I made them but now see that the Pillar Box Blue blog has a similar tutorial with a different style, if you want to check out her version!
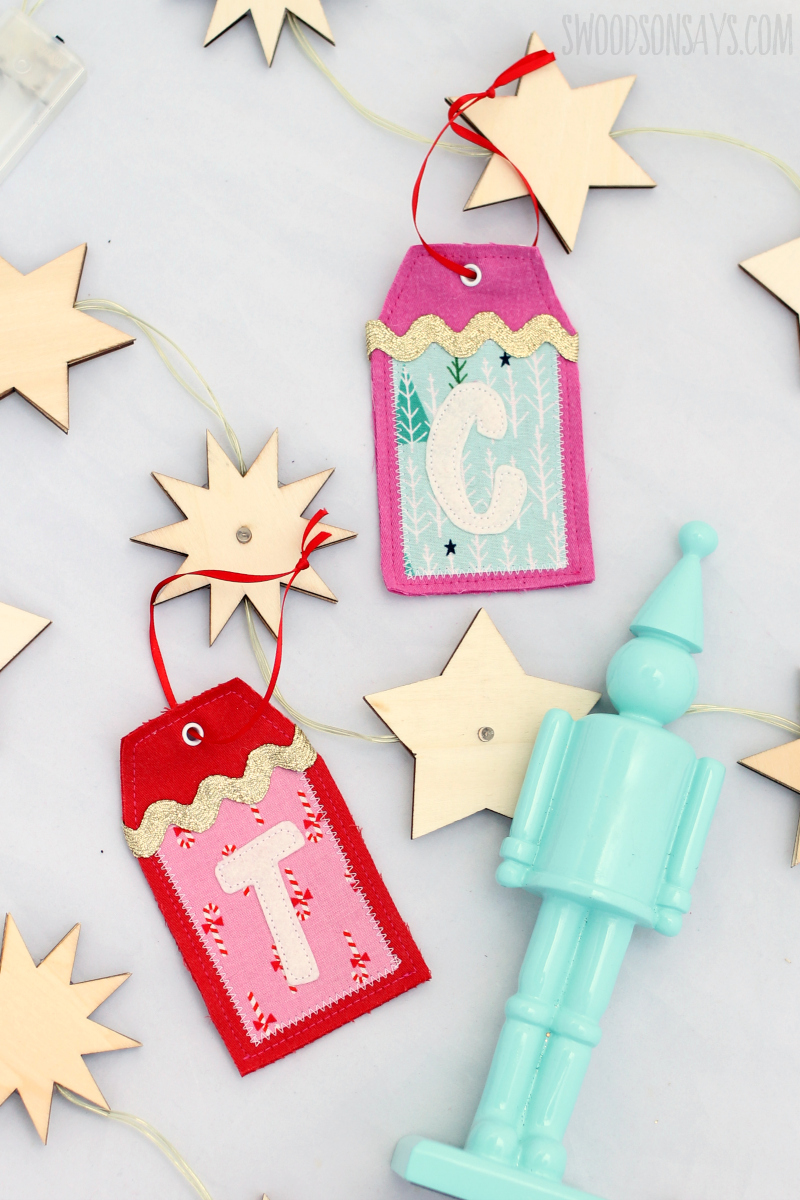
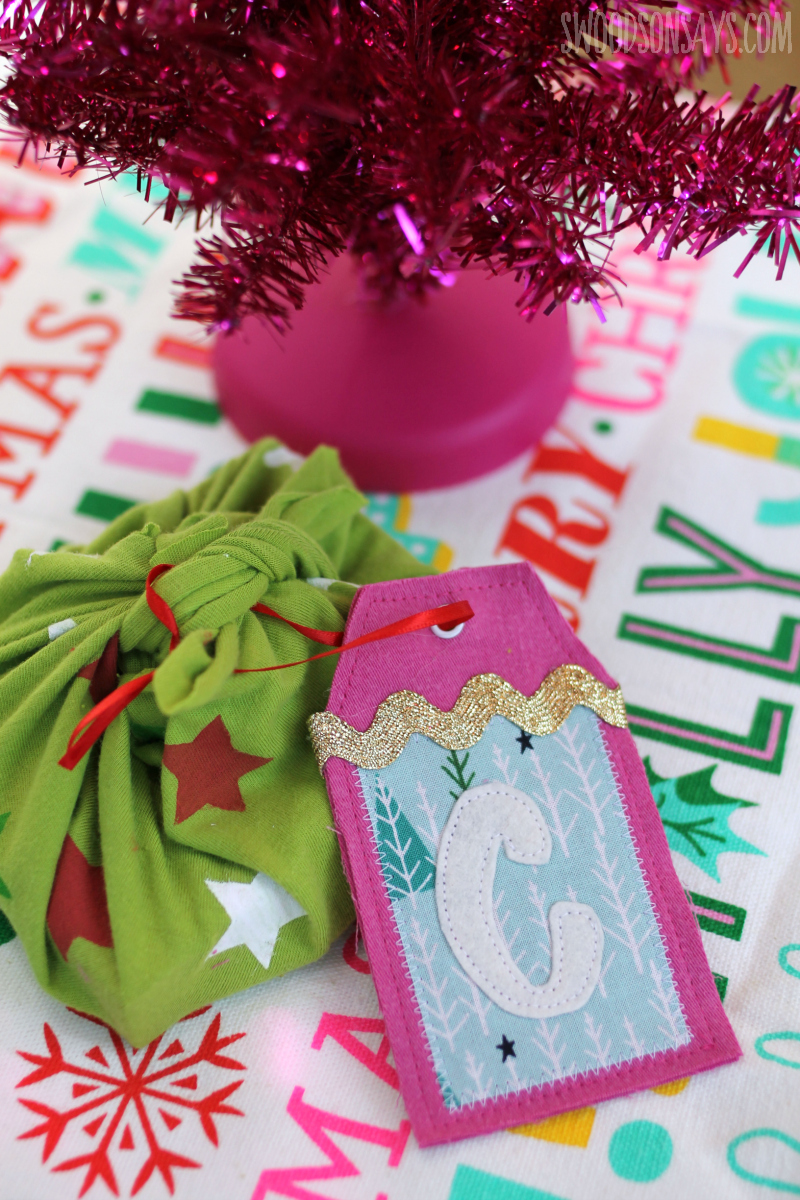
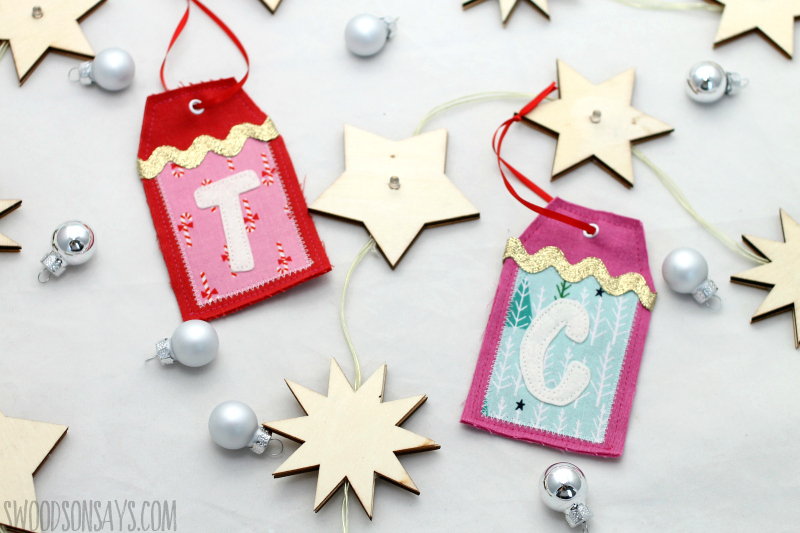
I went with an initial instead of a full name but you could do iron-on, embroidery, or stamps too! I included the full alphabet, forward & reversed (for using with transfer paper) in the pattern, but if you want to DIY it, the free font I used is Bonoco.
If you like this project, you need to check out these posts too!
- 45+ ways to use up old jeans
- How to make furoshiki from old t-shirts – the reusable fabric wrap shown above
- How to make a 5 minute gift bag out of a scarf
- 25+ upcycle sewing tutorials that make great gifts
- Master list of Christmas DIY & craft tutorials
- See how to make upcycled dry-erase gift tags
What do you think, would your kids/family miss ripping into paper? My Grandma always saved wrapping paper and I do if it is salvageable, but I am really trying to get us away from one-time use things, especially stuff that can’t be recycled easily.
Pin this free fabric gift tag pattern for later with this link & collage photo:
Upcycled fabric gift tag tutorial
Supplies
- Old pair of jeans
- Fusible transfer paper like Heat N Bond (Use Super hold if you want this to be no sew)
- Felt & cotton scraps – cotton & steel fabric used here
- Pen
- Iron – I use & like this one!
- Scissors
- Hot glue & fancy trim if desired – I used gold ric rac
- Eyelets & eyelet pliers & awl (you can also sew ribbon in if you prefer)
- Thin ribbon
-
Free pattern & alphabet templates- sign up for my newsletter and get the full pattern once you confirm your subscription! If you’re already a subscriber, you can access the pattern with the password in each newsletter, in the resource library.
Steps
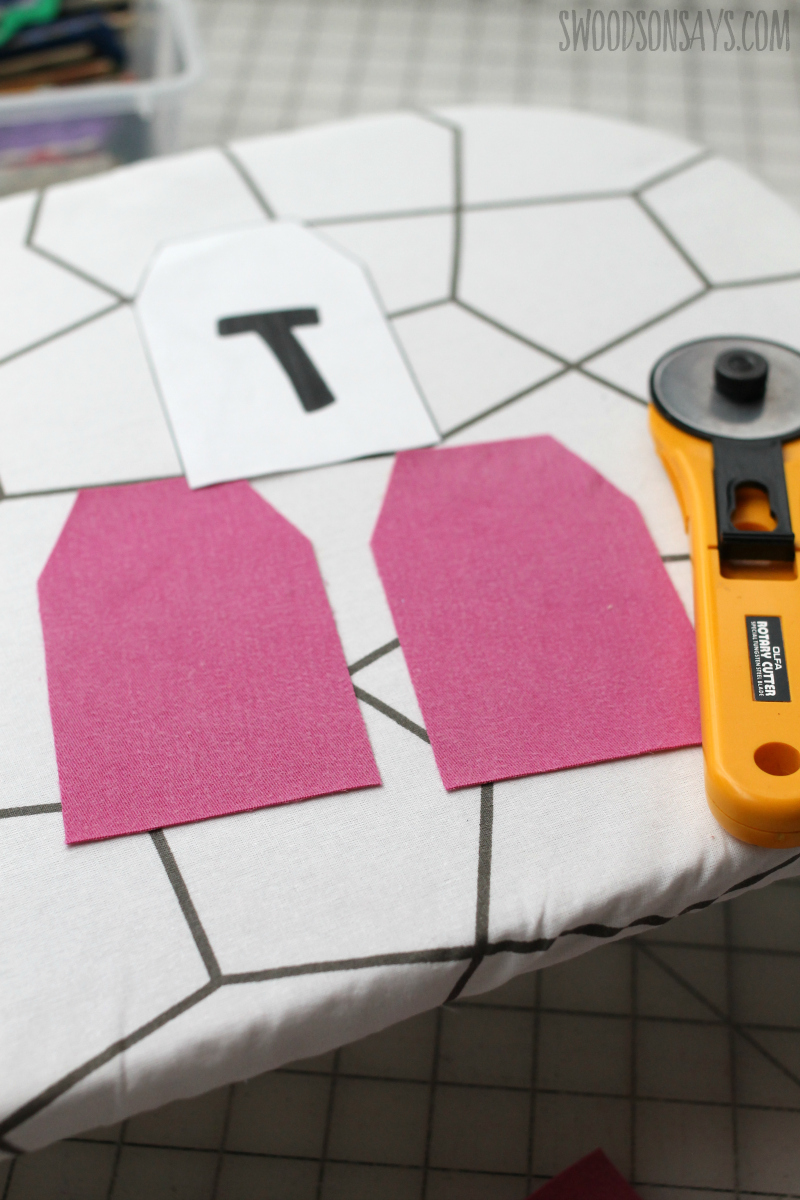
Step 1- Use the pattern to cut 2 denim gift tags (no sew version, just cut one).
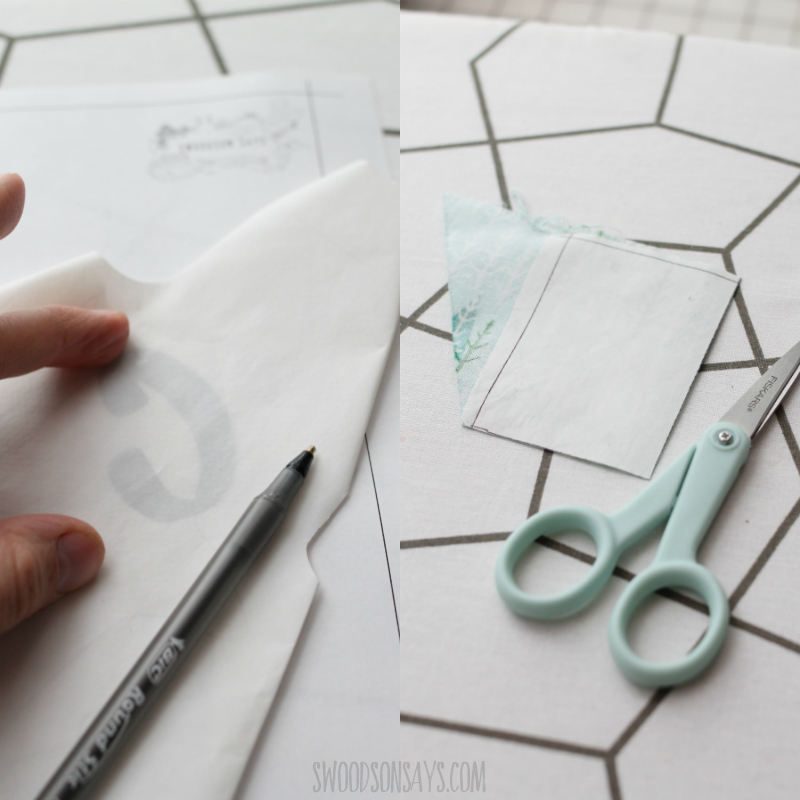
Step 2- Trace your alphabet letter – REVERSED if you are using Heat n Bond, forward if you are using some other method of transfer. Cut out a 3″X2″ rectangle of cotton fabric as well – I used Heat n Bond for this as well so it didn’t fray as much, but you don’t need it. Use your iron to press the traced Heat n Bond on the WRONG side of the fabric, let cool, trim, peel the back off. (More pictures and tips on applique in this post if you need them!).
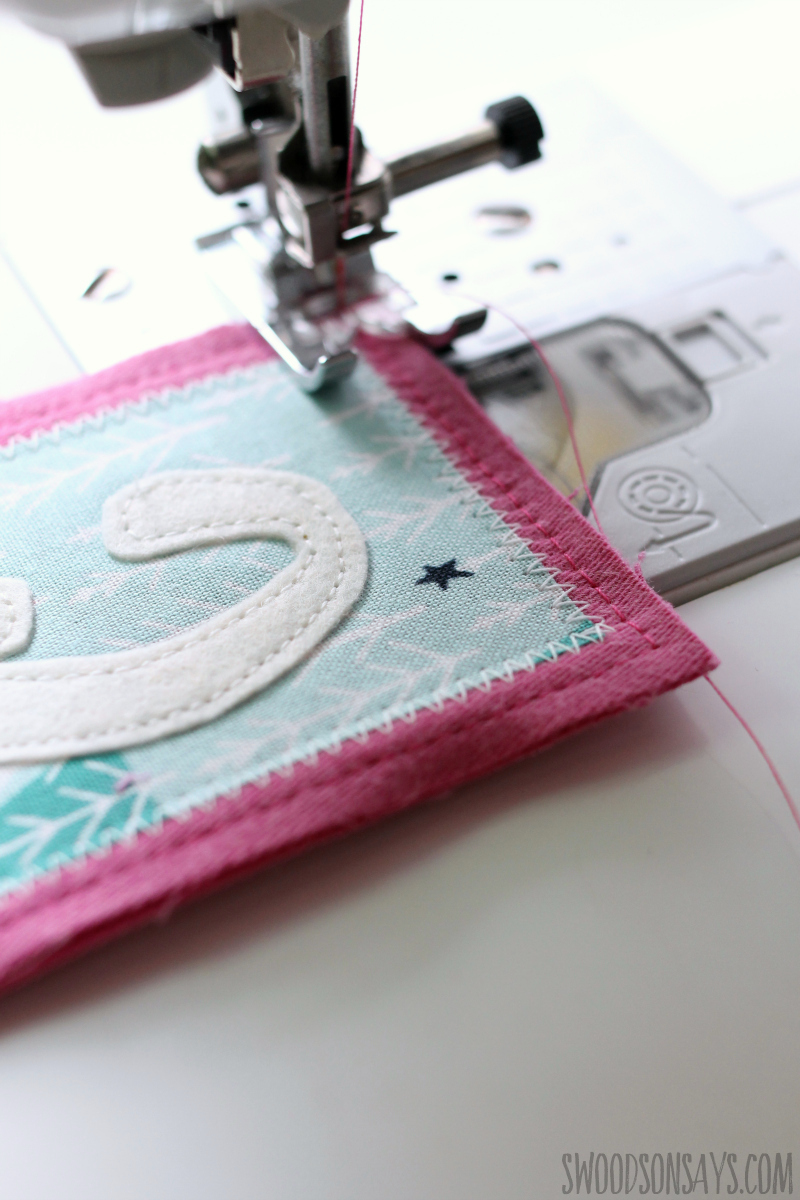
Step 3- Layer the cotton scrap & then the layer on 1 denim tag. If you are using the Ultra Hold/no sew, stop here. If you are using regular Heat n Bond, keep going & sew both the letter and rectangle on to the single tag. Then layer the second tag underneath and sew them together.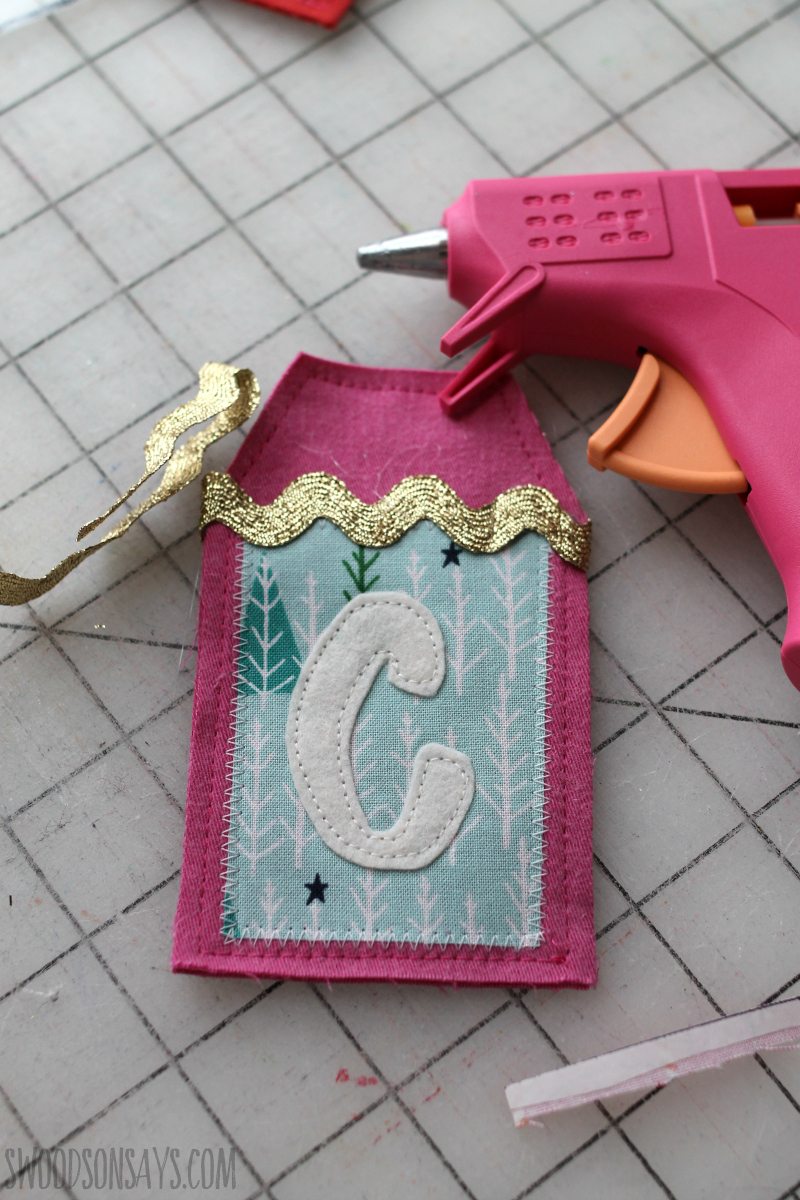
Step 4- Hot glue fun trim over the top of the rectangle if desired.
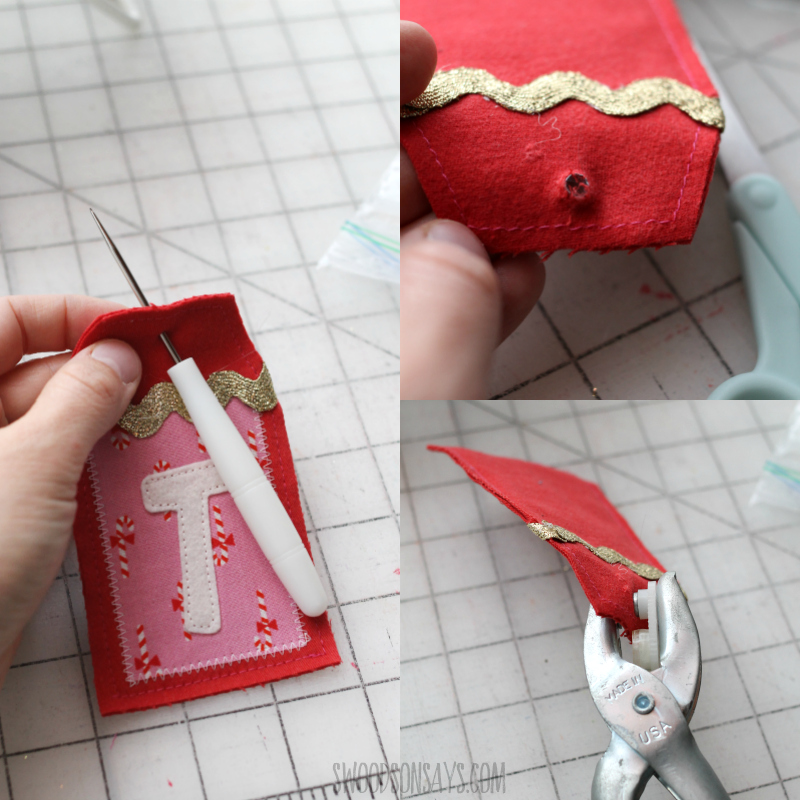
Step 5- Insert an eyelet at the top! Poke a hole with the awl and snip it a little bigger with sharp scissors, push the eyelet through, and push with pliers. It is so fun and easy!
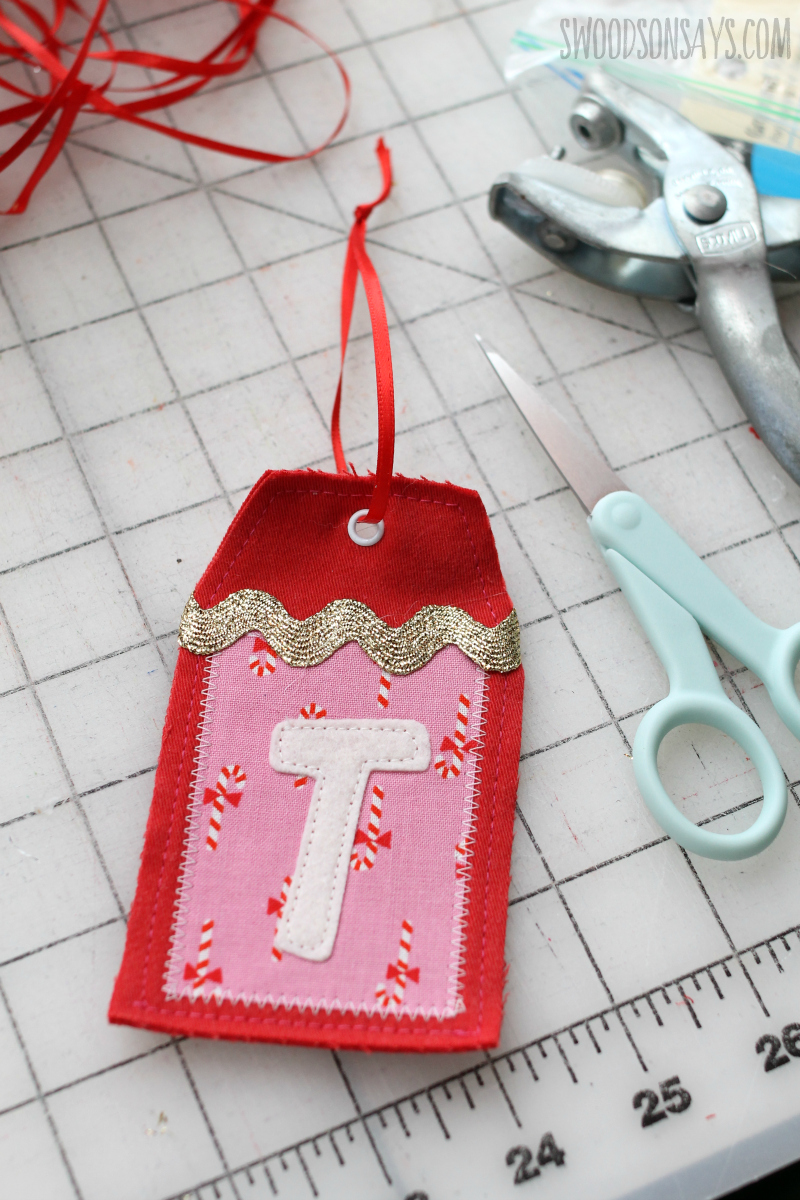
Step 6- Tie ribbon through and you’re done!
My kids are begging me to make some for them (these are for my Mom & husband); I think it will be fun to let them pick the accent fabric!