
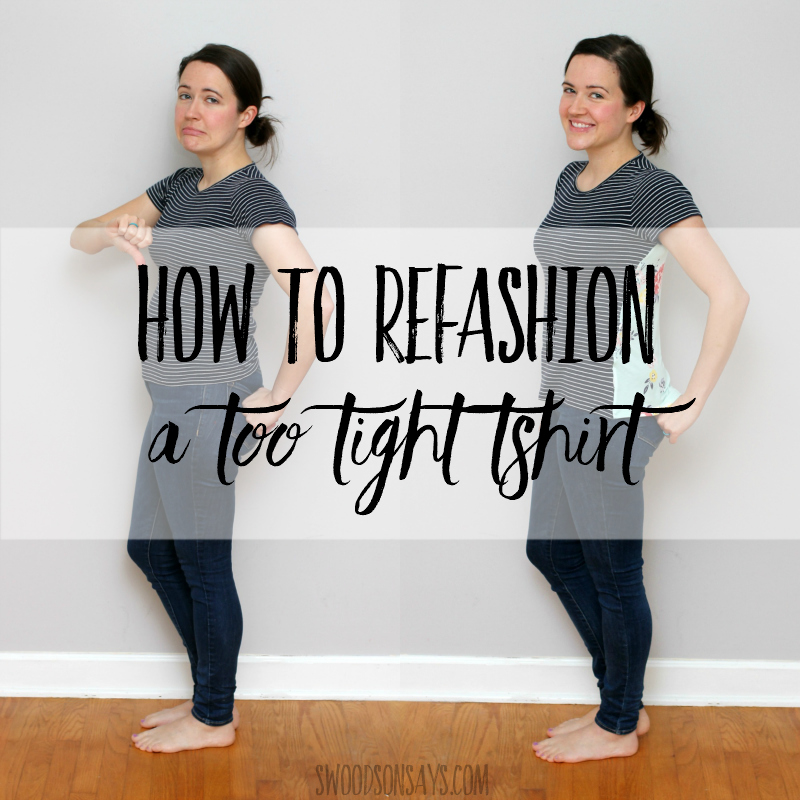
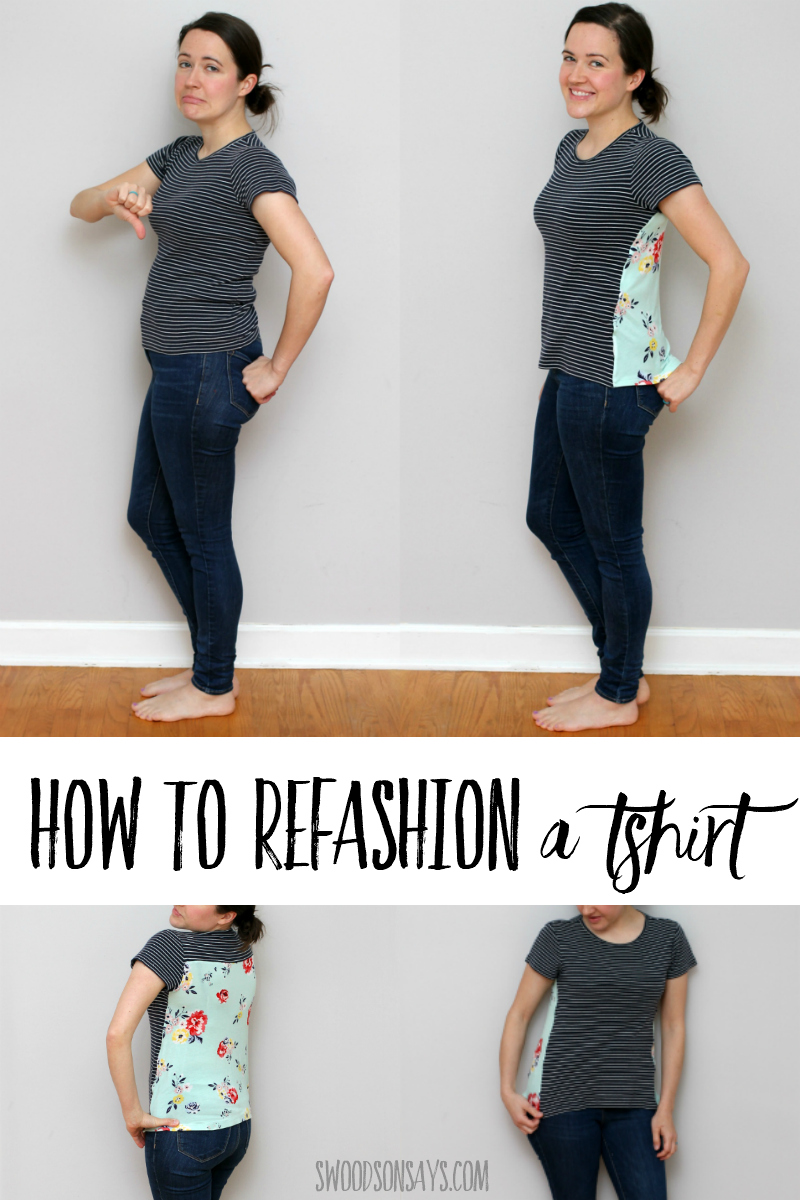
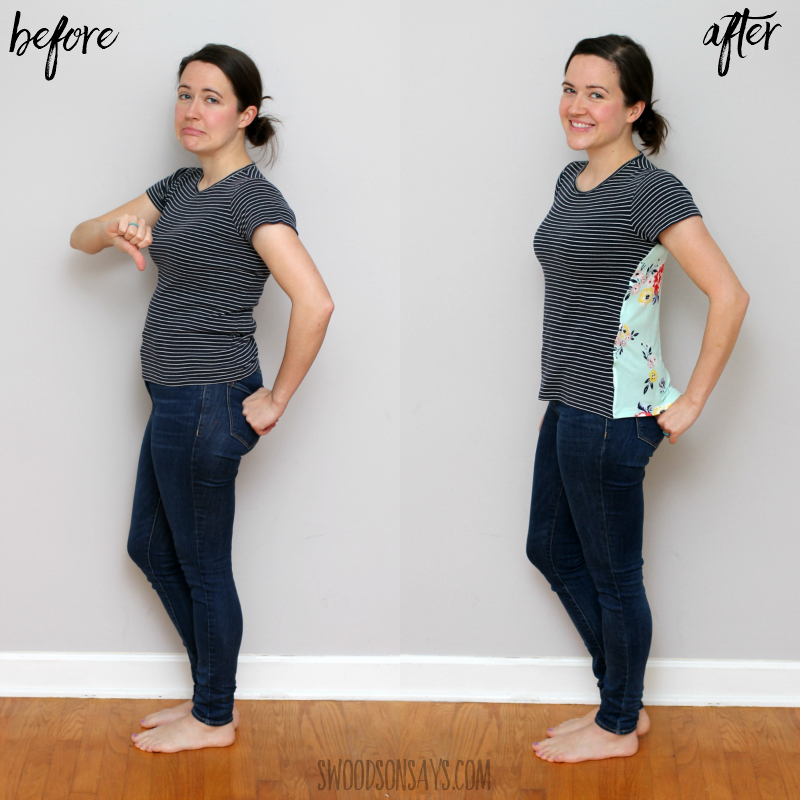
I had so much fun with my last tshirt refashion, I keep brainstorming new ideas to try! I’ve shared about my postpartum stomach before and how it makes tight tshirts uncomfortable so expect plenty more refashions like this! This time I’m sharing how to make a t shirt bigger with a back panel.

This is a standard issue, Gap, old school striped tshirt.
If you like this post, check out these other posts while you’re here!
- 13+ T-shirt refashion ideas
- 25+ Free women’s shirt sewing patterns
- Tips for sewing refashions & upcycles
- Tips for thrift shopping to refashion or upcycle
- 13+ modern books on refashioning clothing & upcycle sewing
- 20+ ways to refashion clothes that are too small
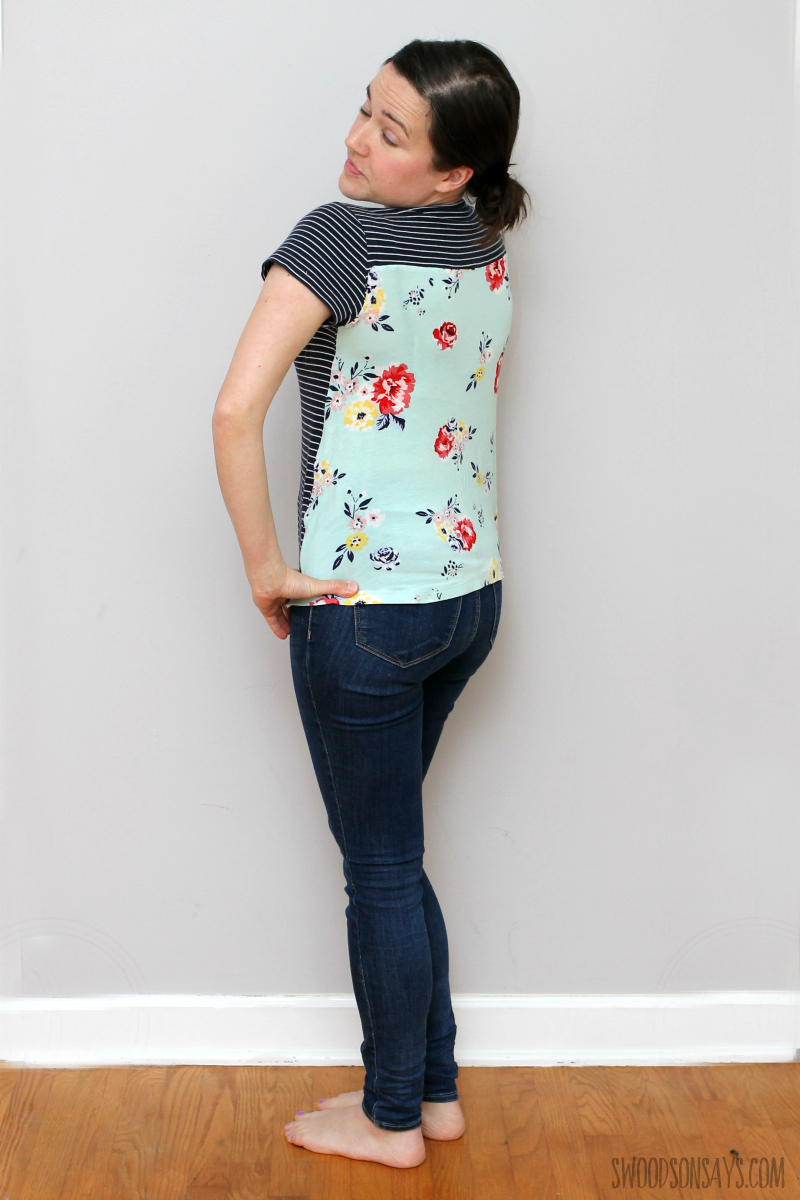
Please forgive my face, but here is a shot of the back! I used a floral rayon spandex from JOANN, I’m ready for spring colors!
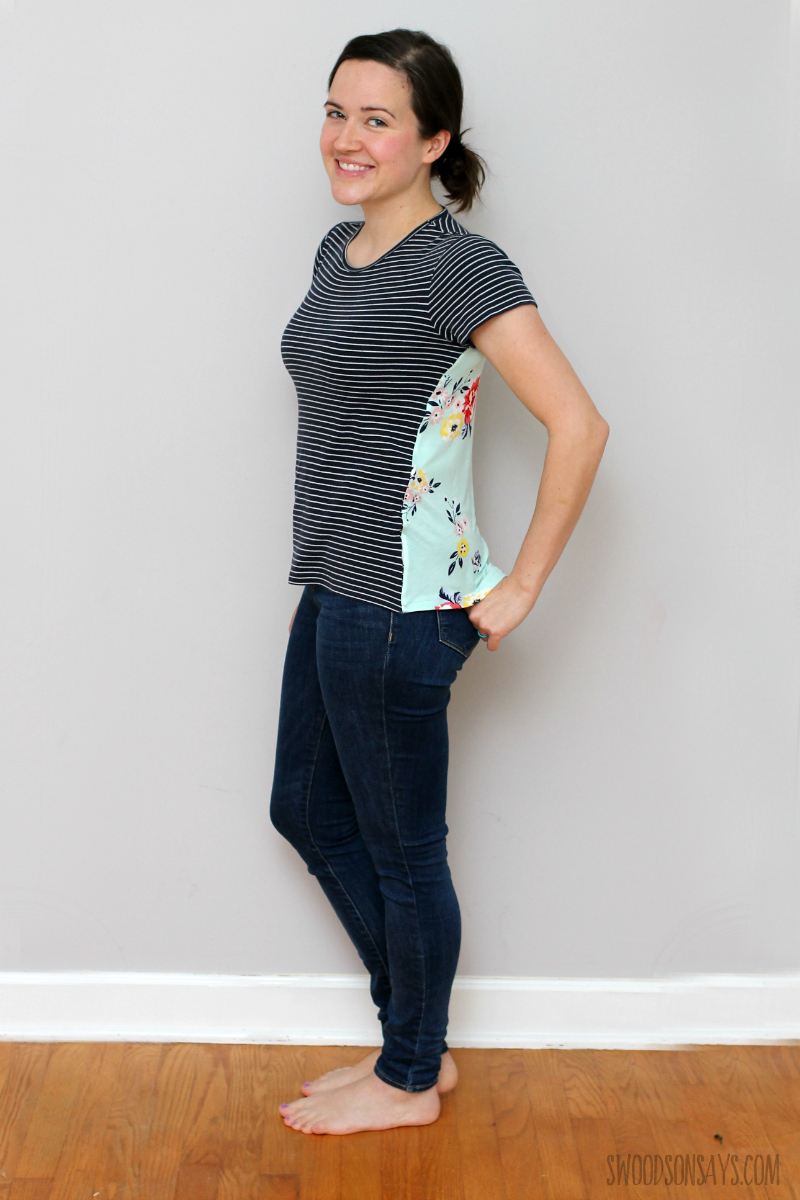
Much more comfortable! Can you believe I didn’t actually cut any from the front panel, it’s just sliding forward? I thought about adding a pocket to the top, do you think I should do that next?
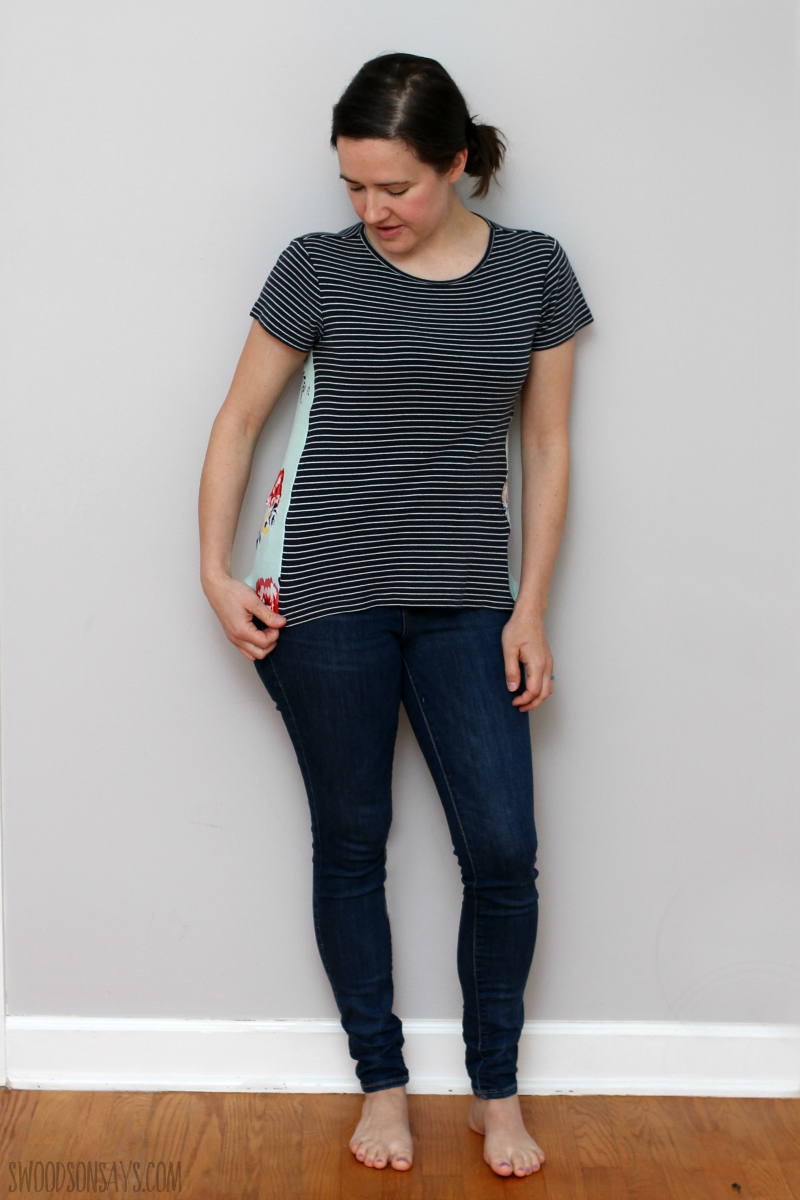
The back fabric peeks out to the front subtly, which I love. Florals & stripes mixed together is my jam.
How to make a t shirt bigger with a back panel
Ready to make your own?
Pin this tutorial for how to add fabric to a shirt to make it bigger with this link or collage image:
 fashion
How to make a t shirt bigger with a back panel
Supplies
- 1/4 yard of knit fabric that is similar to your original tshirt in weight
- HeatnBond Soft Stretch Lite Tape – optional, for hemming
- Ballpoint needles
- Coordinating thread
- Iron
- Rotary cutter
- Scissors
- Pins
- Quilt ruler
- Tracing paper
Steps
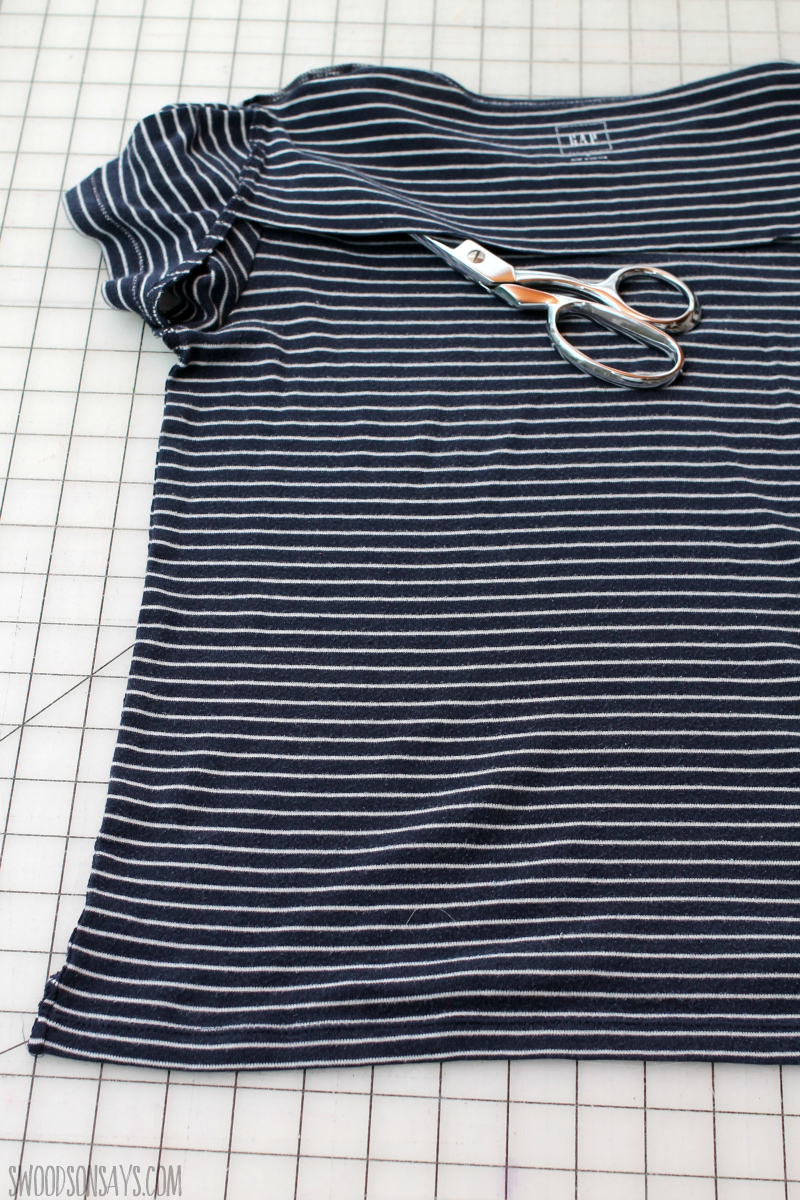
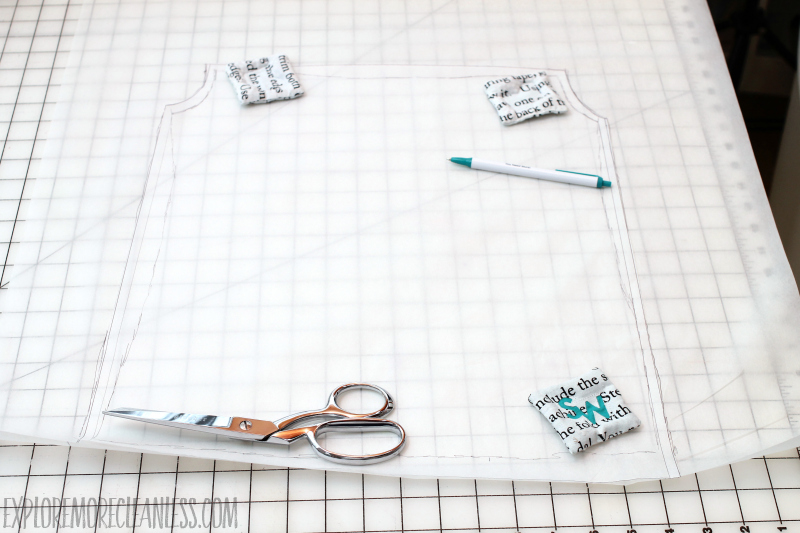
Step 1- Time to chop out the back! I could just follow the seams and a stripe over, but use a pen to mark if your shirt is solid. Be sure to cut so the pre-existing seam is removed along the side seam, but *leave* roughly 1/4″ of extra fabric away from the seam on the arm.
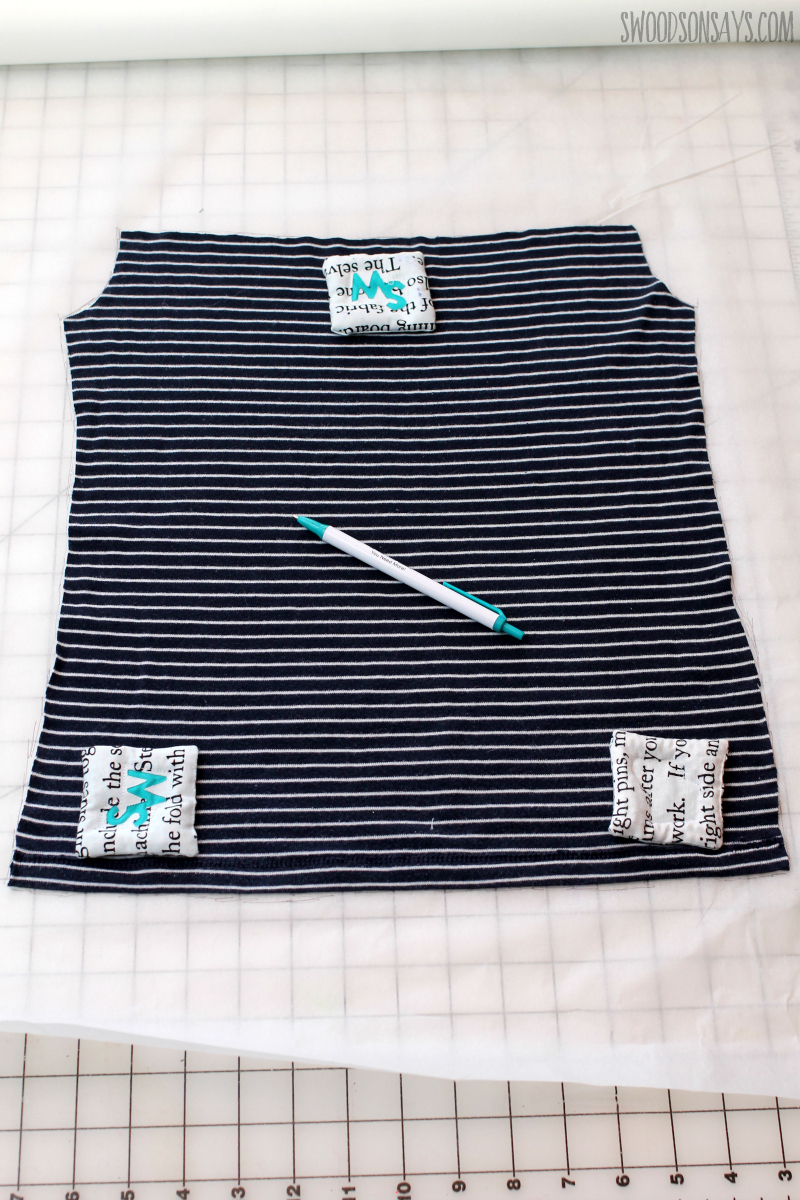
Step 2- Trace the back piece you just chopped off on to tracing paper.
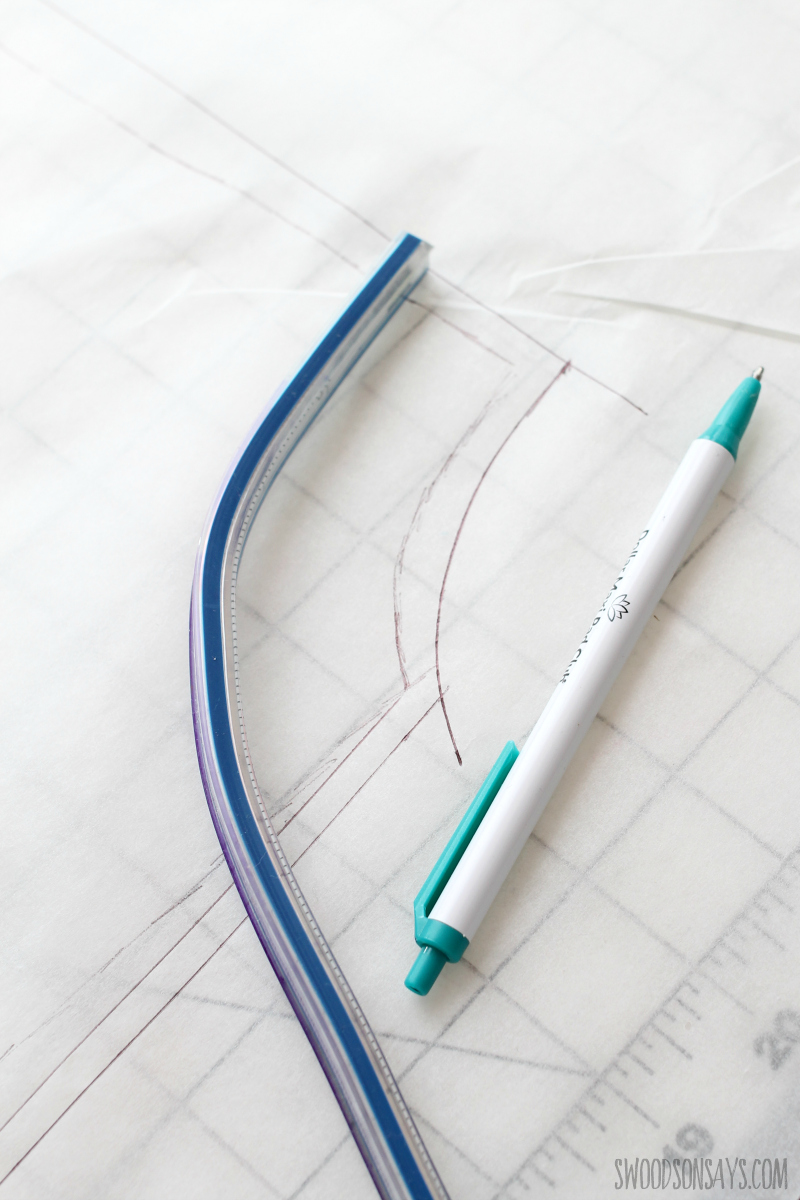
Step 3- Add a seam allowance to all sides, and a hem allowance to the bottom.
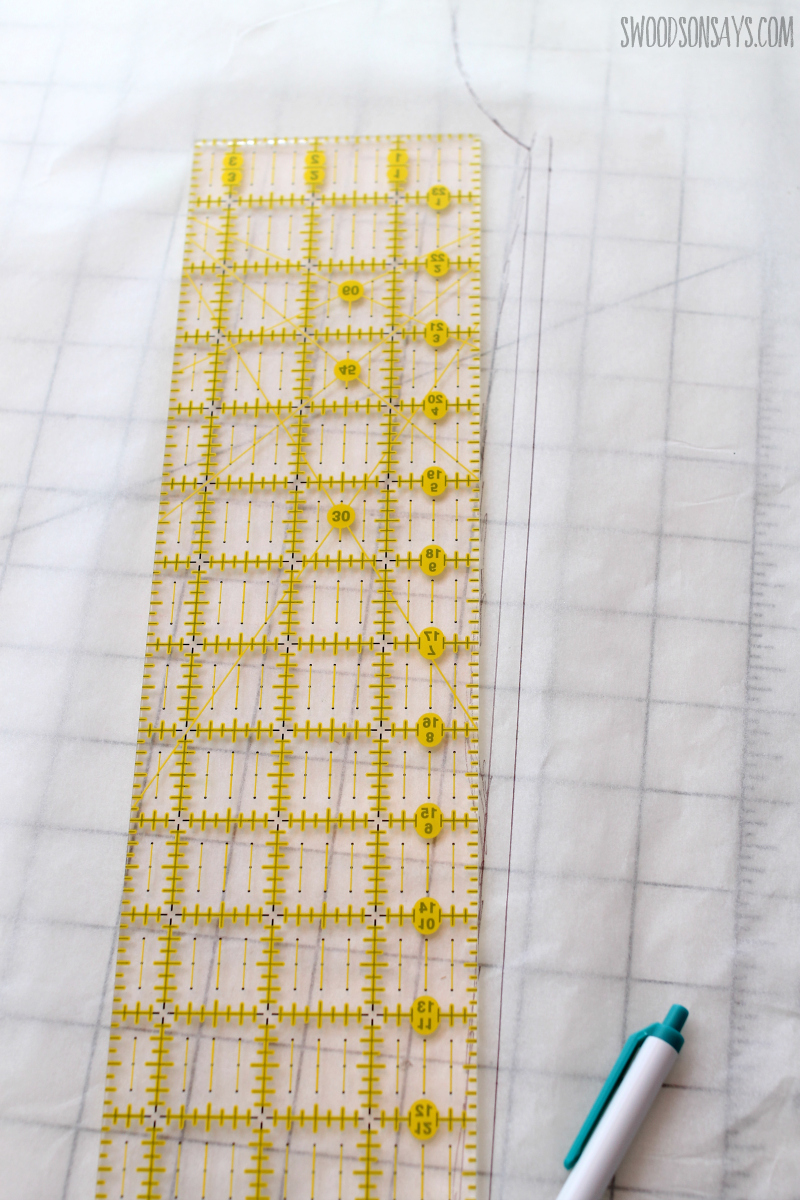
Step 4- Trace your new back pattern piece on to tracing paper, just in case you need to tweak things again from square 1! Then cut it in half, along the exact middle.
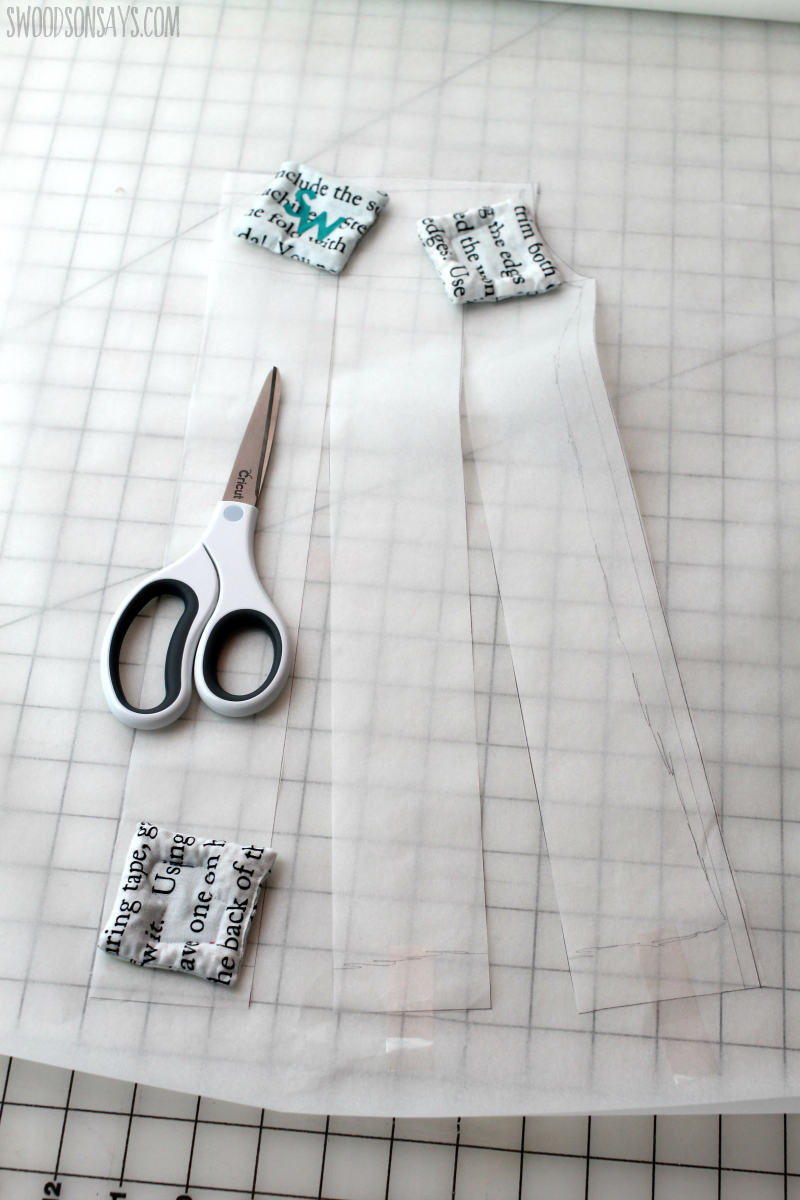
Step 5- Draw straight lines up the middle, cut, and flare them away from the straight line that will eventually be along the fabric’s fold. Trace a new pattern piece! Use it to cut out a “muslin” – I usually use knit jersey sheets for cheap practice fabric.
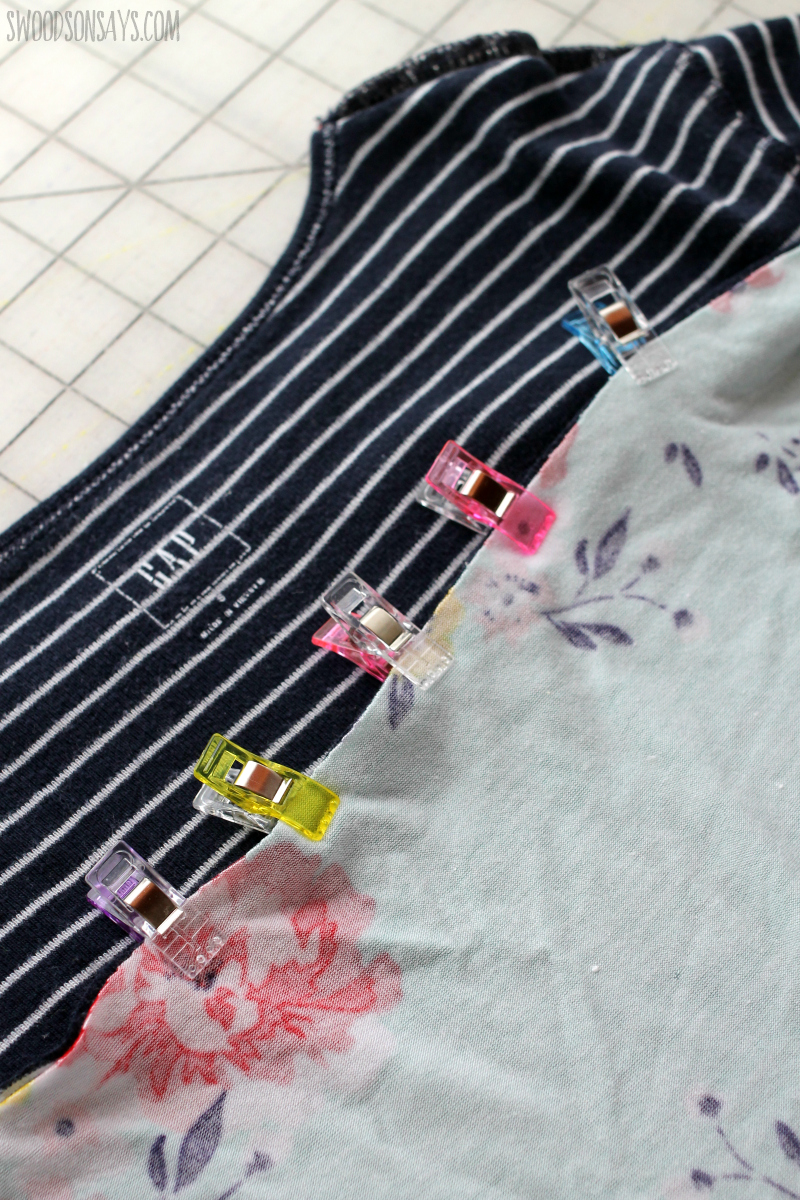
Step 6- I’d suggest pinning and/or clipping the muslin back to the shirt and try it on, inside out, and adjust if needed. Once you’re ready to sew the final version, be sure to put right sides together before sewing the seams. Keep in mind the fabric should overhang the bottom of the front, since you’ll be hemming it.
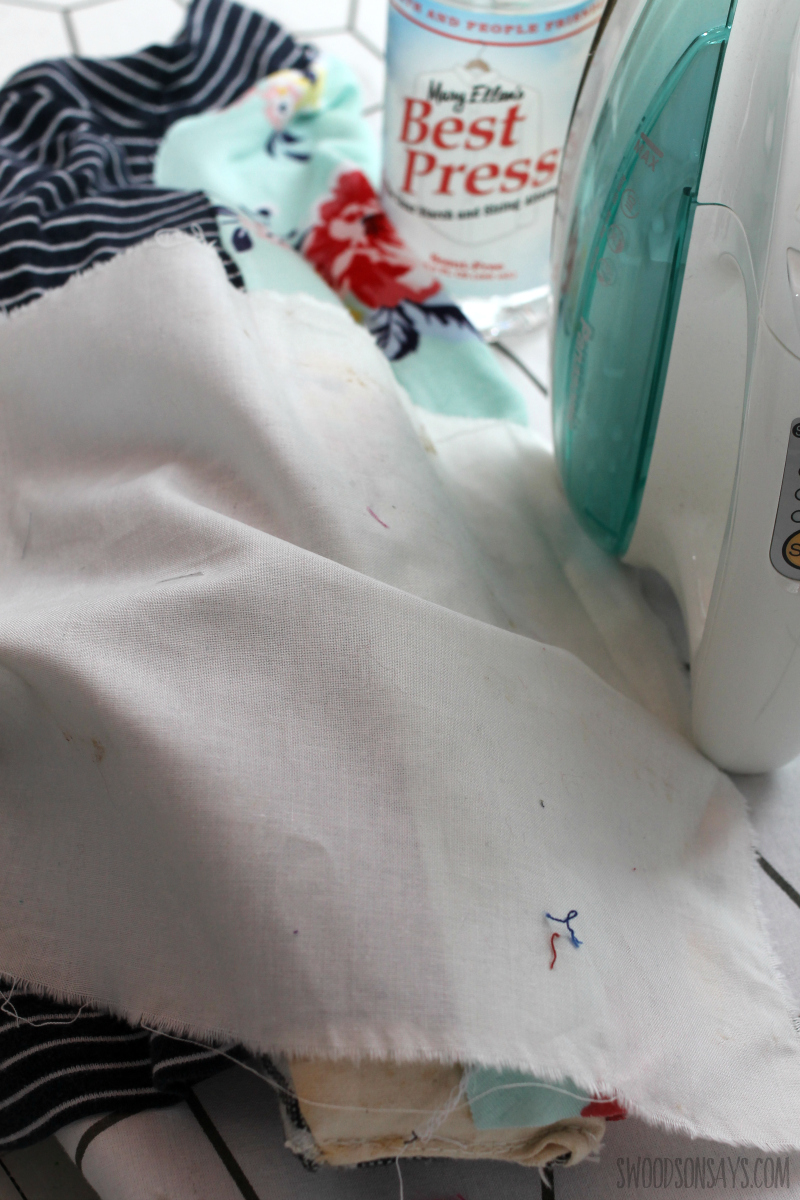
Step 7- Press the seams to the back, using a presser foot to prevent shininess if there’s any spandex in your fabric! Also mark and iron to make a hem.
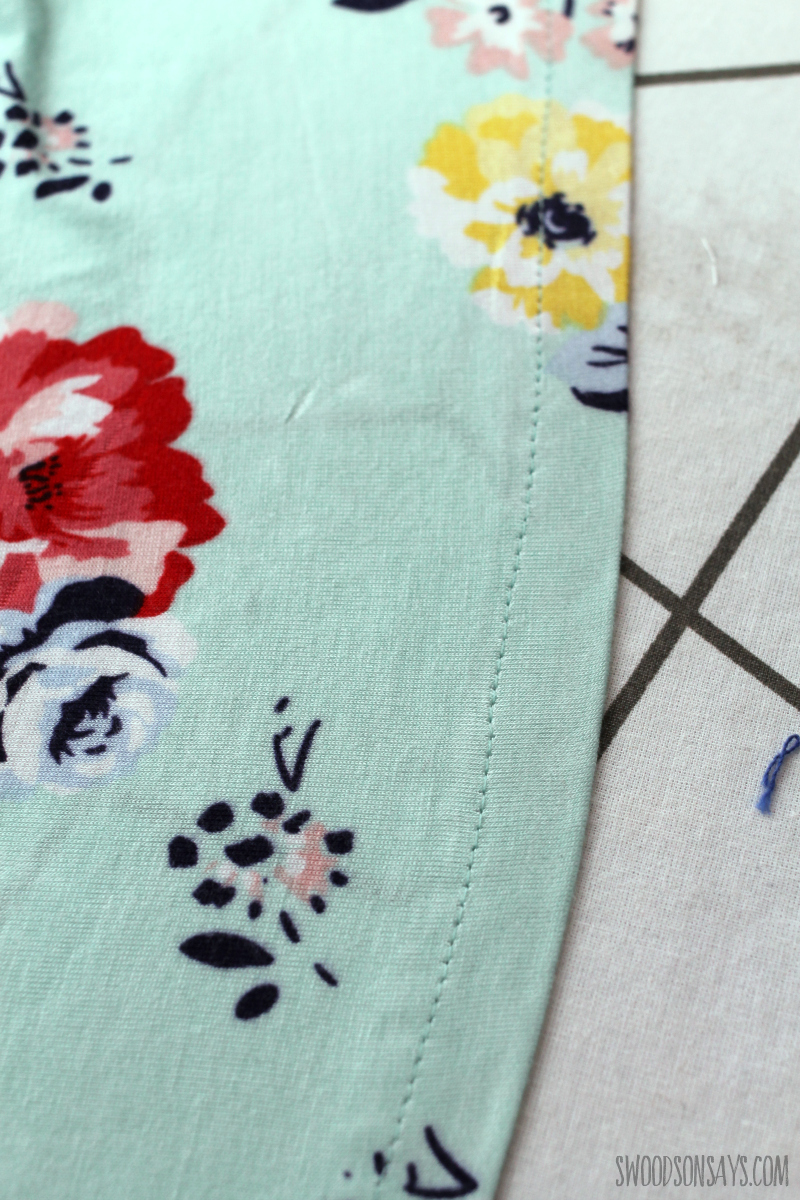
Step 8- Stitch your hem, and you’re done! Your tshirt has some extra swing and sway in the back and you can eat some extra cookies after dinner.
Gayle
Tuesday 22nd of March 2022
Why don’t you use another T-shirt to cut the back out of, as it would also be hemmed and the stretch would be the same
Stephanie - Swoodson Says
Saturday 2nd of April 2022
Gayle, that is a fantastic idea! I will have to try it sometime soon!
Magaly Flores
Friday 3rd of September 2021
Hi! So, you didn't add more fabric than you took away?
gal
Wednesday 6th of April 2022
step 5 shows how you flare pattern piece so when fabric is cut it is larger than original
Stephanie - Swoodson Says
Saturday 4th of September 2021
Hi! The finished panel was flow-ier than the original piece.
Berta
Saturday 9th of January 2021
Great idea. Very cute.
Stephanie - Swoodson Says
Saturday 16th of January 2021
Thanks Berta!
Jeanne
Monday 5th of October 2020
I am loving the shirt ideas 😃
Stephanie - Swoodson Says
Saturday 7th of November 2020
Thanks Jeanne!!