
How to sew a bookmark – a beginner sewing tutorial using fabric scraps and upcycled denim
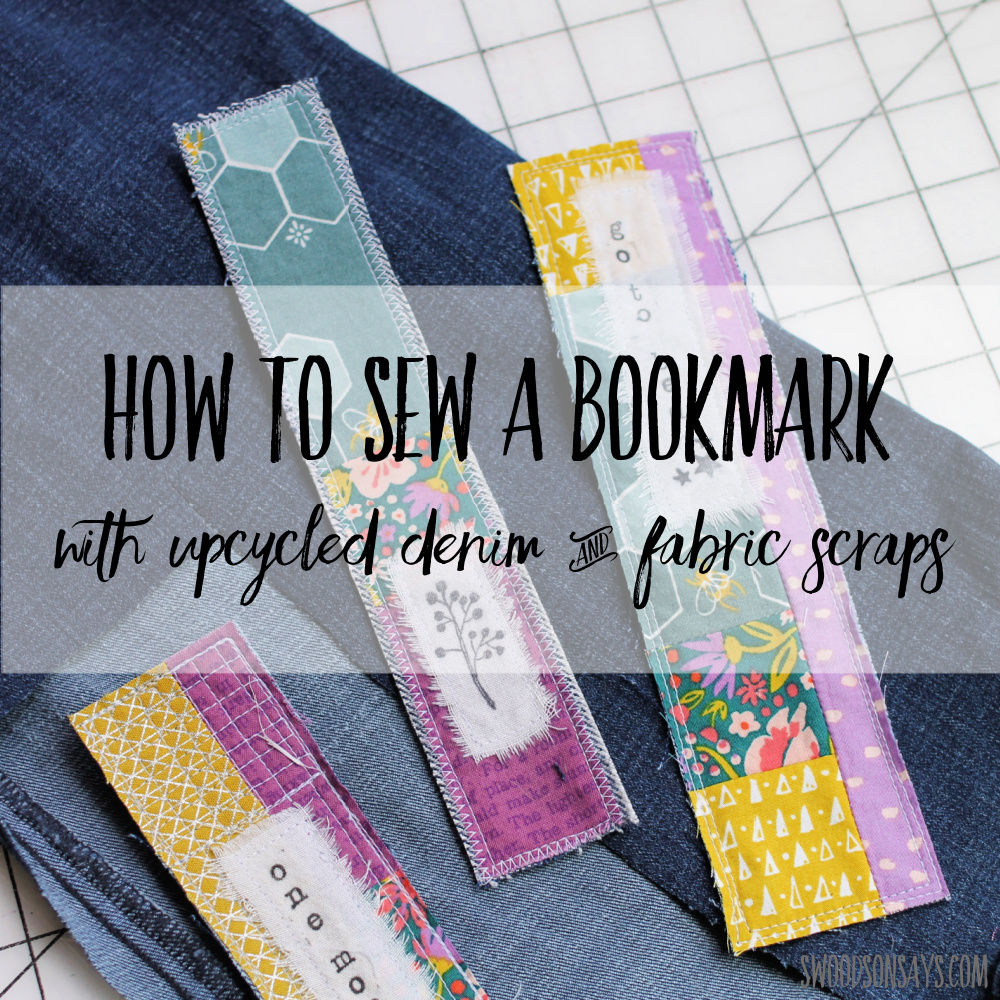
This year I’ve been hosting a few “adult craft nights” for the parents in my kids’ homeschool group, and I was looking for a fun beginner project that was easy to personalize and quick to make. Several years ago, I shared an even simpler beginner bookmark sewing tutorial (I also shared a no sew bookmark tutorial!)- but wanted something a little more sophisticated. Here is a more freestyle, stamped version that I’ve had so much fun making! Instead of tucking your tiny scraps away, why not stitch them up into something cute like this?
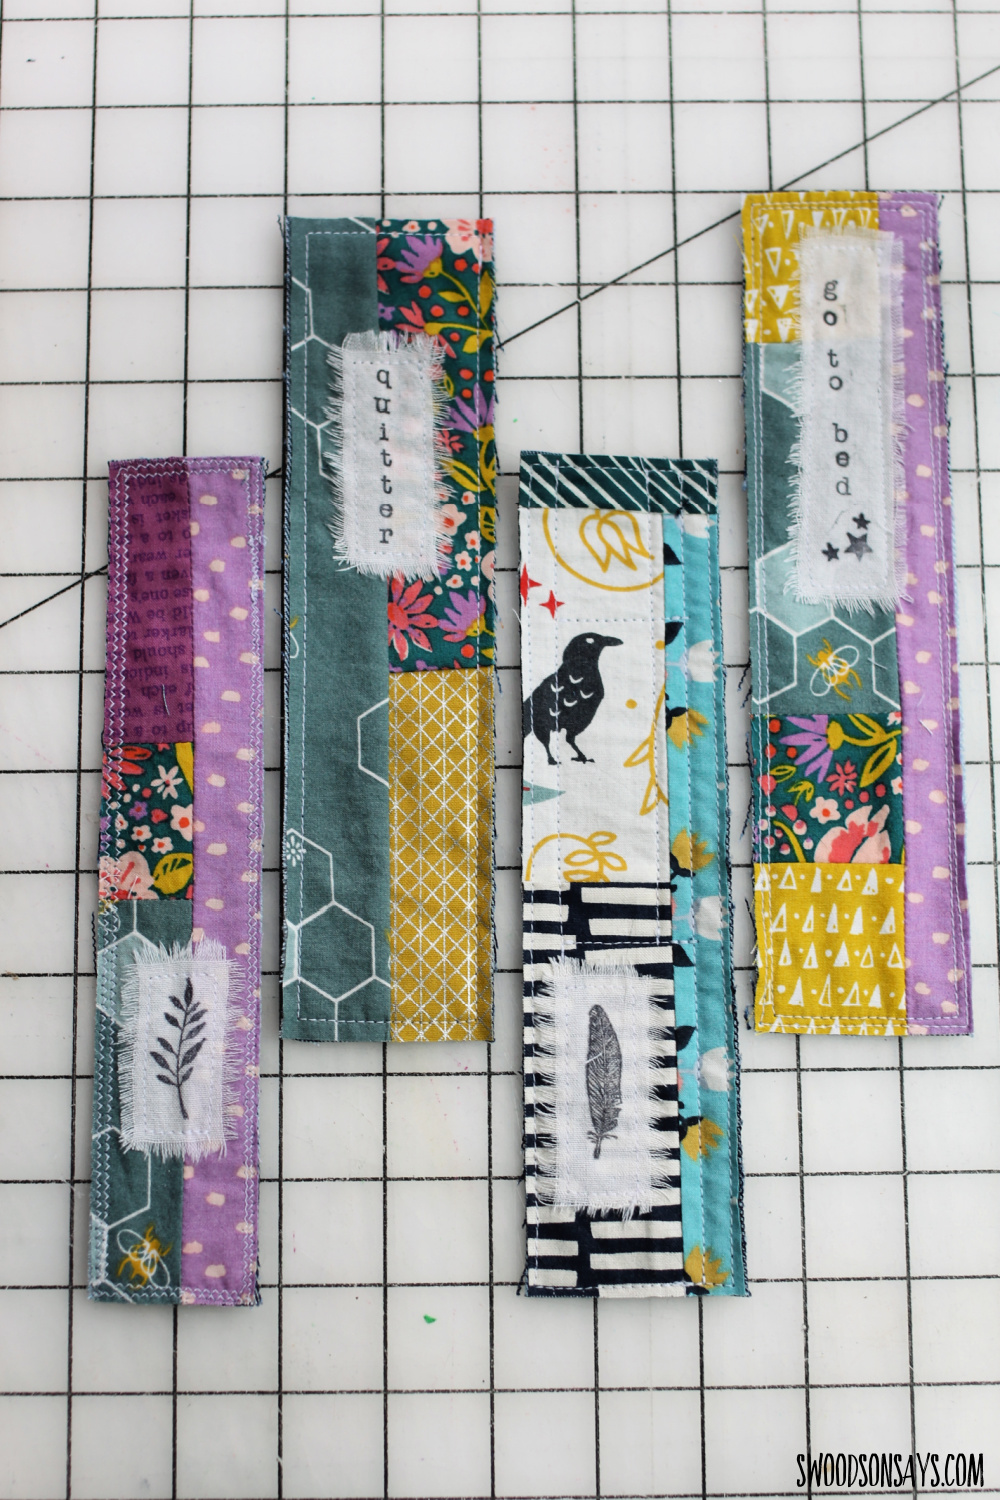
As you can see, there are all sorts of ways to personalize and customize these! They use the tiniest of scraps and don’t require any real measuring, perfect for laidback sewists. There’s not batting in between the layers – I’ve tried it this was and it’s fine, but I like the lower loft and weight of just scraps & denim.
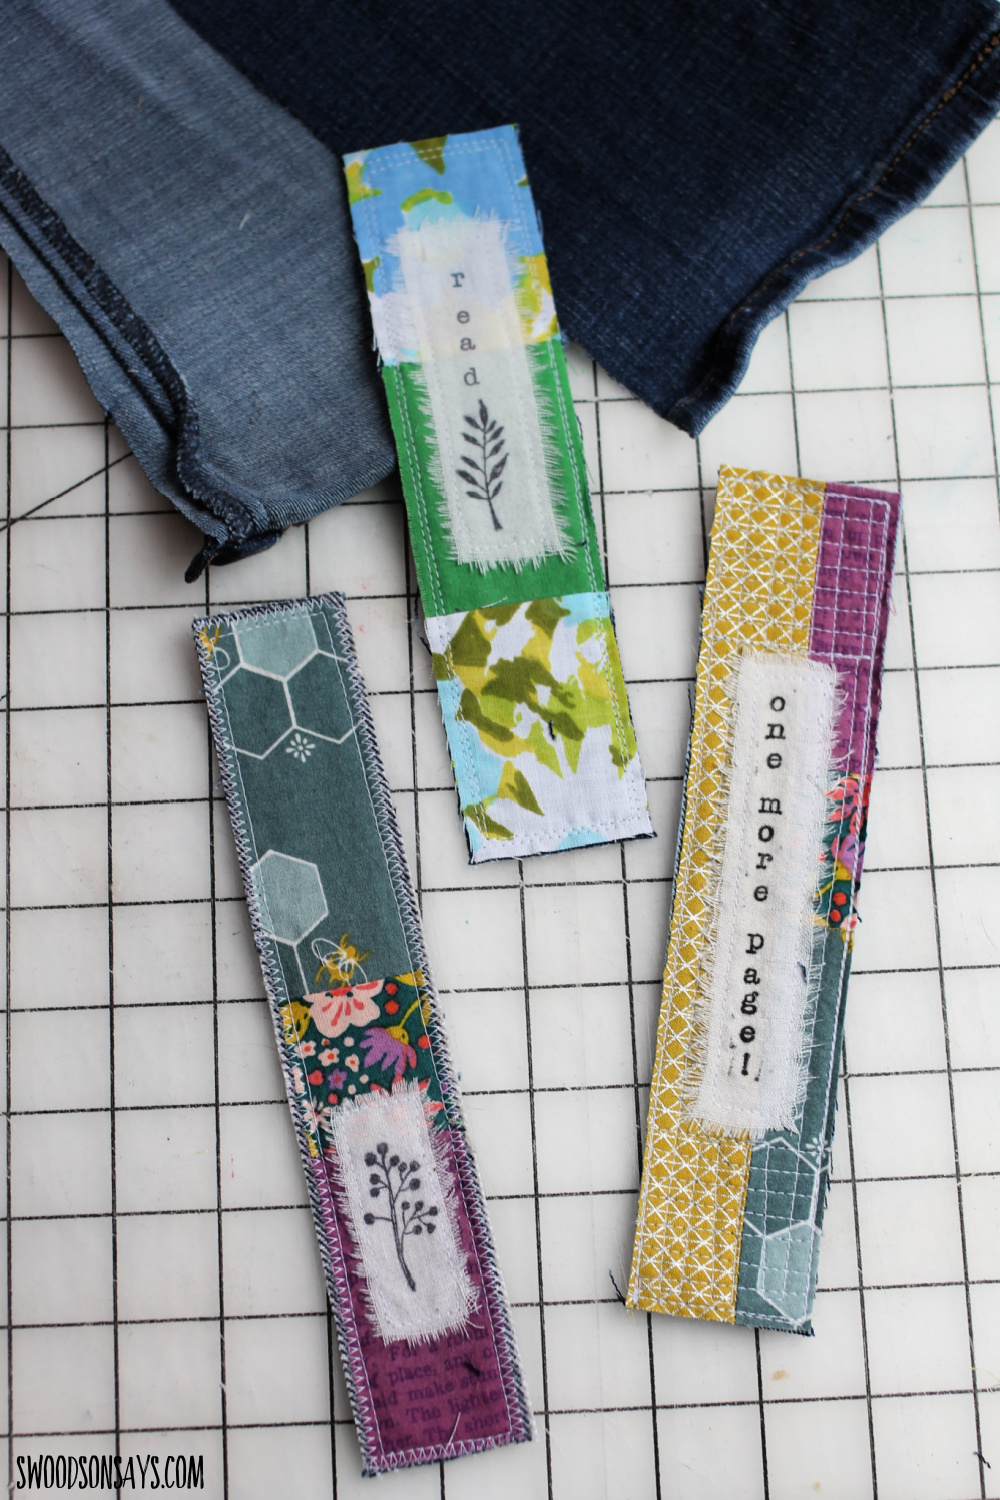
I don’t sew to sell but I suspect these would be a nice affordable item at a craft fair! Perfect for gifting with a book, tucking into little free libraries as a random act of kindness, or leaving at the library to spread good cheer.
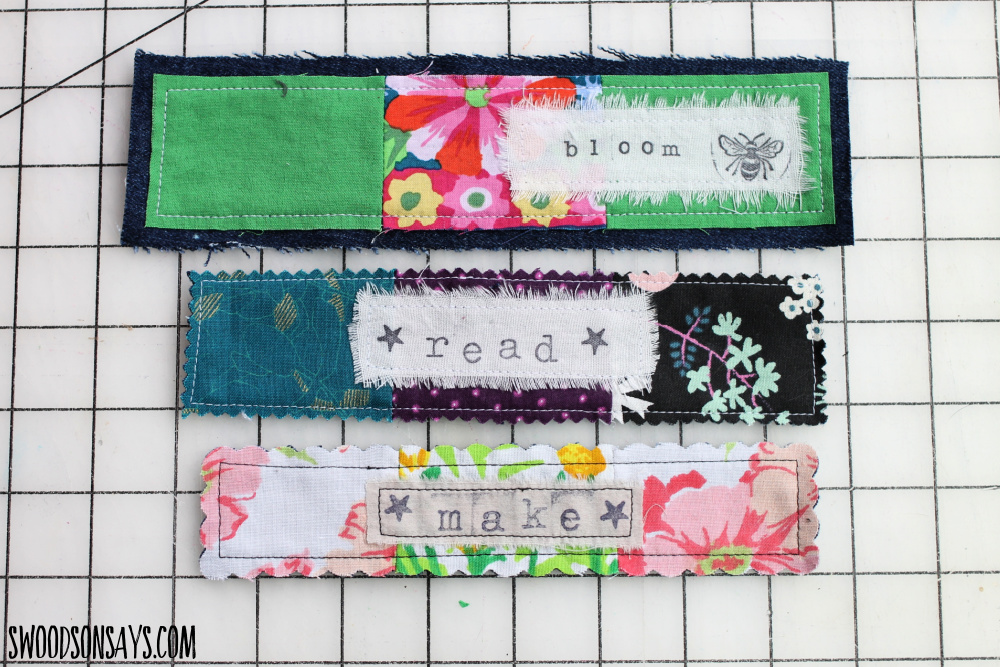
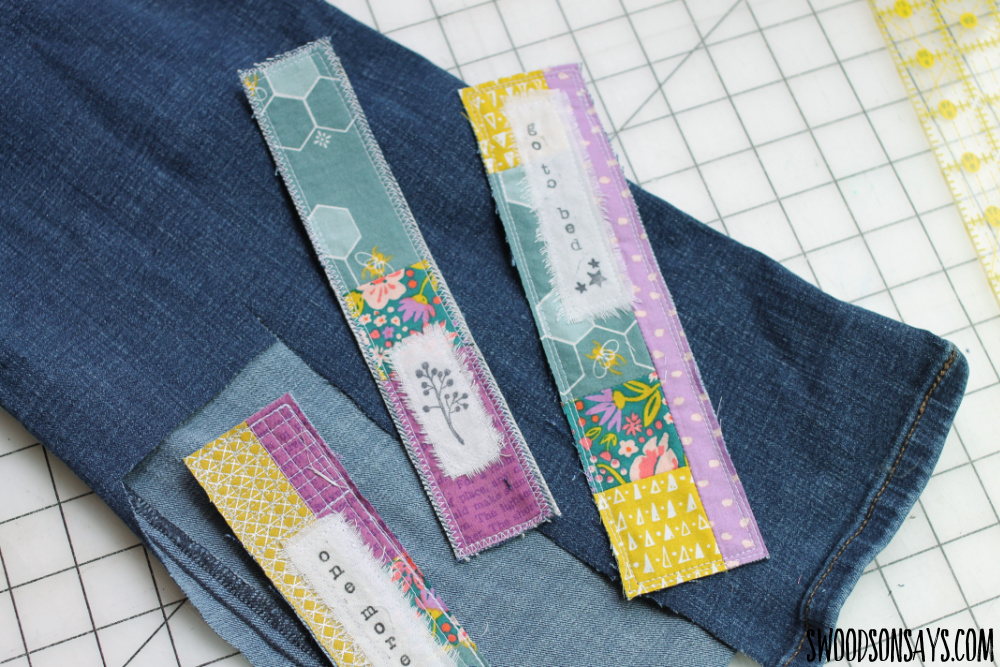
Here are a few with a different style too!
If you like this post, check these out while you’re here!
- 95+ sewing books for children & sewing fiction for adults
- 15+ things to stitch & sew for book lovers
- 30+ of the best fabric scrap projects
- Sewing tips for beginners -15 mistakes to avoid!
- 20+ easy beginner sewing projects
- 45 ways to upcycle old jeans!
Pin this post on how to sew a bookmark – a beginner sewing tutorial with this link or collage image:
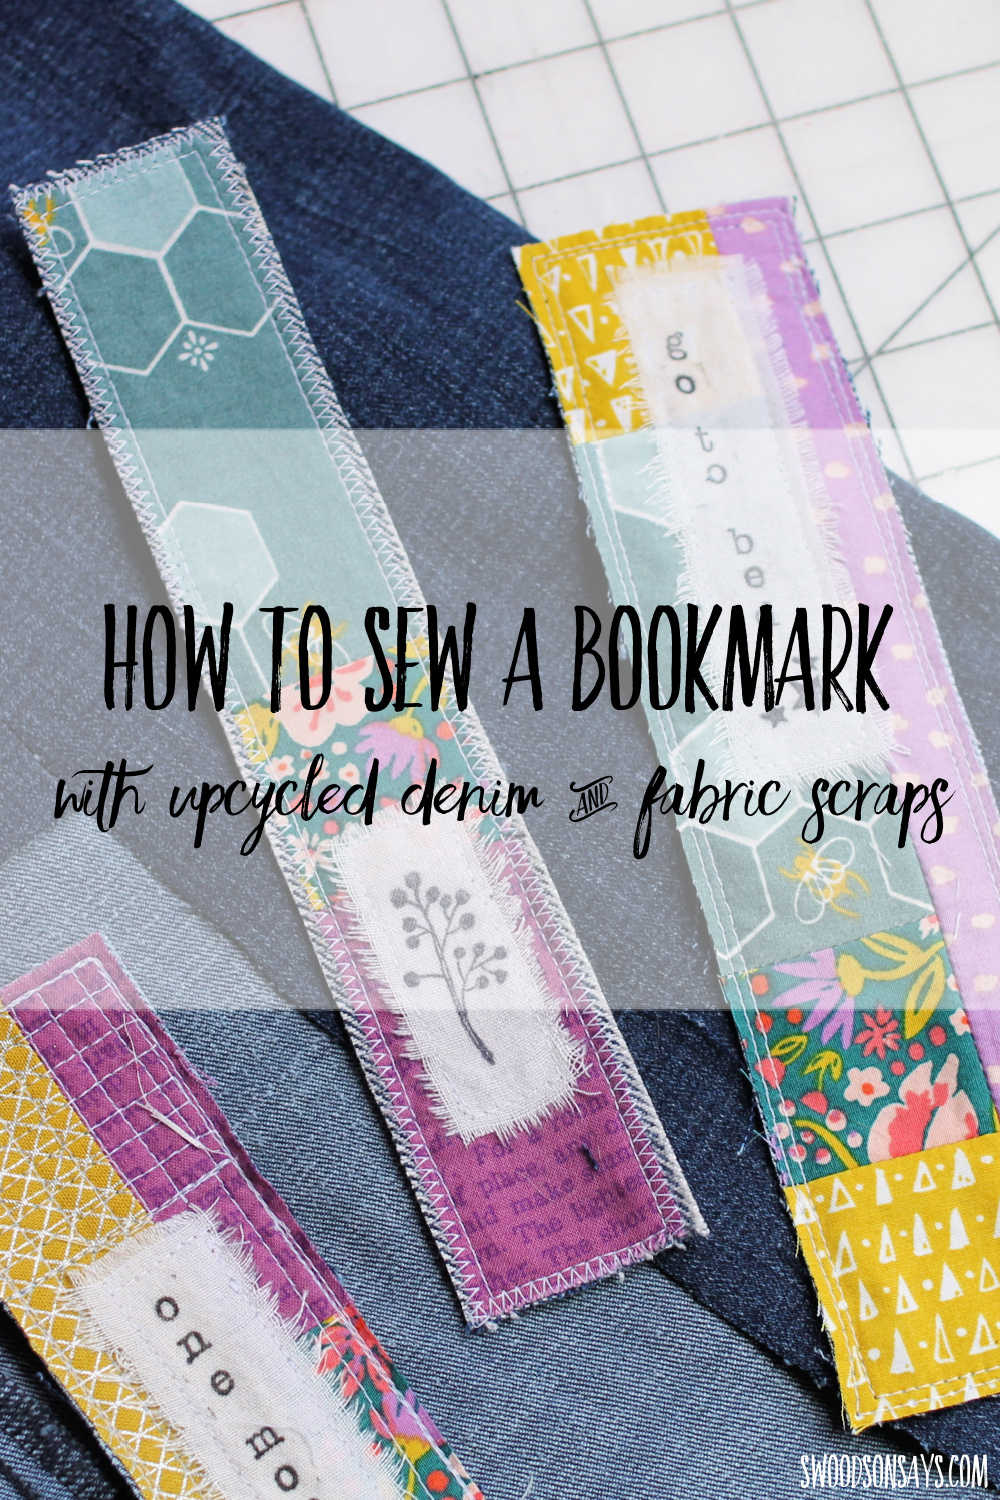
Ready to make your own? These could definitely be done with improv patchwork, curved patchwork, strip piecing, the sky’s the limit! It would be fun to hand embroider the labels instead of stamping, too.
How to sew a bookmark – a beginner sewing tutorial
Supplies:
- White cotton scrap
- Small stamps – here is the botanical set I used in a few of the examples
- Fabric ink (if you want to be able to wash/dry it, otherwise permanent paper ink works too)
- Quilt ruler
- Quilting cotton scraps
- Old jeans
- Glue stick
- Pinking scissors if you want to avoid fraying – or scalloped scissors if you like the look
Steps:
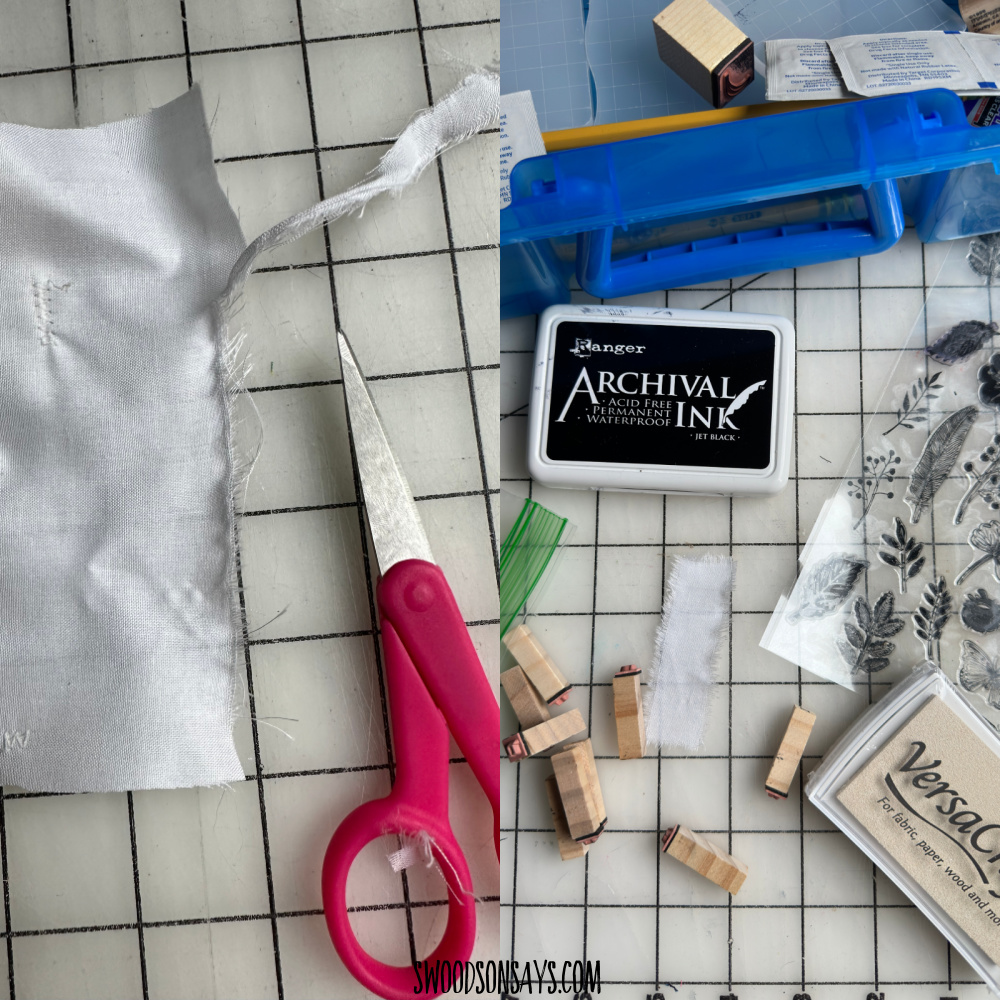
Step 1- First, make your little accent piece. I like the frayed edge look so I took a tiny snip and then ripped the rest, and then stamped.
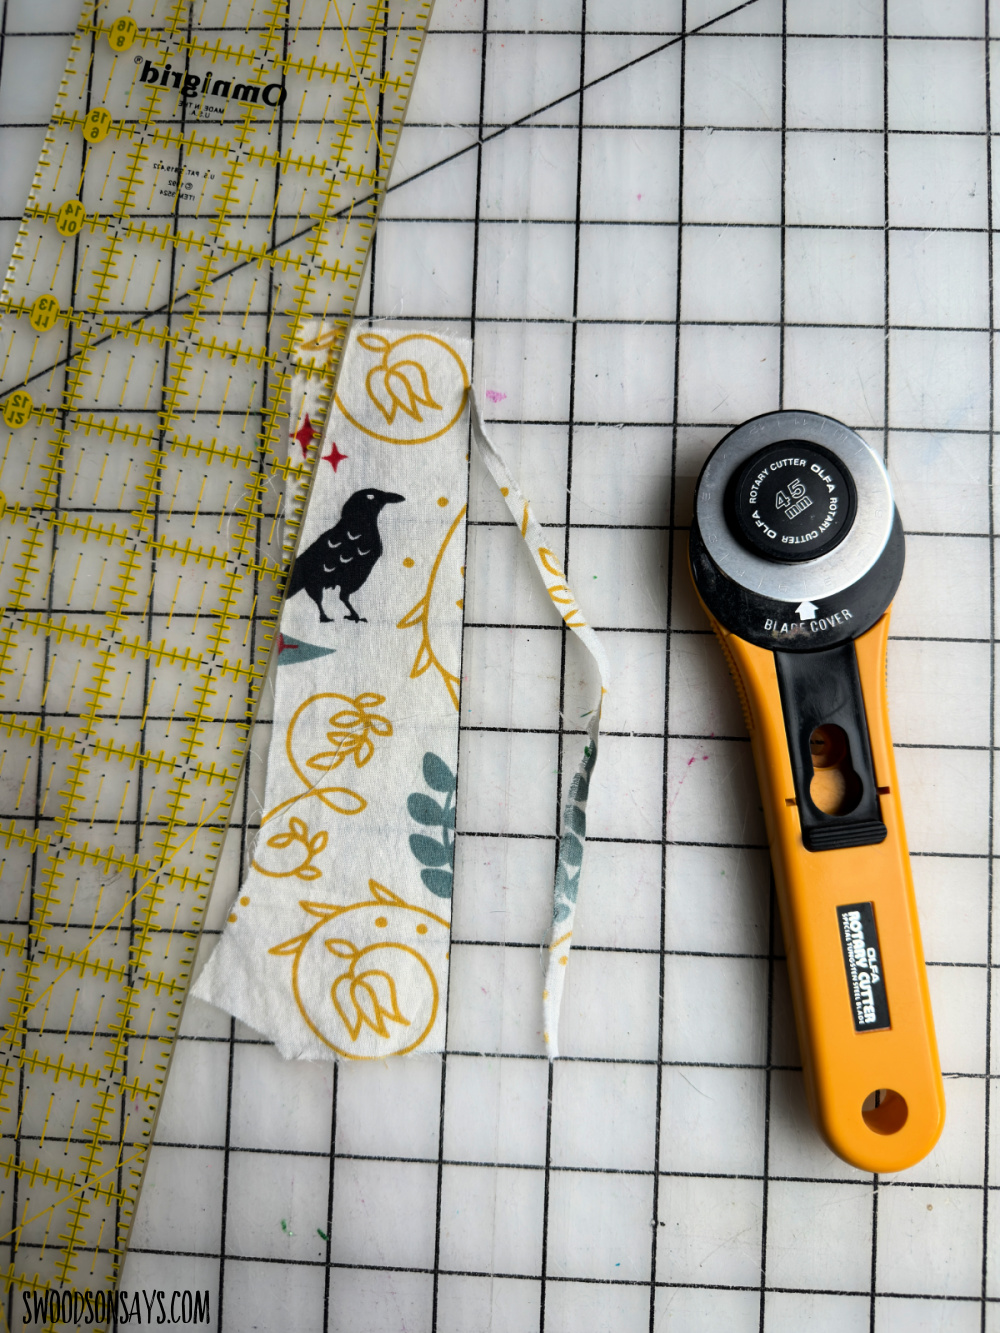
Step 2- Slice some straight edges! Pick a scrap to start with and give it a straight edge, then pick another to go on top or the side. Slice it a straight edge too.

Step 3- Sew your two first pieces together, right sides together. The seam allowance size doesn’t matter too much!
Step 4- Press your seams open or to one side. I like starting with the first set pressed open and then switch to one side for the next set, it stays less bulky. But honestly, it doesn’t make a huge difference. Just press them well!
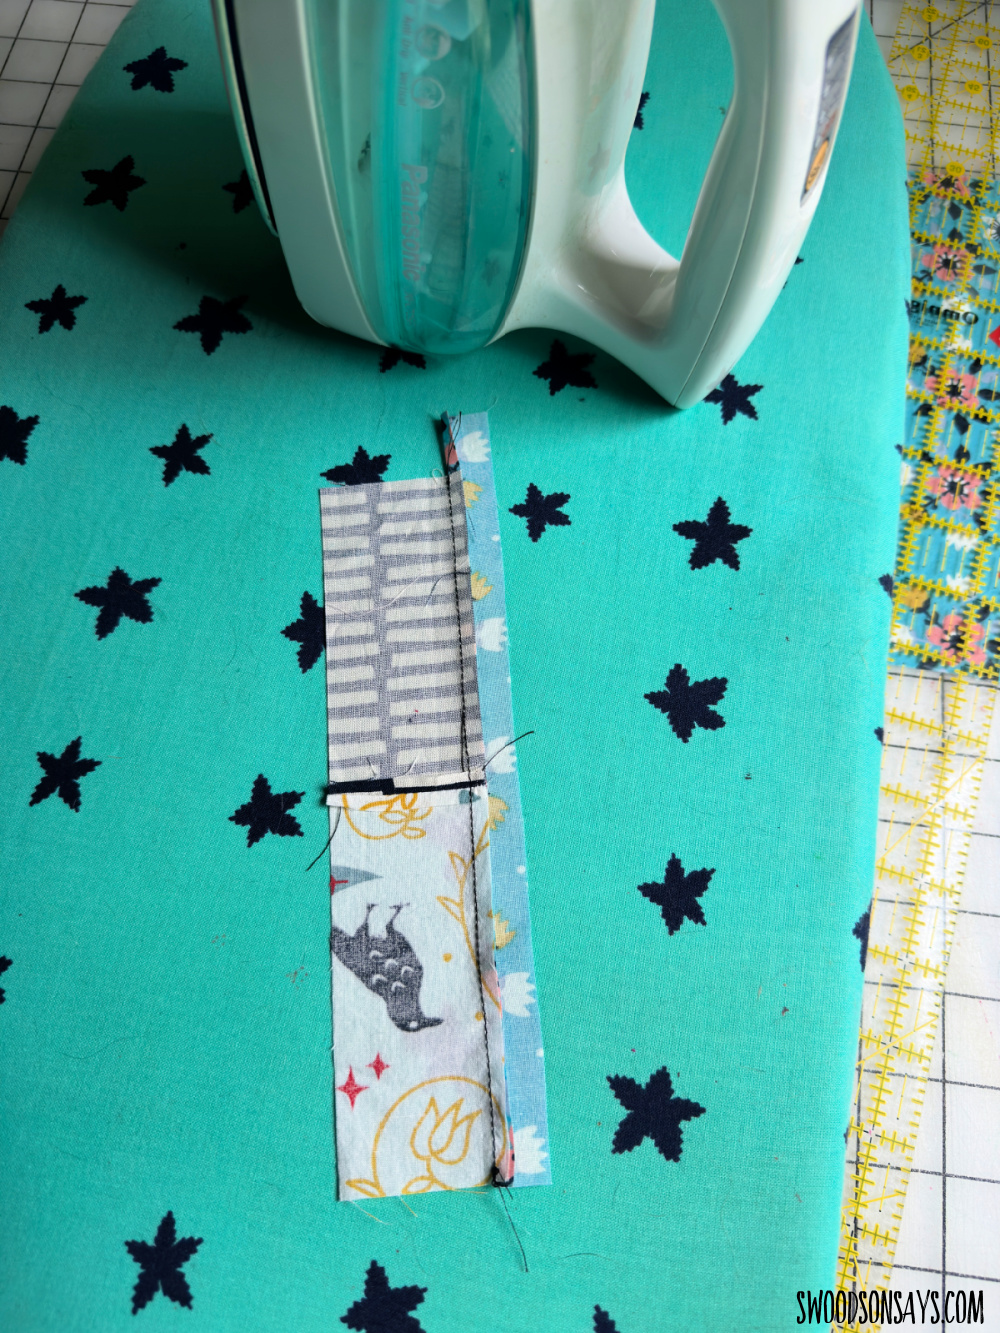
Step 5- Sew on your next piece with a straight edge, press the seams again, repeat until the piece is roughly the size you’d like! I liked mine roughly 1.5-2″ wide and 9-11″ tall. No measuring, just flowing with what looks right. Press again.
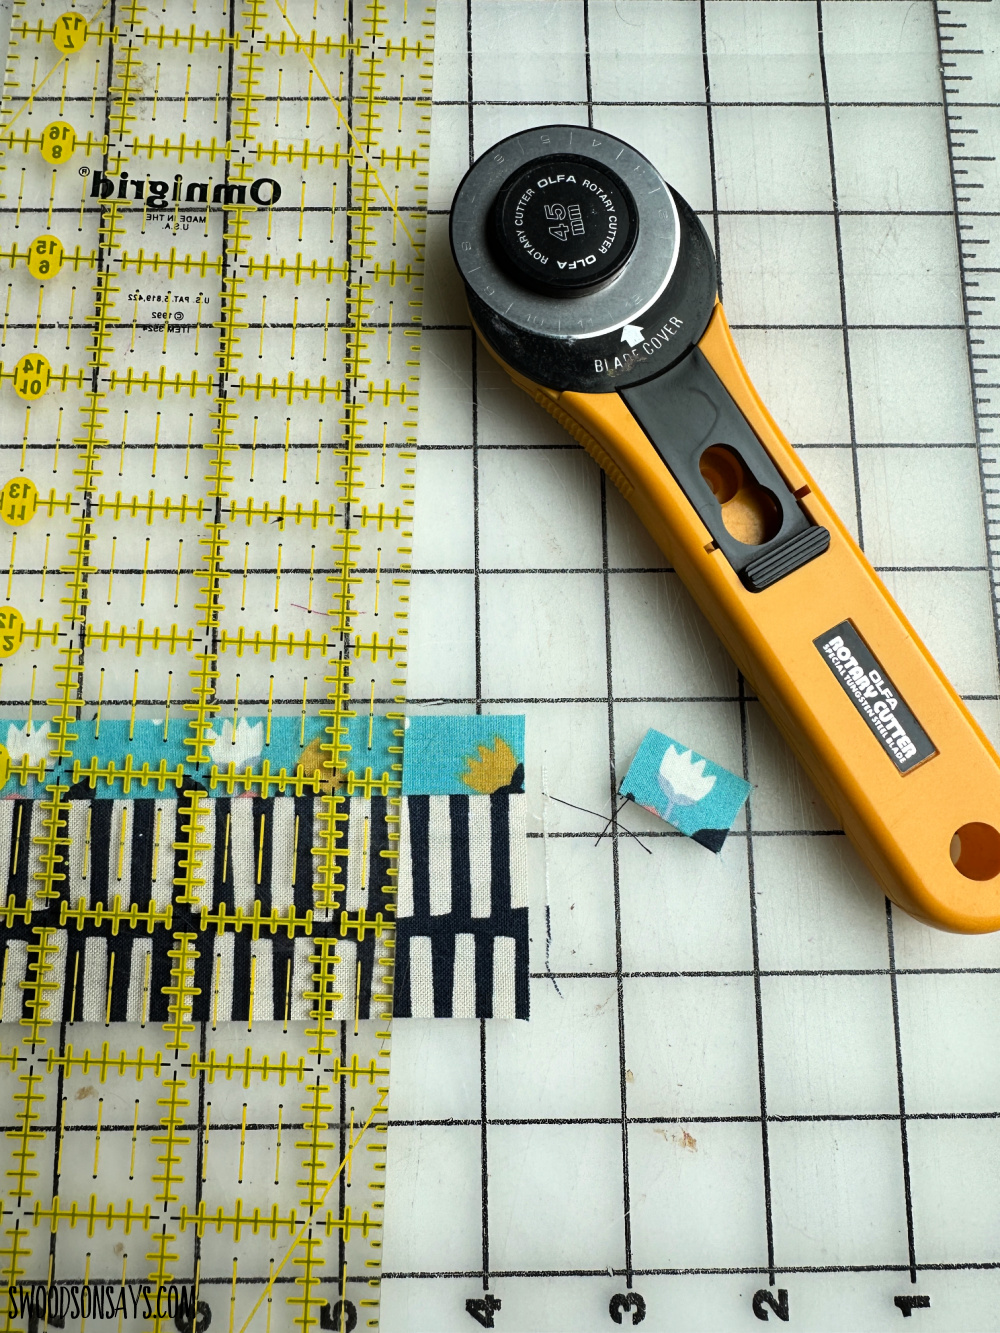
Step 6- Trim your edges nice and straight!
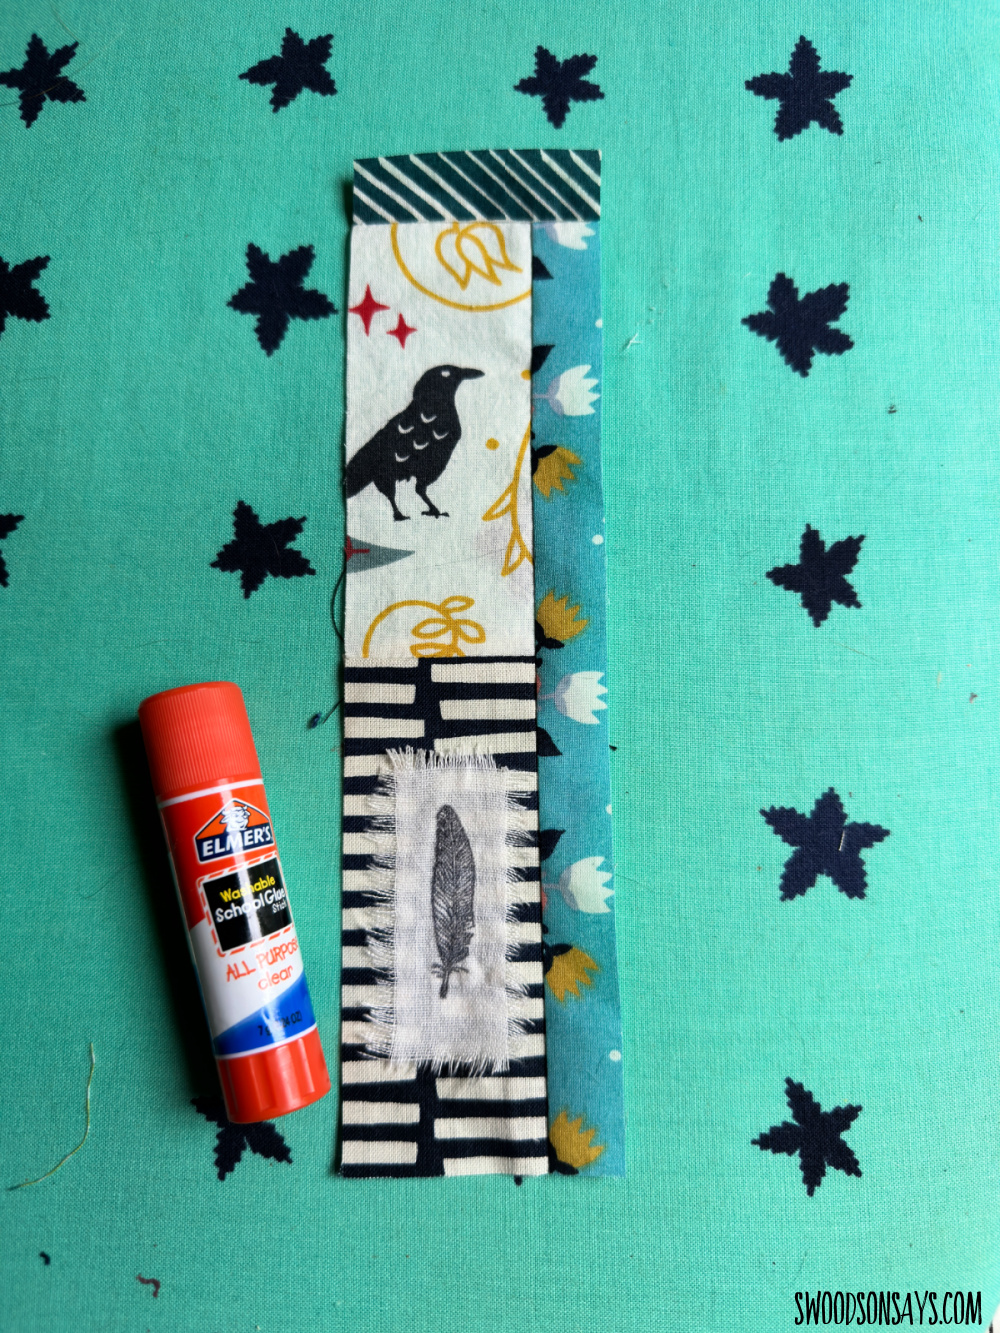
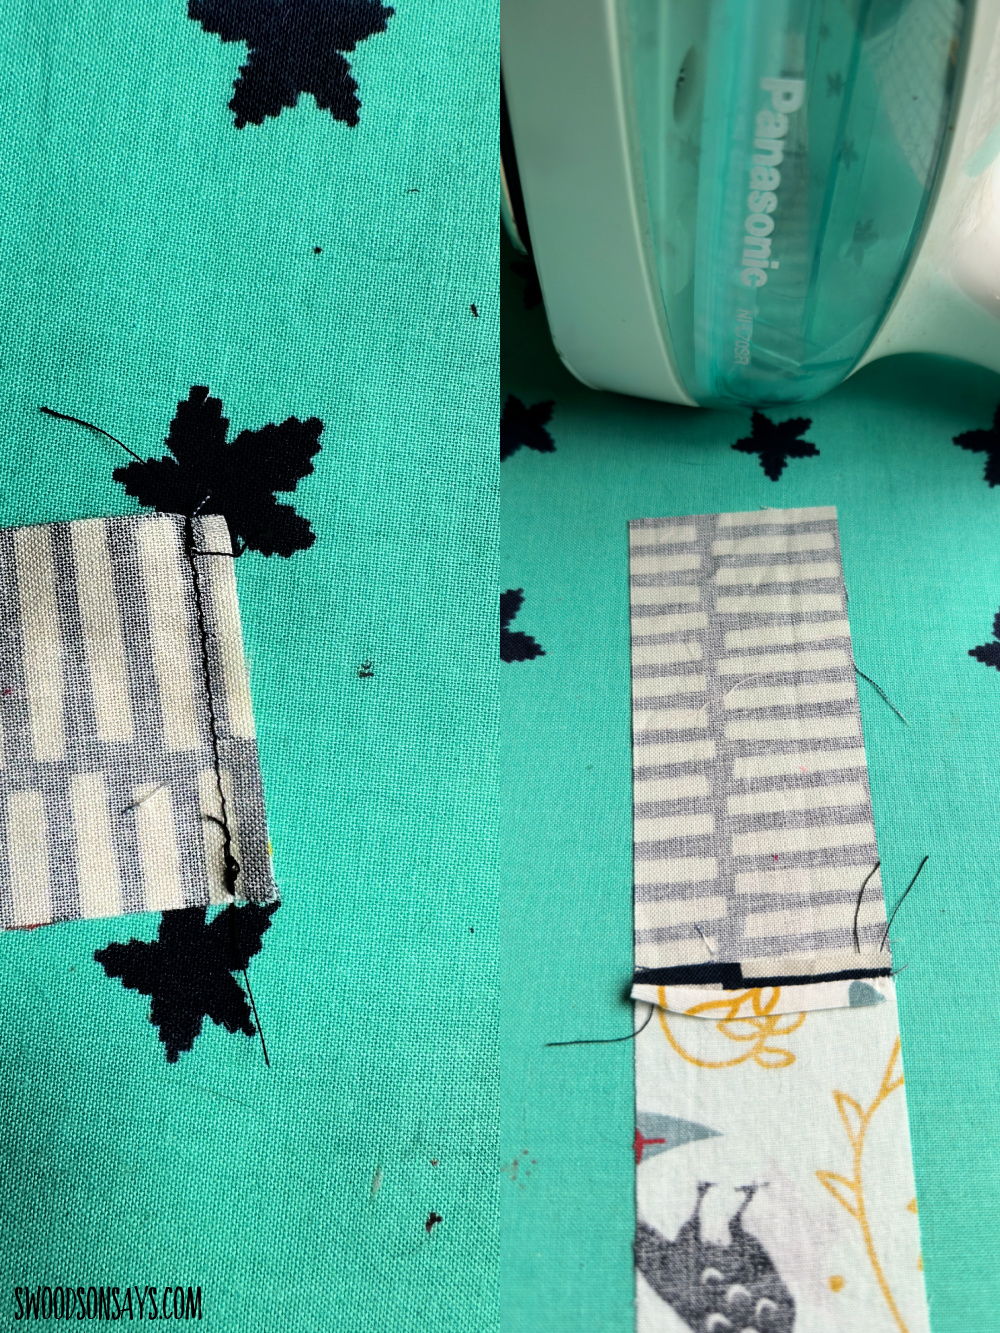
Step 7- Use a glue stick to hold down your accent piece and stitch on.
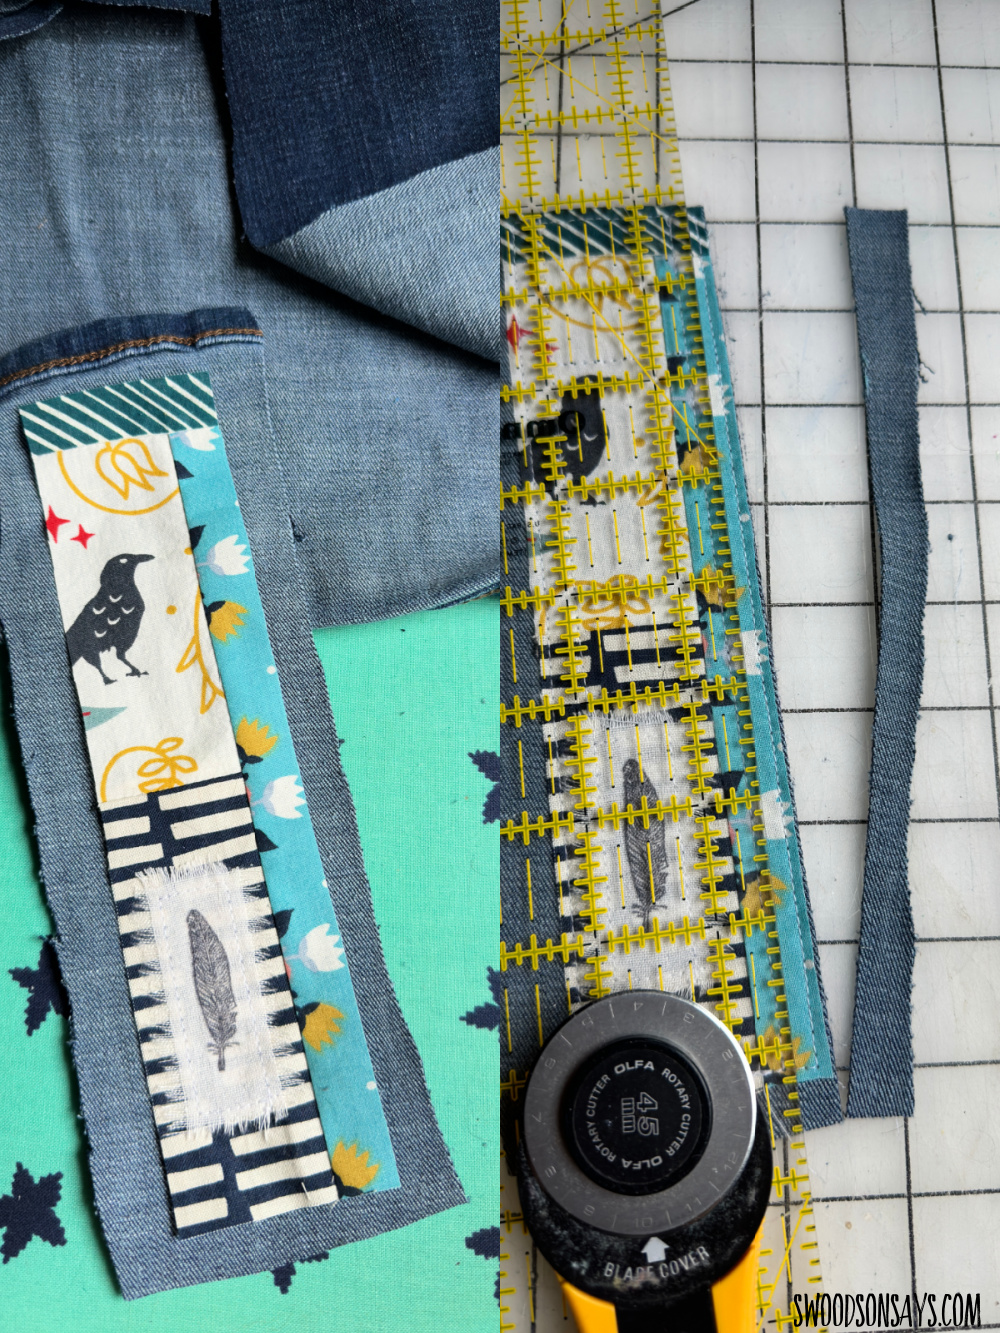
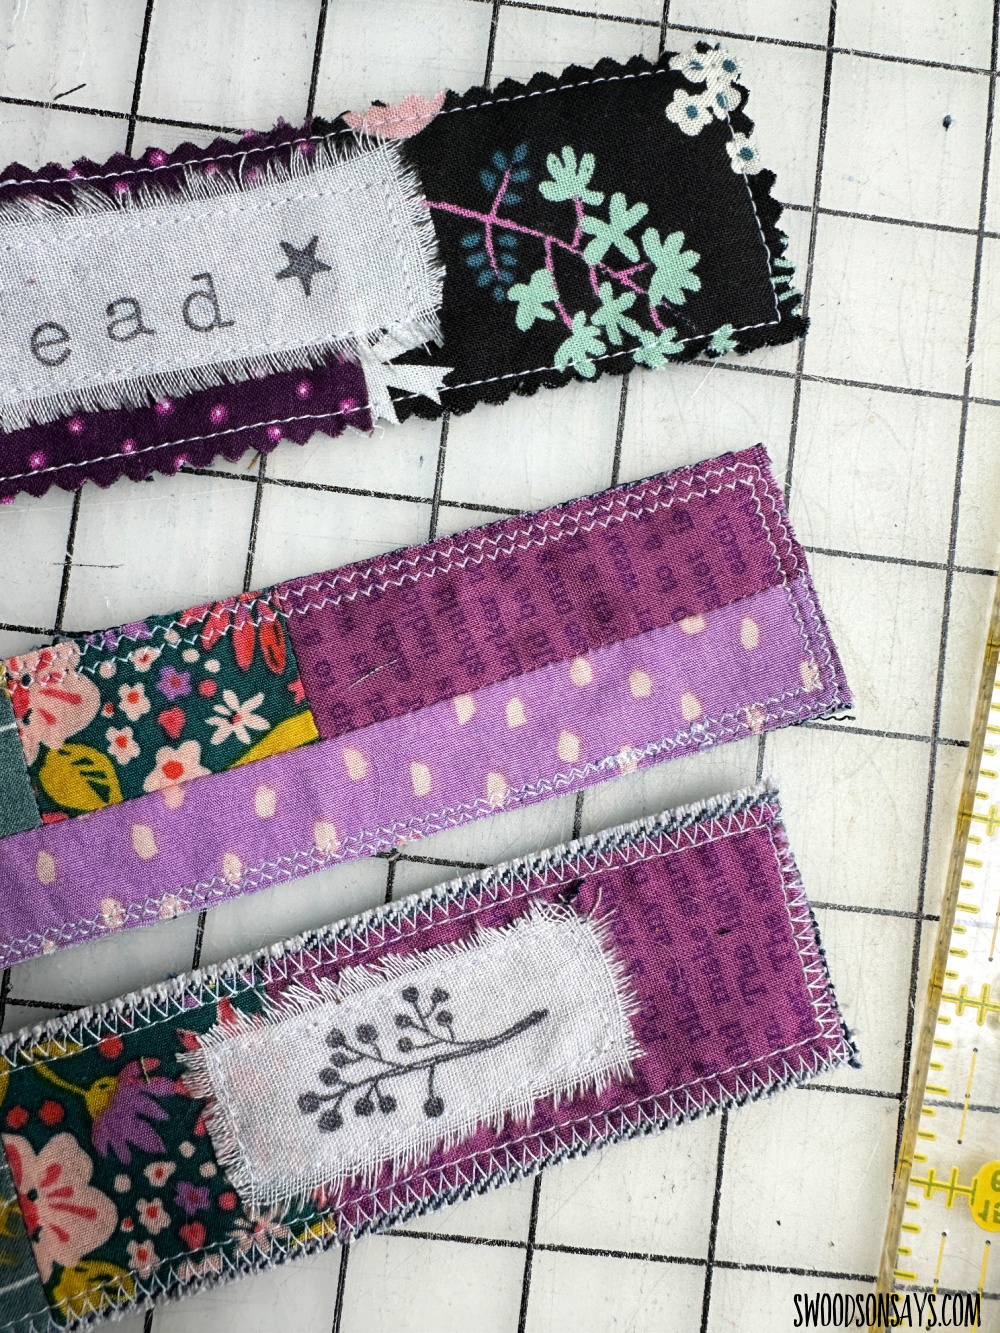
Step 8- Cut a piece of denim that is larger than your bookmark, glue it down, and sew around. I experimented with different stitch options – if you leave it as a straight stitch, it will fray, but as a bookmark this isn’t a huge issue for me. However, you can trim the edges with pinking shears (top option, shown above), use a double zig zag stitch (middle option, shown above), or a zigzag over the raw edges, on to the denim (bottom option, shown above).
You’re done! They make for a super nice weight, use up jeans that no one wants, and sew up nice and quick. Perfect quick project!
Zuzanna
Wednesday 20th of September 2023
Thank-you for this great project. I have saved scraps in gallon jars just because they make me happy. I will be even happier to make something with them! My machine does lettering so I can personalize and add readish words. This is a great make for the times you finish a something and are at a bit of a loss at what to do next.
Zuzanna
Wednesday 20th of September 2023
Than