
Upcycled t-shirt flat bottom drawstring bag pattern
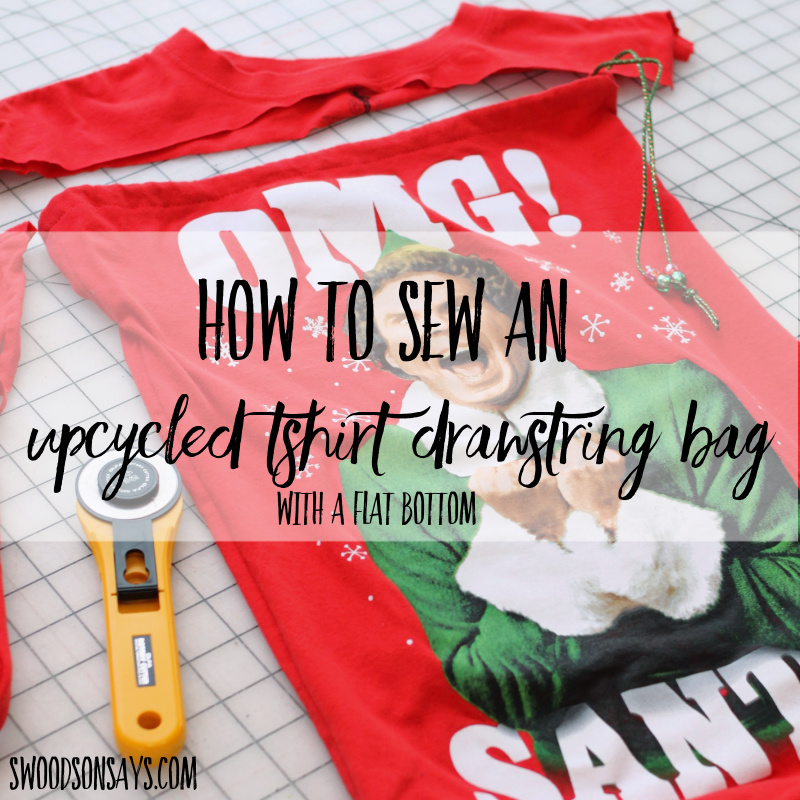
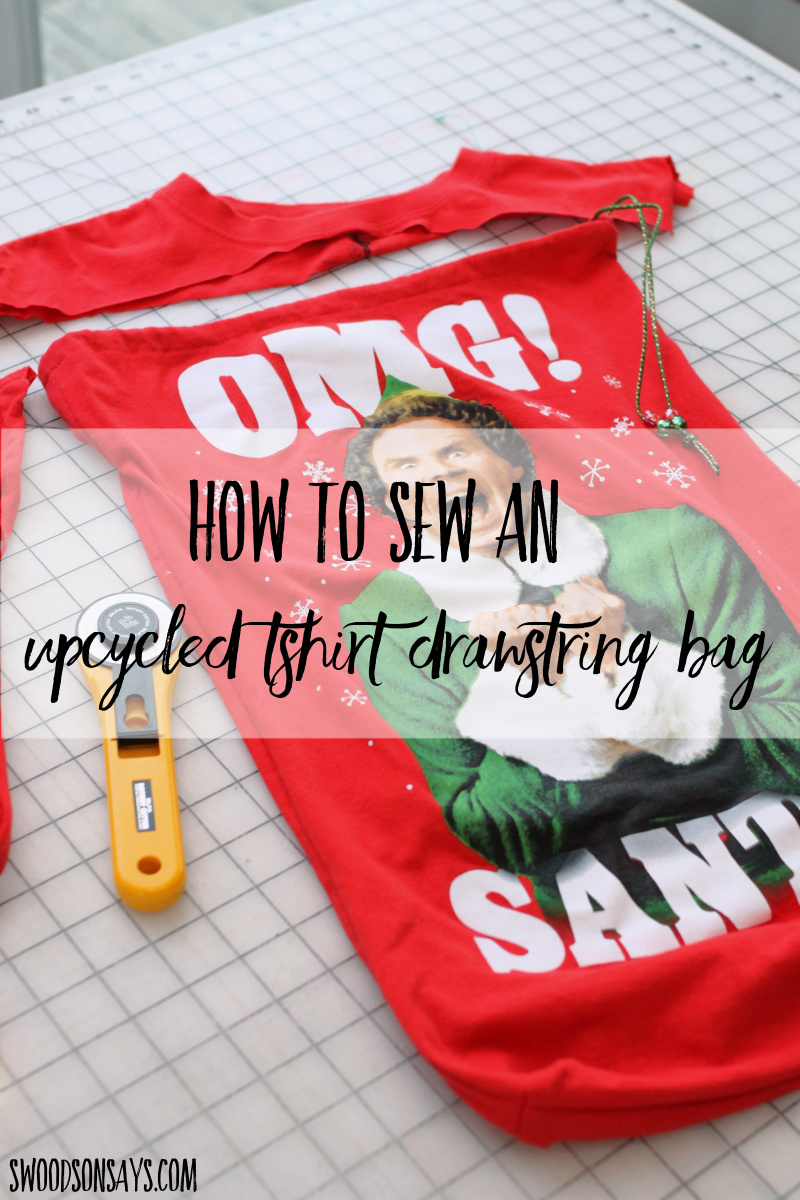
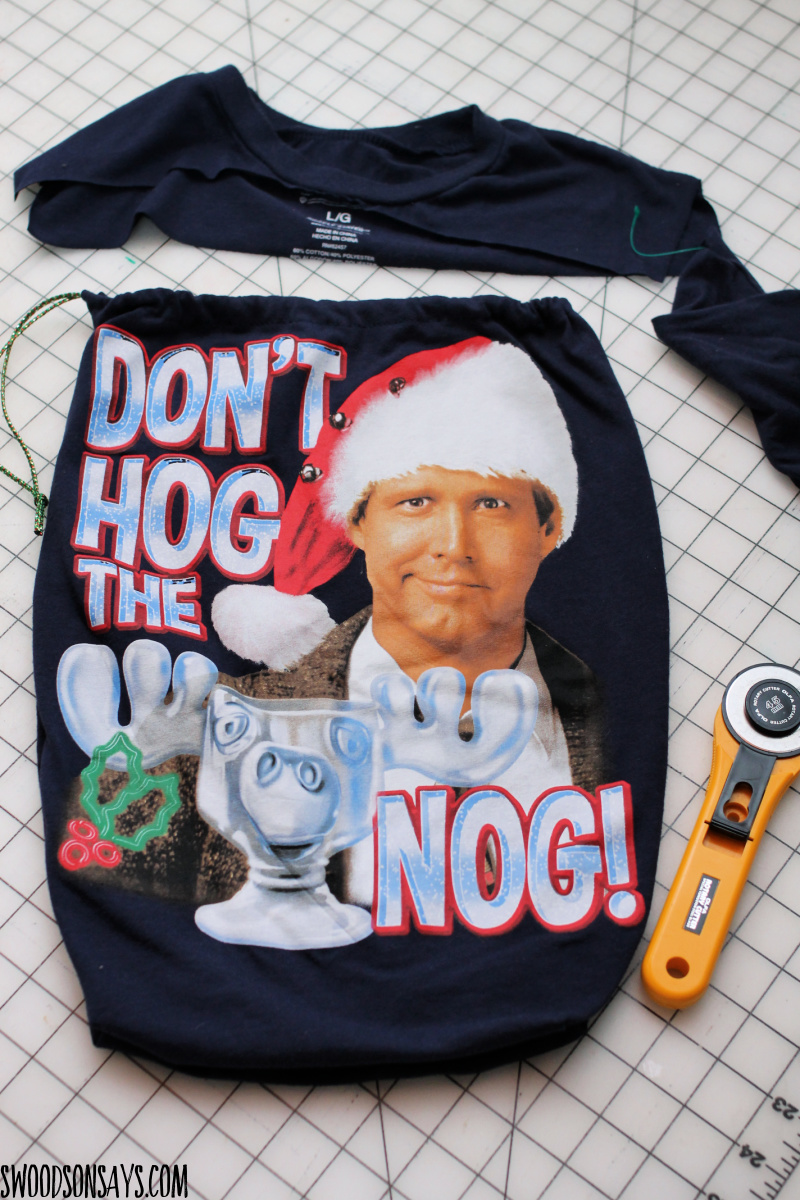
Another way to wrap your gifts without buying wrapping paper that will end up in a landfill! I couldn’t resist these silly holiday shirts at the thrift store but they weren’t the right sizes for me or my husband, so they got chopped up.
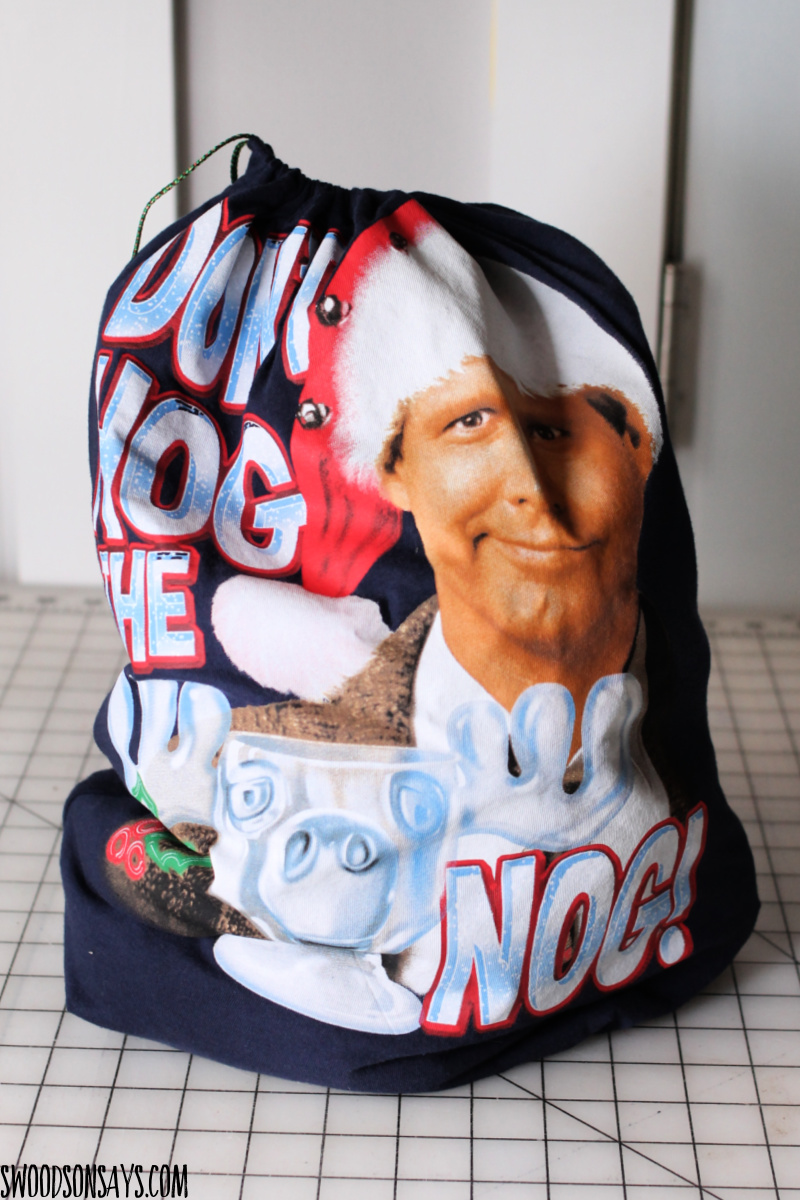
This is similar but not the same as a smaller drawstring bag I upcycled from a tshirt earlier this year – this one sews up more quickly and the flat bottom is a better fit for larger bags/tshirts because it can sit upright with larger gifts instead of just laying flat.
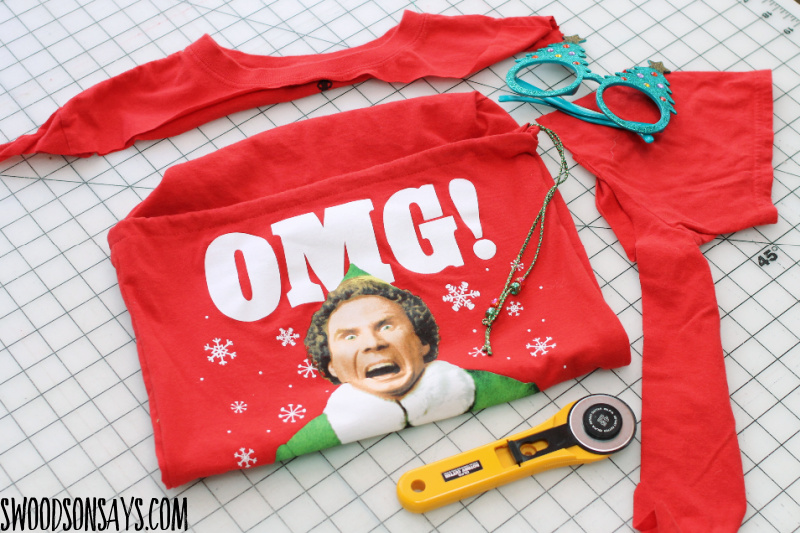
I added beads to the ties on the second version, aren’t they festive!
You might like these other posts while you’re here:
- Sewing tips for beginners -15 mistakes to avoid!
- 25+ ways to repurpose old t shirts
- 20+ upcycled purse tutorials
- 25+ upcycle sewing tutorials that make great gifts
- 15+ fabric wrapping paper alternatives
Pin this tutorial for an upcycled t-shirt flat bottom drawstring bag pattern with this link or photo:
Ready to make your own?
Tutorial for sewing a drawstring bag from an upcycled tshirt
Supplies
- Iron
- Acrylic ruler [Shop: Amazon ]
- Rotary cutter [Shop: Amazon ]
- Bodkin [Shop: Amazon ]
- Dritz Ezy-hem
- Narrow ribbon or cording for the ties; I used plastic canvas cord here [Shop: Amazon] (lighter/fray check if desired for the ends)
- Wonder clips & pins
- 1 tshirt
- Marking pen – here I used a white clover chaco marker [Shop: Amazon ]
Steps
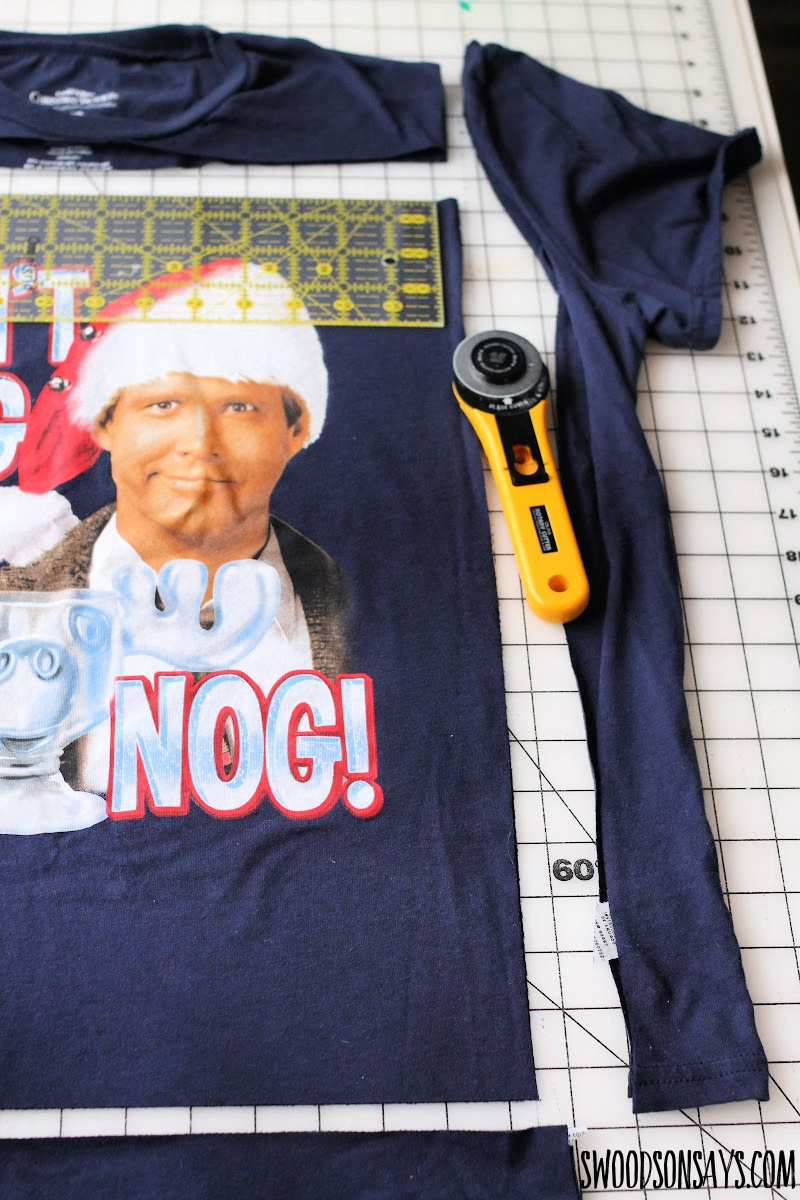
Step 1- Chop off the sleeves, neckline, and hem to make a rectangle. Keep it as balanced as you can – most tshirts seem to have the design pretty high up so keep as much of it as you can!
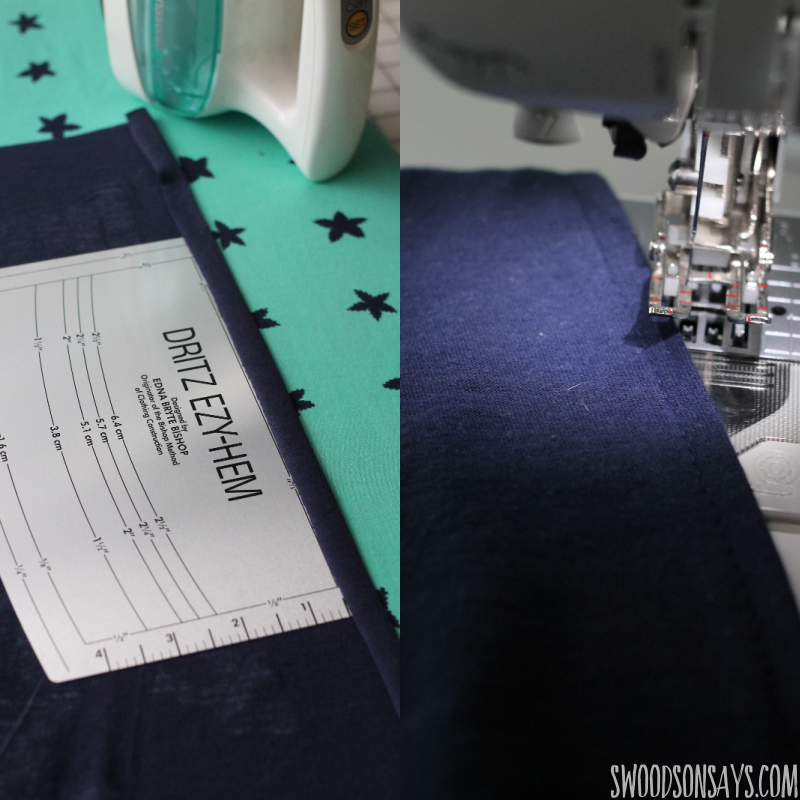
Step 2– With the “right side” (aka the one with the design) laying down, iron a hem back towards the wrong side that’s 1/2″ wide. Then sew it down on both sides, from top to bottom.
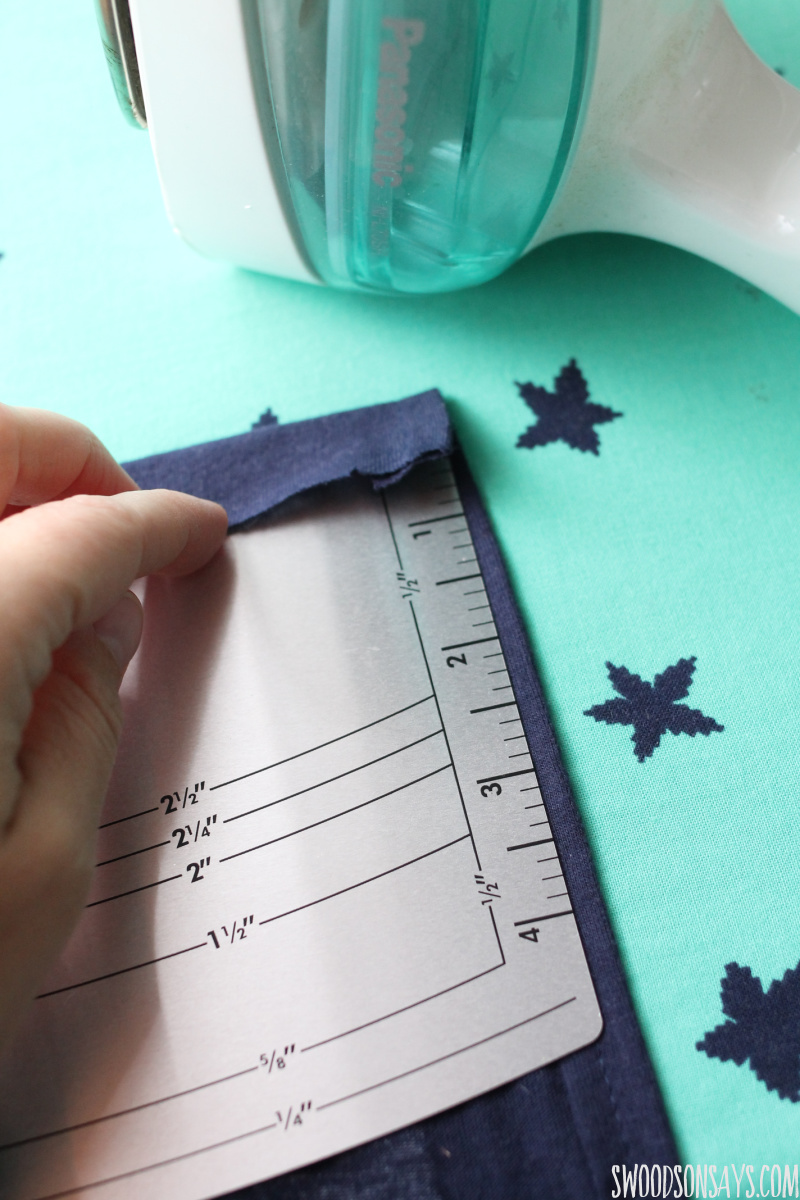
Step 3– Iron the top hem down for both front and back, 1/2″ down. This will eventually become the casing your drawstring goes through.
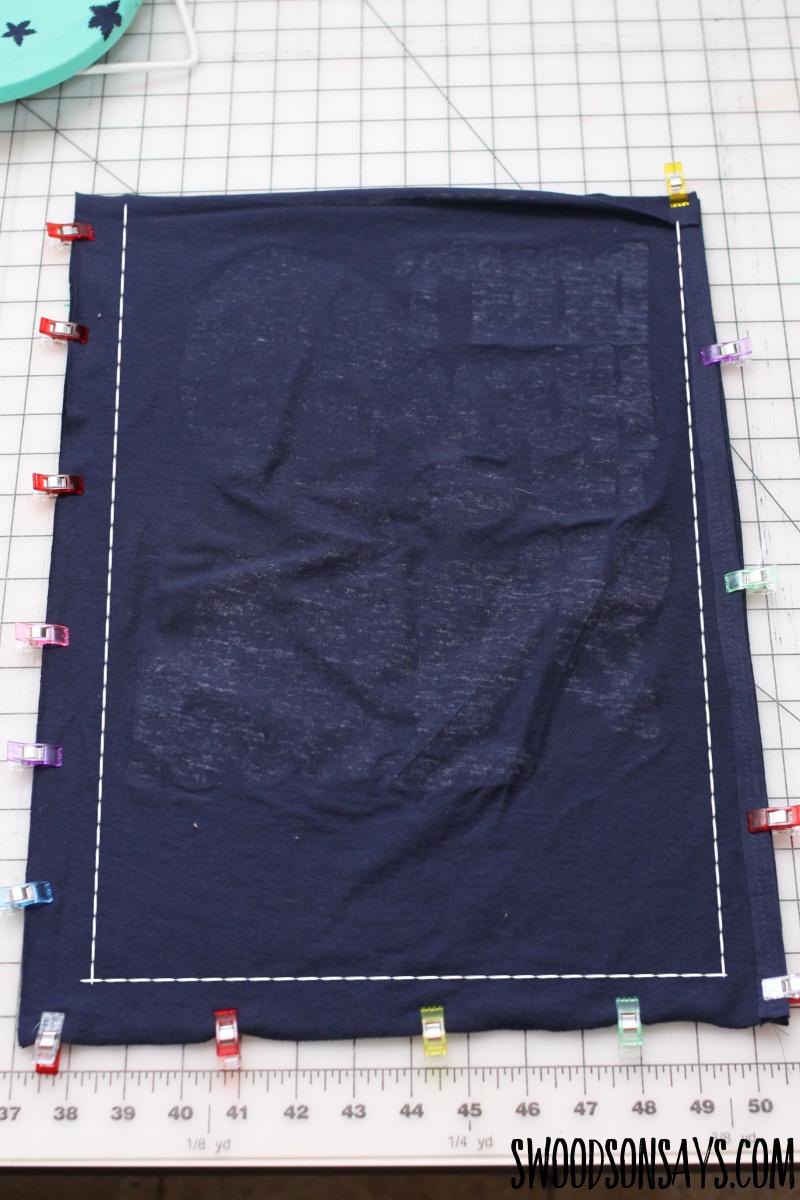
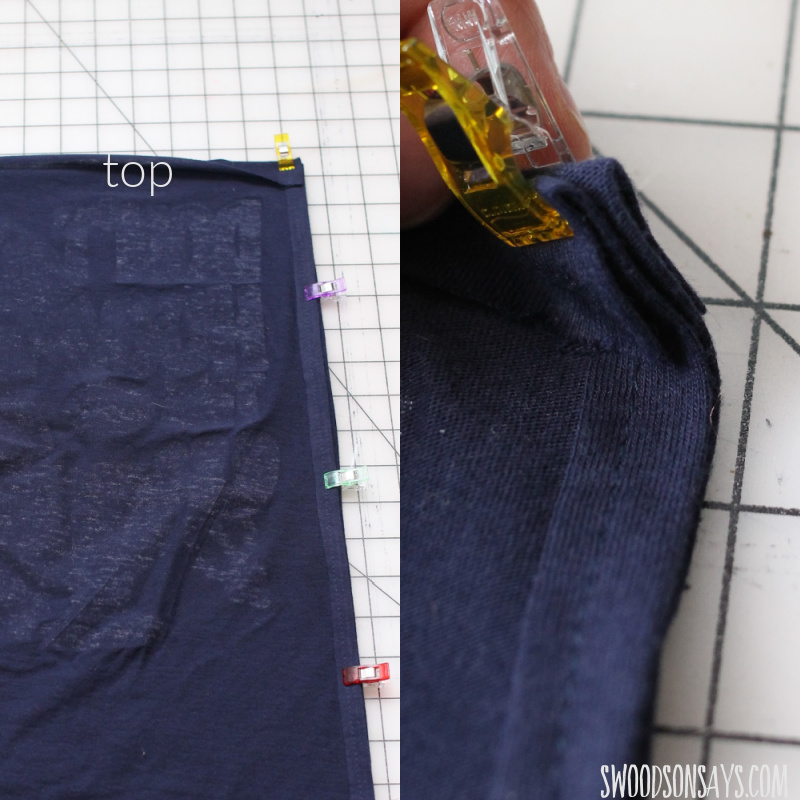
Step 4– With right sides together, clip almost all the way around on both sides and bottom, folding in the top hem on one side -see pictures above. you won’t sew through this the whole way, just barely catch the bottom or go right under it.
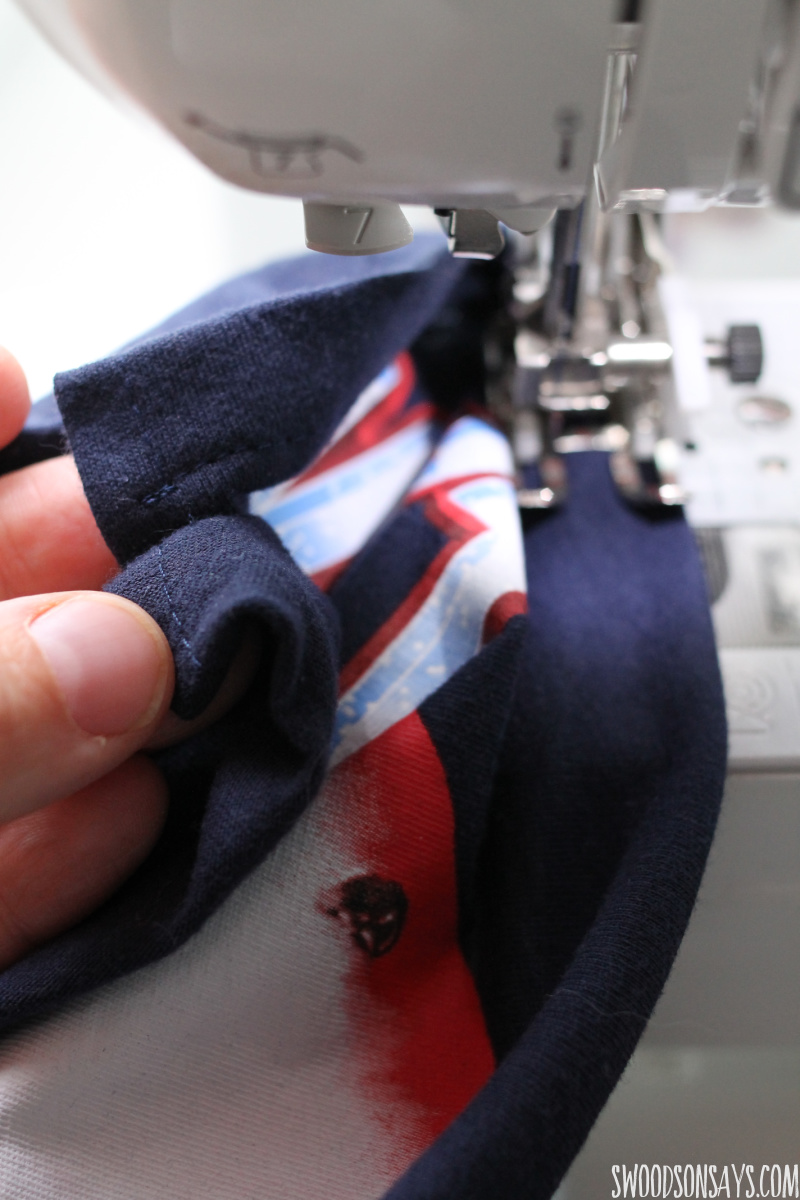
Step 5- Once the bottom and sides are sewn, re-fold the top hem (future drawstring casing) that you already ironed and sew it down around the entire way right along the edge. This will leave the open end of one side looking like the above!
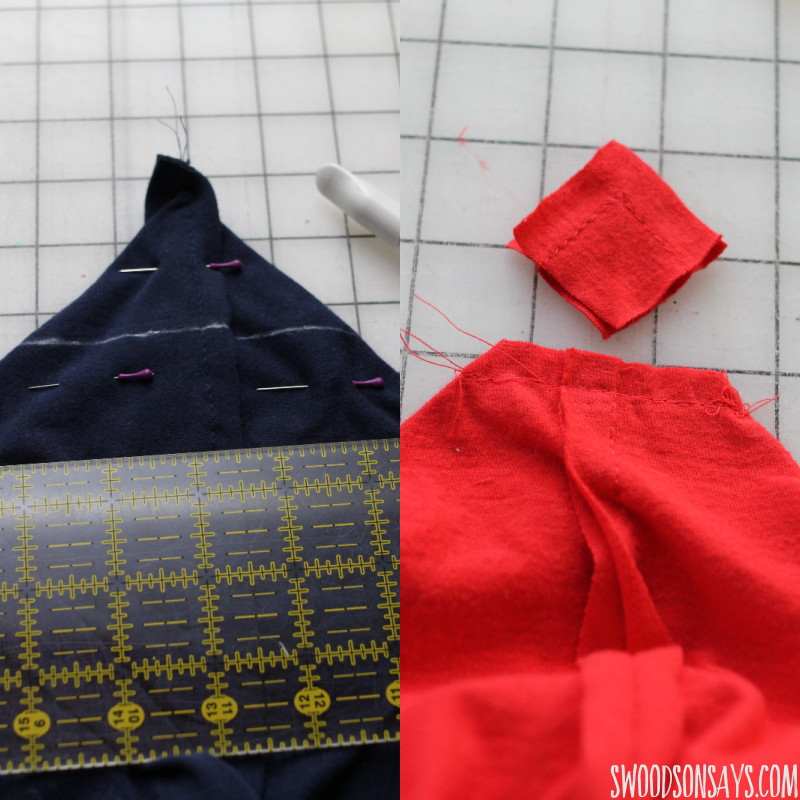
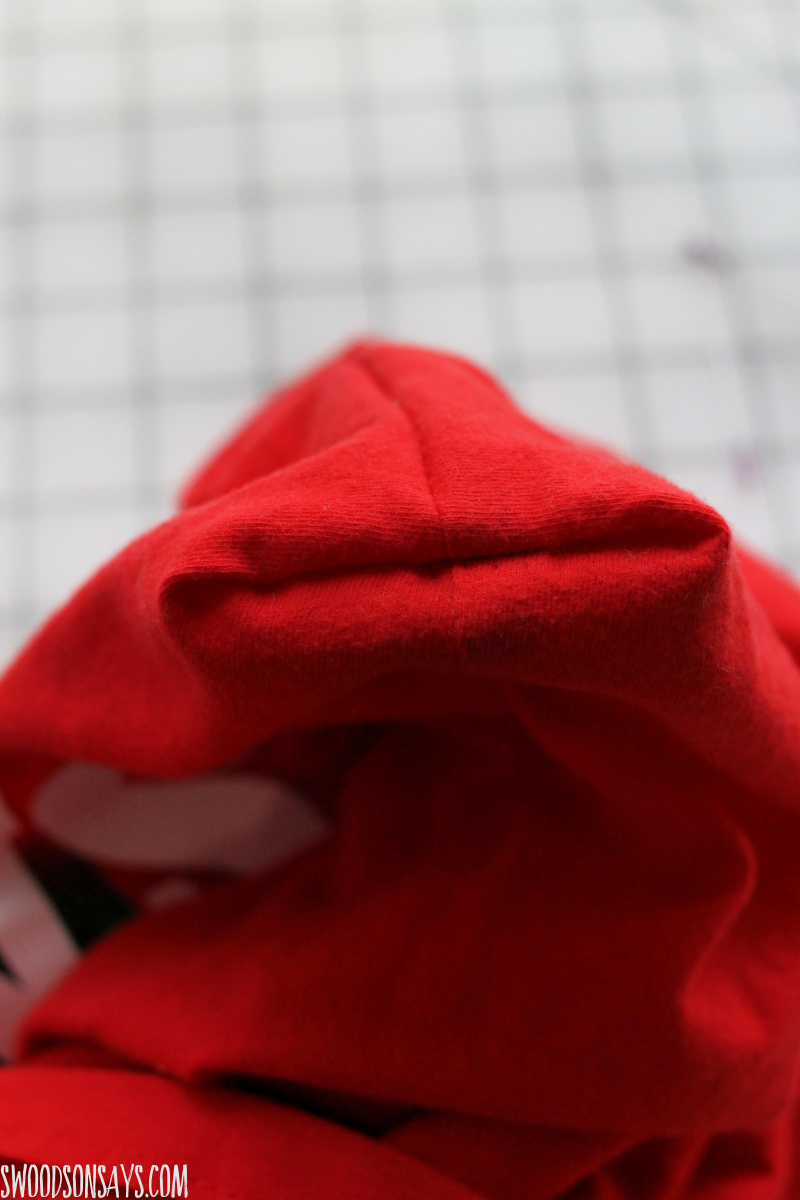
Step 6- Time to box the corners! Wiggle the corner so the seams are matching up and laying flat on the same side, pin, and then mark off about 1.5″ down from the corner tip. Use a BASTING stitch (as long as it will go) and sew along the line you marked. Turn it right side out and make sure the seams match up as shown. Turn it back wrong side out and sew with a smaller stitch. Check one more time and then chop off the excess corner. Repeat for the other bottom corner.
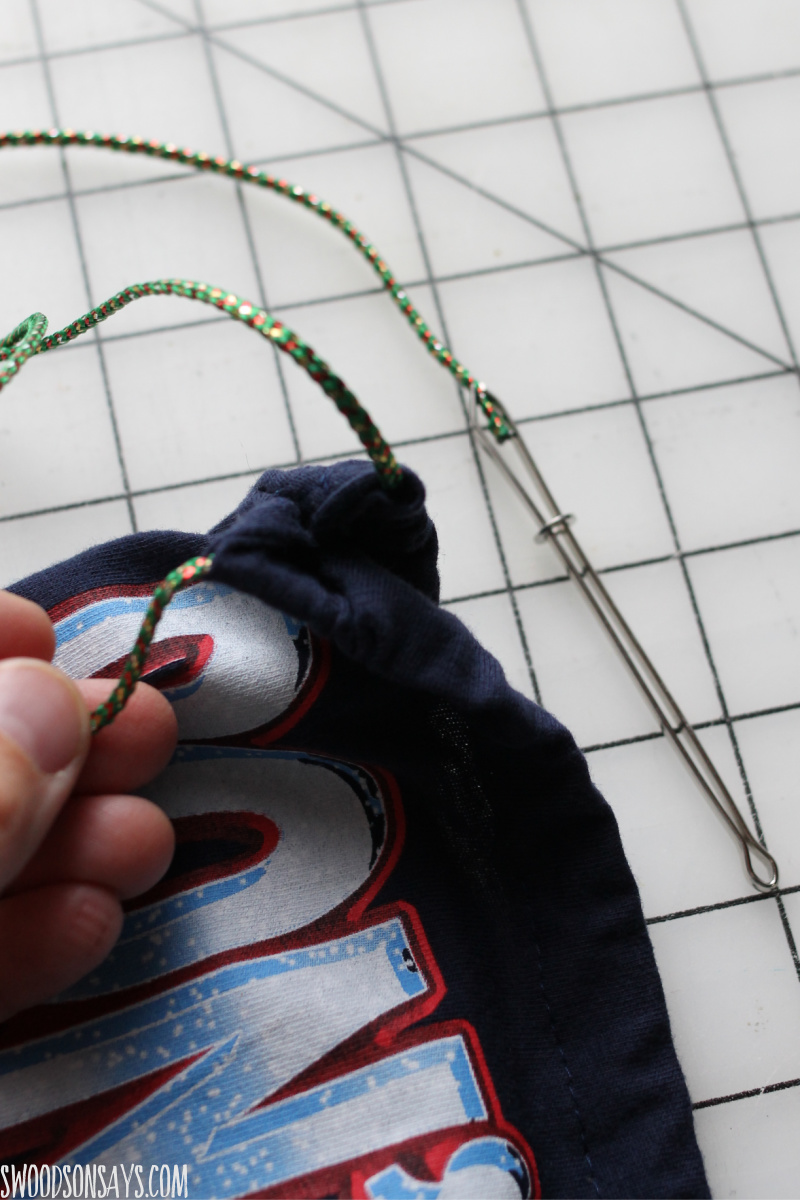
Step 7- Time to thread the drawstring! Use a lighter or fray check to burn the ends so they don’t fray and pull it through carefully.
Step 8- Ta da you’re done! This pulls the drawstring out one side and has nice boxed corners at the bottom.