See how to mend jeans by hand without a patch with this simple hand sewing mending tutorial!

Visible mending has been popular for a few years now, and I love it. Our family doesn’t actually wear jeans very often, so I admit I was a little excited when my husband ripped this pair! I have a super easy tutorial for how to mend jeans by hand without a patch on top, including a downloadable pattern for that fun little moon. This has been washed, dried, and worn; I’ll update in a few years as to longevity but for now it looks great! Can you see the extra denim peeking out the front of the hole? Keep reading to see what the backside looks like!
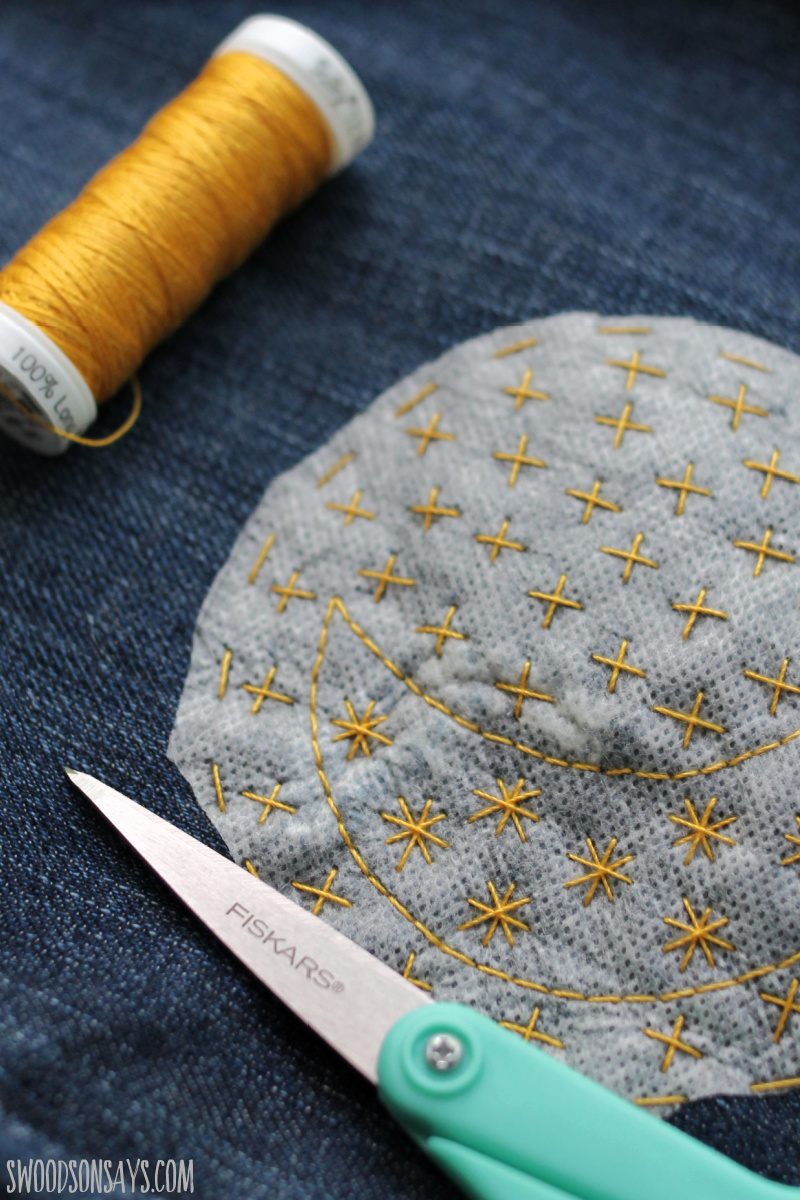
All super simple stitches, anyone can do this. As you can see, even with the pattern to follow, my stitches aren’t perfect as our two dogs jump over me and my two kids jostle my arm as they investigate what I’m making. It’s fine! It can be beautiful without being perfect. Eagle eyed, long-time followers will spot the similarity to the patch I put on this overall refashion, with a few tweaks!
If you like this post, check these out while you’re here!
- 20+ creative ways to hide stains on clothes
- 12+ ideas for how to repair upholstery
- How to mend jeans by hand – diy beetle patch tutorial
- DIY needle felting to mend holes in wool tutorial
- Denim mending reverse applique tutorial
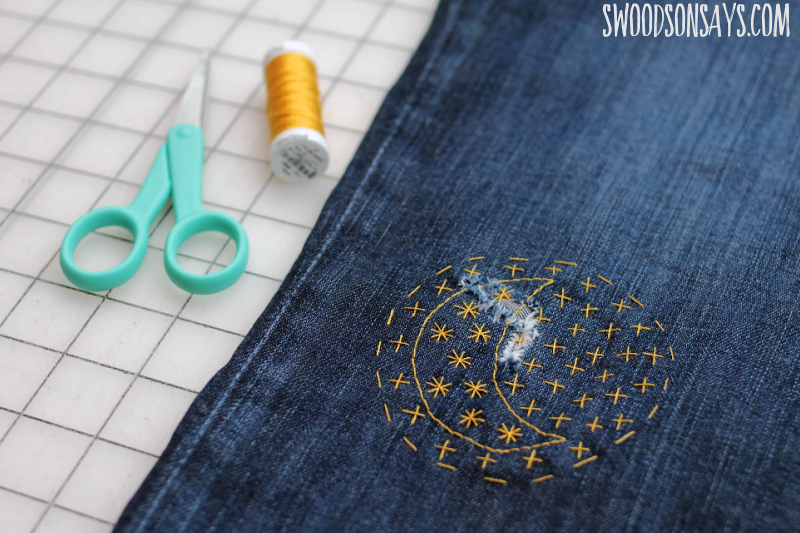
What do you think, do you like the stitching over top with a pattern instead of the more traditional geometric lines? I have more ideas after making this one, now I need to thrift some more jeans that need mending!
Pin this tutorial for how to mend jeans by hand without a patch with this link or photo:

How to mend jeans by hand without a patch
Supplies
- Sulky Fabri-Solvy*™ highly recommended, or other pattern transfer method—see how to use Fabri-Solvy™ in this post.
- Scrap of denim
- Embroidery floss – I’m using Sulky petite cotton here
- Hand sewing needle- my favorite are these embroidery needles off Amazon
- Pinking shears – these cut little tiny bias mountains so your woven fabric doesn’t fray!
- Pattern! – sign up for my newsletter and get the full pattern once you confirm your subscription! If you’re already a subscriber, you can access the pattern with the password in each newsletter, in the resource library.
Steps
I’m going to write this tutorial that you could use with any stitching design on top, or you can use mine!
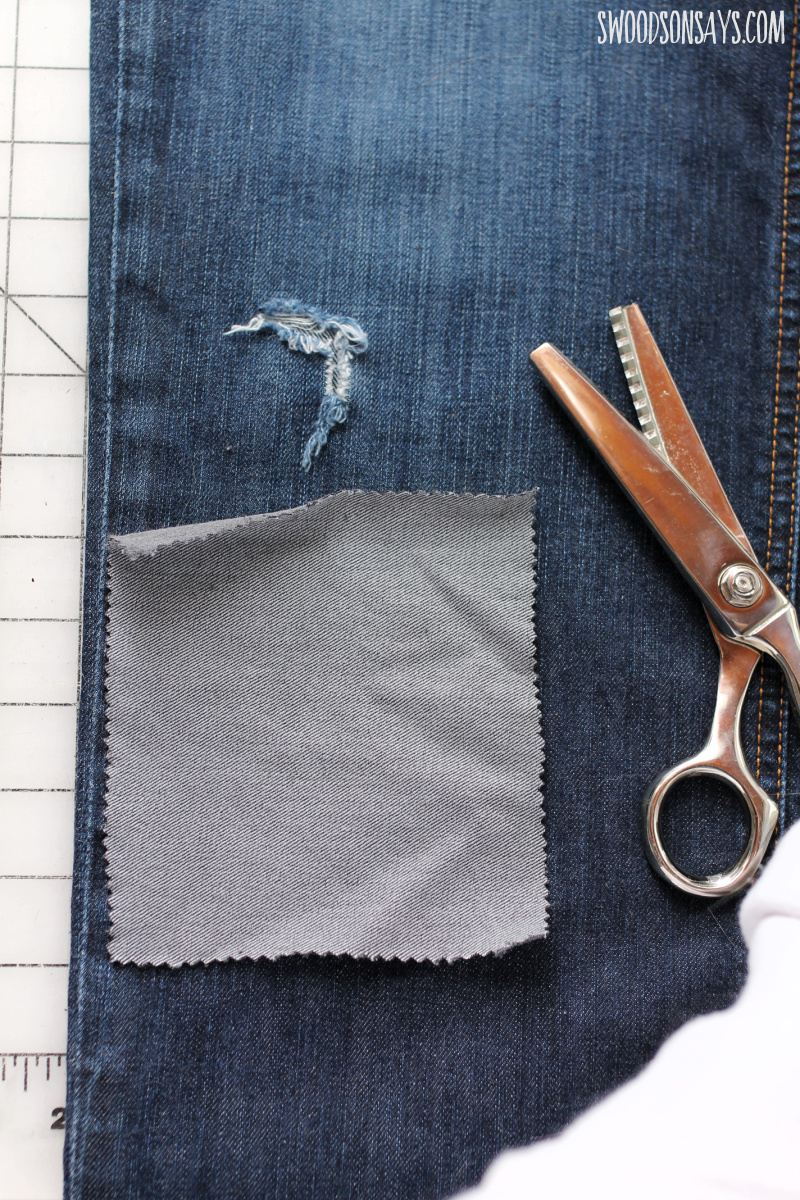
Step 1– Cut a denim scrap out with pinking shears that is a little larger than your planned embroidery design, making sure it fits over the hole itself and isn’t so long it’s going over seams, etc. unless you want it to. Trim any shaggy thread hanging down around the hole.
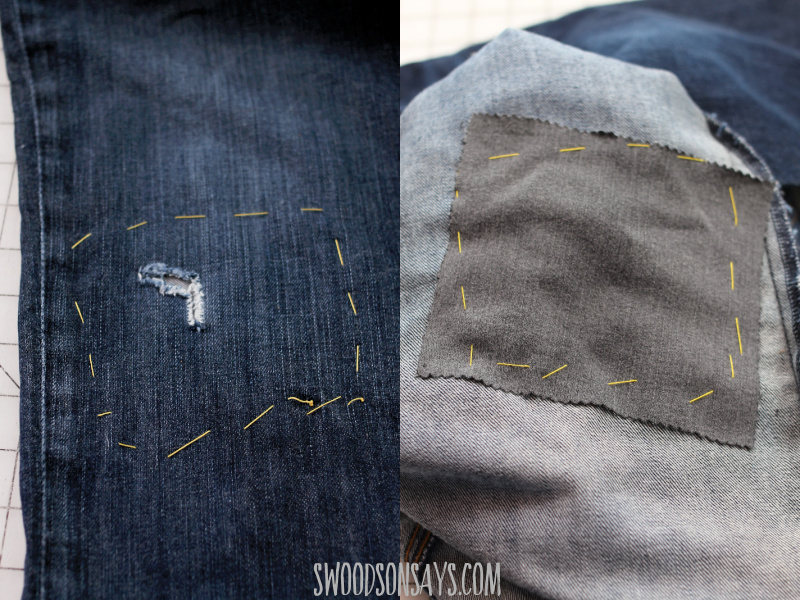
Step 2– Roughly hand baste the square behind the hole, making sure to flip it and see that you didn’t miss anything. It should go behind the hole with some extra edge around all sides.
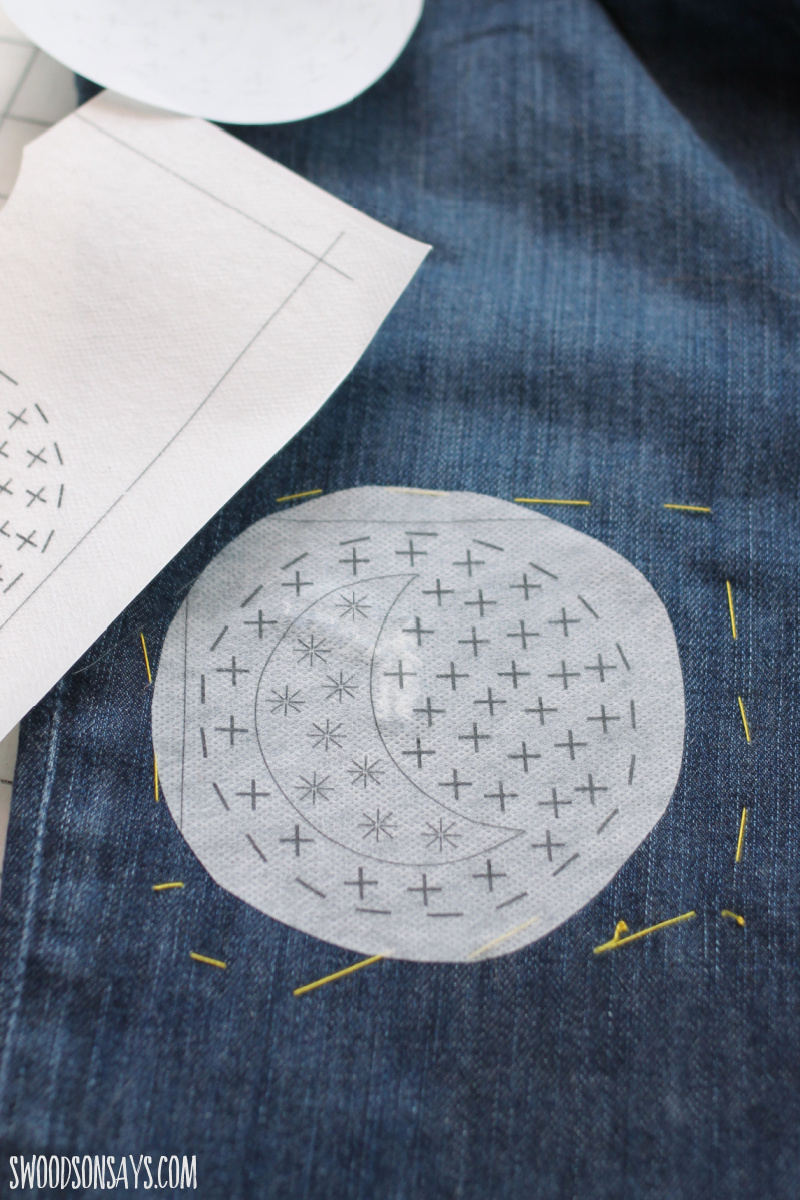
Step 3– You can now sketch a stitching design over top; or use Fabri-Solvy™ (more in this post) like I did! If using that, cut roughly around the pattern and stick it on.
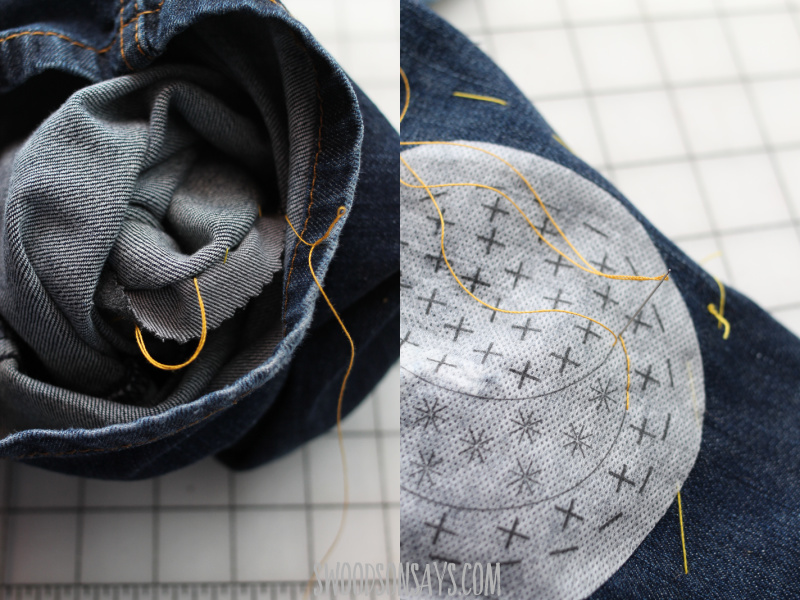
Step 4– Time to stitch! I knotted my thread and then came up in between my scrap denim patch and the top jeans layer, so the knot was hidden.
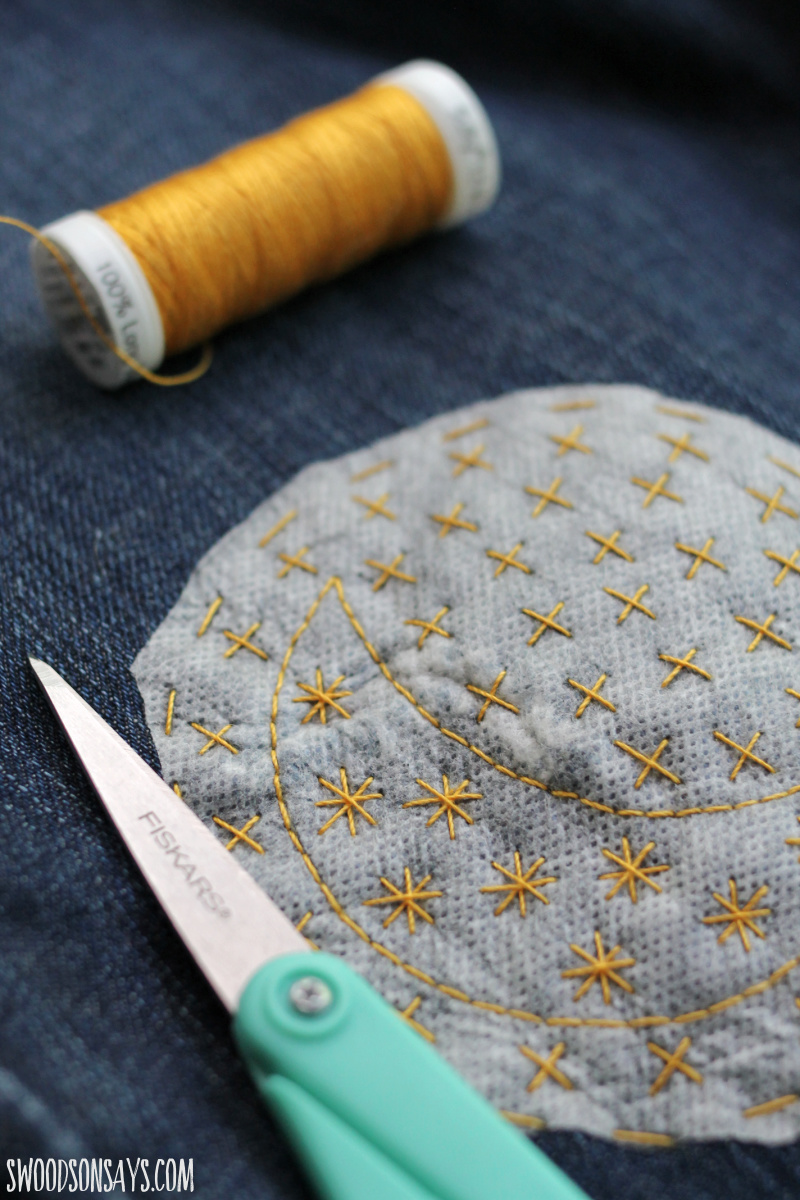
Step 5– Stitch the entire pattern, using whatever stitches you see fit!
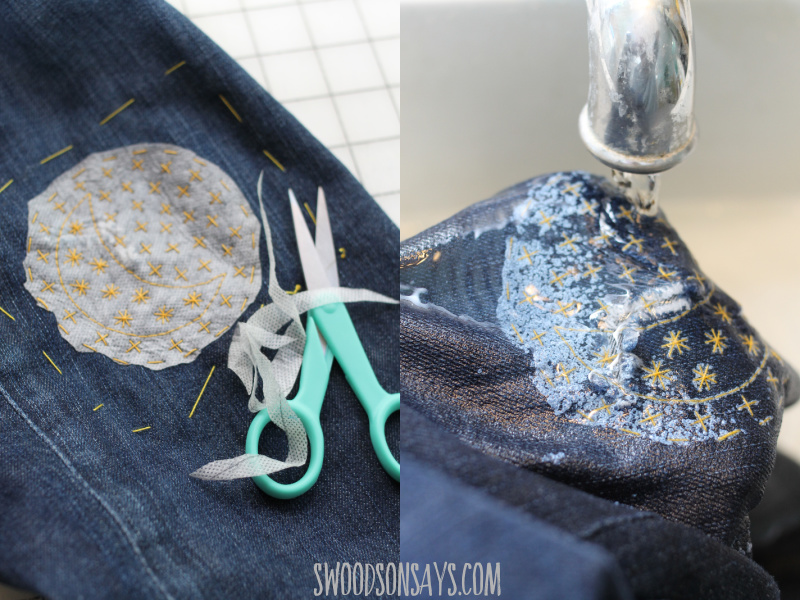
Step 6– Trim off the excess stabilizer, clip the basting stitches out, and then use warm water to wash it away, setting out to dry.
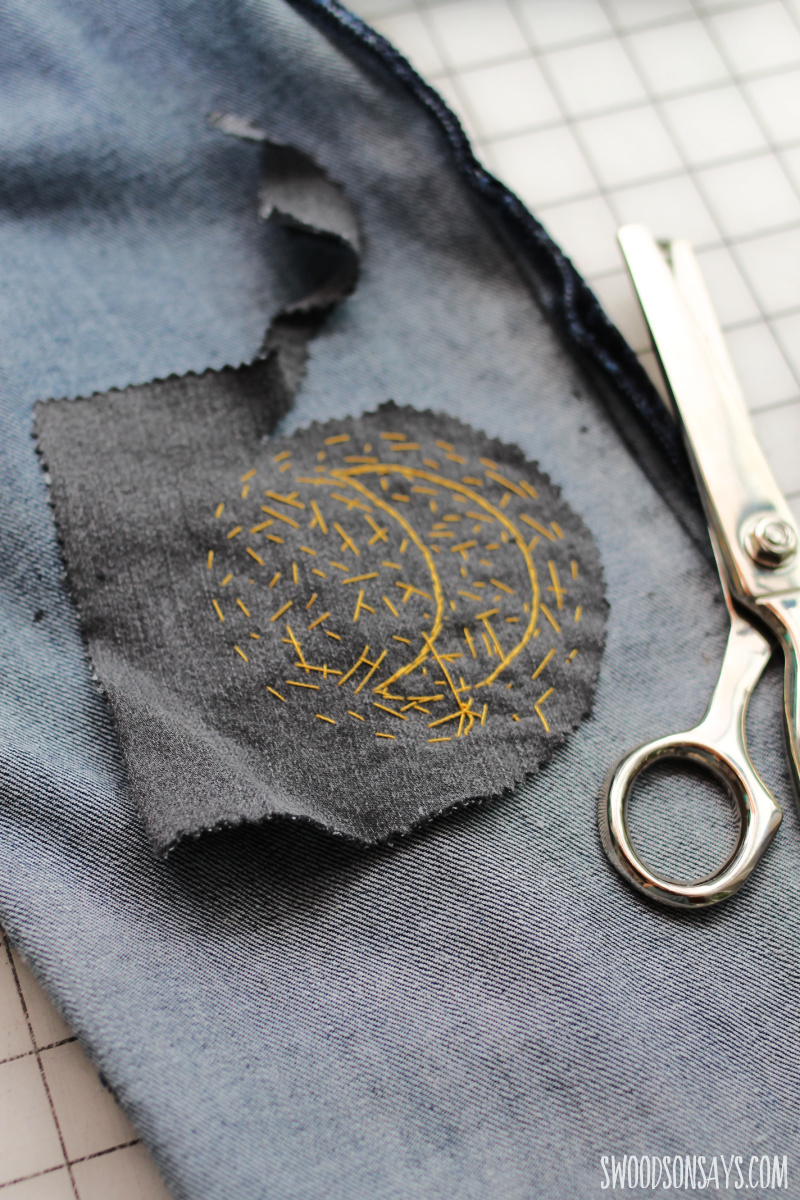
Step 7– Flip the jeans inside out and use the pinking shears to trim carefully around the edges if desired, and you’re done!

Kathleen
Friday 3rd of June 2022
Love this design. Is it hard to stitch from the top? It doesn't look like you use a hoop or open up the side seam of the jeans leg at all.
Stephanie - Swoodson Says
Saturday 4th of June 2022
Hey Kathleen, thanks!! Nope, not hard at all! this was on a pretty wide-leg pair of men's jeans so it was no issue not opening a side seam!. With stiff denim I don't tend to use a hoop because I'm lazy and it seems to work out fine without.