
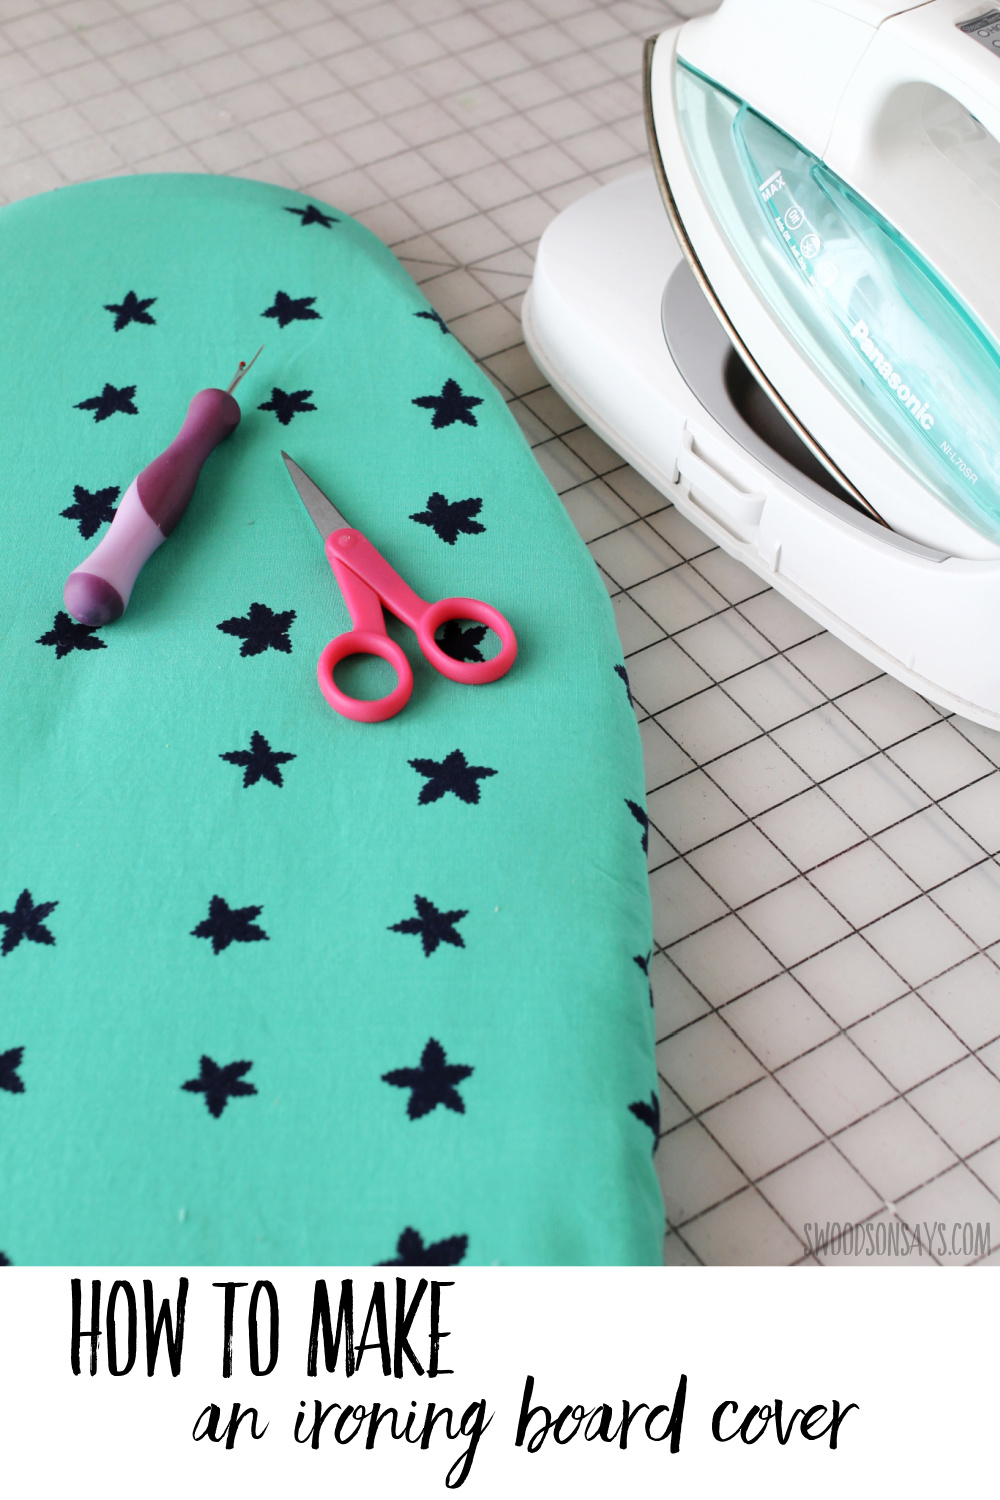
How to make an ironing board cover tutorial!
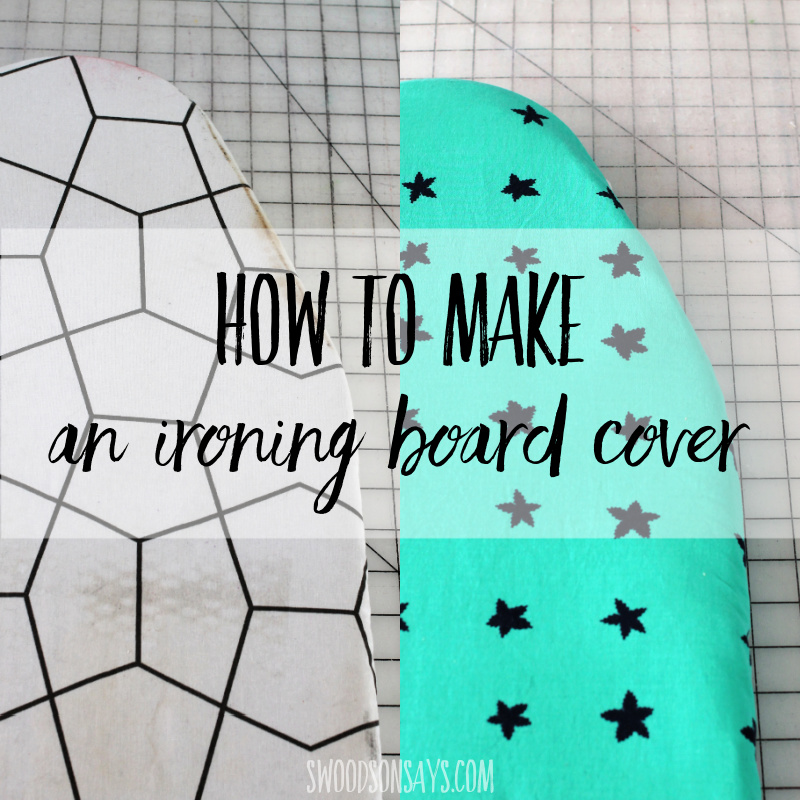
I’ve been meaning to do this for years and it only took two hours, including the time to photograph it for this post! I primarily use a cheapie tabletop ironing board for my projects, and as you can see from the stains, it was so thin that it would press the iron grid marks into fabric if I wasn’t super careful. Not only is my new cover prettier, it is much more functional because of what I upcycled to pad it underneath! The best fabric for ironing board covers is a 100% cotton quilting substrate and this is such a fun way to update a sewing room workhorse without a ton of time or effort.
See that peeking through? Can you guess what it is and why it is making my ironing and pressing much easier? Keep scrolling to find out! This is a peek at how the bottom of the cover looks. I wrote this for my tabletop but there isn’t any measuring involved so you could use the same concept to make a fullsize board cover too.
Check out these other posts while you’re here:
- 8 Free Sewing Room Printables for Wall Decor
- 10 tips for getting rid of craft supplies (and ideas for where to send them!)
- 15 Fabric Scrap Busters
- Sewing tips for beginners -15 mistakes to avoid!
- 20+ craft & sewing room decor ideas
- How to make a floor pouf – 12 different DIY poufs
- 12+ ideas for how to repair upholstery
Pin this how to make an ironing board cover tutorial with this link or collage image:
how to make an ironing board cover tutorial
Supplies
- Cotton yardage that matches your ironing board length
- 1 vintage 100% wool blanket – look for a cheap one often marked ‘cutter’, indicating it is for repurposing! I snagged mine from goodwill outlet ages ago, just make sure it is 100% natural fibers with the tag or a burn test
- Rotary cutter
- Yardage of 1/2″ elastic that matches the perimeter measurement of your board
- Bodkin or safety pin
- Wonder clips or pins
- Ironing board; mine is a mini from Ikea
Steps
This tutorial doesn’t use any measuring, just tracing and winging it. If you are a very beginner or using precious fabric, please do a ‘scrap’ copy first, it doesn’t take very long! This was my first try, no issues.
Make sure to prewash all fabric before you use it so it doesn’t shrink when you’re done!
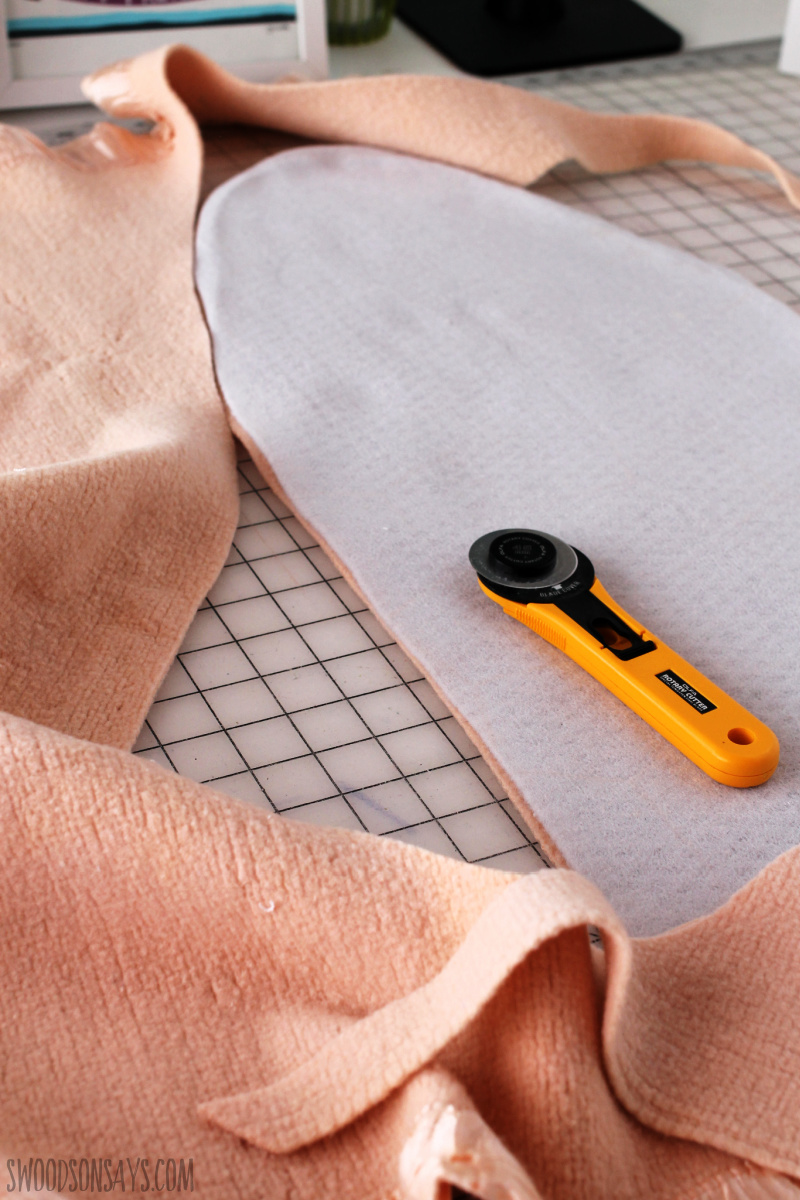
Step 1- Did you guess it? This is a vintage 100% wool blanket. Wool retains heat and is great for pressing, so it makes a fantastic inner layer. I used the previous padding as a template and cut out two pieces with my rotary cutter.
Step 2- I used the actual cover as a template to cut a new cover. I cut off the casing from the original cover, knowing I was replacing it with a newer one!
![]()
![]()
Step 3- Time to make the casing. I ripped/cut 2″ wide strips long enough to go all the way around the perimeter of the cover and then folded over the short ends and hemmed them on each short end. If you need to join extra pieces (as shown on left) just press them open.

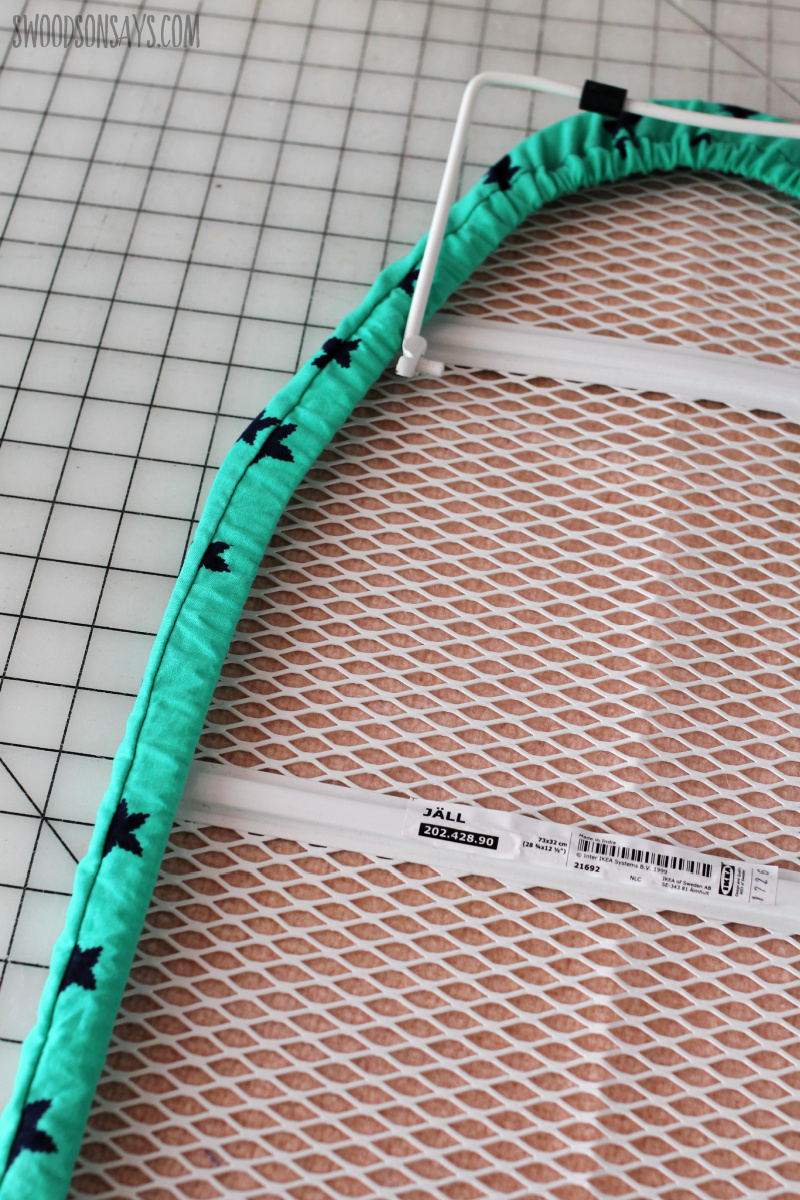
Step 4- Carefully pin your casing around the edge of the cover, matching raw edges with raw edges. I then serged it together with 3/8″ seam allowance but a sewing machine will work as well, just consider finishing the raw seam with pinking shears or an enclosed bias tape if you plan to wash it often.
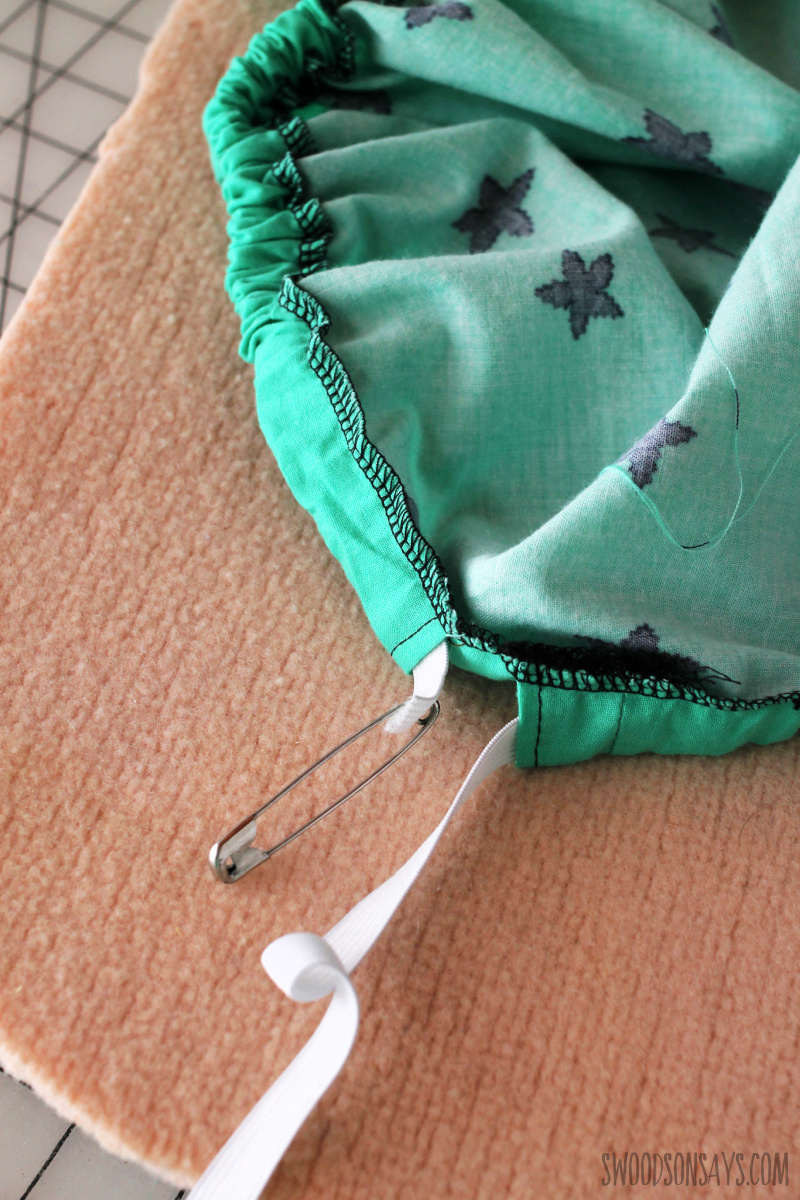
Step 5- Time to do a drawstring or elastic, like I did! A bodkin is key here but of course I couldn’t find mine so I had to use an old-school safety pin instead. I just eyeballed it instead of measuring and subtracting some off the length, tied it off in a knot, and voila! You can’t see the elastic or casing from the top so don’t sweat the details.
Jessica
Friday 24th of January 2025
Hi, Thank you for this tutorial. Did your wool padding go over the edge of the edge? I want to make sure I do it the right way.
Stephanie - Swoodson Says
Friday 24th of January 2025
Nope, it was just the top of the board not over the edge! You could do it that way, but you might need to add more seam allowance since it would add bulk!
SHARON Johnson
Saturday 8th of May 2021
Love this idea, I hope I can find a wool blanket. that doesn't cost a fortune.
Stephanie - Swoodson Says
Sunday 9th of May 2021
I hope so too Sharon! Ask around - often people just trash ones that have moth holes. Hope you find one :)
MRS JENNIFER MOORE
Tuesday 4th of May 2021
"Back in the days" (ye Gods! I am now 75.5 yrs old) when my mother used to iron absolutely everything that was washed (including sheets, Pillowcases, tea towels) I used to help her and she would place a pure wool blanket over the dining table and cover it with a pure cotton sheet to do the ironing on. Things ironed beautifully. From that experience I learned and have always placed a layer of old woolen blanket on my ironing board. Another good thing to use is a good thick cotton bath towel (no cover needed) when I am in a hurry and can't bother putting the board up I use the towel on the end of the kitchen bench. Love your recycle ideas, hints, tips and "things on the internet" (How do you find time to hunt them out?). Regards, Jen Moore, (From country, South Australia, Australia)
Stephanie - Swoodson Says
Wednesday 5th of May 2021
Jen, your mother would absolutely run out of my house in horror, I literally only iron things if I'm sewing them, haha :) That is such a good idea to make a whole-table ironing space like that!! Thank you for reading, and I have a very, very large stash of things on the internet because I spend way too much time poking around online instead of actually making things!!
Carol
Tuesday 4th of May 2021
I did that very thing the last time I needed an ironing board cover! And then I just wondered why I hadn’t thought to do that sooner! When I ripped off the casing to get the pattern, though, I realized it was in really good shape so I reused the casing for the cover. And I used two layers of cotton batting for the padding. My mom taught me to just put the new cover over the old cover so as to increase the padding, so that is what I had been doing.
Gayle
Tuesday 4th of May 2021
Carol, my mom also told me to always put the new ironing board cover over the old. It's nice to have that extra cushioning, isn't it? I have noticed that new covers I've purchased aren't quite as wide as my old ironing board. So I'm excited (sad commentary on my life?) to make a new, custom cover for my ironing board!
Stephanie - Swoodson Says
Tuesday 4th of May 2021
Ah that sounds even better! The ikea casing was shredded but I can't complain since the whole thing was like $6 originally. That is smart to put it over top everything else, too!!